
Maple Dijon Roasted Carrots Flavorful Side Dish Recipe
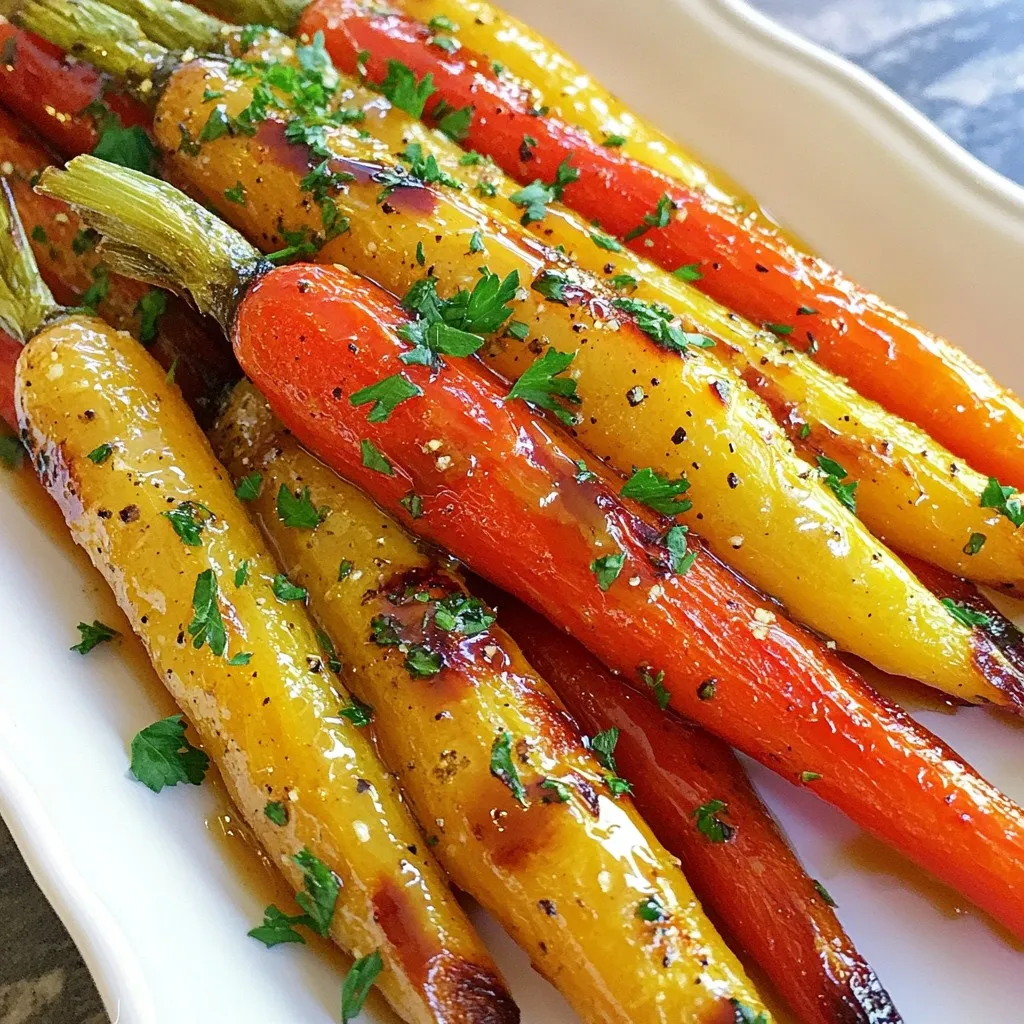
Looking for a side dish that bursts with flavor? You’ve found it! My Maple Dijon Roasted Carrots make a perfect addition to any meal. Sweet maple syrup meets zesty Dijon mustard in this quick and easy recipe. You’ll love how simple it is to prepare these vibrant, delicious carrots. Let’s dive into the ingredients and steps to make this colorful dish shine on your table.
Why I Love This Recipe
- Amazing Flavor Combination: The sweet maple syrup and tangy Dijon mustard create a perfect balance that elevates the natural sweetness of the carrots.
- Simple Preparation: With just a few ingredients and minimal prep time, this recipe is easy enough for weeknight dinners yet impressive for guests.
- Healthy and Colorful: Roasting carrots brings out their vibrant colors and nutrients, making it a visually appealing and healthy side dish.
- Versatile Serving: These roasted carrots can accompany a variety of main dishes, from meats to plant-based options, making them a great addition to any meal.
Ingredients
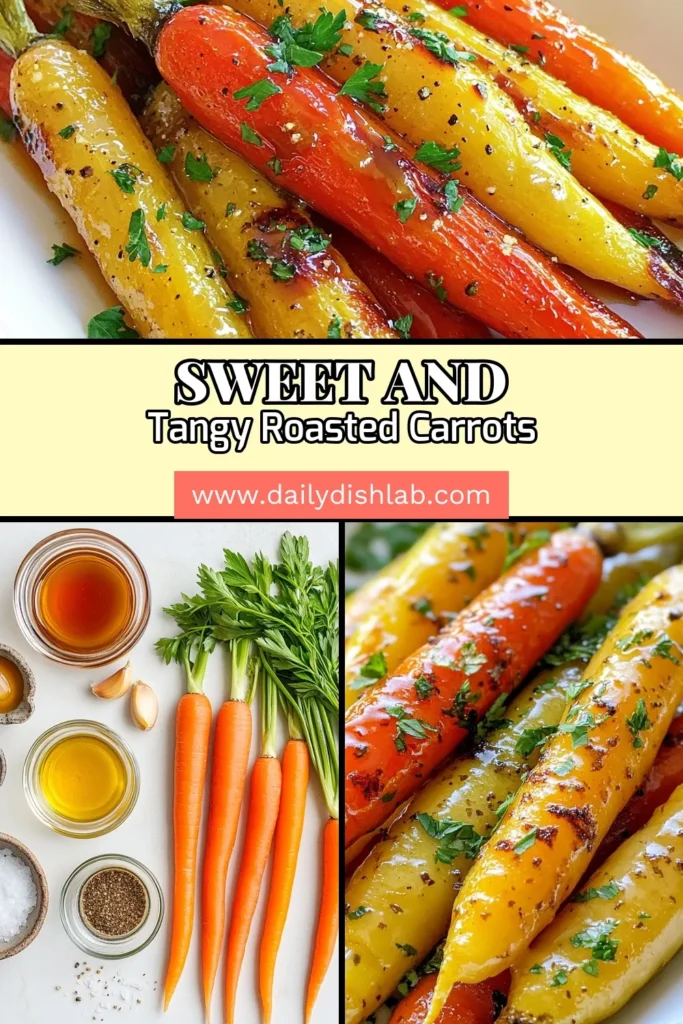
List of Ingredients
- 1 pound baby carrots, or tri-colored carrots, cut into sticks
- 3 tablespoons olive oil
- 2 tablespoons pure maple syrup
- 1 tablespoon Dijon mustard
- 1 teaspoon garlic powder
- 1 teaspoon ground cumin
- Salt and pepper to taste
- Fresh parsley, chopped, for garnish
Baby carrots are small and sweet. You can also use tri-colored carrots for a fun look. They add a mix of flavors and colors to your dish.
For this recipe, I love using pure maple syrup. It gives a rich, sweet flavor that pairs well with the tangy Dijon mustard. Olive oil helps the carrots roast beautifully, making them tender and golden.
Now, spices can transform your dish. Garlic powder adds depth, while ground cumin brings warmth. Salt and pepper are key for balancing flavors.
Lastly, don’t forget fresh parsley. It adds a bright touch and a pop of color. These ingredients together create a tasty side that everyone will enjoy.

Step-by-Step Instructions
Preparation Steps
1. Preparing the carrots and preheating the oven
Start by washing one pound of baby carrots. You can also use tri-colored carrots. If they are large, cut them into sticks. Then, preheat your oven to 400°F (200°C). Line a baking sheet with parchment paper. This helps with easy cleanup.
2. Mixing the maple Dijon marinade
In a large bowl, add three tablespoons of olive oil. Then, pour in two tablespoons of pure maple syrup. Next, add one tablespoon of Dijon mustard, one teaspoon of garlic powder, and one teaspoon of ground cumin. Season with salt and pepper to taste. Whisk all these ingredients together until they blend well and form a smooth mixture.
3. Coating and roasting the carrots
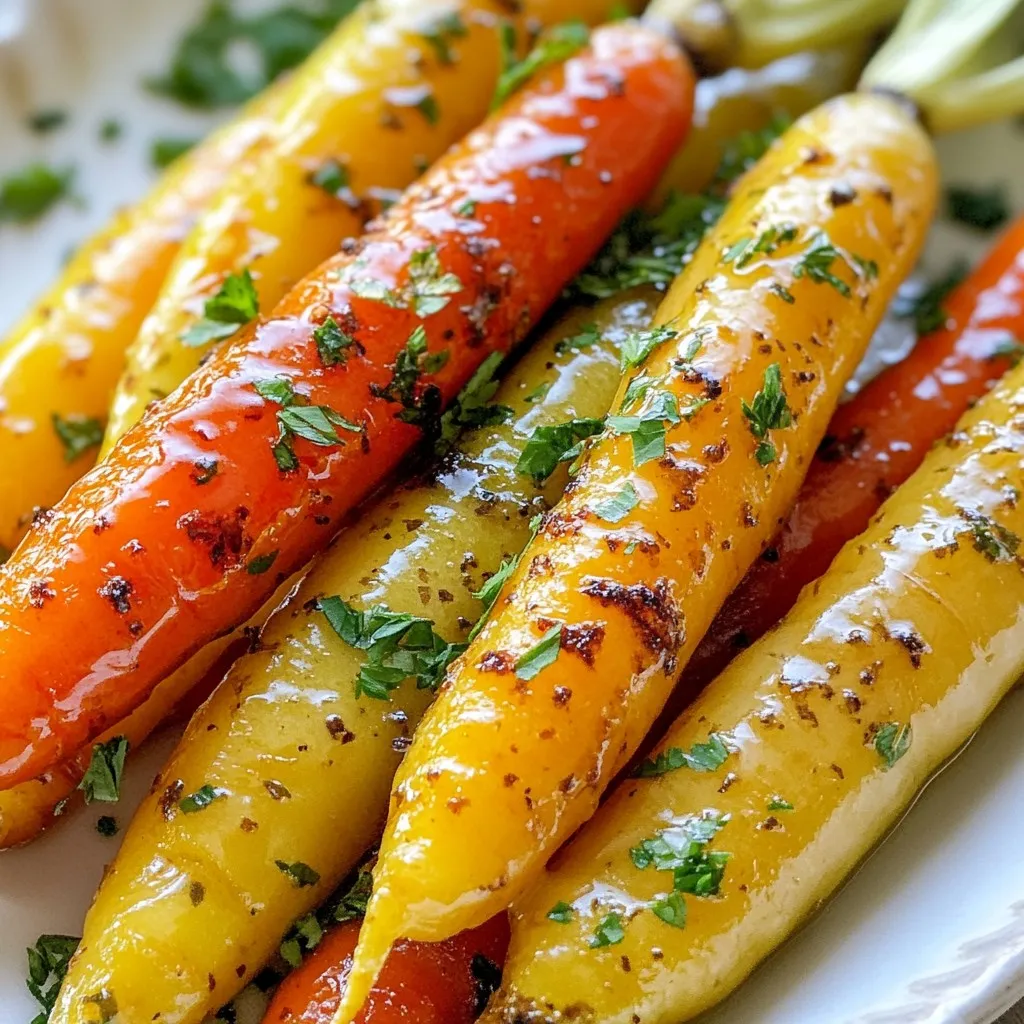
Add the prepared carrots to the bowl. Toss them in the maple Dijon mixture until each carrot is coated evenly. Spread the carrots out in a single layer on the lined baking sheet. Roast in your preheated oven for about 25 to 30 minutes. Make sure to toss the carrots halfway through. This ensures they cook evenly. When done, the carrots should be tender and lightly caramelized. After removing them from the oven, let them cool for a minute. Finally, transfer the carrots to a serving platter and sprinkle with freshly chopped parsley for a nice touch.
Tips & Tricks
Perfecting Your Maple Dijon Roasted Carrots
- Ensuring even coating and roasting: Start by mixing the olive oil, maple syrup, and Dijon mustard well. This mix should coat your carrots evenly. Toss the carrots in this mixture until they are fully covered. Spread them out on the baking sheet in a single layer. This step helps them roast evenly. Toss them halfway through cooking to get that nice caramelized look.
- Adjusting flavors to taste: If you want a sweeter flavor, add more maple syrup. For a sharper taste, try a bit more Dijon mustard. You can also add a pinch of cayenne for heat or swap garlic powder for fresh garlic for more punch. Remember, tasting as you go helps you find the balance you love.
- Best practices for presentation and serving: Once the carrots are roasted, let them cool for a minute. This helps the flavors set. For a beautiful touch, sprinkle fresh parsley over the top. You can also use a colorful plate to make your dish pop. Serve these carrots warm for the best taste. They pair well with many meals, making them a versatile side.
Pro Tips
- Use Fresh Carrots: For the best flavor and texture, opt for fresh baby carrots or tri-colored carrots. They offer a sweeter taste and vibrant appearance.
- Adjust Sweetness: If you prefer a sweeter dish, feel free to increase the amount of maple syrup to suit your taste preference.
- Perfectly Caramelized: To achieve a caramelized effect, ensure that the carrots are spread out in a single layer on the baking sheet and avoid overcrowding.
- Herb Variations: Experiment with different herbs such as thyme or rosemary for a unique flavor profile that complements the sweetness of the maple syrup.
Variations
Customizing Your Recipe
You can easily switch up your Maple Dijon roasted carrots. Here are some fun ideas:
- Substituting different vegetables: Try using parsnips, sweet potatoes, or Brussels sprouts. They all roast well and soak up the sauce nicely. Each will bring its own flavor to the dish.
- Altering spices and flavors: Mix in a pinch of paprika or thyme for a new taste. You can also use honey instead of maple syrup for a sweeter twist. Experiment with different spices to find your favorite mix.
- Making it vegan or paleo-friendly: This recipe is already close to vegan. Just ensure your Dijon mustard fits your diet. For paleo, swap the maple syrup with coconut sugar or another natural sweetener. Adjust the olive oil to fit your needs.
These changes keep the dish fresh and exciting. Enjoy making it your own!
Storage Info
Storing Leftovers
When you have extra Maple Dijon Roasted Carrots, proper storage is key. I recommend using airtight containers. Glass or plastic containers work great to keep the carrots fresh.
For short-term storage, place the leftovers in the fridge. They will stay good for about three to five days. If you want to save them longer, freezing is a good option. Just remember to allow them to cool before freezing. Use freezer bags or containers to keep them safe.
When you’re ready to eat, reheating is simple. You can use the microwave for quick heating. For best results, reheat them in the oven. This helps keep their flavor and texture. Preheat the oven to 350°F (175°C) and place the carrots on a baking sheet. Heat for about 10-15 minutes, until warm. Enjoy your tasty side dish again!
FAQs
Common Questions about Maple Dijon Roasted Carrots
Can I use frozen carrots for this recipe?
Yes, you can use frozen carrots. However, fresh carrots taste better. Frozen carrots might get too soft. If you use frozen carrots, thaw them first. Pat them dry to remove excess water. This helps them roast better.
How do I prevent burning while roasting?
To prevent burning, keep an eye on the oven. Toss the carrots halfway through cooking. This helps them cook evenly. If they start to brown too fast, lower the heat. You can also add a bit more olive oil. This keeps them moist and tasty.
What dishes pair well with this side?
Maple Dijon roasted carrots go well with many main dishes. Try them with grilled chicken or salmon. They also taste great with pork chops. For a veggie meal, serve them with quinoa or a salad. Their sweet and tangy flavor makes any dish better.
In this post, we covered how to make Maple Dijon Roasted Carrots. We looked at ingredients, steps, tips, and ways to customize the dish. Remember, you can swap veggies and adjust flavors to match your taste. Store leftovers properly for the best flavor. With these simple tricks, you can enjoy this easy and tasty dish. I hope you try this recipe and make it your ow

Maple Dijon Roasted Carrots
Ingredients
- 1 pound baby carrots, peeled or tri-colored carrots, cut into sticks
- 3 tablespoons olive oil
- 2 tablespoons pure maple syrup
- 1 tablespoon Dijon mustard
- 1 teaspoon garlic powder
- 1 teaspoon ground cumin
- to taste Salt and pepper
- for garnish Fresh parsley, chopped
Instructions
- Preheat your oven to 400°F (200°C) and line a baking sheet with parchment paper.
- In a large bowl, whisk together olive oil, maple syrup, Dijon mustard, garlic powder, ground cumin, salt, and pepper until well combined.
- Add the baby carrots to the bowl and toss them in the maple Dijon mixture until they are evenly coated.
- Spread the carrots in a single layer on the prepared baking sheet.
- Roast in the preheated oven for approximately 25-30 minutes, or until the carrots are tender and lightly caramelized, tossing halfway through for even cooking.
- Remove the carrots from the oven and let them cool for a minute. Transfer to a serving platter and sprinkle with freshly chopped parsley for a pop of color.


![- 1 lb ground beef or turkey - 1 packet taco seasoning - 1 can black beans, rinsed and drained - 1 cup corn, frozen or canned - 1 large head of romaine lettuce, chopped For a tasty loaded taco salad, you need a few key items. The star is ground beef or turkey. This meat gives the salad its savory flavor. Next, you will need taco seasoning. This mix adds spice and zest. Black beans bring in protein and fiber. They also add a nice texture. Corn sweetens the dish and adds a pop of color. Lastly, chopped romaine lettuce makes a great base. It stays crisp and fresh. - 1 cup cherry tomatoes, halved - 1 avocado, diced - 1 cup shredded cheddar cheese - 1/2 cup sour cream - 1/4 cup fresh cilantro, chopped Now, let’s talk toppings! Cherry tomatoes add a juicy bite and bright color. Diced avocado brings creaminess and healthy fats. Shredded cheddar cheese gives a rich flavor and melty touch. Sour cream adds a cool contrast to the spices. Finally, fresh cilantro brings a burst of herbal taste. You can mix these toppings in or add them on top for a fun look. - Salsa, for drizzling - Tortilla chips, for garnish - Lime wedges, for serving - Salt and pepper to taste If you want to jazz up your salad, consider add-ins. Salsa adds more flavor and a bit of heat. Crushed tortilla chips give a crunchy texture. Lime wedges offer a zesty kick when squeezed over the top. Don’t forget to season with salt and pepper to taste. These optional items can turn a good salad into a great one. For the full recipe, check out the complete guide! 1. Brown the ground beef or turkey: Heat a large skillet over medium heat. Add the ground meat and cook until it turns brown. This usually takes about 5 to 7 minutes. Stir often to ensure it cooks evenly. 2. Drain excess fat: Once the meat is browned, carefully drain any extra fat. This step keeps your salad lighter and healthier. 3. Add taco seasoning and simmer: Open the taco seasoning packet and sprinkle it over the meat. Follow the instructions on the packet. Typically, you will add some water and let it simmer for about 5 minutes. This allows the flavors to blend perfectly. 1. Create a base with lettuce: Take a large serving bowl and layer the chopped romaine lettuce at the bottom. This will be your fresh and crunchy base. 2. Layer with cooked meat and other ingredients: Evenly distribute the cooked meat over the lettuce. Next, add a layer of black beans, followed by corn, cherry tomatoes, and diced avocado. Each layer adds texture and flavor. 3. Add toppings and garnishes: Sprinkle shredded cheddar cheese on top. Then, add dollops of sour cream and drizzle salsa over everything. Finally, garnish with fresh cilantro and crushed tortilla chips for that extra crunch. 1. Present in a large bowl or individual bowls: You can serve this salad in one large bowl for sharing or in individual bowls for each guest. 2. Arrange in sections for visual appeal: To make your salad eye-catching, arrange the ingredients in sections. This way, each component shines and looks delicious. Consider adding a sprinkle of cheese and a few extra tortilla chips on top for even more visual appeal. For more detailed steps and tips, check out the Full Recipe for Loaded Taco Salad. To make your loaded taco salad shine, adjust the seasoning to your taste. You might want more spice or salt. Taste as you go to get it just right. Fresh ingredients boost flavor. Try to use ripe tomatoes and crisp lettuce. Fresh cilantro adds a bright touch, too. You can save time by preparing ingredients in advance. Chop your veggies the night before. This way, you can mix the salad fast. Canned or frozen items work well. Black beans from a can save time and taste great. Frozen corn can also cut down on prep time. The way you present your salad matters. Create colorful layers to catch the eye. Start with green lettuce and add bright tomatoes. Layering makes it look fun and tasty. Garnish with extra tortilla chips and cheese for crunch. This adds flair and makes your dish pop. {{image_2}} You can easily switch the meat in your loaded taco salad. If you prefer, use shredded chicken or tofu. Shredded chicken adds a tender texture. Tofu gives a nice bite and works well for vegetarians. You can even try black bean burgers for a fun twist. These options keep the dish tasty while meeting different dietary needs. Feel free to get creative with ingredients. You can use different beans, like pinto or kidney beans. Each type brings its own flavor and texture. Cheese is another area to explore—try pepper jack for a spicy kick or queso fresco for a milder taste. For the greens, mix it up with spinach or arugula. These changes can give your salad a fresh spin. Don't forget about the dressing! A creamy ranch pairs well with the flavors in your salad. If you want a zing, try a vinaigrette for brightness. For those who love heat, add a spicy chipotle dressing. It amps up the flavor and makes the salad even more exciting. Each dressing can change your taco salad experience, so have fun experimenting! For the full recipe, check [Full Recipe]. To keep your loaded taco salad fresh, store it in an airtight container. This step keeps moisture out and preserves flavors. It’s best to keep the meat and toppings separate. This way, your salad stays crisp and tasty. You can refrigerate the salad for up to 3 days. Make sure to eat it within this time for the best taste. I recommend avoiding freezing. Freezing can change the texture of the ingredients, especially the lettuce and tomatoes. When you are ready to enjoy leftovers, reheat the meat separately. This method helps maintain the meat's flavor and warmth. After reheating, add fresh toppings like avocado and cilantro. This keeps your salad looking and tasting great. For a full recipe, check out the loaded taco salad instructions above. You can make your loaded taco salad even better with fun toppings. Consider adding: - Jalapeños for heat - Olives for saltiness - Bell peppers for crunch - Radishes for a fresh bite - Greek yogurt as a sour cream swap - Fresh corn for sweetness Feel free to mix and match toppings. The more colors, the better it looks! Yes, you can prepare parts of your taco salad ahead of time! Here are some tips: - Cook the meat and store it in the fridge for up to three days. - Chop your veggies and keep them in airtight containers. - Wait to add toppings like avocado and sour cream until right before serving. This keeps them fresh. Layering is key for both taste and looks. Here’s how I do it: 1. Start with a base of romaine lettuce. 2. Add the cooked meat evenly over the lettuce. 3. Next, layer black beans, corn, tomatoes, and avocado. 4. Sprinkle cheese on top for a nice finish. 5. Finally, dollop sour cream and drizzle salsa for flavor. This way, each bite is packed with flavor! Making a lighter taco salad is simple. Try these swaps: - Use lean ground turkey or chicken instead of beef. - Swap sour cream for Greek yogurt to cut calories. - Add more veggies like spinach or kale instead of lettuce. - Use low-fat cheese or skip it altogether for fewer calories. These changes keep your salad tasty and nutritious! For the full recipe, check out the Loaded Taco Salad section. This blog post showed you how to make a delicious loaded taco salad. You learned about essential ingredients, cooking steps, and tasty toppings. I shared tips for flavor and presentation, plus fun variations and storage info. Now you can create your own loaded taco salad that fits your taste. Enjoy experimenting with the ingredients. Make it colorful and flavorful, and share it with friends!](https://dailydishlab.com/wp-content/uploads/2025/06/0bf67b06-348e-48f5-b73f-4698b039c9e8-768x768.webp)
