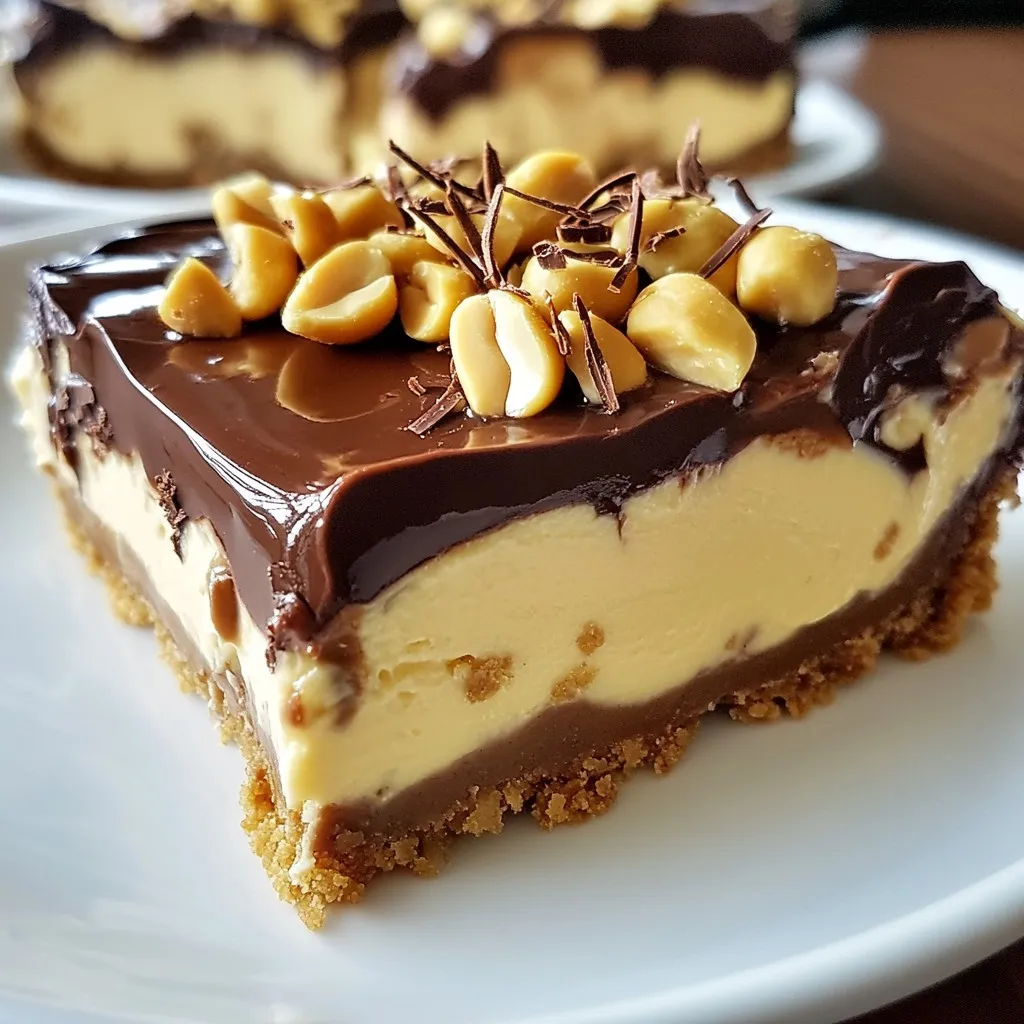
Chocolate Peanut Butter No Bake Pie Delightful Treat

Craving something sweet and easy? Meet the Chocolate Peanut Butter No Bake Pie Delightful Treat! This no-bake treat combines creamy peanut butter and rich chocolate—all with simple steps. Imagine juicy bites of flavor without turning on the oven. It’s perfect for parties, or just a cozy night in. I’ll guide you through the ingredients, tips, and tasty variations. Get ready to impress your friends and satisfy your sweet tooth!
Why I Love This Recipe
- Decadent Flavor Combination: The rich chocolate and creamy peanut butter create a heavenly pairing that satisfies any sweet tooth.
- No Baking Required: This pie is perfect for warm days or when you want a quick dessert without the hassle of turning on the oven.
- Simple Ingredients: With just a few pantry staples, you can whip up this impressive dessert that looks and tastes gourmet.
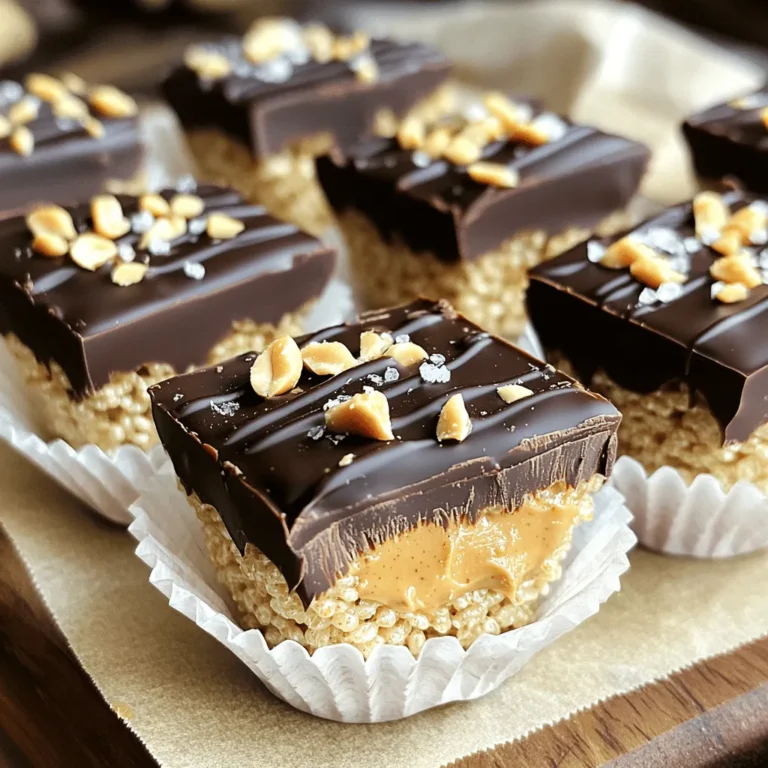
- Customizable Toppings: Add your favorite garnishes, like chopped peanuts or chocolate shavings, to make each slice uniquely yours.
Ingredients
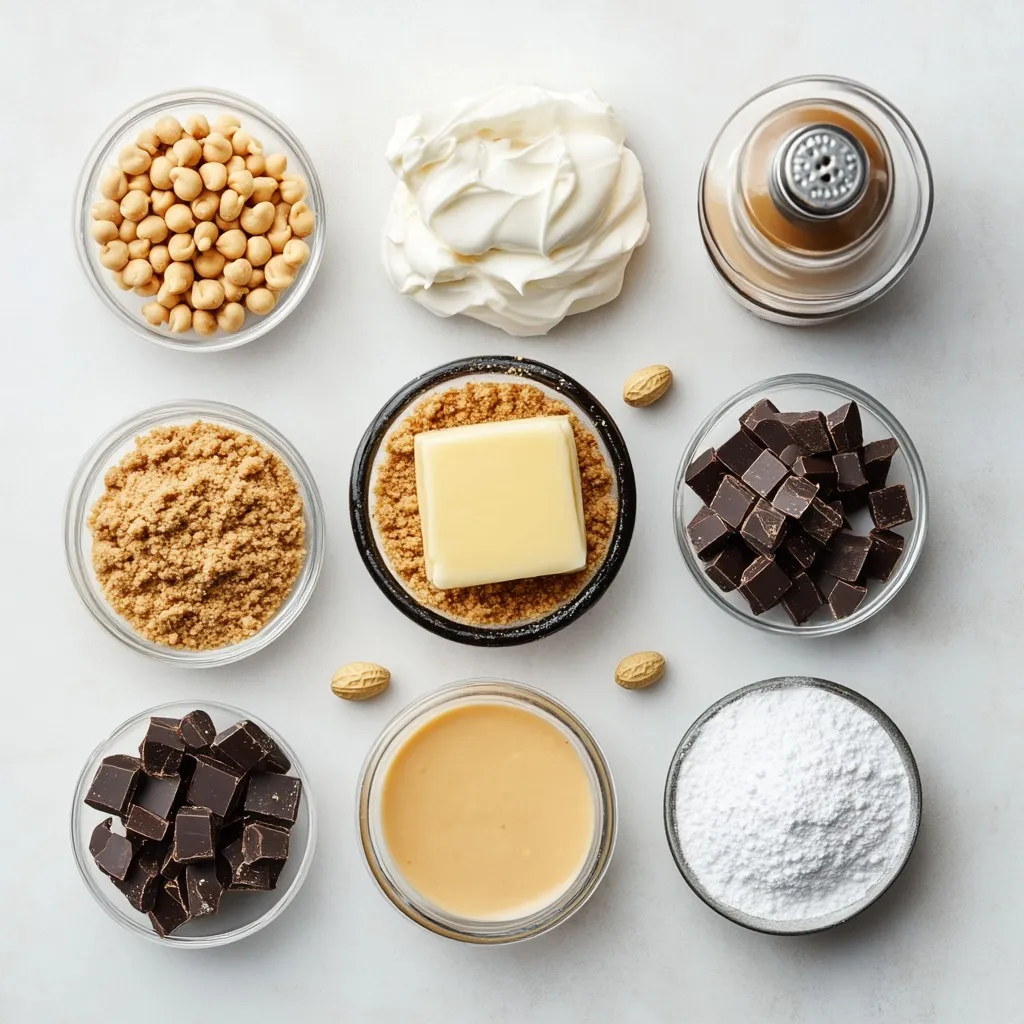
Main Ingredients
- 1 ½ cups graham cracker crumbs
- ½ cup unsalted butter, melted
- 1 cup creamy peanut butter
- 1 cup powdered sugar
- 1 cup heavy cream
- 1 cup semi-sweet chocolate chips
- ½ teaspoon vanilla extract
- Pinch of salt
The main ingredients create a rich and creamy dessert. The graham cracker crumbs form the base, giving the pie a sweet crunch. Unsalted butter adds flavor and helps hold the crust together. Creamy peanut butter gives the filling its signature taste.
Powdered sugar sweetens the filling and keeps it smooth. Heavy cream is essential for a light texture. The semi-sweet chocolate chips create a luscious topping. A splash of vanilla extract enhances the flavors. Finally, a pinch of salt balances the sweetness.
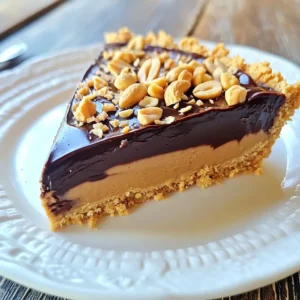
Optional Garnishes
- Chopped peanuts
- Chocolate shavings
The optional garnishes add a nice touch. Chopped peanuts give a crunchy contrast to the smooth filling. Chocolate shavings add a fancy look and extra chocolate flavor. These garnishes make your pie even more inviting. You can choose to add them or leave them off based on your preference.
Step-by-Step Instructions
Preparing the Crust
- In a medium bowl, combine 1 ½ cups of graham cracker crumbs and ½ cup of melted unsalted butter.
- Mix until the crumbs feel like wet sand. Press this mixture firmly into a 9-inch pie dish. Use your fingers or the back of a measuring cup for an even layer. Place the crust in the freezer to set while you prepare the filling.
Making the Peanut Butter Filling
- In a large mixing bowl, mix 1 cup of creamy peanut butter, 1 cup of powdered sugar, and a pinch of salt. Stir until it is smooth and well blended.
- In another bowl, whip 1 cup of heavy cream until soft peaks form. Gently fold this whipped cream into the peanut butter mixture.
Assembling the Pie
- Pour the peanut butter filling into the chilled crust. Smooth the top with a spatula.
- In a microwave-safe bowl, melt 1 cup of semi-sweet chocolate chips in 30-second intervals. Stir until smooth. Add ½ teaspoon of vanilla extract and mix well.
- Pour the melted chocolate over the peanut butter filling. Gently spread it out evenly.
- Refrigerate the pie for at least 4 hours, or until it sets completely.
Tips & Tricks
Perfecting the Texture
To get a smooth peanut butter filling, use creamy peanut butter. Mix it with powdered sugar and a pinch of salt. Stir until it looks like a soft paste. This simple step makes a big difference.
For a firm crust, make sure to mix the graham cracker crumbs with melted butter well. It should feel like wet sand. Press it evenly into the pie dish. Use your fingers or a cup to pack it down hard. This helps the crust stay together.
Presentation Tips
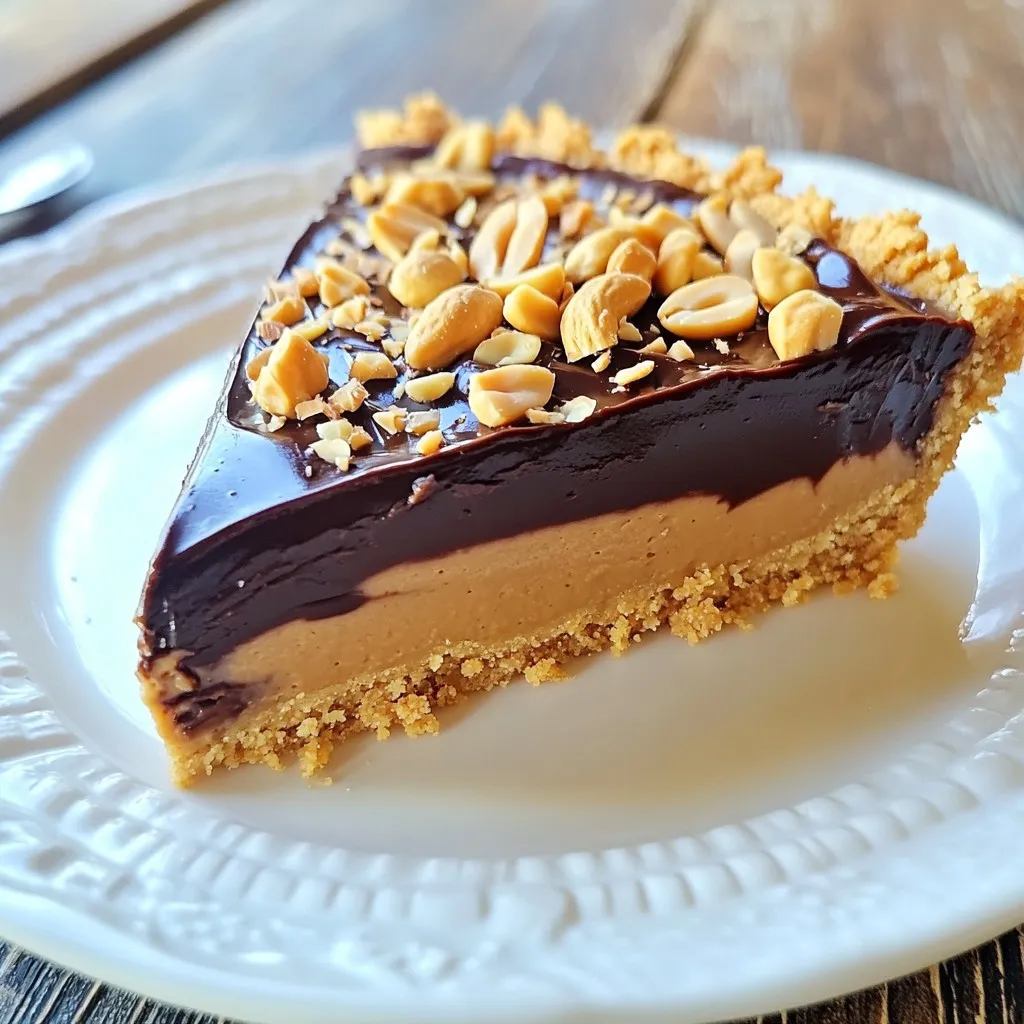
Serving this pie is an art. Cut slices and place them on chilled plates. Drizzle extra melted chocolate around the pie for a fancy look.
For garnish, sprinkle chopped peanuts and chocolate shavings on top. This adds both taste and visual appeal. It makes the pie look even more tempting.
Pro Tips
- Chill Your Bowl: Before whipping the cream, chill the mixing bowl and beaters in the freezer for about 10-15 minutes. This helps the cream whip faster and achieve better volume.
- Use Quality Chocolate: For the best flavor, choose high-quality semi-sweet chocolate chips. This will enhance the overall taste of the pie.
- Room Temperature Peanut Butter: Make sure your peanut butter is at room temperature before mixing. This allows for easier blending with the powdered sugar.
- Let It Set: Allow the pie to chill for at least 4 hours or overnight if possible. This ensures the filling is set and makes slicing easier.
Variations
Flavor Enhancements
You can make this pie even more fun with some simple changes. Adding chocolate chips to the filling gives it a rich, chocolatey taste. Just mix in half a cup of chocolate chips when you combine the peanut butter and sugar. This small tweak adds depth to your pie.
Another great option is to use crunchy peanut butter instead of creamy. This change adds texture and a nice crunch. It makes each bite exciting and different. If you love peanut butter, this is a must-try!
Dietary Modifications
If you need a gluten-free option, swap the graham cracker crust for a nut-based crust. Almond flour mixed with melted butter works great. Just press it into the pie dish like you would with graham crackers.
For a vegan version, use coconut cream in place of heavy cream. You can also choose maple syrup instead of powdered sugar. Use a dairy-free chocolate for the topping to finish it off. These changes keep the pie delicious and suitable for everyone.
Storage Info
Refrigeration
To store leftovers, cover the pie tightly with plastic wrap. This keeps it fresh. Place it in the fridge for up to five days. If you cut the pie, use a piece of wax paper between the slices. This helps keep the edges from getting dry. Always serve cold for the best taste.
Freezing
You can freeze the pie or slices for later. Wrap the entire pie in plastic wrap, then foil. This protects it from freezer burn. It can last for two months in the freezer. For individual slices, wrap each slice in plastic wrap. Place them in a freezer bag. Thaw in the fridge overnight before enjoying.
FAQs
How long does the pie need to set?
This pie needs to chill for at least 4 hours. I recommend letting it set overnight for the best taste. The longer it sits, the firmer it gets. This makes it easier to slice.
Can I use a different type of chocolate?
Yes, you can use dark chocolate or milk chocolate. Each type will change the taste a bit. Dark chocolate adds a richer flavor. Milk chocolate is sweeter and creamier. Choose what you like best!
Is this pie suitable for kids?
Absolutely! This pie is kid-friendly. However, be mindful of allergies, especially with peanuts. Cut small slices for younger kids. The pie is rich, so small servings work best. Enjoy sharing this treat with the little ones!
This article covered how to make a delicious peanut butter pie. We discussed the main ingredients like graham cracker crumbs and creamy peanut butter. I shared step-by-step instructions, tips for the perfect texture, and ways to customize your pie.
In summary, this pie is easy, tasty, and fun to make. Whether you keep it simple or add your twist, it’s sure to please everyone. Enjoy your tasty creation, and don’t forget to share i
Chocolate Peanut Butter No Bake Pie
Ingredients
- 1.5 cups graham cracker crumbs
- 0.5 cups unsalted butter, melted
- 1 cups creamy peanut butter
- 1 cups powdered sugar
- 1 cups heavy cream
- 1 cups semi-sweet chocolate chips
- 0.5 teaspoon vanilla extract
- 1 pinch salt
- optional chopped peanuts and chocolate shavings for garnish
Instructions
- In a medium bowl, combine the graham cracker crumbs and melted butter. Mix until the crumbs are well coated and the mixture resembles wet sand.
- Press the graham cracker mixture firmly into a 9-inch pie dish to form a crust. Use the back of a measuring cup or your fingers to create an even layer. Place the crust in the freezer to set while preparing the filling.
- In a large mixing bowl, combine the peanut butter, powdered sugar, and a pinch of salt. Stir until the ingredients are fully incorporated and smooth.
- In a separate bowl, whip the heavy cream until soft peaks form. Gently fold the whipped cream into the peanut butter mixture until fully combined.
- Pour the peanut butter filling into the chilled crust and smooth the top with a spatula.
- In a microwave-safe bowl, melt the chocolate chips in 30-second intervals, stirring in between until smooth. Add the vanilla extract and mix until combined.
- Pour the melted chocolate over the peanut butter filling and gently spread it out evenly.
- Refrigerate the pie for at least 4 hours, or until thoroughly set.
- Before serving, garnish with chopped peanuts and chocolate shavings for added texture and flavor.
![To make chewy oatmeal raisin cookies, you need key ingredients. Here is what you should have: - 1 cup all-purpose flour - 1 teaspoon baking soda - 1 teaspoon cinnamon - 1/2 teaspoon salt - 1/2 cup unsalted butter, softened - 3/4 cup brown sugar, packed - 1/4 cup granulated sugar - 1 large egg - 1 teaspoon vanilla extract - 1 1/2 cups old-fashioned oats - 1 cup raisins These ingredients work together to create that soft and chewy texture. The oats give the cookies a hearty feel, while the raisins add natural sweetness. You can make your cookies even better with some optional add-ins. Here are a few ideas: - 1/2 cup chopped walnuts - 1/2 cup chocolate chips - 1/2 cup shredded coconut Feel free to mix and match these extras. Each add-in brings its own tasty twist. The walnuts add crunch, while chocolate chips can make them extra special. Choosing the right ingredients matters a lot. Here are some tips: - Butter: Use unsalted butter for better control over saltiness. - Oats: Choose old-fashioned oats for the best texture. - Raisins: Look for fresh, plump raisins; they should not be dry or hard. Fresh ingredients lead to better cookies. Always check expiration dates. For the full recipe, see the recipe section above. To start, gather all your ingredients. You will need flour, baking soda, cinnamon, salt, butter, brown sugar, granulated sugar, an egg, vanilla, oats, raisins, and optional walnuts. 1. Preheat your oven to 350°F (175°C). Line a baking sheet with parchment paper. 2. In a medium bowl, whisk the flour, baking soda, cinnamon, and salt. Set this aside. 3. In a large bowl, cream together the softened butter, brown sugar, and granulated sugar. Mix until it’s light and fluffy. 4. Beat in the egg and vanilla extract until everything is well combined. 5. Gradually mix the dry ingredients into the wet mixture. Stir until just combined. 6. Lastly, fold in the oats, raisins, and walnuts (if you’re using them). Now it’s time to bake! 1. Use a spoon to drop rounded tablespoons of dough onto your prepared baking sheet. Leave about 2 inches between each mound. 2. Bake in your preheated oven for 10-12 minutes. Look for golden edges, but keep the centers soft. Once baked, let the cookies cool. 1. Allow them to sit on the baking sheet for 5 minutes. This helps them set. 2. Carefully transfer the cookies to a wire rack to cool completely. 3. If you want to store them, keep them in an airtight container. They stay fresh for several days. For the full recipe, visit the recipe section above. Enjoy your chewy oatmeal raisin cookies! To get that perfect chewy texture in your cookies, use old-fashioned oats. They soak up moisture well, keeping your cookies soft. Also, do not overmix the dough. Just mix until the dry ingredients blend in. This keeps your cookies tender. Lastly, take them out of the oven while they still look a bit soft. They will firm up as they cool. One common mistake is using quick-cooking oats instead of old-fashioned oats. Quick oats can make your cookies dry. Another mistake is baking them too long. Watch the edges; they should be golden, but the center must stay soft. Lastly, make sure your butter is softened, not melted. Melted butter can change your cookie’s texture. For a lovely presentation, place the cookies on a nice platter. Dust them lightly with powdered sugar for a sweet touch. You can also serve them with a bowl of fresh fruit. Adding a side of flaxseeds or sunflower seeds gives a nice crunch. These ideas make your cookies not just tasty but also pretty! For the full recipe, check back to ensure you have all the steps. {{image_2}} You can make your cookies healthier. Use whole wheat flour instead of all-purpose flour. This adds fiber and nutrients. You can also swap in coconut oil for butter. This change gives a nice flavor and is a great fat source. For sweetness, try using honey or maple syrup instead of sugar. This can cut down on refined sugars and add a unique taste. Get creative with flavors! Add dark chocolate chips for a richer taste. You can also mix in dried cranberries or apricots for a fruity twist. Try spices like nutmeg or ginger to add warmth. Even a splash of orange juice can brighten the cookies. These fun changes keep the recipe exciting and fresh! If you need gluten-free cookies, use almond flour or a gluten-free flour blend. Make sure your oats are labeled gluten-free. For vegan cookies, skip the egg and use flaxseed meal. Mix one tablespoon of flaxseed with three tablespoons of water and let it sit for a few minutes. This makes a great egg substitute. These options let everyone enjoy chewy oatmeal raisin cookies! For the full recipe, check out the details above. To keep your chewy oatmeal raisin cookies fresh, store them in an airtight container. You can place a piece of bread in the container to help keep them soft. The bread will absorb extra moisture, ensuring your cookies remain chewy. You can freeze the cookies if you want to save some for later. First, let the cookies cool completely. Then, place them in a single layer on a baking sheet. Freeze them for about an hour. Once they are firm, transfer them to a freezer bag or container. This way, you can enjoy them anytime! Stored cookies stay fresh for about one week at room temperature. In the freezer, they can last up to three months. When you are ready to eat frozen cookies, let them thaw at room temperature for a few minutes. For a warm treat, heat them in the oven for a few minutes. Don’t forget to check the [Full Recipe] for more tips! Your oatmeal raisin cookies may not be chewy for a few reasons. First, check your oven temperature. If it is too hot, the cookies may bake too fast and dry out. Second, over-mixing the dough can lead to tough cookies. Mix only until the ingredients combine. Lastly, using too much flour can also make them dry. Always measure flour correctly. Yes, you can substitute some ingredients in the recipe. If you do not have brown sugar, use white sugar instead. This will change the flavor a bit, but the cookies will still be good. For a dairy-free option, use coconut oil or a dairy-free butter. You can also swap raisins for chocolate chips or nuts if you like. To find the best chewy oatmeal raisin cookies, check local bakeries or farmers' markets. Many bakeries make fresh cookies daily. You can also look at online stores that specialize in baked goods. They often ship cookies right to your door. If you want to try some now, check out the Full Recipe for a simple and tasty way to make them at home! To make chewy oatmeal raisin cookies, use key ingredients like oats and raisins. Remember to mix in optional flavors for a fun twist. Follow the step-by-step guide to prepare, bake, and store your cookies. For perfect texture, avoid common baking mistakes. Explore creative variations like gluten-free or vegan recipes. Proper storage extends their lifespan. With these tips, you’ll bake delicious cookies every time. Enjoy the baking process and share with others to spread the joy!](https://dailydishlab.com/wp-content/uploads/2025/07/06db6db4-aa4f-466c-8591-6bfd0fae1d2e-768x768.webp)