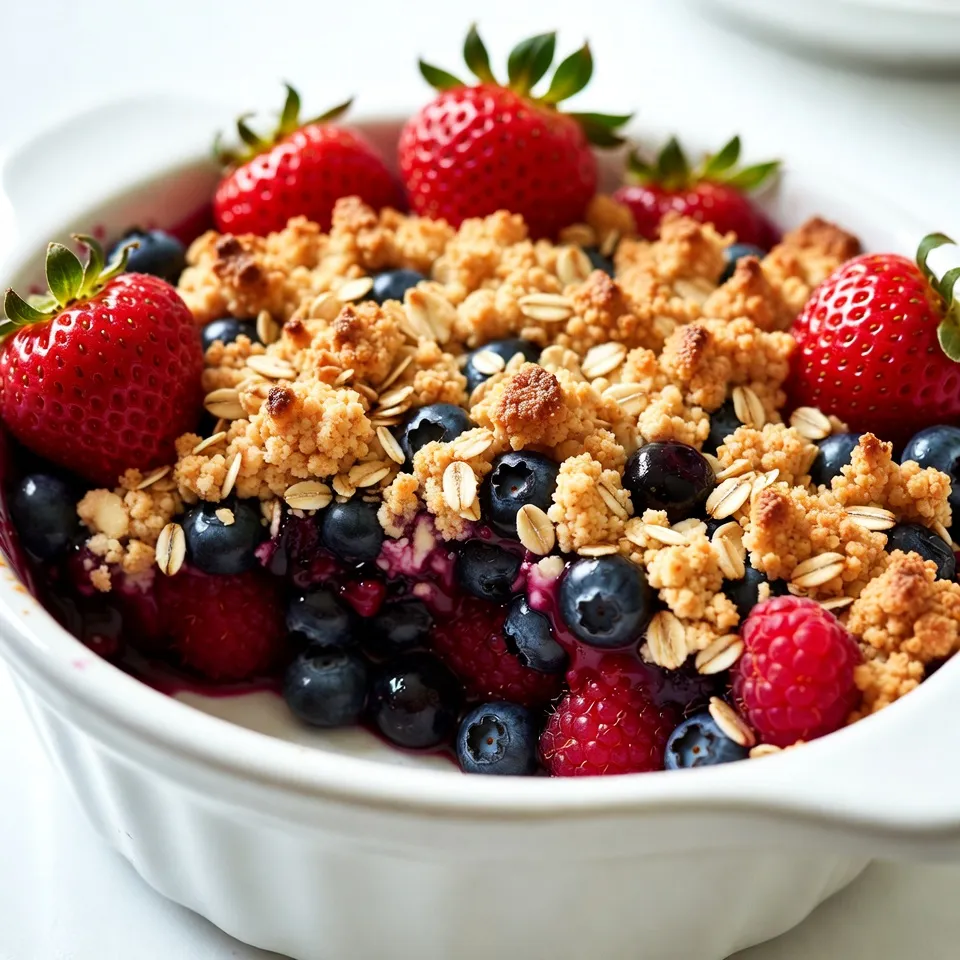
Triple Berry Crumble Irresistible and Easy Dessert
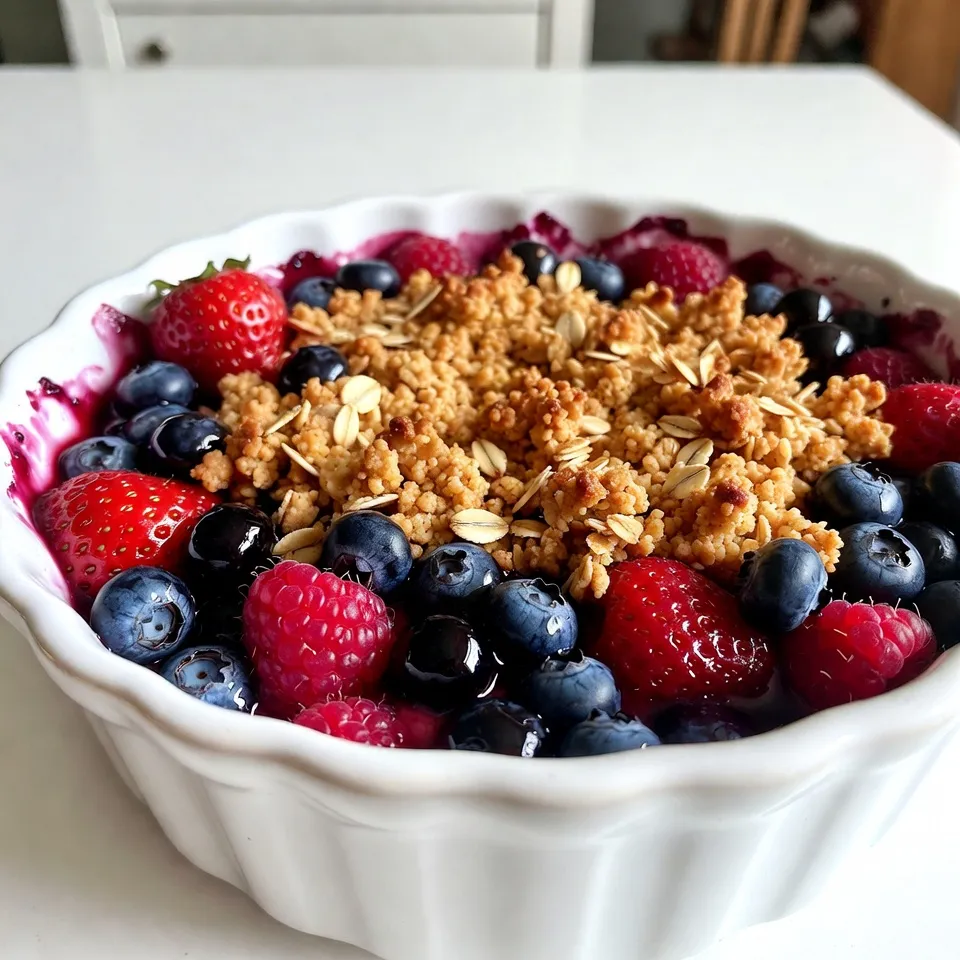
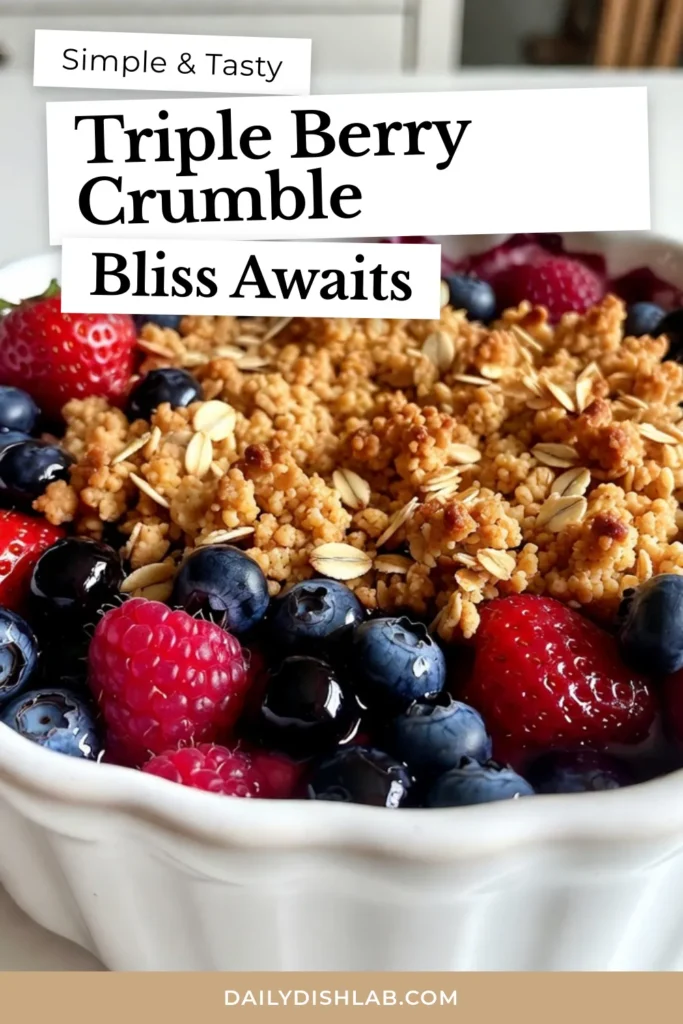
Are you ready to whip up a dessert that will wow your friends and family? My Triple Berry Crumble is simple, tasty, and perfect for any occasion. With juicy berries and a crunchy topping, this dessert hits the spot every time. I promise this recipe can be made with just a few easy steps. Let’s dive in and make something irresistible together!
Why I Love This Recipe
- Fresh and Fruity: The combination of strawberries, blueberries, and raspberries creates a vibrant and refreshing flavor that’s perfect for any dessert lover.
- Simple to Make: With just a few steps and minimal ingredients, this recipe is easy enough for beginner bakers to master.
- Perfect for Sharing: This crumble serves six generously, making it an ideal dessert for gatherings, family dinners, or potlucks.
- Deliciously Versatile: Feel free to mix and match your favorite berries or add nuts for a crunchy twist—this recipe is adaptable to your taste!
Ingredients
Types of Berries
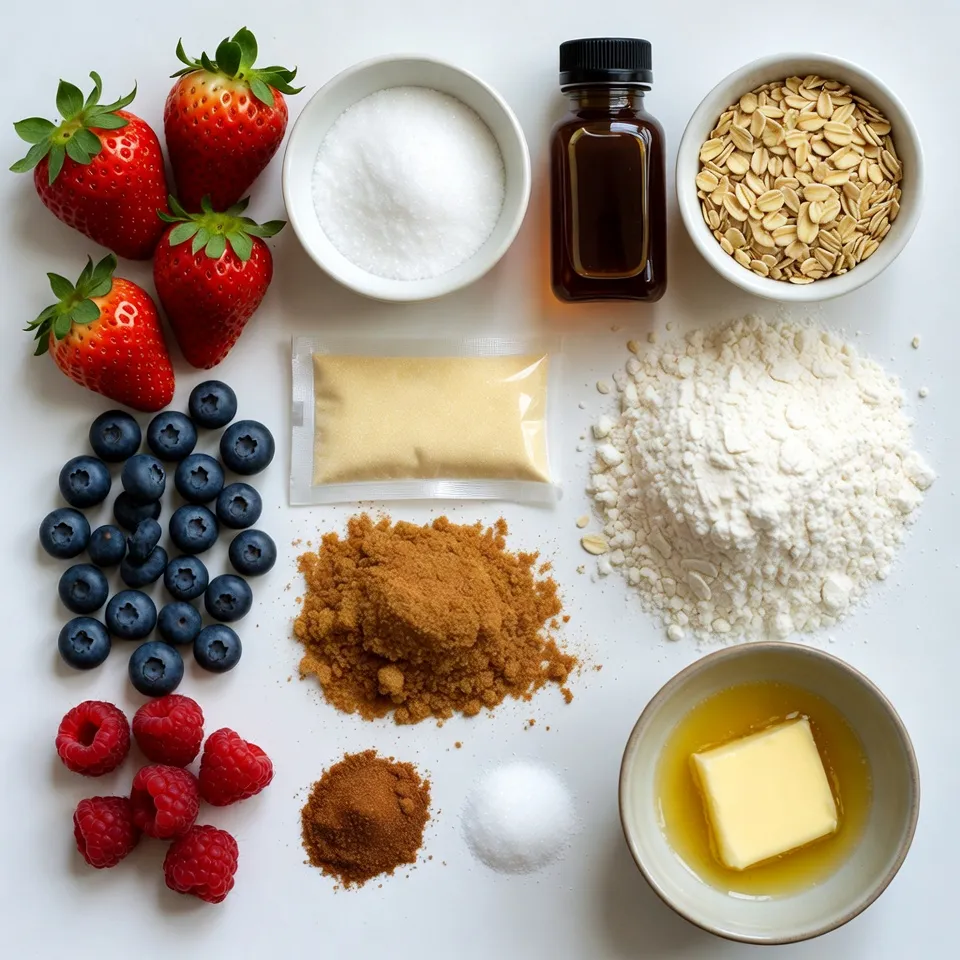
For this crumble, I love using a mix of fresh berries. I use:
- 1 cup strawberries, hulled and sliced
- 1 cup blueberries
- 1 cup raspberries
These berries blend well together. Strawberries bring sweetness, while blueberries add a juicy burst. Raspberries give a nice tartness. This mix makes the crumble tasty and colorful.
Topping Ingredients
The topping is just as important as the berries. Here’s what you need:
- 1 cup rolled oats
- ½ cup all-purpose flour
- ½ cup brown sugar, packed
- ½ teaspoon cinnamon
- ½ cup unsalted butter, melted
- Pinch of salt
The oats give a great crunch. Flour helps bind the topping together. Brown sugar adds a rich flavor, and cinnamon gives warmth. The melted butter makes it all come together.
Additional Flavor Enhancers
To make your crumble even better, consider these extras:
- ¼ cup granulated sugar
- 1 tablespoon lemon juice
- 1 teaspoon cornstarch
- 1 teaspoon vanilla extract
Granulated sugar helps sweeten the berries. Lemon juice adds brightness. Cornstarch thickens the berry mix, so it’s not runny. Vanilla extract gives a lovely aroma and enhances all the flavors.
Step-by-Step Instructions
Prepping the Berries
Start by washing your berries. Use one cup each of strawberries, blueberries, and raspberries. Hull and slice the strawberries. Next, place all the berries in a mixing bowl. Add ¼ cup of granulated sugar, one tablespoon of lemon juice, one teaspoon of cornstarch, and one teaspoon of vanilla extract. Toss gently to coat them well. This step helps the berries release their juices and enhances their flavor.
Making the Crumble Topping
In another bowl, mix together one cup of rolled oats, ½ cup of all-purpose flour, and ½ cup of packed brown sugar. Add ½ teaspoon of cinnamon and a pinch of salt. Now, pour in ½ cup of melted unsalted butter. Stir until the mixture is crumbly. This crumble topping adds a nice texture and sweetness to the dish.
Baking the Triple Berry Crumble
Preheat your oven to 350°F (175°C). Pour the berry mixture into a greased 9-inch baking dish, spreading it evenly. Next, evenly sprinkle the crumble topping over the berries. Bake in the oven for 25-30 minutes. Look for a golden brown crumble and bubbling berries. Remove it from the oven and let it cool for a few minutes before serving. Enjoy the warm, delicious flavors!
Tips & Tricks
Perfecting the Berry Mixture
For the best berry mix, use fresh berries when possible. Pick ripe strawberries, blueberries, and raspberries. This ensures a sweet and juicy filling. If you find some berries are tart, add a bit more sugar. The lemon juice adds a nice tang. It helps brighten the flavors. Mix the berries gently but well, so every piece gets coated.
Achieving the Best Crumble Texture
The crumble topping should be crumbly, not wet. Use cold, unsalted butter for a nice texture. Mix the oats, flour, brown sugar, and cinnamon first. Then, add the melted butter. Stir just until combined. Do not overmix; this keeps the topping light. A pinch of salt enhances the sweetness. Spread the topping evenly over the berry mix. This helps it bake nicely.
Serving Suggestions and Pairings
Serve your crumble warm for the best taste. A scoop of vanilla ice cream on top adds creaminess. Whipped cream also works well. For a fresh touch, add a sprig of mint. You can also sprinkle some extra cinnamon for flavor. Pair it with a cup of tea or coffee for a delightful treat. Enjoy!
Pro Tips
- Use Fresh Berries: For the best flavor and texture, opt for fresh berries when making this crumble. Frozen berries can work, but they may release more liquid during baking, resulting in a soggier crumble.
- Adjust Sweetness: Depending on the natural sweetness of your berries, you may want to adjust the amount of granulated sugar used. Taste the berry mixture before adding all the sugar to ensure it’s perfectly sweet.
- Let it Cool: Allow the crumble to cool for a few minutes after baking. This helps the juices thicken up a bit, making it easier to serve and enhancing the overall flavor.
- Experiment with Toppings: Feel free to customize the crumble topping by adding nuts or seeds for extra crunch or substituting different spices like nutmeg for a unique twist on the classic flavor.
Variations
Using Different Berry Combinations
You can change the berries based on what you like. Try using blackberries or cherries. You could also mix in peaches for a twist. Each berry brings its own flavor to the dish. Just remember to keep the total amount at three cups. This way, the ratio stays right.
Gluten-Free Options
If you need a gluten-free crumble, swap out the all-purpose flour. Use almond flour or a gluten-free blend instead. You can also check that your oats are certified gluten-free. This keeps the dish safe for those with gluten issues. The taste will remain just as yummy!
Vegan Substitutes for Ingredients
To make this dish vegan, you can replace the butter. Use coconut oil or vegan butter instead. For the topping, substitute brown sugar with coconut sugar. You can also skip the vanilla extract if you want. The crumble will still taste great with these changes!
Storage Info
How to Store Leftovers
To store leftover triple berry crumble, let it cool down first. Once cool, cover it tightly with plastic wrap or foil. You can also place it in an airtight container. Store it in the fridge for up to three days. This keeps the berries fresh and the crumble tasty.
Reheating Tips
When you’re ready to enjoy your leftover crumble, preheat your oven to 350°F (175°C). Place the crumble in an oven-safe dish. Heat for about 15-20 minutes. This makes the topping crisp again. You can also reheat individual portions in the microwave. Just warm them for about 30 seconds or until hot.
Freezing Instructions
If you want to freeze your triple berry crumble, let it cool completely first. Cover it tightly with plastic wrap, then foil. This helps prevent freezer burn. You can freeze it for up to three months. To enjoy later, thaw it in the fridge overnight before reheating.
FAQs
Can I use frozen berries for Triple Berry Crumble?
Yes, you can use frozen berries! They work well in this recipe. Just remember to let them thaw first. Drain any extra juice before mixing them with sugar and lemon juice. This keeps the crumble from getting too soggy. Frozen berries may take a bit longer to cook, so keep an eye on them while baking.
What can I substitute for brown sugar?
If you don’t have brown sugar, you can use white sugar. For a similar taste, mix white sugar with a bit of molasses. Use one tablespoon of molasses for each cup of white sugar. You can also try coconut sugar or maple sugar for a unique flavor.
How do I know when the crumble is done baking?
Look for a golden brown color on top. The berries should bubble around the edges. If you insert a fork, it should feel soft and warm. Bake for about 25-30 minutes at 350°F (175°C) to achieve the perfect texture. Let it cool slightly before serving for the best flavor.
This article broke down how to make a tasty Triple Berry Crumble. We explored types of berries, topping ingredients, and ways to enhance flavors. The step-by-step guide helped you prep, make, and bake the crumble perfectly. You also learned tips for the best berry mix and crumble texture, with serving suggestions. Plus, we discussed fun variations and storage tips.
Now, you can create your own version with confidence. Enjoy every bite of your delicious crumbl

Triple Berry Crumble
Ingredients
- 1 cup strawberries, hulled and sliced
- 1 cup blueberries
- 1 cup raspberries
- ¼ cup granulated sugar
- 1 tablespoon lemon juice
- 1 teaspoon cornstarch
- 1 teaspoon vanilla extract
- 1 cup rolled oats
- ½ cup all-purpose flour
- ½ cup brown sugar, packed
- ½ teaspoon cinnamon
- ½ cup unsalted butter, melted
- 1 pinch salt
Instructions
- Preheat your oven to 350°F (175°C).
- In a mixing bowl, combine strawberries, blueberries, and raspberries. Add granulated sugar, lemon juice, cornstarch, and vanilla extract. Toss gently to coat the berries evenly.
- Pour the berry mixture into a greased 9-inch baking dish, spreading it out evenly.
- In another bowl, mix together the rolled oats, all-purpose flour, brown sugar, cinnamon, melted butter, and a pinch of salt until crumbly.
- Evenly spread the oat mixture over the berry layer in the baking dish.
- Bake in the preheated oven for 25-30 minutes, or until the crumble is golden brown and the berries are bubbling.
- Remove from the oven and let cool for a few minutes before serving.


![- 1 cup canned pumpkin puree - 1/2 cup granulated sugar - 1/2 cup brown sugar - 2 large eggs - 1 cup all-purpose flour To create the Snickerdoodle Pumpkin Cobbler, you need some key ingredients. Canned pumpkin puree gives the dish its warm, earthy flavor. Both granulated and brown sugars add sweetness and depth. Two large eggs help bind everything together, while all-purpose flour forms the base. - 1/2 cup chopped walnuts or pecans - 2 tablespoons cinnamon-sugar mixture (for topping) You can add chopped walnuts or pecans for a nutty crunch. A sprinkle of cinnamon-sugar on top gives it a sweet finish. This step is all about personal touch and taste. - 1 teaspoon ground cinnamon - 1/2 teaspoon ground nutmeg - 1/4 teaspoon ground ginger - 1 teaspoon baking powder - 1/2 teaspoon baking soda - 1/4 teaspoon salt Spices are crucial for flavor. Ground cinnamon adds warmth. Nutmeg and ginger offer a hint of spice. Baking powder and baking soda help the cobbler rise. A pinch of salt balances the sweetness. For the full recipe, you can check the [Full Recipe]. First, preheat your oven to 350°F (175°C). Next, grease a 9x9-inch baking dish with non-stick spray or butter. This step is crucial to prevent sticking. In a large mixing bowl, combine the pumpkin puree, granulated sugar, brown sugar, and vanilla extract. Whisk them together until the mixture is smooth. This blend adds sweetness and a lovely flavor to your cobbler. In another bowl, mix the dry ingredients. Combine the cinnamon, nutmeg, ginger, baking powder, baking soda, salt, and flour. Stir them well to ensure even distribution of the spices. Gradually add the dry mix to the wet ingredients. Alternate with the milk as you mix. Be gentle here; over-mixing can make the cobbler tough. Once just combined, stir in the melted butter. If you like, add chopped walnuts or pecans for extra crunch. Pour the batter into your prepared baking dish. Spread it evenly for a consistent bake. Before placing it in the oven, sprinkle the top with the cinnamon-sugar mixture. This adds a sweet crust that contrasts nicely with the soft filling. Bake in the preheated oven for 30-35 minutes. Check for doneness by inserting a toothpick in the center. If it comes out clean, your cobbler is ready. Let it cool slightly before serving. Enjoy it warm for the best taste, especially with a scoop of ice cream. For the complete recipe, refer to the Full Recipe above. - Not measuring ingredients accurately: Always use dry measuring cups for flour and sugar. This helps keep the balance right. A kitchen scale is your best friend for precision. - Over-mixing the batter: Mix until just combined. Over-mixing makes the cobbler tough. You want it soft and fluffy, not dense. - Resting the batter before baking: Let your batter sit for a few minutes. This helps the flavors blend well. It can also improve the texture. - Adjusting spices to personal taste: Feel free to change up the spices! If you love nutmeg, add a bit more. If you want it spicier, increase the ginger. Make it yours! - Pairing with ice cream or whipped cream: Serve warm with a scoop of vanilla ice cream. The cold ice cream contrasts nicely with the warm cobbler. Whipped cream is a great choice too! - Presentation ideas for gatherings: Cut into squares and serve in bowls. Sprinkle some cinnamon on top for a pop of color. Add a dollop of whipped cream for a lovely finish. This makes your dessert look fancy! For the full recipe, check out the Snickerdoodle Pumpkin Cobbler section above. {{image_2}} You can change the nuts in this dish or skip them. If you like walnuts, use them. Pecans work great too. If you want a nut-free option, just leave them out. For sugar, swap granulated sugar for coconut sugar or honey. These options add a different flavor and sweetness. Coconut sugar gives a rich taste, while honey adds a nice touch. Want to jazz up your cobbler? Try adding chocolate chips or butterscotch chips. These sweet bites melt and blend with the pumpkin. You can also explore spices like allspice or cloves. These spices add warmth and depth to the cobbler. Don't be afraid to mix and match your favorites to create new flavors. For gluten-free friends, use gluten-free flour. Many brands work well and keep the taste great. If you need to avoid eggs, try flaxseed or applesauce as a substitute. Each option helps to keep the cobbler moist and tasty. You can enjoy the same warm dessert while meeting your dietary needs. For the full recipe, check the link above. After enjoying your Snickerdoodle Pumpkin Cobbler, let it cool down. Then, cover it with plastic wrap or keep it in an airtight container. Store it in the fridge for up to three days. The cobbler stays tasty and fresh when stored properly. To enjoy your cobbler warm, you can reheat it. The best way is to use an oven. Preheat the oven to 350°F (175°C) and place the cobbler in for about 10-15 minutes. This keeps the texture nice and soft. If you use a microwave, heat it in short bursts of 20 seconds. Check to avoid drying it out. If you want to save some for later, freezing works well. Cut the cobbler into squares first. Wrap each piece in plastic wrap, then place them in a freezer bag. This way, you can take only what you need. For the best taste, eat it within three months. When ready to enjoy, thaw it in the fridge overnight before reheating. - Prep time: 15 mins - Total time: 50 mins - Servings: 9 Yes, you can prepare this cobbler ahead of time. Mix the batter and pour it into the greased dish. Cover it tightly with plastic wrap and store it in the fridge for up to a day. When you're ready, bake it straight from the fridge. Just add a few extra minutes to the baking time. You can serve it with a scoop of vanilla ice cream or a dollop of whipped cream. A drizzle of caramel sauce adds a nice touch, too. Fresh whipped cream garnished with a sprinkle of cinnamon works great as well. Look for a golden-brown color on top. A toothpick inserted in the center should come out clean. If it comes out with wet batter, give it a few more minutes. The edges should be slightly puffed and firm to touch. Yes, fresh pumpkin can be used instead of canned pumpkin puree. To do this, cook the pumpkin until soft, then mash it. Make sure to drain any excess water. This will give your cobbler a fresh taste and a nice texture. In this blog post, you discovered how to make a delicious Snickerdoodle Pumpkin Cobbler. We talked about essential ingredients, like canned pumpkin and sugars, and shared optional ones to enhance flavor. I provided step-by-step instructions for preparation, baking, and common mistakes to watch out for. Remember to store leftovers properly to keep them fresh. This dessert is easy to make, fun to personalize, and perfect for gatherings. Enjoy baking this delightful treat that brings warmth and sweetness to any occasion!](https://dailydishlab.com/wp-content/uploads/2025/07/2d25911d-0f51-4f98-ae6a-a9dc8136342e-768x768.webp)

![- 1 cup rolled oats - 1/2 cup almond butter (or any nut butter of choice) - 1/4 cup honey or maple syrup These key ingredients form the base of your energy bites. Rolled oats provide fiber and texture. Almond butter gives healthy fats and protein. Honey or maple syrup adds natural sweetness. - 1/4 cup mini chocolate chips - 1/4 cup ground flaxseed - 1/4 cup shredded coconut (unsweetened) Mini chocolate chips add a delightful burst of flavor. Ground flaxseed boosts nutrition with omega-3s. Shredded coconut gives a chewy texture and tropical taste. - 1 tsp vanilla extract - 1/2 tsp cinnamon - A pinch of salt Vanilla extract enhances the overall flavor. Cinnamon adds warmth and depth. A pinch of salt balances the sweetness and brings all the flavors together. For the complete guide on making these bites, check out the [Full Recipe]. To start, gather your ingredients. For the dry mix, you need rolled oats, ground flaxseed, shredded coconut, and cinnamon. In a medium bowl, combine these dry ingredients. Mix them well so they blend nicely. Next, let's make the wet mix. In a separate bowl, add almond butter, honey (or maple syrup), vanilla extract, and a pinch of salt. Stir until it becomes smooth and creamy. This step is key for a good flavor. Now, pour the wet mix into the dry mix. Stir until you combine everything. You want all the dry ingredients to be coated with the wet mix. Finally, gently fold in mini chocolate chips. This adds a sweet delight to every bite. Now it’s time to shape your energy bites. Take about one tablespoon of the mixture. Roll it between your hands to form a ball. Make sure they are about the same size for even bites. Repeat this process until you use all the mixture. Place each ball on a parchment-lined baking sheet. This helps them not stick and makes clean-up easy. Keep them spaced out a bit to avoid sticking together. After shaping, place the baking sheet in the fridge. Let the energy bites chill for at least 30 minutes. This helps them firm up and hold their shape. Once chilled, store the bites in an airtight container. Keep them in the fridge for up to one week. Enjoy these tasty snacks whenever you need a quick energy boost, and don’t forget to check out the Full Recipe for more details! To boost the flavor of your energy bites, add spices like nutmeg or ginger. They give a warm kick. You can also try different extracts, like almond or coconut, for a unique taste. If you like it sweeter, adjust the honey or maple syrup. Just add a little at a time to find your perfect sweetness. For a better texture, focus on the consistency of your mixture. If it's too dry, add a touch more nut butter or honey. For crunchier bites, mix in chopped nuts or seeds. If you prefer them chewier, reduce the baking time slightly. This makes them softer and more enjoyable. Use a medium bowl for mixing your ingredients. A spatula works well for combining everything. To store your energy bites, an airtight container is best. It keeps them fresh longer. You can also use parchment paper to prevent sticking when chilling them in the fridge. For the full recipe, check out the [Full Recipe]. {{image_2}} You can easily make these energy bites fit your diet. For gluten-free options, use certified gluten-free oats. This way, you avoid any gluten while still enjoying a tasty snack. If you want vegan alternatives, swap honey for maple syrup. Both options keep the bites sweet and delicious. You can add fun flavors to your energy bites. Try mixing in dried fruits like raisins or cranberries. These add chewiness and natural sweetness. Nuts such as almonds or walnuts also work well. They add crunch and healthy fats. You can also experiment with different types of chocolate. Use dark, milk, or even white chocolate chips. Each type brings its own unique taste. Get creative with nut butters! While almond butter is great, you can try peanut butter or cashew butter. Each brings a different flavor and texture. You can also incorporate protein powder for a boost. This makes the bites even more filling and nutritious. Adjust the wet ingredients slightly if you add protein powder to keep the right texture. Feel free to explore these variations. They can help you make the perfect chocolate chip energy bites just for you. Check out the Full Recipe for the basic mix, then let your imagination lead the way! To keep your chocolate chip energy bites fresh, store them in an airtight container. Glass or plastic containers work well. Place them in the fridge to maintain their texture and taste. They can last up to one week when stored properly. You can freeze energy bites for longer storage. To freeze, place them in a single layer on a baking sheet. Once frozen, transfer them to a freezer-safe bag. This method prevents them from sticking together. When you want to eat them, take out a few bites and let them thaw in the fridge. This process takes about an hour. In the fridge, these bites last about one week. After that, they may lose flavor and texture. Watch for signs of spoilage, like an off smell or changes in color. If you see or smell anything unusual, it's best to toss them. Enjoy your homemade snacks while they’re fresh! Chocolate chip energy bites can last up to one week in the fridge. Store them in an airtight container for the best freshness. If you freeze them, they can last for about three months. Just thaw them in the fridge when you're ready to enjoy. Yes, you can easily substitute ingredients in this recipe. If you don't like almond butter, feel free to use peanut butter or sunflower seed butter. You can swap honey for maple syrup if you prefer a vegan option. The mini chocolate chips can also be replaced with dried fruits or nuts. Absolutely! These energy bites are a great snack for kids. They are tasty, healthy, and easy to make. You can even involve your kids in the preparation. They will love rolling the bites into balls. Just ensure there are no allergies to the ingredients used. Yes, making these energy bites in advance is a smart idea. You can prepare a batch at the start of the week. This way, you have quick snacks ready for busy days. Just store them in the fridge or freeze some for later use. Chocolate chip energy bites offer many nutritional benefits. They contain rolled oats, which provide fiber for digestion. Almond butter adds healthy fats and protein. Flaxseed is rich in omega-3 fatty acids, promoting heart health. Plus, the little bit of chocolate makes them a treat! These chocolate chip energy bites are simple to make and full of good stuff. You can enjoy them as snacks or quick breakfast bites. Let’s dive into what makes these little treats so special. - Rolled oats: They give a hearty base and provide fiber. - Almond butter (or nut butter alternatives): This adds creaminess and healthy fats. - Honey or maple syrup: Sweeteners that bring flavor and stickiness. - Mini chocolate chips: They add sweetness and a fun texture. - Ground flaxseed: This boosts nutrition and adds omega-3s. - Unsweetened shredded coconut: It gives a nice chewiness. - Vanilla extract: This enhances the flavor and warms the bites. - Cinnamon: It adds spice and depth. - Salt: Just a pinch balances all the flavors. In this recipe, we blend all these ingredients to create something delicious. You can find the [Full Recipe] at the start of this article. It only takes about 10 minutes to mix, and then just chill for 30 minutes. You’ll have about 12 bites ready to enjoy! Feel free to switch it up with your favorite nut butter or add different mix-ins. The options are endless! These chocolate chip energy bites are simple to make and full of flavor. We covered key ingredients like oats and nut butter. I shared tips on making them crunchier or chewier, and variations for different diets. Remember to store them in an airtight container for the best taste. You can enjoy these bites anytime you need a quick snack. Making them yourself lets you control the ingredients and flavors. Healthy snacks can be easy and delicious, so try these energy bites today!](https://dailydishlab.com/wp-content/uploads/2025/07/ee6487bc-f560-4f96-a21c-d76d52703957-768x768.webp)