Lemon Garlic Roasted Shrimp Savory and Simple Dish

Looking for a quick and tasty dish? Lemon Garlic Roasted Shrimp is a simple recipe you can whip up in no time. With just a few fresh ingredients, you’ll create a dish that bursts with flavor. Whether you’re a busy professional or a home cook, this meal fits perfectly into your weeknight routine. Let’s dive into this savory delight that’s sure to impress anyone at your dinner table!
Why I Love This Recipe
- Fresh and Flavorful: This recipe showcases the vibrant flavors of lemon and garlic, making every bite a burst of freshness.
- Quick and Easy: With just 30 minutes from prep to table, it’s perfect for busy weeknights or last-minute gatherings.
- Healthy and Light: Shrimp is a lean protein, and this recipe uses healthy ingredients, making it a guilt-free option.
- Customizable Heat: The red pepper flakes allow you to adjust the spice level to your liking, catering to all taste preferences.
Ingredients
Main Ingredients
- 1 pound large shrimp, peeled and deveined
- 4 cloves garlic, minced
- 1/4 cup olive oil
Flavor Enhancers
- Juice of 2 lemons
- Zest of 1 lemon
- 1 teaspoon red pepper flakes
Seasoning
- 1 teaspoon salt
- 1/2 teaspoon black pepper
- 1 tablespoon fresh parsley, chopped (for garnish)
- Lemon wedges (for serving)
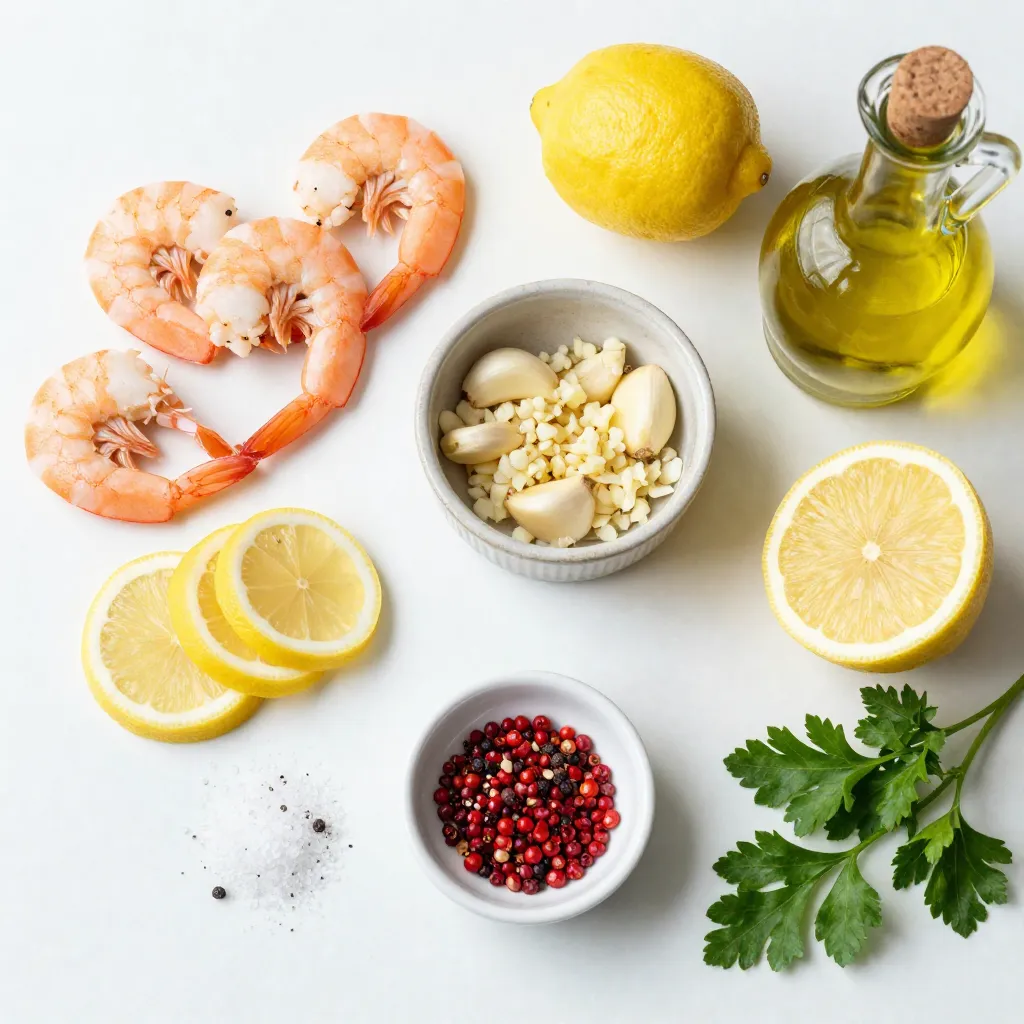
Gathering the right ingredients is key to making this dish shine. The shrimp brings a sweet and tender base. Fresh garlic adds a punch of flavor. A splash of olive oil gives it richness.
The lemon juice and zest brighten up the dish. They bring a tangy taste that pairs well with the shrimp. Red pepper flakes add a hint of heat. Adjust the amount to suit your taste.
For seasoning, the salt and black pepper enhance all the flavors. Fresh parsley is a lovely garnish. It adds color and freshness. Don’t forget to serve with lemon wedges for extra zing!

Step-by-Step Instructions
Preparation Steps
- Preheat the oven to 400°F (200°C).
- Line a baking sheet with parchment paper.
Start by heating your oven. This step ensures that the shrimp cook evenly. Next, line your baking sheet with parchment paper. This will help with easy cleanup and keep the shrimp from sticking.
Marinating the Shrimp
- Combine ingredients in a bowl.
- Toss shrimp in marinade and let sit for 15-20 minutes.
In a medium bowl, combine minced garlic, olive oil, lemon juice, lemon zest, red pepper flakes, salt, and black pepper. Mix these well. Add the shrimp to this bowl. Toss the shrimp until they are fully coated in the marinade. Let them sit for 15 to 20 minutes. This time helps the shrimp soak up all the yummy flavors.
Roasting the Shrimp
- Spread shrimp on the baking sheet.
- Roast for 8-10 minutes until cooked through.
After marinating, spread the shrimp out on the baking sheet in a single layer. Make sure they are not crowded. Roast them in the preheated oven for 8 to 10 minutes. You’ll know they’re done when they turn pink and opaque. Be careful not to overcook them; otherwise, they can become tough.
Tips & Tricks
Achieving Perfectly Cooked Shrimp
To cook shrimp just right, timing is key. Roast them for 8-10 minutes. Check for pink color and a firm texture. When shrimp turn opaque, they are done. If you overcook them, they get tough. So, keep an eye on them!
Enhancing Flavor
Want to boost the taste? Try adding fresh herbs like basil or cilantro. You can also mix in spices like paprika or cumin for a unique twist. If you like heat, add more red pepper flakes or a dash of cayenne. This will give your dish a great kick!
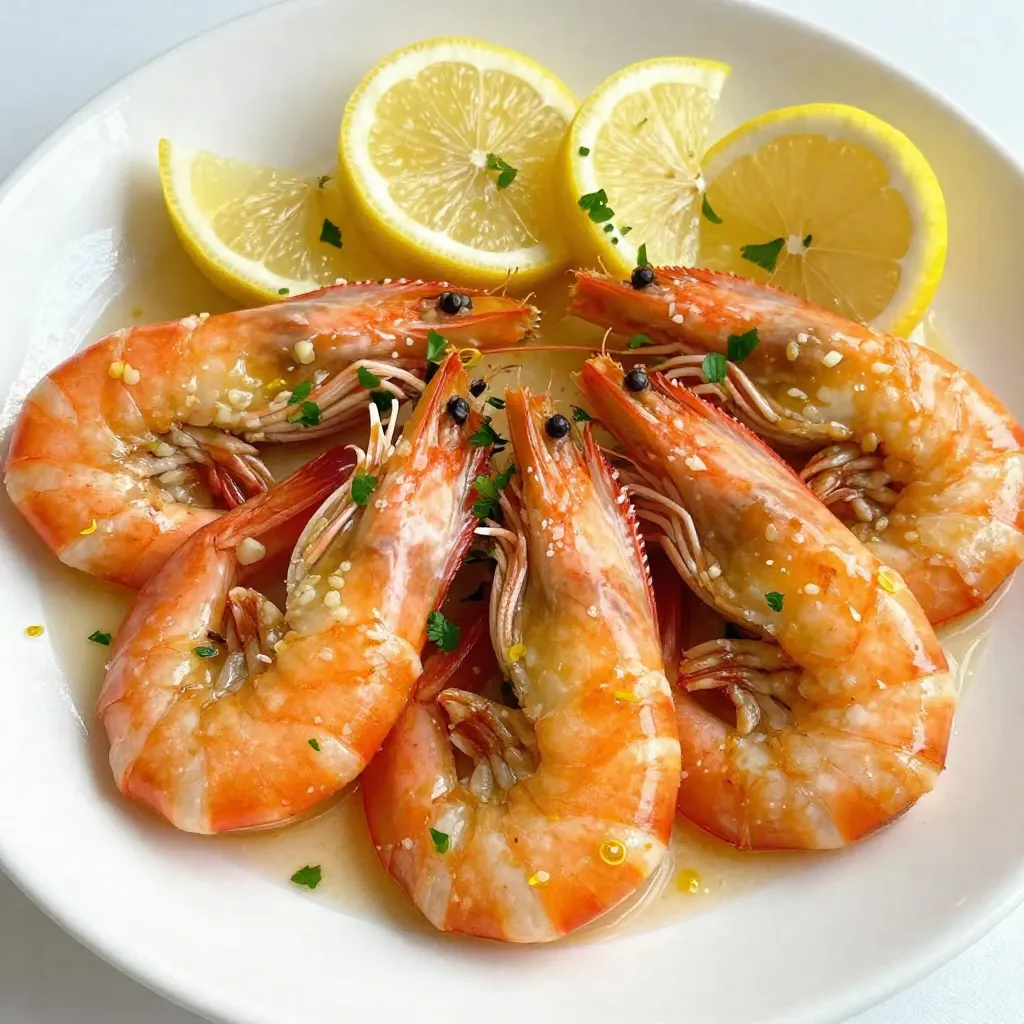
Presentation Suggestions
Serving shrimp well makes a big impact. Arrange them on a nice plate in a single layer. Add lemon wedges around the shrimp. This adds color and freshness. For garnish, sprinkle chopped parsley on top. You can also use lemon zest for a beautiful touch. Get creative, and your dish will shine!
Pro Tips
- Fresh Shrimp is Key: Always opt for fresh shrimp if possible, as they provide the best flavor and texture. If using frozen shrimp, ensure they are fully thawed and drained before marinating.
- Marinate for Flavor: Allow the shrimp to marinate for at least 15-20 minutes at room temperature. This helps the shrimp absorb the garlic and lemon flavors more effectively.
- Don’t Overcook: Keep a close eye on the shrimp while roasting; they cook quickly. Once they turn pink and opaque, they are ready. Overcooking will make them tough and rubbery.
- Serve with Fresh Herbs: Garnishing with fresh parsley not only adds a pop of color but also enhances the dish’s overall flavor. Consider adding other herbs like basil or cilantro for a different twist.
Variations
Ingredient Substitutions
If you want to switch things up, you can use scallops or chicken instead of shrimp. Both options work well with the lemon garlic flavor. Scallops cook quickly and will take on the marinade nicely. Chicken adds heartiness and can be cooked to a safe temperature easily.
You can also try different citrus fruits. For a twist, use lime or orange juice. Each fruit adds its own unique flavor, keeping your dish exciting and fresh.
Cooking Method Alternatives
Roasting shrimp is fantastic, but grilling offers a smoky flavor. Simply preheat your grill and cook shrimp for about 2-3 minutes per side. It’s quick, and the grill marks add a nice touch.
If you need a faster option, stovetop cooking works too. Just heat a skillet, add some oil, and sauté the marinated shrimp for about 4-5 minutes. This method gives you a great sear and keeps the shrimp juicy.
Dietary Adaptations
For those who need gluten-free meals, this dish is naturally safe. Just make sure all your ingredients, especially any added sauces, are gluten-free.
If you’re watching carbs, this dish fits right in. Shrimp is low in carbs, making it a great choice for low-carb diets. Pair it with a side of veggies for a full meal that keeps it light and healthy.
Storage Info
Refrigeration Guidelines
To store leftovers, place the shrimp in an airtight container. This keeps them fresh. You can also cover the dish tightly with plastic wrap. The shrimp are best when eaten within 2-3 days. After that, the flavor and texture may change.
Freezing Shrimp
If you want to freeze cooked shrimp, first cool them completely. Place the shrimp in a freezer-safe bag. Squeeze out as much air as you can before sealing. They can last for up to 3 months in the freezer. When you are ready to eat them, thaw the shrimp overnight in the fridge. To reheat, warm them gently in a skillet over low heat. This keeps them tender.
Best Practices for Meal Prep
You can prepare the shrimp in advance for easy meals. Marinate them the night before and store them in the fridge. This will enhance the flavor. For meal planning, use leftover shrimp in salads or pasta dishes. They add great taste and protein to your meals.
FAQs
How long to cook shrimp in the oven?
I recommend cooking shrimp for 8 to 10 minutes at 400°F (200°C). This time ensures your shrimp become pink and opaque. Overcooking can lead to a rubbery texture. Always check them near the end of the cooking time. If they look cooked, take them out!
Can I use frozen shrimp for this recipe?
Yes, you can use frozen shrimp! Just make sure to thaw them first. Place the shrimp in a bowl of cold water for about 15 minutes. After thawing, pat them dry with a paper towel. This helps the marinade stick better. Follow the rest of the recipe as usual!
What are the best side dishes to serve with roasted shrimp?
Roasted shrimp pairs well with many sides. Here are a few great options:
- Garlic bread for a crunchy bite
- A fresh salad with citrus dressing
- Steamed vegetables like broccoli or asparagus
- Rice or quinoa to soak up the juices
These sides can make your meal more complete and tasty!
This post covered the key ingredients, preparation steps, and tips for delicious roasted shrimp. You’ll appreciate how easy it is to prepare this dish and the flavor options available. Remember, variations exist if you want to switch ingredients or cooking methods. Storing or meal prepping your shrimp can save time and effort. Enjoy your cooking journey, and don’t hesitate to experiment with flavors. The perfect roast shrimp is waiting for yo
Lemon Garlic Roasted Shrimp
Ingredients
- 1 pound large shrimp, peeled and deveined
- 4 cloves garlic, minced
- 1 quarter cup olive oil
- 2 lemons juice
- 1 lemon zest
- 1 teaspoon red pepper flakes
- 1 teaspoon salt
- 1 half teaspoon black pepper
- 1 tablespoon fresh parsley, chopped
- none lemon wedges for serving
Instructions
- Preheat your oven to 400°F (200°C) and line a baking sheet with parchment paper.
- In a medium-sized bowl, combine the minced garlic, olive oil, lemon juice, lemon zest, red pepper flakes, salt, and black pepper. Stir well to combine.
- Add the shrimp to the bowl and toss them until they are evenly coated in the marinade. Allow the shrimp to marinate for 15-20 minutes at room temperature for the best flavor.
- Spread the marinated shrimp out evenly on the prepared baking sheet in a single layer.
- Roast the shrimp in the preheated oven for 8-10 minutes, or until they are pink and opaque. Be careful not to overcook them.
- Remove the baking sheet from the oven and sprinkle the chopped parsley over the shrimp.
- Serve immediately with lemon wedges on the side for extra zing.
Notes
Lemon Garlic Roasted Shrimp
Ingredients
- 1 pound large shrimp, peeled and deveined
- 3 tablespoons olive oil
- 4 cloves garlic, minced
- 1 lemon zested and juiced
- 1 teaspoon salt
- 1/2 teaspoon black pepper
- 1 tablespoon fresh parsley, chopped
Instructions
- Preheat the oven to 400°F (200°C).
- In a bowl, combine olive oil, garlic, lemon zest, lemon juice, salt, and pepper.
- Add the shrimp to the bowl and toss to coat evenly.
- Spread the shrimp in a single layer on a baking sheet.
- Roast in the preheated oven for 8-10 minutes, until shrimp are pink and cooked through.
- Remove from the oven and sprinkle with fresh parsley before serving.
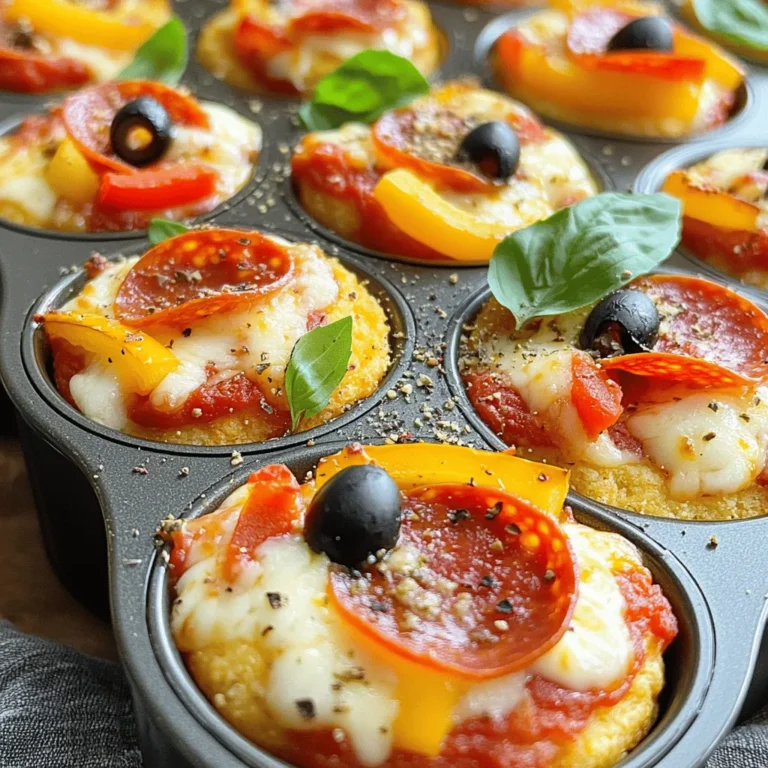
![To make delicious Deep-Dish Pizza Muffins, gather these simple ingredients: - 2 cups all-purpose flour - 1 tablespoon baking powder - 1 teaspoon garlic powder - ½ teaspoon salt - 1 cup shredded mozzarella cheese - ½ cup pepperoni, diced - ½ cup green bell pepper, finely chopped - ½ cup marinara sauce (plus extra for serving) - 1 cup milk - ⅓ cup olive oil - 1 large egg - Italian seasoning, for garnish These ingredients create a tasty muffin that bursts with pizza flavor. Each one is packed with cheese, pepperoni, and veggies. You can mix and match these items to fit your taste. For example, you can swap pepperoni for veggies or try different cheeses. The options are endless! When you gather your ingredients, make sure they are fresh. Fresh ingredients make the muffins taste better. You can find all these items at your local grocery store. If you want, you can even get organic or local options for a healthier choice. Don't forget to check out the Full Recipe for more details on making these muffins, including cooking times and tips! 1. Preheat your oven to 375°F (190°C). This step is key for even baking. 2. Prepare a standard muffin tin by greasing each cup with cooking spray or olive oil. This keeps the muffins from sticking. 3. In a large bowl, mix together the all-purpose flour, baking powder, garlic powder, and salt. Make sure to whisk them well. 4. Now, gently fold in the shredded mozzarella cheese, diced pepperoni, and finely chopped green bell pepper. Mix until they are evenly spread in the flour blend. 1. In another bowl, whisk together the milk, olive oil, and egg. This helps create a smooth mixture for the batter. 1. Slowly pour the wet mix into the dry ingredients. Stir gently until just combined. The batter should be slightly lumpy. 2. Spoon the batter into the prepared muffin tin. Fill each cup about three-quarters full. 3. For a fun twist, add a small dollop of marinara sauce on top of each muffin. 4. Sprinkle some Italian seasoning over the muffins to enhance the flavor. 5. Bake in the preheated oven for 20-25 minutes. The muffins will rise and turn golden brown. 6. To check if they are done, insert a toothpick in the center of a muffin. If it comes out clean, they are ready. 7. Let the muffins cool in the tin for a few minutes, then transfer them to a wire rack to cool completely. This quick process will lead you to delicious Deep-Dish Pizza Muffins! For the complete recipe, refer to the [Full Recipe]. To make the best deep-dish pizza muffins, avoid overmixing the batter. Overmixing can make the muffins tough. Mix just enough until the ingredients come together. To check for doneness, insert a toothpick into the center of a muffin. If the toothpick comes out clean, the muffins are ready. If it has wet batter, bake a few more minutes. For a great presentation, serve the muffins warm on a rustic wooden board. This adds a cozy touch. Include a small bowl of extra marinara sauce for dipping. This makes every bite even better! Garnish with fresh basil leaves for color and taste. Pair these muffins with a simple salad or garlic bread. They make a great meal or snack. You can swap ingredients for different flavors. Try using cheddar or pepper jack cheese for a twist. For a meatless option, add mushrooms or diced zucchini. Adjust the spice level by adding red pepper flakes or using spicy pepperoni. You can customize each batch to suit your taste! {{image_4}} You can change the cheese in these muffins for new tastes. Try using cheddar cheese for a sharp bite. Pepper jack cheese adds a spicy kick. Mixing mozzarella with these cheeses gives a creamy texture. Experimenting with cheese can make your muffins unique. If you want a vegetarian version, skip the pepperoni. You can use mushrooms for a hearty feel. Chopped spinach or zucchini also works well. These veggies add flavor and moisture. Using different toppings keeps the muffins fresh and fun. The dough you choose can change the whole muffin. You can use pizza dough for a chewy texture. Or, try biscuit dough for a fluffy muffin. Each option brings a new twist to the dish. Experiment with dough types to find your favorite. Don't forget to check the Full Recipe for more ideas! To keep your deep-dish pizza muffins fresh at room temperature, place them in an airtight container. This helps prevent them from drying out. If you plan to eat them within two days, they will stay tasty and soft. If you have more, consider freezing them. For best results, freeze the muffins after they cool completely. Wrap each muffin in plastic wrap. Then, place them in a freezer bag. This keeps them fresh for up to three months. To thaw, leave them in the fridge overnight or set them on the counter for a few hours. To reheat the muffins without drying them out, use the oven. Preheat it to 350°F (175°C). Place the muffins on a baking sheet and cover them with foil. Heat for about 10-15 minutes. This method keeps them moist and warm, ready for you to enjoy. For a quick option, you can microwave them for about 20-30 seconds, but they may dry out more this way. Deep-Dish Pizza Muffins come from Chicago's famous deep-dish pizza. This style of pizza started in the 1940s. It became popular for its thick crust and plenty of toppings. These muffins take that rich flavor and make it bite-sized. They are fun, easy to share, and perfect for parties. You get all the classic tastes in a new form. Yes, you can make these muffins ahead of time. After baking, let them cool completely. Store them in an airtight container at room temperature. They stay fresh for about two days. You can also freeze them. Wrap each muffin tightly and place them in a freezer bag. They can last up to three months. When ready to eat, thaw them in the fridge overnight. Warm them in the oven for the best taste. Absolutely! You can use gluten-free flour for these muffins. Just make sure to choose a good blend. A cup-for-cup gluten-free flour works well. This makes it easy to substitute without changing the recipe. The muffins may be slightly different in texture but still taste great. Enjoy your tasty treat without worry! This blog post guides you through making delicious deep-dish pizza muffins. We covered the key ingredients needed, each step, and helpful tips for the best results. Remember to avoid overmixing the batter and check for doneness to achieve perfect muffins. You can customize the recipe with different toppings and adjust flavors to suit your tastes. These muffins freeze well and reheat easily. Enjoy your baking, and watch these tasty treats impress your family and friends!](https://dailydishlab.com/wp-content/uploads/2025/06/d9a1d58c-7d1e-421a-bb26-4a1991aecf18-768x768.webp)