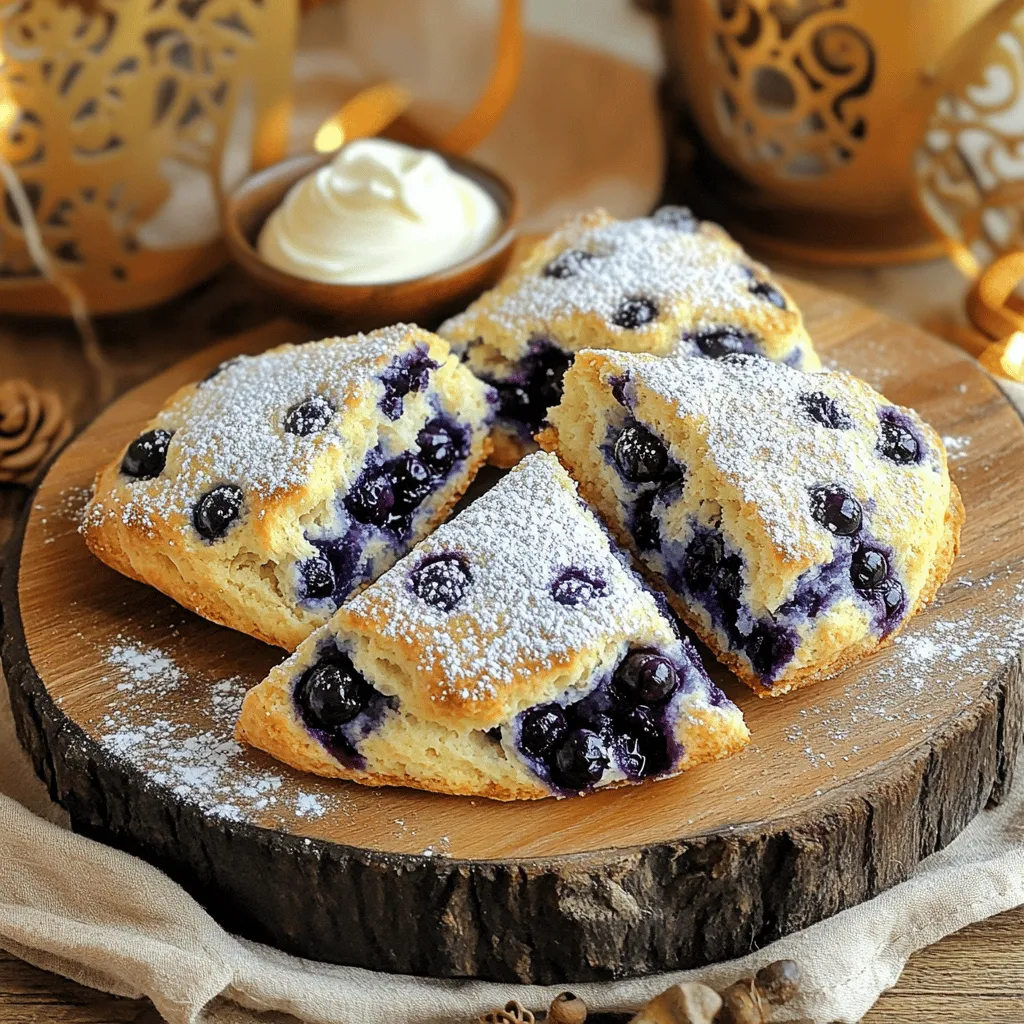
Fresh Blueberry Scones Simple and Tasty Recipe Guide

Are you ready to make the best Fresh Blueberry Scones? With this simple recipe guide, you’ll whip up scones that are fluffy, tasty, and packed with fresh blueberries. I’ll share everything you need, from the right ingredients to expert tips. Whether you’re a beginner or a pro, this guide helps you bake perfect scones every time. Let’s get started on this delightful treat!
Why I Love This Recipe
- Fresh Flavors: The combination of fresh blueberries and lemon zest creates a delightful burst of flavor in every bite.
- Easy to Make: This scone recipe is straightforward and requires minimal effort, making it perfect for both beginners and experienced bakers.
- Perfect for Any Occasion: These scones are versatile enough to be enjoyed at breakfast, brunch, or as an afternoon snack with tea.
- Customizable: You can easily swap in different fruits or add nuts to suit your taste, making this recipe a great base for experimentation.
Ingredients
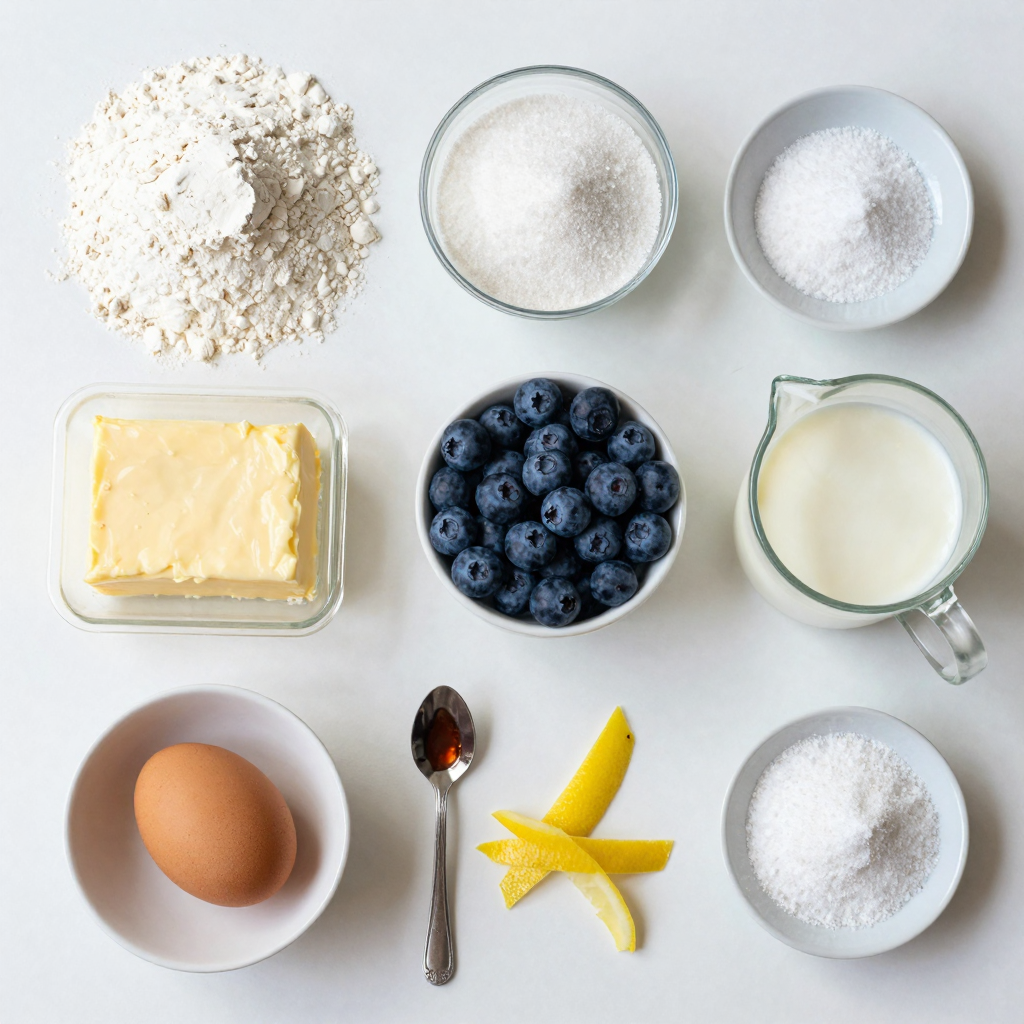
List of Essential Ingredients
To make fresh blueberry scones, gather these key items:
- 2 cups all-purpose flour
- 1/2 cup granulated sugar
- 2 teaspoons baking powder
- 1/2 teaspoon baking soda
- 1/2 teaspoon salt
- 1/2 cup unsalted butter, cold and cubed
- 1 cup fresh blueberries (plus more for topping)
- 1/2 cup buttermilk
- 1 large egg
- 1 teaspoon vanilla extract
- 1 tablespoon lemon zest
- 1 tablespoon coarse sugar (for topping)
These ingredients work together to create a light, flaky scone that bursts with flavor.
Optional Add-ins for Flavor Enhancement
You can add a few fun extras to boost taste. Here are some ideas:
- Chopped nuts, like walnuts or pecans
- A pinch of cinnamon for warmth
- Chocolate chips for a sweet twist
- Other berries like raspberries or blackberries
Feel free to mix and match these add-ins based on your mood or what you have on hand.
Importance of Fresh Blueberries
Fresh blueberries are the star of this recipe. They add natural sweetness and moisture. Plus, they bring vibrant color to your scones. When choosing blueberries, look for ones that are plump and firm. Avoid any that are soft or mushy.
Using fresh berries helps ensure that your scones taste bright and delicious. Frozen blueberries can work in a pinch, but fresh ones really shine. They make your scones feel homemade and special. For the best flavor, try to use them right after washing. This keeps them fresh and juicy. Don’t forget to save a few for topping!
Step-by-Step Instructions
Prep Work: Preparing Ingredients and Tools
Start by gathering all your ingredients. You will need:
- 2 cups all-purpose flour
- 1/2 cup granulated sugar
- 2 teaspoons baking powder
- 1/2 teaspoon baking soda
- 1/2 teaspoon salt
- 1/2 cup unsalted butter, cold and cubed
- 1 cup fresh blueberries (plus more for topping)
- 1/2 cup buttermilk
- 1 large egg
- 1 teaspoon vanilla extract
- 1 tablespoon lemon zest
- 1 tablespoon coarse sugar (for topping)
Make sure your oven is set to 400°F (200°C). Line a baking sheet with parchment paper. This helps prevent sticking and makes cleanup easy.
Mixing and Combining: Creating the Dough
In a large bowl, whisk the dry ingredients together. Mix the flour, sugar, baking powder, baking soda, and salt. Add the cold butter cubes to the bowl. Use your fingers or a pastry cutter to mash the butter into the flour. You want it to look like coarse crumbs.
Gently fold in the fresh blueberries. This step is key. You don’t want to smash them. In another bowl, combine the wet ingredients: buttermilk, egg, vanilla extract, and lemon zest. Whisk until smooth.
Now, pour the wet mix into the dry mix. Stir just until combined. The dough should look lumpy, not smooth. If you overmix, your scones will be tough.
Baking: From Oven to Perfection
Turn the dough out onto a floured surface. Shape it into a circle about 1 inch thick. Cut it into wedges or use a biscuit cutter for round shapes. Place the scones on the lined baking sheet. Top with extra blueberries and sprinkle coarse sugar on top.
Bake for 15-20 minutes. Look for a light golden color. Insert a toothpick into the center. If it comes out clean, your scones are done. Let them cool on the baking sheet for a few minutes. Then, move them to a wire rack to cool completely.Enjoy your fresh blueberry scones!
Pro Tips
- Use Cold Butter: Make sure your butter is very cold and cubed to achieve that flaky texture. You can even freeze the butter for a few minutes before cutting it into the flour.
- Don’t Overmix: When combining the wet and dry ingredients, mix just until combined. Overmixing can lead to tough scones.
- Fresh Blueberries: Use fresh blueberries for the best flavor and texture. If using frozen, do not thaw them to prevent the dough from turning purple.
- Experiment with Flavors: Try adding different zests or spices, like orange zest or cinnamon, to customize your scones to your liking.
Tips & Tricks
Key Tips for Fluffy Scones
To make your scones fluffy, keep these tips in mind:
- Use cold butter: Cold butter creates steam while baking, making the scones rise.
- Don’t overmix: Mix the dough just until combined. Overmixing makes scones tough.
- Use fresh blueberries: Fresh berries add moisture and flavor. They also create nice bursts of juice.
- Chill the dough: If time allows, chill the dough for 30 minutes. This helps with texture.
Common Mistakes to Avoid
Many people make mistakes that lead to less-than-perfect scones. Here are some common ones:
- Using warm butter: Warm butter will not create that fluffy texture. Always use cold butter.
- Skipping the baking powder: This ingredient is crucial for lift. Ensure it is fresh.
- Ignoring the measurements: Accurate measurements are key. Use a kitchen scale if possible.
- Not checking the oven temperature: An oven that is too hot or too cold can ruin your scones.
How to Achieve the Perfect Golden Brown Finish
For that beautiful golden brown finish, follow these steps:
- Preheat your oven: Make sure your oven is at 400°F (200°C) before baking.
- Use an egg wash: Brush the tops of the scones with an egg wash for a shiny finish.
- Watch the baking time: Keep an eye on your scones. Bake them until they are lightly golden.
- Use a baking stone: If you have one, it helps distribute heat evenly for better browning.
With these tips and tricks, your fresh blueberry scones will be a hit!Enjoy baking!
Variations
Lemon Blueberry Scones
Lemon blueberry scones add a bright twist to the classic. To make them, simply add lemon zest and a bit of lemon juice to the dough. The zest gives a nice zing. Use about 1 tablespoon of zest and 1 tablespoon of juice. This balance brightens the flavors. The tartness of lemon pairs well with sweet blueberries. You can even drizzle a lemon glaze on top after baking for extra sweetness.
Gluten-Free Version
If you need a gluten-free option, don’t worry! You can swap the all-purpose flour for a gluten-free blend. Make sure the blend includes xanthan gum. This helps the scones hold together. Follow the same measurements in the original recipe. The texture might change slightly, but the taste will remain delicious. Enjoy your gluten-free scones with a side of jam or butter.
Incorporating Other Fruits and Flavors
Don’t limit yourself to blueberries! You can mix in other fruits too. Try raspberries, blackberries, or even chopped strawberries. Each fruit brings its own flavor and sweetness. You can also add spices like cinnamon or nutmeg for warmth. For a savory option, consider adding cheese or herbs. Experimenting with flavors lets you create unique scones every time.
Storage Info
Best Practices for Storing Scones
To keep your scones fresh, store them in an airtight container. This keeps moisture in but also stops them from getting too soft. Place a piece of parchment paper in between layers if you stack them. You can keep them at room temperature for up to two days. If you want to keep them longer, consider the fridge, where they can last for about a week.
How to Reheat Leftover Scones
If you have leftover scones, reheating them is easy. Preheat your oven to 350°F (175°C). Place the scones on a baking sheet. Heat them for about 5 to 10 minutes. This will bring back their warm, soft texture. If you prefer, you can microwave them for about 15 seconds, but the oven is best for crispness.
Freezing Scones for Future Enjoyment
Freezing scones lets you enjoy them later. After baking, let them cool completely. Wrap each scone in plastic wrap tightly. Then, place them in a freezer-safe bag. They can last for up to three months in the freezer. When you’re ready to eat one, simply reheat it from frozen in the oven. This way, you always have fresh blueberry scones on hand!
FAQs
How do I make scones using frozen blueberries?
You can use frozen blueberries in this recipe. Just take them straight from the freezer. Do not thaw them first. This helps keep the scones from turning blue. Mix the frozen berries into the dough gently. They will bake well and taste great. You may need to add a minute or two to the bake time. Always check for that golden color.
Can I substitute ingredients in this recipe?
Yes, you can substitute some ingredients if needed. If you lack buttermilk, use regular milk with a bit of lemon juice. It will work well. You can also swap all-purpose flour for whole wheat flour. This will change the flavor and texture a little. If you want a dairy-free option, use coconut oil instead of butter. These swaps can create unique flavors.
What is the best way to serve fresh blueberry scones?
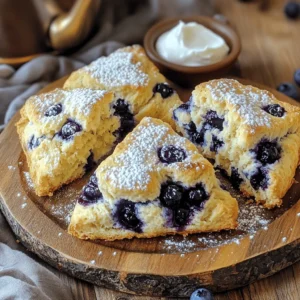
Fresh blueberry scones taste best warm. Serve them with a little butter or clotted cream. You can also add lemon curd for a zesty kick. Arrange them on a pretty plate for a lovely look. Pair them with tea or coffee for a nice treat. For a fun twist, sprinkle some powdered sugar on top before serving. Enjoy your delicious scones with friends!
You now have a clear guide to making delicious blueberry scones. We covered essential ingredients, helpful tips, and variations to suit your taste. Fresh blueberries make a big difference, while optional add-ins enhance flavor. Remember to prep well, avoid common mistakes, and store wisely for later enjoyment. With these steps, you can bake perfect scones every time. Try different flavors and share with friends. Enjoy your baking journey!
Fresh Blueberry Scones
Ingredients
2 cups all-purpose flour
1/2 cup granulated sugar
2 teaspoons baking powder
1/2 teaspoon baking soda
1/2 teaspoon salt
1/2 cup unsalted butter, cold and cubed
1 cup fresh blueberries (plus more for topping)
1/2 cup buttermilk
1 large egg
1 teaspoon vanilla extract
1 tablespoon lemon zest
1 tablespoon coarse sugar (for topping)
Instructions
Preheat your oven to 400°F (200°C) and line a baking sheet with parchment paper.
In a large mixing bowl, whisk together the flour, granulated sugar, baking powder, baking soda, and salt.
Add the cold, cubed butter to the flour mixture. Using a pastry cutter or your fingertips, work the butter into the dry ingredients until the mixture resembles coarse crumbs.
Gently fold in the fresh blueberries, making sure they are evenly distributed.
In a separate bowl, whisk together the buttermilk, egg, vanilla extract, and lemon zest until well combined.
Pour the wet ingredients into the dry ingredients and mix until just combined. Be careful not to overwork the dough; it should be a little lumpy.
Turn the dough out onto a floured surface and shape it into a 1-inch thick circle. Cut into wedges or use a biscuit cutter to create circular shapes.
Place the scones onto the prepared baking sheet and top with additional blueberries and a sprinkle of coarse sugar for an extra sweet crunch.
Bake for 15-20 minutes, or until the scones are lightly golden and a toothpick inserted into the center comes out clean.
Allow the scones to cool slightly on the baking sheet before transferring them to a wire rack to cool completely.
Prep Time: 15 minutes | Total Time: 35 minutes | Servings: 8 scones
– Presentation Tips: Arrange the scones on a beautiful serving platter and dust them lightly with powdered sugar. For an added touch, serve with clotted cream or a side of lemon curd for spreading. Enjoy with your favorite tea or coffee!
Fresh Blueberry Scones
Ingredients
- 2 cups all-purpose flour
- 1/2 cup granulated sugar
- 2 teaspoons baking powder
- 1/2 teaspoon baking soda
- 1/2 teaspoon salt
- 1/2 cup unsalted butter, cold and cubed
- 1 cup fresh blueberries (plus more for topping)
- 1/2 cup buttermilk
- 1 large egg
- 1 teaspoon vanilla extract
- 1 tablespoon lemon zest
- 1 tablespoon coarse sugar (for topping)
Instructions
- Preheat your oven to 400°F (200°C) and line a baking sheet with parchment paper.
- In a large mixing bowl, whisk together the flour, granulated sugar, baking powder, baking soda, and salt.
- Add the cold, cubed butter to the flour mixture. Using a pastry cutter or your fingertips, work the butter into the dry ingredients until the mixture resembles coarse crumbs.
- Gently fold in the fresh blueberries, making sure they are evenly distributed.
- In a separate bowl, whisk together the buttermilk, egg, vanilla extract, and lemon zest until well combined.
- Pour the wet ingredients into the dry ingredients and mix until just combined. Be careful not to overwork the dough; it should be a little lumpy.
- Turn the dough out onto a floured surface and shape it into a 1-inch thick circle. Cut into wedges or use a biscuit cutter to create circular shapes.
- Place the scones onto the prepared baking sheet and top with additional blueberries and a sprinkle of coarse sugar for an extra sweet crunch.
- Bake for 15-20 minutes, or until the scones are lightly golden and a toothpick inserted into the center comes out clean.
- Allow the scones to cool slightly on the baking sheet before transferring them to a wire rack to cool completely.
- Arrange the scones on a beautiful serving platter and dust them lightly with powdered sugar. For an added touch, serve with clotted cream or a side of lemon curd for spreading. Enjoy with your favorite tea or coffee!
![- 2 cups grated zucchini (about 2 medium zucchinis) - 1 ½ cups all-purpose flour - 1 teaspoon baking soda - 1 teaspoon baking powder - ½ teaspoon salt - 1 teaspoon ground cinnamon - ½ teaspoon nutmeg - ½ cup granulated sugar - ½ cup brown sugar, packed - ½ cup vegetable oil (or melted coconut oil) - 2 large eggs - 1 teaspoon vanilla extract - ½ cup chopped walnuts (optional) - ½ cup raisins or chocolate chips (optional) To make classic zucchini muffins, you need fresh ingredients. Grated zucchini adds moisture and a soft texture. You can use about two medium zucchinis for this. All-purpose flour gives structure to the muffins. Baking soda and baking powder help them rise, so they become fluffy. The spices bring warmth and flavor. Salt enhances sweetness while cinnamon and nutmeg add depth. You’ll want both granulated and brown sugars for the best taste. Granulated sugar is sweet, while brown sugar adds richness. Oil keeps the muffins moist. You can choose between vegetable oil or melted coconut oil. Eggs bind everything together and add richness. Vanilla extract boosts the overall flavor. For extra crunch or sweetness, add walnuts, raisins, or chocolate chips. These optional add-ins make the muffins even more enjoyable. Check the [Full Recipe] for all the steps to bring these ingredients together. 1. Preheat your oven to 350°F (175°C). This ensures even baking. 2. Grate two medium zucchinis. Place them in a bowl and add a pinch of salt. Let them sit for about 10 minutes. This draws out extra moisture. 3. Use a clean kitchen towel to squeeze out the moisture from the zucchini. This step keeps your muffins from being soggy. 4. In a large bowl, whisk together the dry ingredients: all-purpose flour, baking soda, baking powder, salt, ground cinnamon, and nutmeg. This mix adds flavor and structure to the muffins. 1. In another bowl, mix the wet ingredients. Combine granulated sugar, brown sugar, vegetable oil, eggs, and vanilla extract. Stir until everything is well blended. 2. Gently fold the grated zucchini into your wet mixture. This step adds moisture and flavor to your muffins. 3. Gradually add the dry ingredients to the wet mix. Stir until just combined. A few lumps are fine; avoid overmixing. If you want, fold in chopped walnuts and raisins or chocolate chips for extra texture. 1. Divide the batter evenly among the muffin cups. Fill each cup about two-thirds full. 2. Bake your muffins for 18 to 22 minutes. They are ready when a toothpick comes out clean from the center. 3. After baking, let the muffins cool in the tin for five minutes. Then, transfer them to a wire rack to cool completely. This process gives you moist, flavorful muffins. For the full recipe, check the details above. Enjoy the delightful taste of classic zucchini muffins! To avoid soggy muffins with zucchini, start by squeezing out the excess moisture. After grating the zucchini, add a pinch of salt and let it rest for 10 minutes. Then, use a clean towel to squeeze the moisture out. This simple step makes a big difference. Do not overmix your batter. When you combine the dry and wet ingredients, stir until just mixed. A few lumps are okay. Overmixing leads to tough muffins, and we want them soft and fluffy. For garnishing, dust the muffins with powdered sugar right before serving. This adds a nice touch. You can also place a small mint leaf on top for color and freshness. Choose a beautiful serving platter to showcase your muffins. A white or pastel plate works well. It highlights the muffins’ golden-brown tops and makes them look even more inviting. {{image_2}} You can easily change the flavor of your zucchini muffins. A simple way is to add spices like ginger or cloves. Just a pinch will give your muffins a warm kick. You can mix in different nuts too. Walnuts are great, but pecans or almonds work well too. Each nut brings its own crunch and taste. If you need gluten-free muffins, swap the all-purpose flour for a gluten-free blend. You can find many good options at the store. For those who want vegan muffins, replace the eggs with flax eggs. Mix one tablespoon of ground flaxseed with three tablespoons of water. Let it sit for a few minutes to thicken. For dairy-free options, use almond milk or coconut milk instead of regular milk. These changes make the muffins fit many diets. For the full recipe, check out Classic Zucchini Muffins. To keep your classic zucchini muffins fresh, store them on the countertop. Place them in an airtight container. This helps keep moisture in while keeping air out. If you do not have a container, wrap them in plastic wrap. They will stay soft for about three days. Avoid direct sunlight, as this can dry them out. For long-term storage, freezing muffins works great. First, let the muffins cool completely. Wrap each muffin tightly in plastic wrap. Then, place them in a freezer bag or container. Label the bag with the date. They can stay fresh for up to three months. When you want to enjoy one, simply take it out and let it thaw at room temperature. You can also reheat it in the oven or microwave. Enjoy your delicious treat anytime! For the full recipe, check the details above. Can I use frozen zucchini? Yes, you can use frozen zucchini. Just thaw it first and squeeze out any extra water. This helps keep your muffins from getting soggy. Fresh zucchini is great too, but frozen works in a pinch. How do I know when the muffins are done? Your muffins are done when a toothpick inserted in the center comes out clean. They should also look golden on top. If the toothpick has wet batter, bake them a bit longer. What can I substitute for sugar? You can use honey or maple syrup as a substitute for sugar. Adjust the liquid in the recipe if using these. For a lower-calorie option, try using a sugar substitute like stevia. How do I make mini zucchini muffins? To make mini zucchini muffins, just use a mini muffin tin. Fill each cup about halfway. Bake them for about 10-15 minutes. Check with a toothpick to be sure they are done. For more tips, check the Full Recipe for Classic Zucchini Muffins! You now have a complete guide for making classic zucchini muffins. From gathering your ingredients to baking and storing, I covered it all. Remember to squeeze out excess moisture from the zucchini. This keeps your muffins from getting soggy. Have fun experimenting with flavors and variations, like adding nuts or trying gluten-free options. These muffins are not only tasty but also versatile. With the right tips and tricks, your baking will be a success. Enjoy the process and the delicious results!](https://dailydishlab.com/wp-content/uploads/2025/07/9e9b63d2-13fb-4728-9235-22db9d4cda68-768x768.webp)