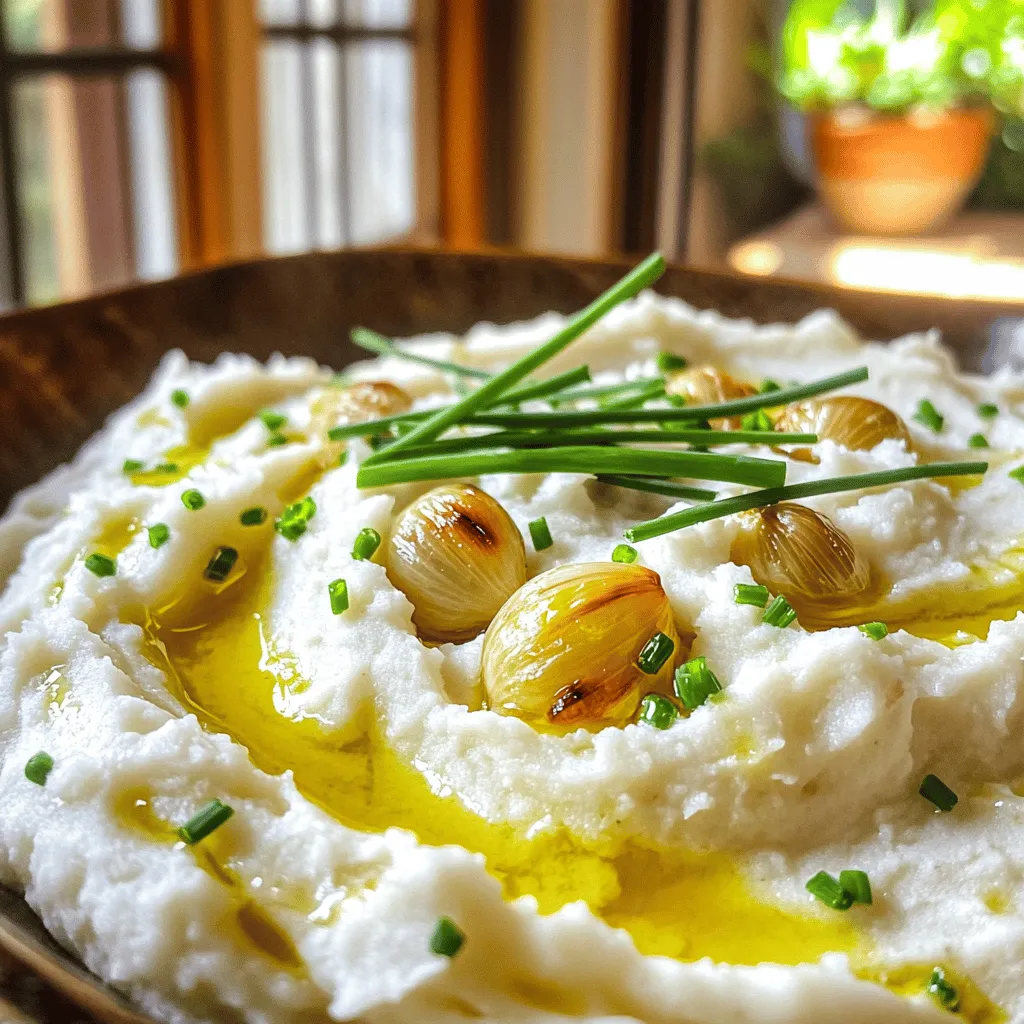
Roasted Garlic Cauliflower Mash Creamy and Flavorful
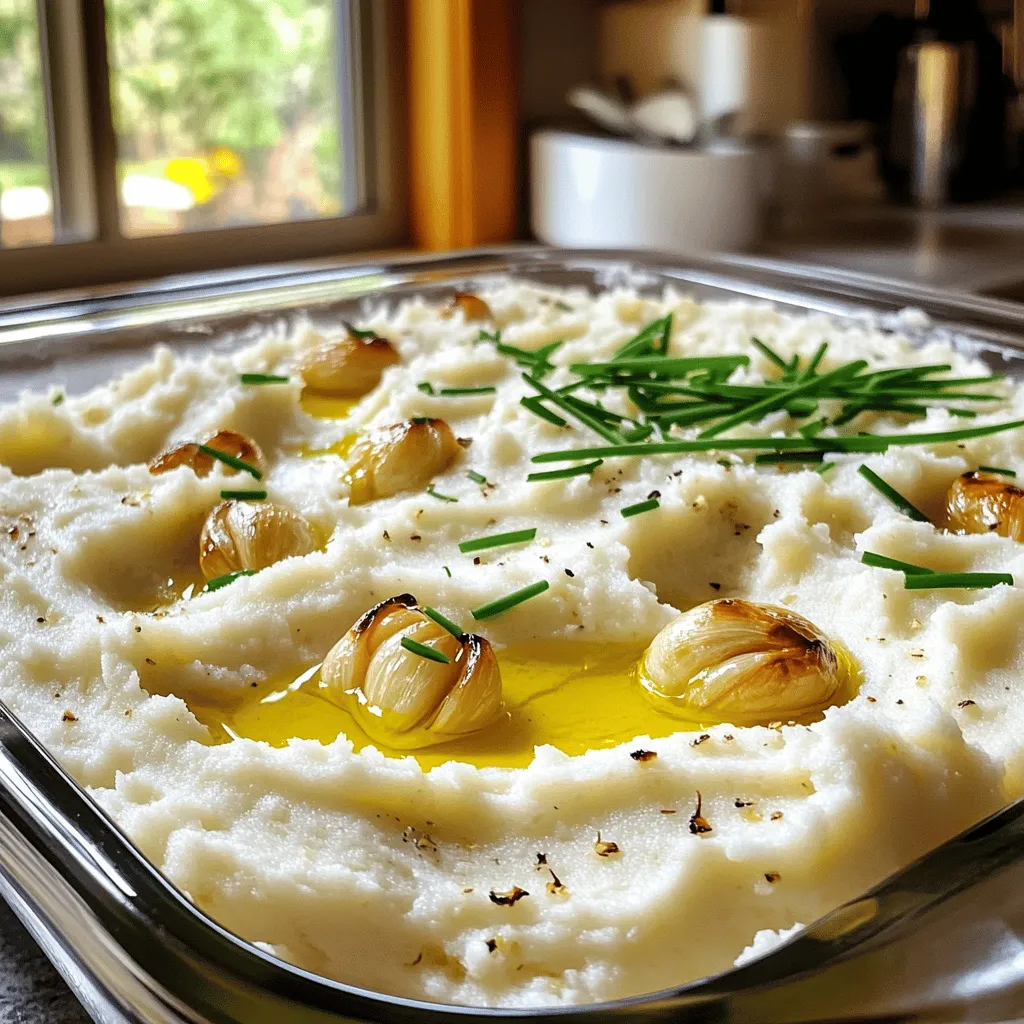
Get ready to transform your dinner with my Roasted Garlic Cauliflower Mash! This creamy delight replaces traditional mashed potatoes with a healthier twist. With just a few simple ingredients, you can whip up a flavorful dish that’s sure to impress. Whether you’re vegan, gluten-free, or just looking for a nutritious side, this recipe has got you covered. Let’s dive into the steps to create your new favorite comfort food!
Why I Love This Recipe
- Delicious Flavor: This roasted garlic cauliflower mash delivers a rich, savory taste that elevates any meal.
- Healthy Alternative: It’s a great low-carb substitute for mashed potatoes, packed with nutrients from cauliflower.
- Easy Preparation: The straightforward steps make this dish simple enough for any home cook.
- Versatile Dish: Serve it as a side, a base for your favorite proteins, or even as a spread!
Ingredients
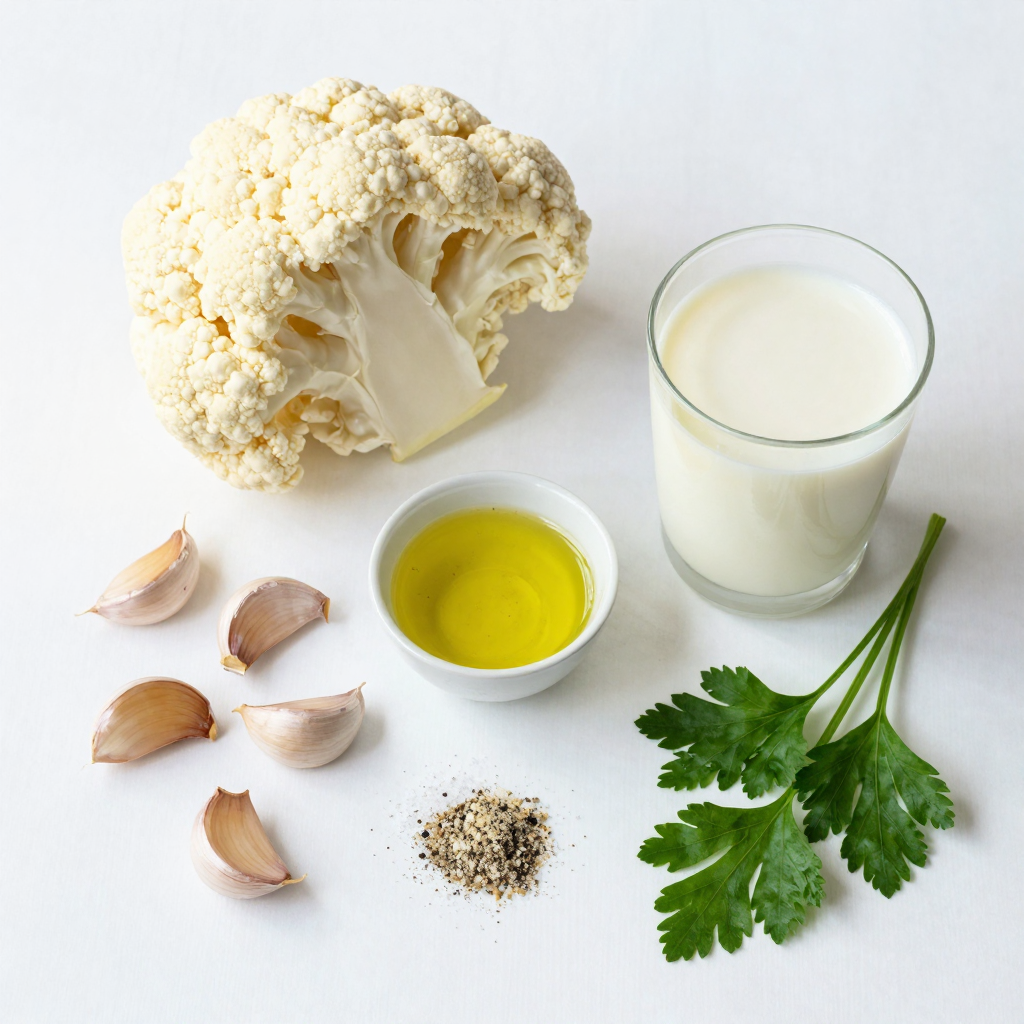
List of Ingredients
- 1 medium head of cauliflower, cut into florets
- 6 cloves of garlic, peeled
- 3 tablespoons olive oil
- 1/4 cup unsweetened almond milk (or any milk of your choice)
- 2 tablespoons nutritional yeast (optional, for a cheesy flavor)
- Salt and pepper to taste
- Fresh chives or parsley for garnish
When creating this roasted garlic cauliflower mash, I choose high-quality ingredients. The cauliflower is the star, with its mild flavor and creamy texture. The garlic adds depth and richness, transforming the dish into something special. Olive oil enhances the flavor and helps with a smooth blend.
You can use any milk you like. Almond milk is my go-to for a dairy-free option, but regular milk works too. Nutritional yeast is optional, but it gives a nice cheesy taste without dairy.
Nutritional Information
This dish serves four and is quite healthy. Each serving has about 120 calories, with 6 grams of fat, 14 grams of carbs, and 4 grams of protein. The fiber-rich cauliflower makes this mash filling and nutritious.
Health Benefits
Cauliflower is low in calories but high in vitamins. It’s packed with vitamin C and K. Garlic also brings health benefits. It may help boost your immune system and reduce blood pressure. Together, they make this mash a tasty and healthy choice.
Step-by-Step Instructions
Preparation Steps
To start, you need to prep the cauliflower and garlic. Take one medium head of cauliflower and cut it into florets. This helps the cauliflower cook evenly. Peel six cloves of garlic. Both the cauliflower and garlic will roast together, creating a rich flavor.
Roasting Process
Set your oven to 400°F (200°C). Spread the cauliflower and garlic on a baking sheet. Drizzle two tablespoons of olive oil over them. Season with salt and pepper. Make sure they are in a single layer, so they roast well. Roast in the oven for 25-30 minutes. You’ll know they are ready when the cauliflower is tender and the garlic turns golden brown. Toss them halfway through to ensure even cooking.
Blending for Smoothness
Once roasted, take them out and let them cool slightly. Now comes the fun part! In a food processor, combine the roasted cauliflower, garlic, and 1/4 cup of unsweetened almond milk. Add the remaining tablespoon of olive oil and two tablespoons of nutritional yeast if you want a cheesy flavor. Blend everything until smooth and creamy. Taste it and adjust the salt and pepper as needed. Transfer your mash to a serving bowl. Garnish with fresh chives or parsley for a pop of color. Enjoy your Roasted Garlic Cauliflower Mash!
Pro Tips
- Choosing the Right Cauliflower: Opt for a medium head of cauliflower that feels firm and heavy for its size to ensure the best flavor and texture.
- Roasting Garlic: For a sweeter, milder garlic flavor, roast the garlic until it is golden brown and soft. This enhances its taste in the mash.
- Make It Creamy: Adjust the amount of almond milk based on your desired creaminess. Start with less and add more until you reach your preferred consistency.
- Flavor Boost: Incorporate herbs and spices such as smoked paprika or thyme for an added layer of flavor in your cauliflower mash.
Tips & Tricks
Flavor Enhancements
To make your roasted garlic cauliflower mash even better, try adding spices. Here are some ideas to boost the flavor:
- Smoked Paprika: It gives a warm, smoky taste.
- Cumin: Adds a nice earthy tone to the mash.
- Nutmeg: A pinch can bring warmth and depth.
- Lemon Juice: A splash brightens the dish.
- Parmesan Cheese: If you want a richer flavor, sprinkle some on top.
You can also mix in sautéed onions or herbs. Fresh thyme or rosemary can add a lovely aroma.
Common Mistakes to Avoid
Roasting and blending can be tricky. Here’s how to avoid common pitfalls:
- Don’t Overcrowd the Pan: Make sure the cauliflower and garlic have space. If they touch, they will steam instead of roast.
- Check for Doneness: Look for a golden color on the garlic. Cauliflower should be tender when pierced with a fork.
- Blend in Batches: If your food processor is small, blend in smaller amounts. This helps you get a smooth texture.
Always taste and adjust your seasoning as needed. It makes a big difference!
Presentation Options
How you serve your mash can impress your guests. Here are some fun ideas:
- Use a Piping Bag: Pipe the mash onto plates for a fancy look.
- Add a Drizzle of Olive Oil: A swirl on top adds shine and richness.
- Garnish: Fresh chives or parsley not only look nice but add fresh flavor.
- Serve in Bowls: Create a cozy feel. Top with roasted veggies or a protein for a complete meal.
Each of these options makes your dish not just tasty but also beautiful. Enjoy the process!
Variations
Different Ingredients
You can switch up the liquids and seasonings in this mash. Instead of almond milk, try using coconut milk for a creamier taste. You can also use vegetable broth for added depth. If you want more flavor, consider adding smoked paprika or a pinch of cayenne pepper. These changes can make your mash even more exciting.
Dietary Modifications
This recipe is easy to make vegan and gluten-free. The main ingredients are already vegan. Just make sure your milk choice is plant-based. For a low-carb option, skip the nutritional yeast. You can also add some cream cheese or sour cream for a richer taste. These small changes allow everyone to enjoy this dish.
Creative Serving Ideas
You can serve this mash in many ways. Pair it with grilled chicken or roasted fish for a full meal. You can also use it as a base for a veggie bowl. Top it with roasted veggies and a drizzle of balsamic glaze. If you want a fun dip, serve it with pita chips or fresh vegetables. This mash is versatile, and you can make it fit any meal.
Storage Info
Refrigeration Guidelines
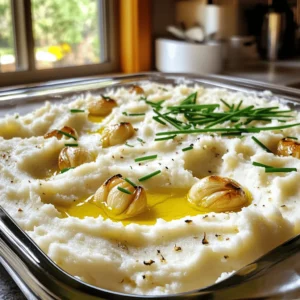
To store leftovers of your roasted garlic cauliflower mash, let it cool first. Transfer it to an airtight container. This keeps the mash fresh. Place it in the fridge. It’s best to eat it within three to four days. When you want to serve it again, simply reheat it on the stove or in the microwave.
Freezing Instructions
If you want to keep the mash longer, freezing works great! First, allow the mash to cool completely. Then, scoop it into freezer-safe bags or containers. Make sure to remove as much air as possible to avoid freezer burn. You can freeze it for up to three months. When you’re ready to eat, thaw it in the fridge overnight. Reheat it gently on the stove, adding a splash of milk to restore creaminess.
Shelf Life
The mashed cauliflower can last in the fridge for about four days. If frozen, it’s good for about three months. Always check for any off smell or change in color before eating. Storing it right helps keep it tasty and safe to enjoy!
FAQs
What can I substitute for nutritional yeast?
You can use grated Parmesan cheese for a cheesy flavor. If you want vegan options, try ground cashews or hemp seeds. Both provide a nutty taste. You may also skip it entirely and still enjoy the dish.
Can I make Roasted Garlic Cauliflower Mash ahead of time?
Yes, you can prep this mash ahead. Cook and blend the cauliflower. Let it cool, then store it in the fridge. When ready to serve, simply reheat it on low heat. Stir in a splash of almond milk to keep it creamy.
How do I know when the cauliflower is done roasting?
Look for a golden-brown color on the garlic. The cauliflower should be fork-tender. If it breaks apart with a fork, it’s ready. This usually takes about 25-30 minutes in the oven.
Can I make this recipe without a food processor?
Yes, you can. Use a potato masher or a fork if you don’t have a food processor. It may take a bit longer, but you can still achieve a nice texture. Just ensure the cauliflower is very soft for easy mashing.
This blog post covered a simple and tasty recipe for Roasted Garlic Cauliflower Mash. We explored the key ingredients and their health benefits, giving you a nutritious option. I provided easy steps for preparation and roasting, along with tips to avoid common mistakes. You also learned about variations and how to store leftovers safely.
Eating healthy can be easy and enjoyable. Try this recipe and enjoy the benefits!
Roasted Garlic Cauliflower Mash
Ingredients
1 medium head of cauliflower, cut into florets
6 cloves of garlic, peeled
3 tablespoons olive oil
1/4 cup unsweetened almond milk (or any milk of your choice)
2 tablespoons nutritional yeast (optional, for a cheesy flavor)
Salt and pepper to taste
Fresh chives or parsley for garnish
Instructions
Preheat your oven to 400°F (200°C).
On a baking sheet, toss the cauliflower florets and garlic cloves with 2 tablespoons of olive oil, salt, and pepper. Spread them out in a single layer.
Roast in the preheated oven for 25-30 minutes, or until the cauliflower is tender and the garlic is golden brown, tossing halfway through.
Remove from the oven and allow to cool slightly.
In a food processor, combine the roasted cauliflower and garlic with the almond milk, nutritional yeast (if using), and the remaining tablespoon of olive oil. Blend until smooth and creamy.
Taste and adjust seasoning with additional salt and pepper if needed.
Transfer the mash to a serving bowl and garnish with fresh chives or parsley.
Prep Time: 10 minutes | Total Time: 40 minutes | Servings: 4
Roasted Garlic Cauliflower Mash
Ingredients
- 1 medium head cauliflower, cut into florets
- 6 cloves garlic, peeled
- 3 tablespoons olive oil
- 1/4 cup unsweetened almond milk (or any milk of your choice)
- 2 tablespoons nutritional yeast (optional, for a cheesy flavor)
- to taste salt and pepper
- for garnish fresh chives or parsley
Instructions
- Preheat your oven to 400°F (200°C).
- On a baking sheet, toss the cauliflower florets and garlic cloves with 2 tablespoons of olive oil, salt, and pepper. Spread them out in a single layer.
- Roast in the preheated oven for 25-30 minutes, or until the cauliflower is tender and the garlic is golden brown, tossing halfway through.
- Remove from the oven and allow to cool slightly.
- In a food processor, combine the roasted cauliflower and garlic with the almond milk, nutritional yeast (if using), and the remaining tablespoon of olive oil. Blend until smooth and creamy.
- Taste and adjust seasoning with additional salt and pepper if needed.
- Transfer the mash to a serving bowl and garnish with fresh chives or parsley.

![For this BBQ ranch chicken salad, you will need: - 2 boneless, skinless chicken breasts - 1 cup BBQ sauce (divided) - 6 cups mixed greens (spinach, arugula, and romaine) - 1 cup cherry tomatoes, halved - 1 cucumber, sliced - 1 cup corn (fresh or canned) - 1/2 red onion, thinly sliced - 1 cup shredded cheddar cheese - 1/2 cup ranch dressing - 1/4 cup fresh cilantro, chopped (optional) - Salt and pepper to taste - Olive oil for grilling To make your BBQ ranch chicken salad stand out, use high-quality ingredients. Choose organic chicken for a juicier bite. Fresh, local greens add a crisp taste. Opt for ripe cherry tomatoes for sweetness. Sweet corn complements the BBQ sauce well. Aged cheddar cheese enhances the flavor depth. If you can, use homemade ranch dressing. This adds a personal touch and fresh flavor. You can easily adjust this recipe for different diets. If you're vegan, swap chicken for grilled tofu or chickpeas. Use a vegan BBQ sauce and ranch dressing to keep it plant-based. For gluten-free options, ensure your BBQ sauce and ranch are gluten-free. If you're dairy-free, use a dairy-free cheese or skip it entirely. Enjoying this salad can fit your needs while still being delicious! Start by preheating your grill to medium-high heat. This gives you a nice, hot grill for cooking. While the grill heats up, brush your chicken breasts with olive oil. This helps keep the chicken juicy. Season the chicken with salt and pepper for flavor. Grill the chicken for about 6 to 7 minutes on each side. You want the chicken to reach an internal temperature of 165°F (75°C). Near the end, brush one side with BBQ sauce. This adds a great smoky flavor. Once done, take the chicken off the grill. Let it rest for about 5 minutes before slicing it into thin strips. Grab a large salad bowl for this part. In the bowl, mix together the greens, cherry tomatoes, cucumber, corn, red onion, and shredded cheddar cheese. This mix adds color and texture to your salad. It’s a great way to sneak in some veggies. Next, place the sliced grilled chicken on top of the salad mixture. This creates a beautiful layered look. Now, it’s time for the dressings! Drizzle the remaining BBQ sauce and ranch dressing over the salad. Use enough to coat the salad well, but not too much that it gets soggy. Toss the salad gently to combine all the ingredients. Make sure everything gets a bit of dressing. If you like, you can garnish with chopped cilantro for a fresh touch. This adds a nice pop of color and flavor. For the full recipe, check out the complete instructions above. Enjoy your BBQ Ranch Chicken Salad! To grill chicken just right, start with good quality meat. Use boneless, skinless chicken breasts for even cooking. Brush them lightly with olive oil to help them stay moist. Season with salt and pepper for extra flavor. Preheat your grill to medium-high heat. Place the chicken on the grill and cook for 6-7 minutes on each side. This ensures they cook through. Brush BBQ sauce on the chicken in the last few minutes. This adds a nice glaze to the chicken. Always check that the internal temperature reaches 165°F (75°C). Let the chicken rest for five minutes before slicing. This helps keep the juices in. Making ranch dressing from scratch is simple and fun. You need just a few ingredients. Mix together 1/2 cup of sour cream, 1/4 cup of mayonnaise, and 1/4 cup of buttermilk. Add 1 teaspoon of garlic powder and 1 teaspoon of onion powder. Stir in a pinch of salt and pepper. For extra flavor, add fresh herbs like dill or parsley. Whisk everything until it's smooth and creamy. Adjust thickness by adding more buttermilk if needed. This dressing pairs perfectly with the BBQ Ranch Chicken Salad. When serving the salad, make it look appealing. Use a large bowl to let guests help themselves. Layer the salad ingredients for a colorful display. Start with mixed greens as the base. Next, add the cherry tomatoes and cucumbers. Sprinkle corn and red onion on top. Place the grilled chicken strips attractively on the salad. Drizzle BBQ sauce and ranch dressing over the top. Garnish with chopped cilantro for a fresh touch. This not only adds flavor but also makes the dish pop visually. If you want to dive deeper into the full recipe, check out the [Full Recipe]. {{image_2}} You can easily swap chicken for tofu. Use firm or extra-firm tofu. First, press the tofu to remove excess water. Then, slice it into thick strips. Marinate the tofu in BBQ sauce for 30 minutes. Grill it for about 5-7 minutes on each side. This gives you a smoky flavor without meat. Serve it on your salad just like you would with chicken. For a keto-friendly version, keep the BBQ sauce low in sugar. Use fresh veggies like spinach and cucumbers. Skip the corn and reduce the amount of cheese. You can add avocado for healthy fats. This keeps the salad tasty while staying low in carbs. Want to boost flavor? Try adding crispy bacon bits or sliced jalapeños. You can also toss in some black beans or avocado. These will add texture and richness. For a crunch, consider adding nuts or seeds. Each addition enhances the taste and visual appeal. Check out the Full Recipe for all the details! To keep your BBQ Ranch Chicken Salad fresh, store it in an airtight container. Make sure the salad is cool before sealing it. If you have extra dressing, keep it separate for the best taste. This way, the greens stay crisp, and you avoid sogginess. When stored correctly, your salad can last up to three days in the fridge. After that, the quality may drop. Always check for any signs of spoilage before eating. If it looks or smells funny, it's best to toss it. I prefer this salad cold, straight from the fridge. The flavors blend well when chilled. If you want to warm it up, heat the chicken separately. Adding hot chicken to the salad can make the greens wilt. Enjoy it how you like, but cold is my top choice! Don't forget to check the full recipe for more details. You can serve BBQ Ranch Chicken Salad with warm bread or crispy tortilla chips. Grilled corn on the cob makes a great side too. If you want a drink, try iced tea or lemonade. They balance the flavors of the salad well. A light fruit salad also pairs nicely for a fresh touch. Yes, you can use store-bought BBQ sauce. Many brands offer tasty options that save time. Look for sauces with natural ingredients for the best flavor. If you want a kick, try spicy BBQ sauce. Just remember to adjust the amount to fit your taste. Homemade BBQ sauce gives a fresh touch, but store-bought is fine. You can make parts of this salad in advance. Grill the chicken and cool it, then slice it. Store it in the fridge until you need it. Chop veggies like cucumbers and onions ahead of time too. Keep them in an airtight container. Mix the greens just before serving to keep them fresh. Dress the salad right before serving to avoid sogginess. For the full recipe, check the section above. You now know how to make a tasty BBQ Ranch Chicken Salad. We covered the key ingredients, steps for grilling chicken, and assembling the salad. I shared tips for grilling perfectly and making the dressing from scratch. Plus, you learned fun variations for different diets. Enjoy this salad fresh or store it for later. You can adapt it easily for your taste. This meal is great for everyone, so get creative and have fun!](https://dailydishlab.com/wp-content/uploads/2025/06/37ba7e2e-ec61-4304-bb56-f70e4f5b40d8-768x768.webp)