
No-Bake Cookie Dough Bars Simple and Tasty Treat
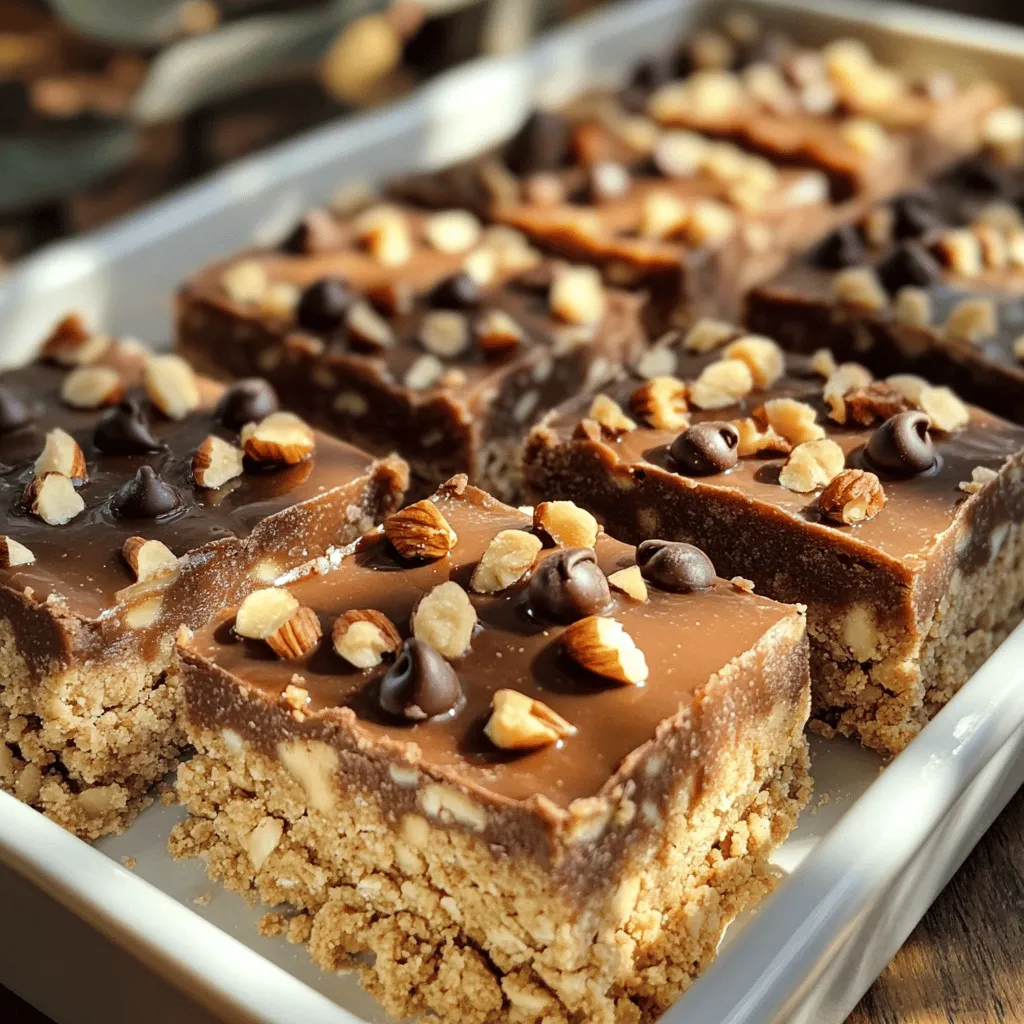
Are you craving a sweet treat without the fuss of baking? I’ve got just the thing for you—No-Bake Cookie Dough Bars! These simple, tasty bars are quick to whip up, and you don’t even need an oven. In this post, I’ll share easy steps, ingredient tips, and fun variations. Get ready to impress your friends and family with these delicious bars that satisfy your cookie cravings!
Why I Love This Recipe
- Quick and Easy: This recipe takes only 10 minutes to prepare, making it perfect for a last-minute treat.
- No Baking Required: Enjoy delicious cookie dough bars without turning on the oven, keeping your kitchen cool.
- Healthy Ingredients: Made with almond flour and natural sweeteners, these bars are a guilt-free indulgence.
- Customizable: Easily adapt this recipe by adding your favorite mix-ins like dried fruit or different nuts.
Ingredients
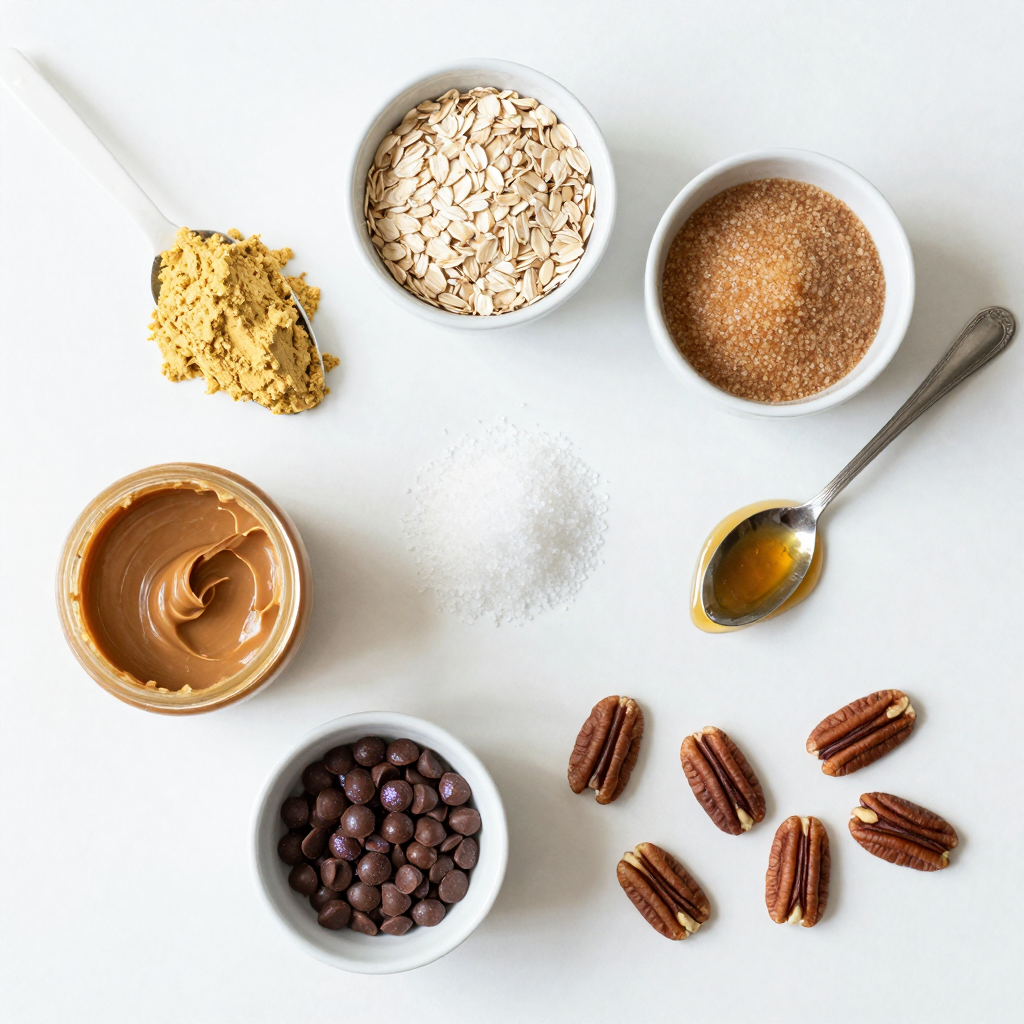
Complete list of ingredients for No-Bake Cookie Dough Bars
To make these tasty no-bake cookie dough bars, you will need:
- 1 cup almond flour
- 1/2 cup rolled oats
- 1/4 cup brown sugar or coconut sugar
- 1/4 teaspoon salt
- 1/2 cup almond butter (or peanut butter)
- 1/4 cup maple syrup or honey
- 1 teaspoon vanilla extract
- 1/2 cup mini chocolate chips
- Optional: 1/4 cup chopped nuts (e.g., pecans or walnuts) for added crunch
Ingredient substitutions and modifications
You can swap almond flour for oat flour if you want. Peanut butter can replace almond butter easily. For sweetening, use agave syrup instead of honey or maple syrup. You can also use coconut flour, but reduce the amount to 1/3 cup. If you want a nut-free version, use sunflower seed butter. Lastly, feel free to change the chocolate chips for dried fruit or seeds.
Nutritional information for the recipe
Each bar has about 150 calories. They contain healthy fats from the nut butter. The oats provide fiber, which is good for digestion. Each bar has around 5 grams of protein, making them a great snack. If you add nuts, the protein content may increase. These bars are a good option for a quick treat that keeps you full.
Step-by-Step Instructions
Preparation of the dry ingredients
To start, grab a large mixing bowl. In this bowl, combine the almond flour, rolled oats, brown sugar, and salt. Mix them well with a spoon. This blend gives the bars a nice texture and flavor. Make sure there are no lumps.
Mixing wet ingredients for the dough
Now, take another bowl. In this bowl, mix together the almond butter, maple syrup, and vanilla extract. Stir until the mixture is smooth. This step adds richness to the dough. You want a creamy blend that mixes well with the dry ingredients.
Combining and pressing the mixture into the baking dish
Next, pour the wet mix into the dry mix. Stir until everything is well combined. The dough will be thick and slightly crumbly. Fold in the mini chocolate chips and nuts if you choose to add them. They give extra flavor and crunch.
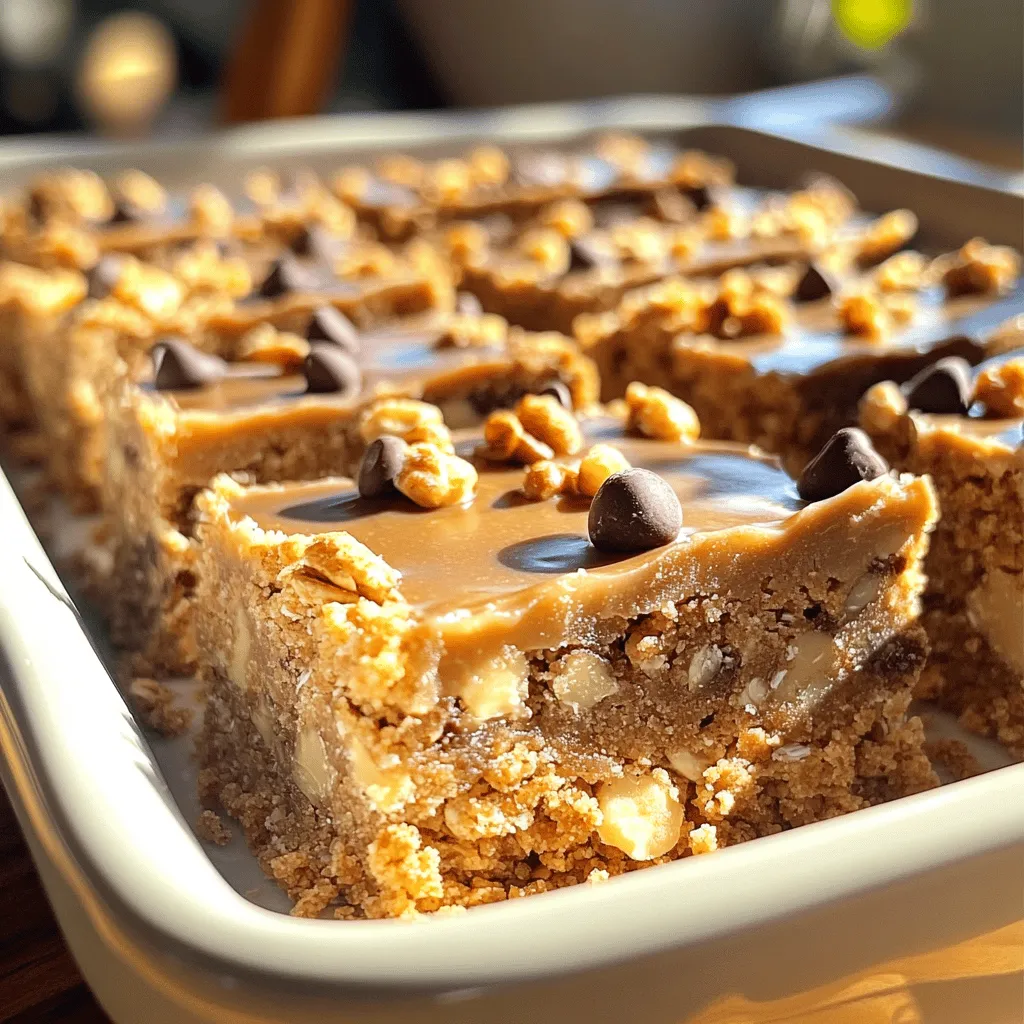
Prepare an 8×8 inch baking dish by lining it with parchment paper. Leave some overhang to help remove the bars later. Transfer the dough into the dish. Press it down firmly. You want a flat, even layer. Use a spatula or your hands to smooth the top.
Finally, place the dish in the fridge for at least 30 minutes. This helps the bars set. After chilling, pull them out using the parchment paper. Cut them into squares or rectangles. Enjoy your delicious no-bake cookie dough bars!
Pro Tips
- Chill for Better Texture: Allow the bars to chill for at least 30 minutes to ensure they firm up properly, making them easier to cut and enhancing their texture.
- Customize Your Mix-ins: Feel free to experiment with different mix-ins like dried fruits, seeds, or various nut butters to tailor the flavor to your preference.
- Use Parchment Paper: Lining your baking dish with parchment paper not only makes for easy removal but also helps in cutting the bars into perfect squares without sticking.
- Store Properly: Keep leftovers in an airtight container in the fridge for up to a week to maintain freshness and prevent them from becoming too soft.
Tips & Tricks
Common mistakes to avoid when making no-bake cookie dough bars
When I first made no-bake cookie dough bars, I learned a few things. One common mistake is not measuring ingredients properly. Use dry measuring cups for dry items like almond flour. Another issue is overmixing the dough. This can lead to a tough texture. Always mix just until combined. Lastly, don’t skip the chilling step. This helps the bars set and hold together well.
How to achieve the perfect texture
For the best texture, balance is key. The almond flour gives a soft base. Rolled oats add chewiness. If your mixture feels too dry, add a splash of maple syrup. If it feels too wet, add a bit more almond flour. Press the dough firmly into the dish. This creates a nice, dense bar. Chilling for at least 30 minutes is a must. It firms up the bars and makes them easy to cut.
Suggestions for serving and presentation
I like to cut the bars into small squares. This makes them easy to grab and enjoy. You can also drizzle melted chocolate on top for a fancy touch. To impress guests, add a sprinkle of sea salt. It contrasts nicely with the sweetness. Serve them on a colorful plate or in a fun container. This adds flair to any gathering.
Variations
Different flavor options for cookie dough bars
You can change the flavor of your no-bake cookie dough bars easily. Try using different nut butters like cashew or sunflower seed butter. You can also swap the almond flour for oat flour for a new taste. Want something sweet? Add cocoa powder for chocolate bars. Mix in some cinnamon for a warm, cozy flavor. Each option adds a fun twist to the recipe.
Add-ins to enhance the recipe
Enhancing your cookie dough bars is simple. You can add dried fruit like cranberries or apricots for a sweet bite. Seeds like chia or pumpkin seeds add crunch and nutrition. If you like nuts, pecans or walnuts work well too. These add-ins make the bars more interesting and tasty, so feel free to get creative!
Gluten-free and vegan adaptations
Making these bars gluten-free is easy. Just use certified gluten-free oats and almond flour. For a vegan version, replace honey with maple syrup. Ensure your nut butter is also vegan. This way, everyone can enjoy these delicious treats. These adaptations keep the bars tasty while meeting different dietary needs.
Storage Info
Best methods for storing no-bake cookie dough bars
To keep your no-bake cookie dough bars fresh, store them in an airtight container. I like to place a piece of parchment paper between layers to prevent sticking. You can keep them in the fridge for up to a week. This helps maintain their soft texture and flavor. If you want them to last longer, consider freezing them.
Freezing options for extended storage
Freezing is a great option for longer storage. Cut the bars into squares before freezing. Wrap each piece tightly in plastic wrap. Then place them in a freezer-safe bag or container. They will last for up to three months in the freezer. This way, you can enjoy a quick treat anytime.
How to thaw and serve leftovers
To thaw your frozen bars, simply take them out and let them sit at room temperature for about 30 minutes. If you’re in a hurry, you can microwave one bar for about 10-15 seconds. This warms it up nicely. Serve with a glass of milk or your favorite drink for a perfect snack. Enjoy your delicious no-bake cookie dough bars!
FAQs
How long do no-bake cookie dough bars last?
No-bake cookie dough bars last up to a week in the fridge. Store them in an airtight container. This keeps them fresh and tasty. For best taste, eat them within the week. If they sit longer, they may lose their flavor.
Can I make these bars without almond flour?
Yes, you can make these bars without almond flour. You can swap it for oat flour or all-purpose flour. If you use oat flour, ensure it is finely ground. This keeps the texture smooth. Just remember, the bars may taste a bit different.
What are the best ways to customize no-bake cookie dough bars?
You can customize no-bake cookie dough bars in many fun ways! Add different mix-ins like:
- Dried fruits (e.g., cranberries, raisins)
- Seeds (e.g., chia, sunflower)
- Different nut butters (e.g., cashew, sunflower seed)
- Flavored extracts (e.g., almond, mint)
Feel free to mix and match to find your favorite!
No-bake cookie dough bars are easy, fun, and delicious. We covered the ingredients, step-by-step instructions, and helpful tips. You now know how to choose ingredients, avoid common mistakes, and explore tasty variations. Remember the right storage helps keep them fresh. This treat is perfect for any occasion. Enjoy making your own cookie dough bars and share them with friends! Taste and fun await you in every bite.

No-Bake Cookie Dough Bars
Ingredients
1 cup almond flour
1/2 cup rolled oats
1/4 cup brown sugar or coconut sugar
1/4 teaspoon salt
1/2 cup almond butter (or peanut butter)
1/4 cup maple syrup or honey
1 teaspoon vanilla extract
1/2 cup mini chocolate chips
Optional: 1/4 cup chopped nuts (e.g., pecans or walnuts) for added crunch
Instructions
In a large mixing bowl, combine the almond flour, rolled oats, brown sugar, and salt. Stir until evenly mixed.
In a separate bowl, mix together the almond butter, maple syrup, and vanilla extract until smooth.
Pour the wet ingredients into the dry mixture, stirring until well combined. The mixture will be thick and slightly crumbly.
Fold in the mini chocolate chips and chopped nuts (if using) until evenly distributed.
Line an 8×8 inch baking dish with parchment paper, leaving some overhang for easy removal.
Transfer the dough mixture into the prepared dish and press down firmly to create an even layer. Use a spatula or your hands to smooth the top.
Place the dish in the refrigerator for at least 30 minutes to set.
Once chilled, remove the bars from the dish using the parchment paper overhang. Cut into squares or rectangles as desired.
Store leftovers in an airtight container in the fridge for up to a week.
Prep Time: 10 minutes | Total Time: 40 minutes (includes chilling) | Servings: 12 bars
No-Bake Cookie Dough Bars
Ingredients
- 1 cup almond flour
- 0.5 cup rolled oats
- 0.25 cup brown sugar or coconut sugar
- 0.25 teaspoon salt
- 0.5 cup almond butter or peanut butter
- 0.25 cup maple syrup or honey
- 1 teaspoon vanilla extract
- 0.5 cup mini chocolate chips
- 0.25 cup chopped nuts (optional)
Instructions
- In a large mixing bowl, combine the almond flour, rolled oats, brown sugar, and salt. Stir until evenly mixed.
- In a separate bowl, mix together the almond butter, maple syrup, and vanilla extract until smooth.
- Pour the wet ingredients into the dry mixture, stirring until well combined. The mixture will be thick and slightly crumbly.
- Fold in the mini chocolate chips and chopped nuts (if using) until evenly distributed.
- Line an 8x8 inch baking dish with parchment paper, leaving some overhang for easy removal.
- Transfer the dough mixture into the prepared dish and press down firmly to create an even layer. Use a spatula or your hands to smooth the top.
- Place the dish in the refrigerator for at least 30 minutes to set.
- Once chilled, remove the bars from the dish using the parchment paper overhang. Cut into squares or rectangles as desired.

![To make these brownies, you need specific ingredients. Here’s what you’ll gather: - 1 cup unsalted butter (2 sticks) - 2 cups granulated sugar - 4 large eggs - 1 teaspoon vanilla extract - 1 cup all-purpose flour - 1 cup unsweetened cocoa powder - 1/2 teaspoon salt - 1 cup chopped pecans - 1 cup caramel sauce (store-bought or homemade) - 1/2 cup chocolate chips (semi-sweet or dark) - 1/4 teaspoon sea salt (for topping) Each ingredient plays a key role in creating the rich, fudgy texture and flavor you will love. While the essential ingredients are perfect, you can add more for extra flavor. Consider these options: - A dash of espresso powder can deepen the chocolate taste. - A splash of bourbon or rum brings warmth and complexity. - Use dark chocolate chips for a richer finish. - Add sea salt flakes on top for a contrast in taste. These optional ingredients can take your brownies to the next level. To make the process smooth, you'll need some tools. Here’s what I recommend: - A medium saucepan for melting butter. - A mixing bowl for combining wet ingredients. - A separate bowl for dry ingredients. - A whisk for mixing eggs and vanilla. - A spatula to fold in the nuts and chips. - A 9x13 inch baking pan lined with parchment paper. These tools help you create the perfect caramel pecan turtle brownies. For the full recipe, you can check the complete steps and tips. Enjoy your baking! To create your brownie batter, start with the basics. First, preheat your oven to 350°F (175°C). Next, grease a 9x13 inch baking pan and line the bottom with parchment paper. This step helps with easy removal later. In a medium saucepan, melt 1 cup of unsalted butter over low heat. Once it melts, add 2 cups of granulated sugar and stir until mixed well. Remove the saucepan from heat and let it cool for a few minutes. This cooling step is important to avoid cooking the eggs. Now, whisk in 4 large eggs, one at a time. Add 1 teaspoon of vanilla extract and mix until smooth. In another bowl, sift together 1 cup of all-purpose flour, 1 cup of unsweetened cocoa powder, and 1/2 teaspoon of salt. Gradually add the dry mix to the wet mix. Stir gently until just combined. Overmixing can lead to tough brownies. Fold in 1 cup of chopped pecans and 1/2 cup of chocolate chips, saving a few pecans for the topping. Now it’s time to layer your brownies. Pour half of the brownie batter into the prepared pan and spread it evenly. Drizzle half of the caramel sauce over this layer. Then spoon the rest of the batter on top and spread it gently. Drizzle the remaining caramel sauce over this layer. Sprinkle the reserved pecans on top and add a pinch of sea salt to enhance the flavor. Bake in your preheated oven for 30 to 35 minutes. To check for doneness, insert a toothpick in the center. It should come out with a few moist crumbs, not wet batter. After baking, remove the pan from the oven. Let the brownies cool in the pan for at least 30 minutes. Use the parchment paper to lift them out. Slice them into squares for serving. For a special touch, serve the brownies warm. Drizzle with extra caramel sauce and sprinkle with sea salt. This adds a lovely finishing touch that enhances the flavor. Enjoy your delicious creation! For the complete recipe, check out the [Full Recipe]. One big mistake is overmixing the batter. When you mix too much, it makes brownies tough. Mix until just combined for a softer bite. Another common error is not measuring ingredients well. Use dry measuring cups for flour and cocoa powder. Level the tops with a knife for accuracy. For that perfect chewy texture, use melted butter. This gives your brownies a rich flavor. Don't forget to let the batter rest for a few minutes before baking. It helps the ingredients meld together. Also, bake just until a toothpick shows a few moist crumbs. Too long makes them dry. Serve brownies warm to enjoy their gooey center. Drizzle extra caramel sauce on top for added sweetness. A sprinkle of sea salt can enhance the flavors. Pair with a scoop of vanilla ice cream for a delightful treat. Enjoy your Caramel Pecan Turtle Brownies with friends and family for a memorable dessert. Check out the Full Recipe for more tips! {{image_2}} If you want to change the taste, try other nuts. Almonds, walnuts, or hazelnuts can work well. Each nut gives a unique flavor. Almonds add a sweet crunch. Walnuts bring a rich, earthy taste. Hazelnuts give a hint of chocolate flavor. Just chop them as you would with pecans and mix them in. You can even toast the nuts lightly for extra flavor! Making your own caramel sauce is easy and fun. You need just sugar, butter, and cream. Start by melting sugar in a pan. Watch it closely so it doesn’t burn. Once it melts and turns golden, add butter and let it melt. Then, pour in heavy cream slowly and stir. Let it cool before using it in your brownies. This sauce adds a fresh taste that store-bought cannot match. Want to make these brownies gluten-free? Use gluten-free all-purpose flour instead of regular flour. Check that your caramel sauce is also gluten-free. Many brands are safe, but always read the label. This way, you can enjoy rich, gooey brownies without worry. The taste remains just as delightful, and your friends will never know the difference! Don't forget to check out the Full Recipe for all the details on making these sweet treats! To keep your caramel pecan turtle brownies fresh, store them in an airtight container. Place parchment paper between layers to avoid sticking. They can last up to a week at room temperature. For longer storage, put them in the fridge. This helps maintain their chewy texture and flavor. Freezing brownies is a great way to save some for later. First, allow them to cool completely. Then, cut them into squares. Wrap each piece tightly in plastic wrap. Put them in a freezer-safe bag or container. They can stay frozen for up to three months. When you’re ready to enjoy, just thaw them in the fridge overnight. To enjoy your brownies warm, reheat them in the microwave. Use a low power setting to avoid drying them out. Heat for about 10-15 seconds. You can also warm them in the oven. Set the oven to 350°F (175°C) and place the brownies in for about 5-10 minutes. This brings back that fresh-baked taste. For extra delight, drizzle some caramel sauce on top before serving. Turtle brownies get their name from the classic turtle candy. This candy has caramel, pecans, and chocolate. In our brownies, I mix these same flavors. The caramel adds sweetness, the pecans give a nice crunch, and the chocolate ties it all together. When you bite into these brownies, you taste the rich chocolate and gooey caramel. It's like a treat you can hold in your hand! Yes, you can. If you want to skip the eggs, you can use a few substitutes. Applesauce is a great choice. Use 1/4 cup of unsweetened applesauce for each egg. You can also use a flaxseed meal. Mix one tablespoon of flaxseed meal with three tablespoons of water. Let it sit for a few minutes until it gets thick. Both options work well and keep the brownies moist. These brownies stay fresh for about four to five days when stored properly. Keep them in an airtight container at room temperature. If you want them to last longer, you can freeze them. Just wrap them well in plastic wrap and place them in a freezer bag. They can last up to three months in the freezer. When you're ready to enjoy, just thaw them at room temperature or warm them in the microwave for a few seconds. Remember, for the full recipe, check our earlier section! In this post, we explored how to make delicious caramel pecan turtle brownies. We discussed essential and optional ingredients, the tools you need, and easy step-by-step instructions. I also shared useful tips to avoid common mistakes and achieve the perfect texture. Plus, we looked at variations, storage info, and common questions. Enjoying these brownies can be a fun baking adventure. I hope you try these tips and enjoy every bite!](https://dailydishlab.com/wp-content/uploads/2025/07/cd6252c4-9eb9-4ecc-b5d9-7ffc816e6e24-768x768.webp)