Cherry Oat Bars Flavorful and Easy Homemade Treat
If you love easy homemade treats, you’ll adore these Cherry Oat Bars. They are simple to make and bursting with flavor. I’ll guide you through all the steps, from key ingredients to baking tips. Whether you’re looking for a quick snack or a healthy dessert, these bars fit the bill. Read on to discover how to whip up these tasty treats in no time!
Why I Love This Recipe
- Healthy Ingredients: This recipe uses wholesome oats and almond flour, making it a nutritious snack or breakfast option.
- Versatile Options: You can easily customize this recipe by adding different fruits or nuts based on your preferences.
- Simple to Make: With just a few steps and minimal prep time, these bars are quick to whip up for any occasion.
- Delicious Flavor: The combination of sweet cherries and warm cinnamon creates a delightful taste that everyone will love.
Ingredients
Essential Ingredients for Cherry Oat Bars
To make cherry oat bars, you need some key items. Here’s what you will need:
- 2 cups rolled oats
- 1 cup almond flour
- 1/2 cup brown sugar
- 1/2 cup honey or maple syrup
- 1/2 cup unsalted butter, melted (or coconut oil for vegan option)
- 1 teaspoon vanilla extract
- 1/2 teaspoon baking soda
- 1/4 teaspoon salt
- 1 cup fresh or frozen cherries, pitted and chopped
- 1/2 cup chopped walnuts (optional)
- 1/4 teaspoon cinnamon
These ingredients work together to create a chewy and tasty treat. The oats add texture, while the cherries bring a sweet and tart flavor.
Optional Ingredients for Customization
You can change the recipe to fit your taste. Here are some ideas:
- Use different nuts like pecans or almonds.
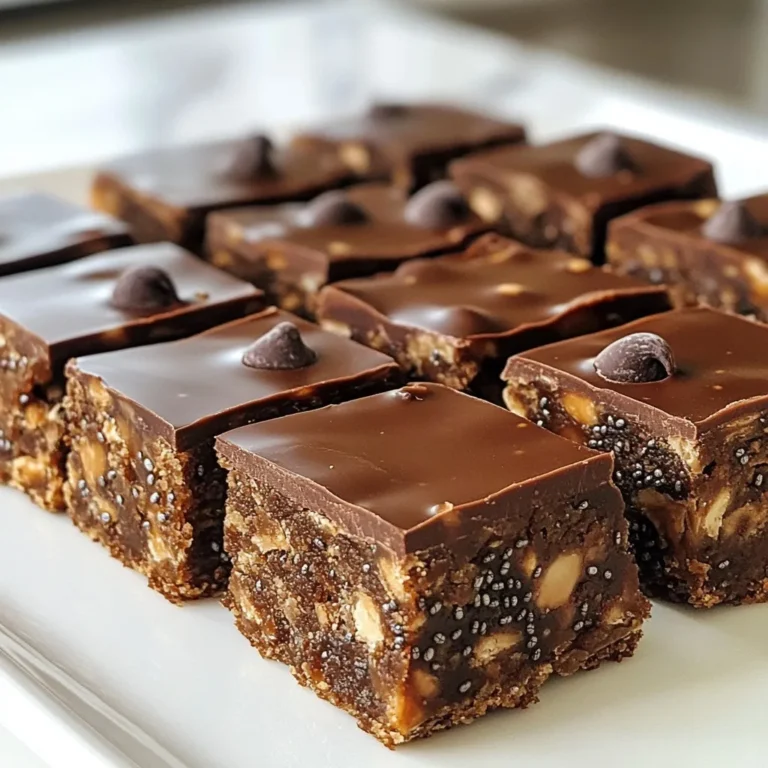
- Add chocolate chips for a sweet twist.
- Swap cherries for other fruits like blueberries or raspberries.
- Try using maple syrup instead of honey for a different sweetness.
Mixing in these ingredients keeps the recipe fun and fresh. You can create your own unique versions of the bars.
Nutritional Information Breakdown
Each cherry oat bar offers a healthy snack. Here’s a quick look at the nutrition:
- Calories: About 150 per bar
- Fat: 7 grams
- Carbohydrates: 21 grams
- Fiber: 3 grams
- Protein: 3 grams
These bars are a good source of energy and fiber. They make a great snack for kids and adults alike. Always remember to adjust portions to fit your dietary needs.

Step-by-Step Instructions
Preparation Steps for Cherry Oat Bars
Start by preheating your oven to 350°F (175°C). This sets the right heat for baking. Next, line an 8×8 inch baking pan with parchment paper. Leave some paper hanging over the edges. This helps you lift out the bars later. In a big bowl, mix the rolled oats, almond flour, brown sugar, cinnamon, baking soda, and salt. Stir them well until they blend. In another bowl, whisk the melted butter, honey, and vanilla extract. Mix until it is smooth and creamy. Pour this mixture into the dry ingredients. Stir until they combine. It should feel a bit crumbly but hold together when pressed. Gently fold in your chopped cherries and walnuts, if you choose to use them.
Baking Process Explained
Now, spread the mixture evenly into your prepared pan. Press it down firmly to create one flat layer. This helps the bars bake evenly. Place the pan in the oven and bake for 25-30 minutes. You want the edges to turn a nice golden brown, and the center should feel set. Keep an eye on it to avoid overbaking. When done, take it out and let it cool in the pan for about 10 minutes.
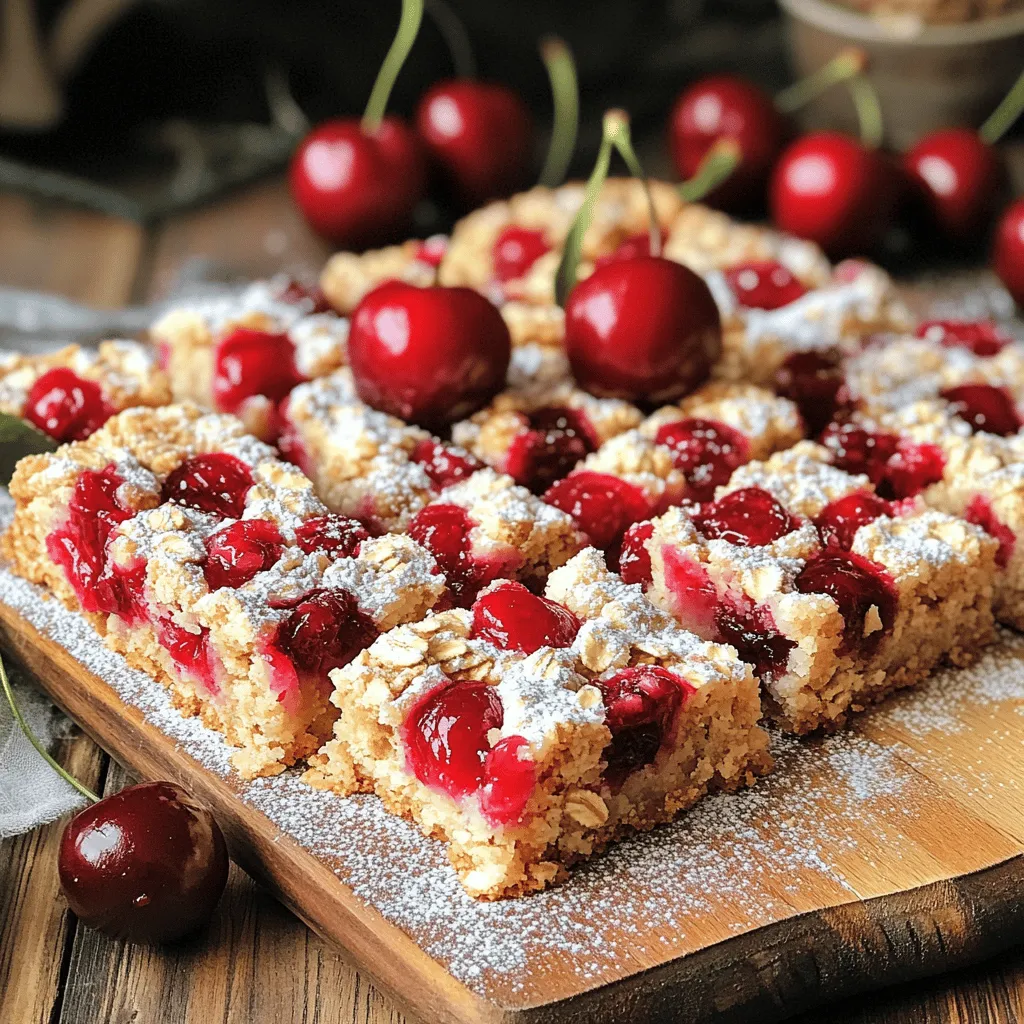
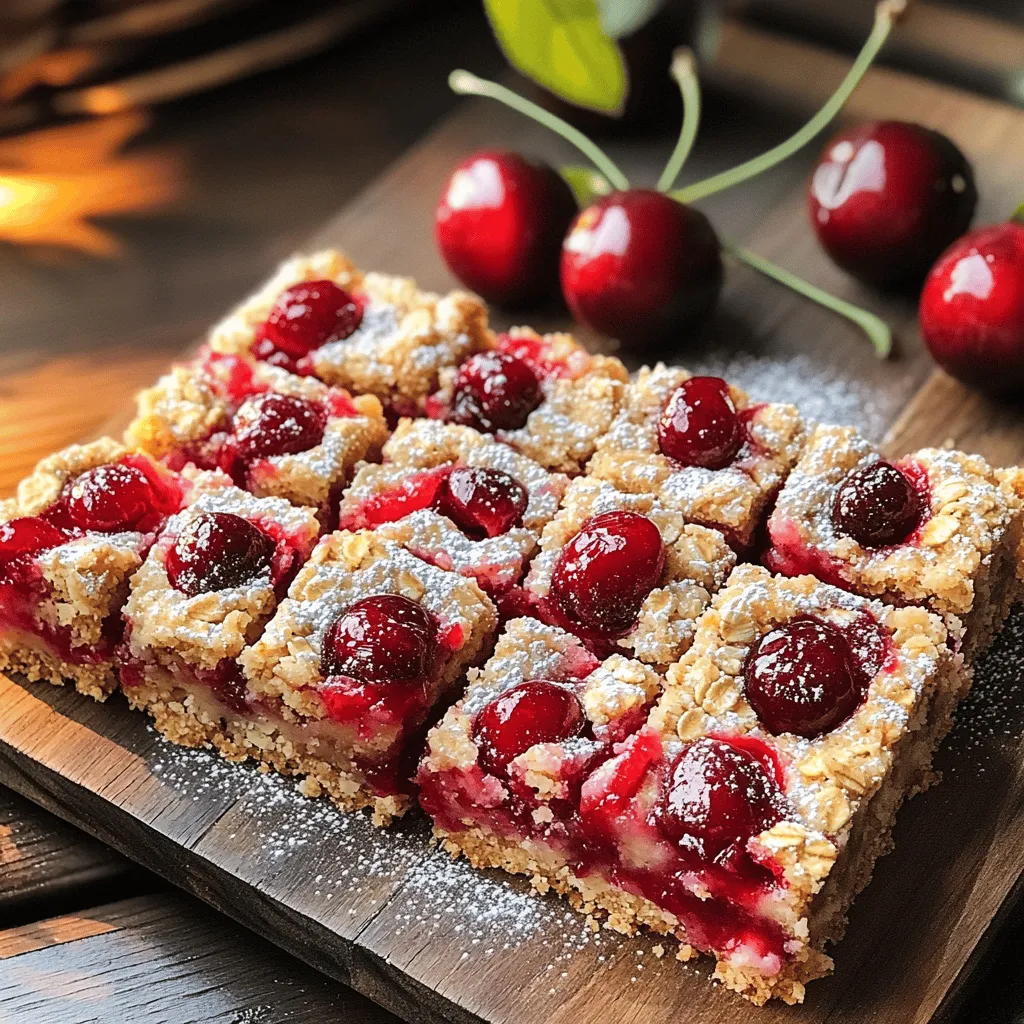
Cooling and Serving Suggestions
Lift the bars out using the parchment paper. Place them on a wire rack to cool completely. This helps them firm up. Once cooled, cut them into squares or bars. For a fun touch, serve the Cherry Oat Delight Bars on a wooden board. Dust them lightly with powdered sugar. Add fresh cherries on top for color and taste. Enjoy your easy homemade treat!
Pro Tips
- Use Fresh Cherries: If possible, opt for fresh cherries for a more vibrant flavor and texture. However, frozen cherries will work just as well; just be sure to thaw and drain them before use.
- Adjust Sweetness: Depending on your preference and cherry sweetness, feel free to adjust the amount of honey or maple syrup to suit your taste.
- Storage Tips: Store the bars in an airtight container at room temperature for up to a week, or refrigerate for longer freshness.
- Experiment with Nuts: Try adding different nuts like almonds or pecans, or even seeds like pumpkin or sunflower for added crunch and nutrition.
Tips & Tricks
Tips for Perfect Texture and Flavor
To get the best texture in your Cherry Oat Bars, use rolled oats. They add chewiness and heartiness. Almond flour helps bind the bars and adds a nutty taste. Make sure the butter is melted but not too hot. This keeps the oats from getting soggy. You can also use a mix of honey and maple syrup for a richer flavor. The key is to mix wet and dry ingredients well but not too much. This keeps your bars from becoming tough.
Common Mistakes to Avoid
One common mistake is not measuring the ingredients correctly. Too much flour or oats can make the bars dry. Another mistake is overbaking. Keep an eye on them while in the oven. Look for a golden brown color on the edges. If you let them cool too long in the pan, they can become too soft. Lastly, don’t skip the salt! It brings out the flavor of the cherries and oats.
Substitutions and Enhancements
You can easily make this recipe your own. Swap almond flour with whole wheat flour for a different taste. If you want a nut-free version, leave out the walnuts or use seeds instead. Dried cherries work well if fresh ones aren’t available. For a chocolate twist, add some dark chocolate chips. You can even sprinkle in some flaxseed for extra nutrition.
Variations
Vegan and Gluten-Free Options
You can easily make Cherry Oat Bars vegan. Replace honey with maple syrup. Use coconut oil instead of butter. For gluten-free bars, swap almond flour with a gluten-free blend. Just make sure your oats are certified gluten-free. This way, you can enjoy tasty bars without the usual ingredients.
Flavor Additions
Want to mix things up? Add chocolate chips for a sweet twist. Dark chocolate pairs well with cherries. You can also try other fruits like blueberries or raspberries. Just chop them up and fold them into the mix. This lets you create a new flavor each time!
Alternative Sweeteners
If you want to cut sugar, try using mashed bananas or applesauce. They keep the bars moist and add natural sweetness. You can also use agave syrup or stevia. Just remember, different sweeteners may change the taste and texture a bit. Experiment to find your favorite!
Storage Info
Best Practices for Storing Cherry Oat Bars
To keep your Cherry Oat Bars fresh, store them in an airtight container. This will help maintain their soft texture. Place parchment paper between layers to avoid sticking. If you plan to eat them within a week, keep them at room temperature. For longer storage, the fridge is a good choice. Just remember, cold bars may feel a bit firmer.
How to Freeze for Long-Term Storage
Freezing is a great way to save Cherry Oat Bars for later. First, let them cool completely. Then, wrap each bar in plastic wrap. After that, place the wrapped bars in a freezer-safe bag. This helps prevent freezer burn. You can store them for up to three months. When you’re ready to eat, just thaw them in the fridge or at room temperature.
Shelf Life of Homemade Cherry Oat Bars
Homemade Cherry Oat Bars can last up to a week at room temperature. If kept in the fridge, they may last up to two weeks. Freezing extends their life to three months. Always check for signs of spoilage, like mold or an off smell, before eating. Enjoy the freshness of your homemade treat!
FAQs
How do I make Cherry Oat Bars without nuts?
You can easily make Cherry Oat Bars without nuts. Just skip the walnuts in the recipe. The bars will still taste great. You can also add a bit more oats. This will keep the texture nice and chewy.
Can I use dried cherries instead of fresh?
Yes, you can use dried cherries instead of fresh. Dried cherries add a sweet and chewy texture. If you choose dried cherries, chop them into smaller pieces. You may want to cut back on the sugar a bit since dried fruit is sweeter.
Where can I buy pre-made cherry oat bars?
You can find pre-made cherry oat bars at many grocery stores. Look in the snack aisle or the health food section. Check brands that focus on natural ingredients. You can also buy them online for convenience.
How to adjust sweetness for Cherry Oat Bars?
To adjust sweetness, change the amount of brown sugar or honey. If you like it sweeter, add a bit more. If you prefer less sweetness, reduce the sugar by a few tablespoons. Tasting the mix before baking helps you find the right balance. For a fun twist, try using maple syrup instead of honey. This change adds a unique flavor.
Cherry oat bars are easy to make and tasty. We explored essential and optional ingredients, plus their nutrition. I shared simple steps to prepare, bake, and serve them, along with helpful tips to get the best results. You can customize your bars and store them well for later use. With these ideas, you can enjoy cherry oat bars that fit your taste and diet. Try making them your own and enjoy a healthy treat!

Cherry Oat Bars
Ingredients
2 cups rolled oats
1 cup almond flour
1/2 cup brown sugar
1/2 cup honey or maple syrup
1/2 cup unsalted butter, melted (or coconut oil for vegan option)
1 teaspoon vanilla extract
1/2 teaspoon baking soda
1/4 teaspoon salt
1 cup fresh or frozen cherries, pitted and chopped
1/2 cup chopped walnuts (optional)
1/4 teaspoon cinnamon
Instructions
Preheat your oven to 350°F (175°C) and line an 8×8 inch baking pan with parchment paper, leaving some overhang to lift the bars out later.
In a large mixing bowl, combine the rolled oats, almond flour, brown sugar, cinnamon, baking soda, and salt. Mix well.
In another bowl, whisk together the melted butter, honey (or maple syrup), and vanilla extract until smooth.
Pour the wet ingredients into the dry ingredients and mix until well combined. The mixture should be slightly crumbly but hold together when pressed.
Gently fold in the chopped cherries and walnuts, if using.
Spread the mixture evenly into the prepared baking pan, pressing down firmly to create an even layer.
Bake in the preheated oven for 25-30 minutes, or until the edges are golden brown and the center is set.
Remove from the oven and let cool in the pan for about 10 minutes. Use the parchment overhang to lift the bars out and place them on a wire rack to cool completely.
Once cooled, cut into squares or bars as desired.
Prep Time: 15 minutes | Total Time: 45 minutes | Servings: 16 bars
– Presentation Tips: Serve the Cherry Oat Delight Bars on a wooden board, dusted with a light sprinkle of powdered sugar, and garnished with fresh cherries on top for a pop of color.
Cherry Oat Bars
Ingredients
- 2 cups rolled oats
- 1 cup almond flour
- 0.5 cup brown sugar
- 0.5 cup honey or maple syrup
- 0.5 cup unsalted butter, melted (or coconut oil for vegan option)
- 1 teaspoon vanilla extract
- 0.5 teaspoon baking soda
- 0.25 teaspoon salt
- 1 cup fresh or frozen cherries, pitted and chopped
- 0.5 cup chopped walnuts (optional)
- 0.25 teaspoon cinnamon
Instructions
- Preheat your oven to 350°F (175°C) and line an 8x8 inch baking pan with parchment paper, leaving some overhang to lift the bars out later.
- In a large mixing bowl, combine the rolled oats, almond flour, brown sugar, cinnamon, baking soda, and salt. Mix well.
- In another bowl, whisk together the melted butter, honey (or maple syrup), and vanilla extract until smooth.
- Pour the wet ingredients into the dry ingredients and mix until well combined. The mixture should be slightly crumbly but hold together when pressed.
- Gently fold in the chopped cherries and walnuts, if using.
- Spread the mixture evenly into the prepared baking pan, pressing down firmly to create an even layer.
- Bake in the preheated oven for 25-30 minutes, or until the edges are golden brown and the center is set.
- Remove from the oven and let cool in the pan for about 10 minutes. Use the parchment overhang to lift the bars out and place them on a wire rack to cool completely.
- Once cooled, cut into squares or bars as desired.
![To make No Bake Pumpkin Spice Cookie Dough Bites, gather the following ingredients. Each one plays a key role in flavor and texture. - 1 cup almond flour - 1/2 cup rolled oats - 1/2 cup pumpkin puree - 1/4 cup maple syrup - 1/4 cup almond butter - 1 tsp vanilla extract - 1 tsp pumpkin spice - 1/2 tsp cinnamon - A pinch of salt - 1/4 cup dark chocolate chips 1. Almond flour: This nut-based flour adds a rich taste and soft texture. 2. Rolled oats: They give the bites a nice chew and help bind the mixture. 3. Pumpkin puree: This provides moisture and a warm, cozy flavor. 4. Maple syrup: It acts as a natural sweetener and adds depth to the taste. 5. Almond butter: This creamy ingredient helps hold everything together. 6. Vanilla extract: A splash of this brightens the flavors in the bites. 7. Pumpkin spice: This blend of spices brings fall warmth to each bite. 8. Cinnamon: It adds a sweet aroma and enhances the pumpkin flavor. 9. Salt: Just a pinch balances the sweetness and lifts the flavors. 10. Dark chocolate chips: These bits of chocolate create delightful bursts of sweetness. These ingredients work together to create a tasty treat. If you want the full experience, check out the Full Recipe for more details. First, gather your ingredients. You will need almond flour, rolled oats, pumpkin puree, maple syrup, almond butter, vanilla extract, pumpkin spice, cinnamon, salt, and dark chocolate chips. 1. In a large mixing bowl, mix the almond flour, rolled oats, pumpkin spice, cinnamon, and salt. Stir well until all the dry ingredients blend together nicely. 2. In another bowl, whisk together the pumpkin puree, maple syrup, almond butter, and vanilla extract. Keep whisking until the mixture is smooth and blended. 3. Pour the wet mixture into the bowl with the dry ingredients. Mix thoroughly. You want to form a dough that holds together well. Now it's time to shape the dough. Use your hands to roll the mixture into small balls. Each ball should be about 1 inch in diameter. Place them on a baking sheet lined with parchment paper. This step makes it easy to chill the bites later. To set the bites, refrigerate them for at least 30 minutes. This chilling time helps them firm up nicely. When you’re ready to serve, enjoy them cold. If you prefer, let them sit out for a few minutes. This makes them easier to eat. You can also serve them as a fun snack or dessert for friends and family. For the full recipe, check out the details above! To get the right texture in your No Bake Pumpkin Spice Cookie Dough Bites, I suggest adjusting the ingredient ratios. For a softer bite, add more pumpkin puree. If you prefer a firmer texture, increase the almond flour. You can also try different sweeteners. Maple syrup adds a nice taste, but agave or honey works too. Just keep the ratios similar for the best results. Want to change it up? You can easily customize the flavor. Try adding nuts or dried fruits. Chopped walnuts or pecans add crunch. Dried cranberries or raisins bring a sweet twist. Just mix them in when you combine the wet and dry ingredients. Prepping ingredients in advance saves time. Measure out the almond flour and oats the night before. You can even mix the dry ingredients early. This way, when you're ready to make the bites, everything is ready to go. It makes the process fast and easy! For the full recipe, check out the details and enjoy making these tasty treats. {{image_2}} You can easily make No Bake Pumpkin Spice Cookie Dough Bites vegan and dairy-free. Use almond butter and maple syrup, just like in the original recipe. Almond flour and rolled oats are already plant-based. You can also swap dark chocolate chips for dairy-free ones. This way, everyone can enjoy them! Want to mix things up? Try adding different spices. Nutmeg is a great choice. It pairs well with pumpkin and gives a warm flavor. You can also add a dash of ginger for some extra warmth. These small changes can make a big difference! How you serve these bites can be fun! You can roll them in crushed nuts or coconut for a crunchy coat. Drizzle some melted dark chocolate on top for a fancy touch. You could also sprinkle a bit of cinnamon for extra flair. These ideas make your bites look as good as they taste. For the complete recipe, check the [Full Recipe]. To keep No Bake Pumpkin Spice Cookie Dough Bites fresh, store them in the fridge. Use an airtight container to prevent them from drying out. Make sure to separate layers with parchment paper. This keeps them from sticking together. They will stay fresh for a longer time when stored properly. If you want to keep these bites longer, freezing is a great option. To freeze, place the cookie dough bites on a baking sheet. Make sure they are not touching each other. Freeze them for about an hour until firm. Then, transfer them to a freezer-safe bag or container. Label the container with the date and flavor. They can last up to three months in the freezer. When stored in the fridge, these bites last about a week. If you freeze them, they can last up to three months. You can enjoy these treats whenever you crave a sweet snack! Just let them thaw in the fridge or at room temperature before eating. For the full recipe, check out the previous sections. Store your cookie dough bites in an airtight container. Keep them in the fridge for up to one week. If you want them to last longer, you can freeze them. Just make sure to separate them with parchment paper. This will help prevent sticking. Yes, you can use other flours. Oat flour or coconut flour are great options. Just know that they may change the texture a bit. If you use coconut flour, reduce the amount to about 1/3 cup. It absorbs more moisture than almond flour. To make sugar-free bites, swap maple syrup for a sugar-free sweetener. Options like stevia or erythritol can work well. Adjust the amount based on your taste. You might need to add a little more pumpkin puree for moisture. For extra flavor, consider adding a dash of vanilla extract. For the full recipe, check out the No Bake Pumpkin Spice Cookie Dough Bites section. These no-bake pumpkin spice cookie dough bites are fun to make and tasty. You learned about the key ingredients, step-by-step instructions, and how to tailor the flavors. We also covered tips for perfect texture and storage. Feel free to mix in your favorite nuts or fruits for a personal touch. Remember, these bites are great for sharing or enjoying on your own. Experiment, have fun, and enjoy every bite of your creation!](https://dailydishlab.com/wp-content/uploads/2025/07/e6c47970-ab6c-4140-bac8-89f339878891-768x768.webp)