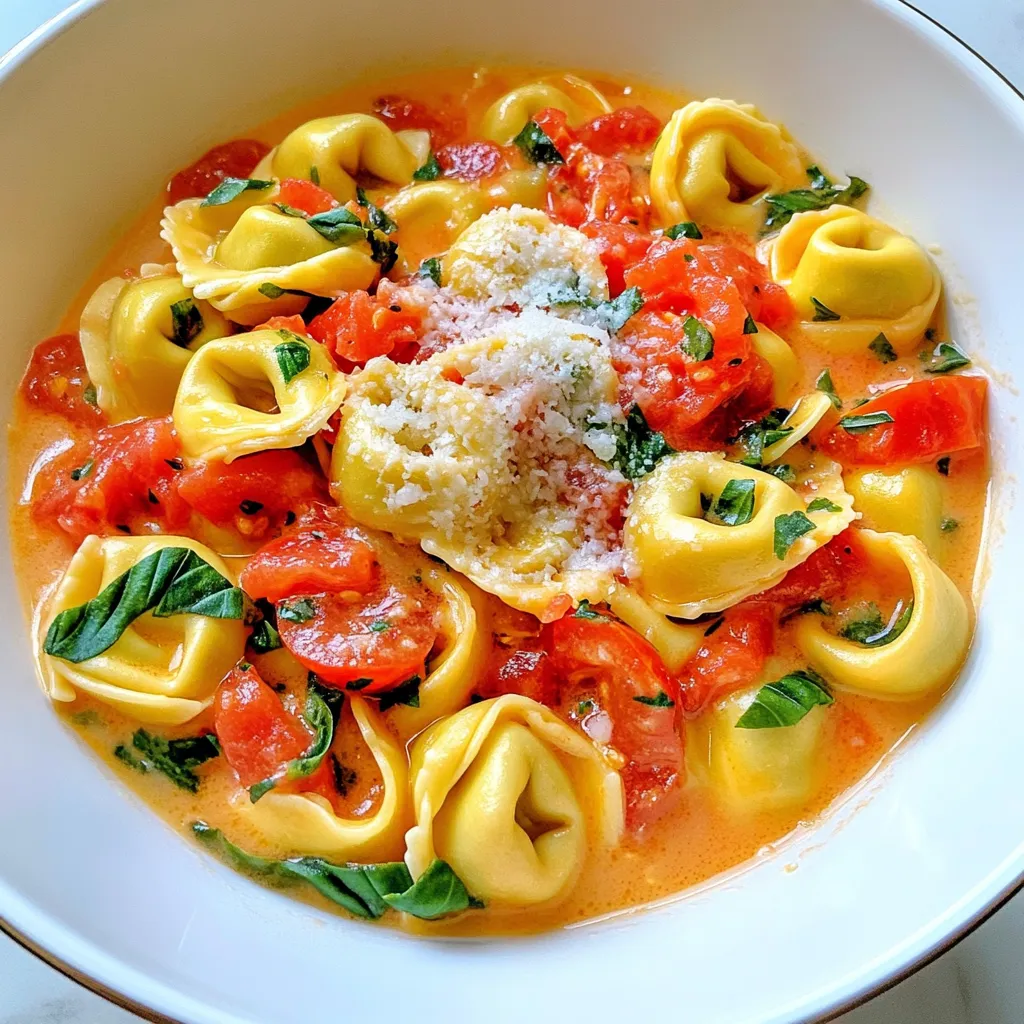
One Pot Tomato Basil Tortellini Quick and Tasty Meal
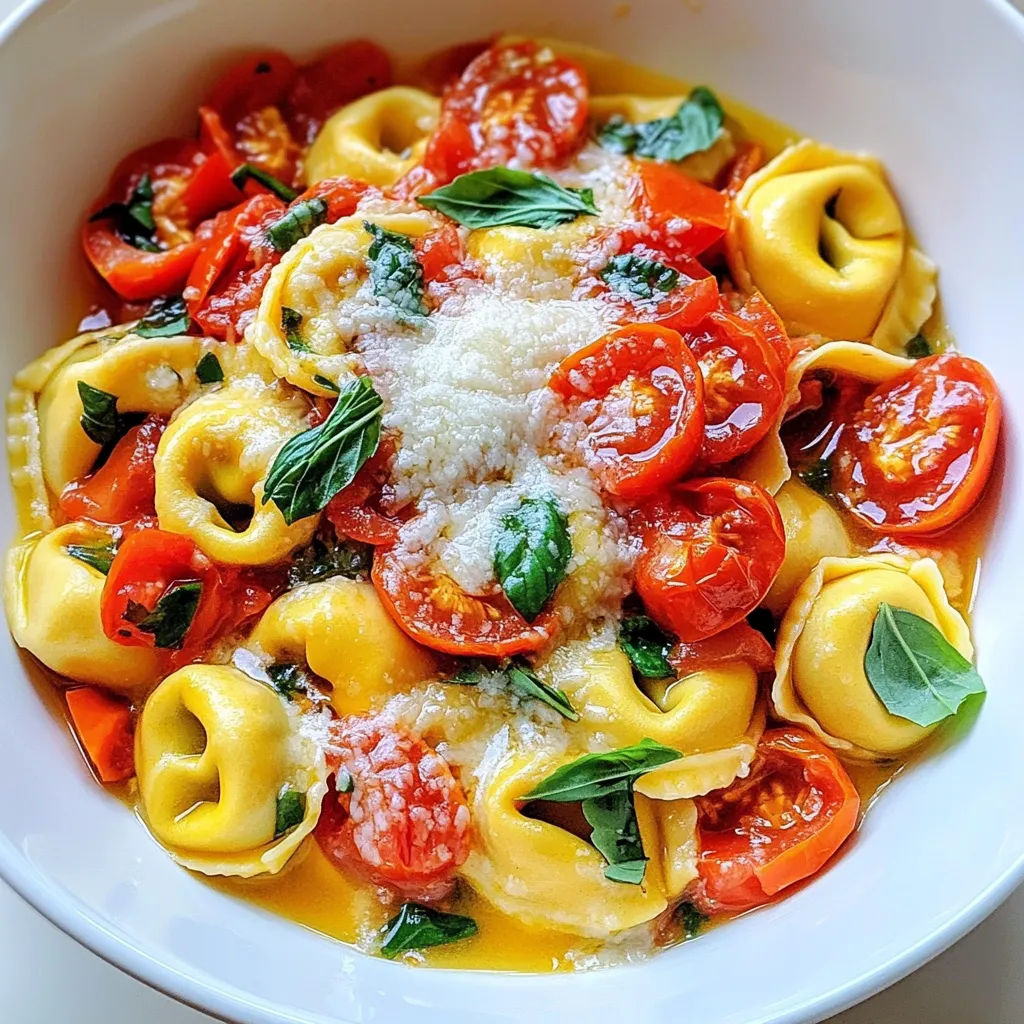
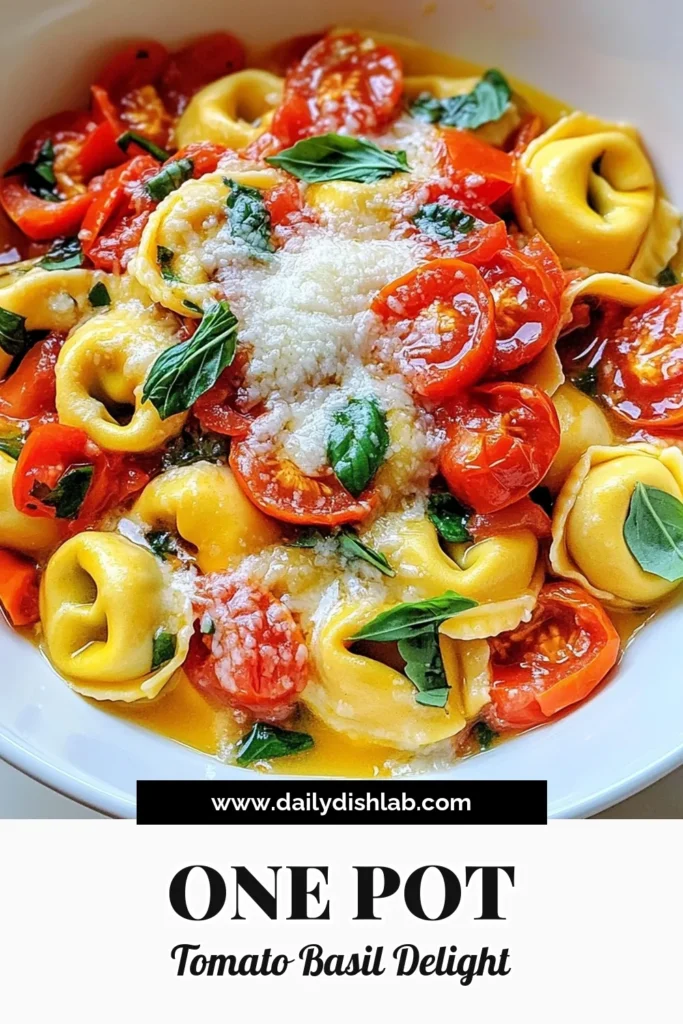
Craving a quick, tasty meal? Look no further! My One Pot Tomato Basil Tortellini is here to save dinner time. In just one pot, you’ll mix flavorful ingredients like garlic, diced tomatoes, and creamy tortellini. Not only is this dish simple to make, but it’s also brimming with fresh taste. Let me guide you step-by-step through this easy recipe that keeps everyone happy and full. Your new favorite meal awaits!
Why I Love This Recipe
- Quick and Easy: This dish comes together in just 20 minutes, making it perfect for busy weeknights or a last-minute dinner party.
- One Pot Wonder: Minimal cleanup is required as everything is cooked in one pot, allowing you to enjoy your meal without the hassle of doing the dishes.
- Flavorful and Comforting: The combination of tomatoes, basil, and creamy goodness creates a comforting dish that warms the soul.
- Customizable: You can easily add your favorite vegetables or protein to make this recipe your own, catering to different tastes and dietary preferences.
Ingredients
Main Ingredients
- 2 tablespoons olive oil
- 3 cloves garlic, minced
- 1 can (14 oz) diced tomatoes, undrained
- 4 cups vegetable broth
- 1 package (9 oz) cheese tortellini (fresh or frozen)
Seasoning and Garnishes
- 1 teaspoon dried Italian seasoning
- 1/2 teaspoon red pepper flakes (optional)
- Salt and pepper to taste
- 1 cup fresh basil leaves, chopped
- 1/2 cup heavy cream (or coconut cream for a dairy-free option)
- Grated Parmesan cheese for serving
When I create One Pot Tomato Basil Tortellini, I use simple and fresh ingredients. Olive oil adds a rich flavor. Minced garlic gives the dish a warm aroma. Diced tomatoes provide juiciness, while vegetable broth adds depth. Cheese tortellini makes it hearty and filling.
For seasoning, I like to add dried Italian seasoning. It brings a nice herb mix. Red pepper flakes can give a bit of heat, but you can skip them if you want a milder taste. Salt and pepper enhance the flavors, while fresh basil leaves add a bright touch. I often stir in heavy cream for a creamy finish. If you prefer a dairy-free option, coconut cream works great. Finally, I sprinkle grated Parmesan cheese on top for extra flavor.
These ingredients come together to create a warm and tasty meal. It’s quick to make, perfect for busy days. With this mix, you can enjoy a comforting dish in just 20 minutes!

Step-by-Step Instructions
Preparation Steps
- Heat 2 tablespoons of olive oil in a large pot over medium heat.
- Add 3 cloves of minced garlic and sauté for about 1 minute.
- Be careful not to burn the garlic; you want it fragrant.
- Next, stir in 1 can of diced tomatoes, undrained, and 4 cups of vegetable broth.
- Bring the mixture to a gentle boil, and watch it bubble.
Cooking Process
- Once boiling, add 1 package of cheese tortellini, 1 teaspoon of dried Italian seasoning, and 1/2 teaspoon of red pepper flakes if you like spice.
- Stir well to combine all the ingredients.
- Reduce heat to medium-low and let it simmer for 5-7 minutes.
- Stir occasionally to keep the tortellini from sticking to the pot.
- Check if the tortellini is cooked through and tender.
Final Touches
- Once the tortellini is ready, stir in 1 cup of chopped fresh basil and 1/2 cup of heavy cream.
- Season with salt and pepper to taste.
- Let it cook for an additional 2-3 minutes until warmed through.
- Serve hot and garnish with grated Parmesan cheese and extra basil leaves if you wish.
Pro Tips
- Use Fresh Basil: Fresh basil adds a vibrant flavor to the dish. Add it at the end of cooking to preserve its aroma and nutrients.
- Adjust the Creaminess: You can modify the amount of heavy cream to your preference, or substitute it with coconut cream for a dairy-free option.
- Perfectly Cooked Tortellini: Keep an eye on the tortellini while it cooks to avoid overcooking. It should be al dente for the best texture.
- Customize Seasoning: Feel free to adjust the seasoning to your taste. Adding more red pepper flakes can give it a nice kick!
Tips & Tricks
Perfecting Your Dish
How do you avoid overcooking tortellini?
To prevent overcooking, keep an eye on the time. Fresh tortellini cooks in about 5-7 minutes. Frozen tortellini may need an extra minute. Stir it gently to check for doneness. You want it tender but not mushy.
Should you use fresh or frozen tortellini?
I prefer fresh tortellini for its soft texture. It cooks quickly and absorbs flavors well. Frozen tortellini is a great option too. It’s easy to store and saves time. Just remember to adjust the cooking time slightly.
Enhancing Flavor
What herbs and spices do you recommend?
Adding fresh basil is key. It brings a bright flavor. You can also add thyme or oregano for more depth. A pinch of red pepper flakes adds a nice kick. Taste as you go to find your perfect mix.
How can you serve with extra garnishes?
Garnishing elevates your dish. A sprinkle of grated Parmesan cheese adds richness. Extra basil leaves on top offer a fresh look. You can also drizzle a bit of olive oil for shine. Serve it hot for the best experience.
Variations
Dietary Adjustments
Making it dairy-free
You can easily make this dish dairy-free. Simply swap heavy cream for coconut cream. This change keeps the dish rich and creamy without dairy. Choose a dairy-free cheese for topping, too. Many brands offer great options that melt well.
Vegetarian or vegan modifications
This dish is already vegetarian. To make it vegan, just ensure you use vegan tortellini. Many stores carry plant-based options now. Check labels to avoid dairy. You can also use vegetable broth to keep it vegan-friendly.
Ingredient Swaps
Alternatives to tortellini
If you want a change, try different pasta shapes. Shells or penne work great in this dish. You can also use gluten-free pasta if needed. Just keep an eye on the cooking time to ensure it stays tender.
Substituting for different sauces
While this recipe uses tomato and basil flavors, feel free to mix it up. For a creamier taste, try adding Alfredo sauce. You can also use pesto for a fresh twist. Each option brings a new flavor profile to the dish.
Storage Info
Storing Leftovers
After you enjoy your One Pot Tomato Basil Tortellini, store any leftovers in an airtight container. Keep it in the fridge for best results. Try to eat it within 3 days for the best taste. If you want to store it longer, freeze it. In the freezer, it can last for up to 2 months.
Reheating Tips
To reheat your tortellini, use a pot on low heat. This helps keep the flavors fresh. You can also use the microwave. If you choose this method, heat it in short bursts. Stir in between to avoid hot spots. Add a splash of broth or cream if it seems dry. Always check to make sure it is heated through without overcooking.
FAQs
Common Questions
Can I use different types of pasta?
Yes, you can use other types of pasta. Just remember that cooking time may change. For example, smaller pasta shapes may cook faster, while larger shapes may take longer. Keep an eye on them as they cook to avoid overdoing it.
How can I make this recipe gluten-free?
To make this dish gluten-free, use gluten-free tortellini. Many stores sell this option now. You can also substitute the broth with gluten-free vegetable broth. Just check the labels to ensure they fit your needs.
Ingredient-Specific Queries
What can I substitute for heavy cream?
You can use coconut cream as a dairy-free option. Another option is to blend silken tofu with a bit of water. This gives a nice creamy texture without dairy.
Is it possible to use fresh tomatoes instead of canned?
Yes, you can use fresh tomatoes. If you do, chop about 4-5 medium-sized tomatoes. You will need to cook them longer to break down and release their juices.
Cooking and Serving Suggestions
What can I serve alongside this dish?
This meal pairs well with a fresh salad or garlic bread. A simple green salad adds a nice crunch. Garlic bread brings a warm, comforting touch to the meal.
Can I double the recipe for a larger group?
Absolutely! Just double all the ingredients. Use a larger pot to fit everything. Keep an eye on cooking time, as it may take a bit longer for the tortellini to cook through.
This blog discussed how to make a tasty tortellini dish. We covered the main ingredients, like olive oil, garlic, and tortellini, and how to cook them step by step. I shared useful tips for great flavor and variations to meet different diets. Lastly, I explained how to store leftovers and answered key questions.
Making this dish allows you to enjoy a wholesome meal with family or friends. Remember, cooking is fun, so feel free to experiment! Enjoy your tortellini journey!

One Pot Tomato Basil Tortellini
Ingredients
2 tablespoons olive oil
3 cloves garlic, minced
1 can (14 oz) diced tomatoes, undrained
4 cups vegetable broth
1 package (9 oz) cheese tortellini (fresh or frozen)
1 teaspoon dried Italian seasoning
1/2 teaspoon red pepper flakes (optional)
Salt and pepper to taste
1 cup fresh basil leaves, chopped
1/2 cup heavy cream (or coconut cream for a dairy-free option)
Grated Parmesan cheese for serving
Instructions
In a large pot, heat the olive oil over medium heat. Add the minced garlic and sauté for about 1 minute or until fragrant, being careful not to burn it.
Stir in the canned diced tomatoes (with their juices) and vegetable broth, and bring the mixture to a gentle boil.
Add the cheese tortellini, dried Italian seasoning, and red pepper flakes (if using). Stir well to combine.
Reduce heat to medium-low and let the mixture simmer for about 5-7 minutes, or until the tortellini is cooked through and tender. Stir occasionally to prevent sticking.
Once the tortellini is ready, stir in the fresh basil and heavy cream. Season with salt and pepper to taste, and cook for an additional 2-3 minutes until warmed through.
Serve hot, garnished with grated Parmesan cheese and additional basil leaves if desired.
Prep Time: 10 minutes | Total Time: 20 minutes | Servings: 4
One Pot Tomato Basil Tortellini
Ingredients
- 2 tablespoons olive oil
- 3 cloves garlic, minced
- 14 oz canned diced tomatoes, undrained
- 4 cups vegetable broth
- 9 oz package cheese tortellini (fresh or frozen)
- 1 teaspoon dried Italian seasoning
- 0.5 teaspoon red pepper flakes (optional)
- to taste salt and pepper
- 1 cup fresh basil leaves, chopped
- 0.5 cup heavy cream (or coconut cream for a dairy-free option)
- for serving grated Parmesan cheese
Instructions
- In a large pot, heat the olive oil over medium heat. Add the minced garlic and sauté for about 1 minute or until fragrant, being careful not to burn it.
- Stir in the canned diced tomatoes (with their juices) and vegetable broth, and bring the mixture to a gentle boil.
- Add the cheese tortellini, dried Italian seasoning, and red pepper flakes (if using). Stir well to combine.
- Reduce heat to medium-low and let the mixture simmer for about 5-7 minutes, or until the tortellini is cooked through and tender. Stir occasionally to prevent sticking.
- Once the tortellini is ready, stir in the fresh basil and heavy cream. Season with salt and pepper to taste, and cook for an additional 2-3 minutes until warmed through.
- Serve hot, garnished with grated Parmesan cheese and additional basil leaves if desired.
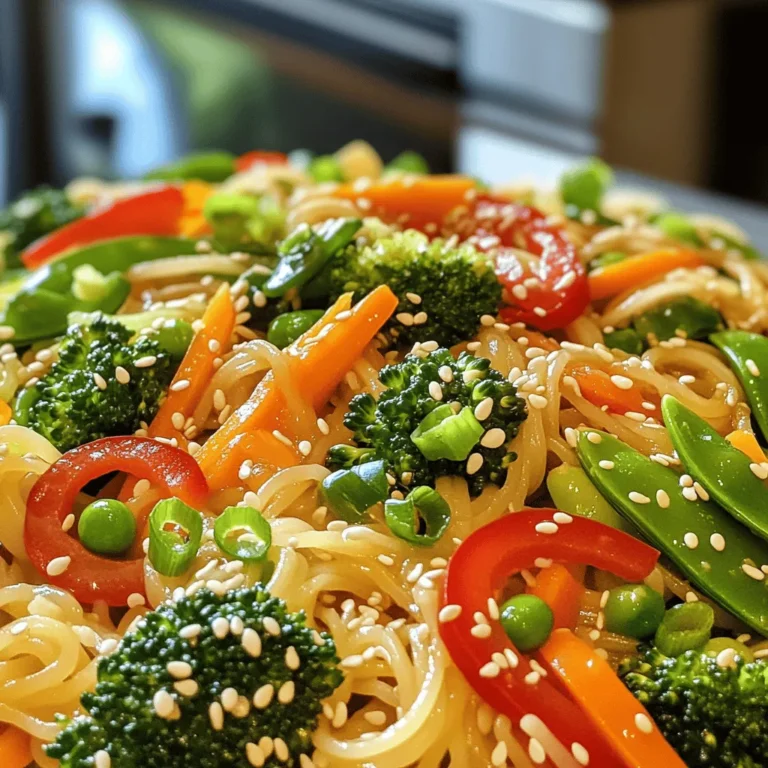
![For the base of this dish, you need: - 8 oz. rice noodles - 2 tablespoons vegetable oil - 1 tablespoon fresh ginger, minced - 4 cloves garlic, minced - 1 bell pepper, julienned (any color) - 1 cup broccoli florets - 1 cup snap peas - 2 green onions, chopped - 3 tablespoons soy sauce - 1 tablespoon sesame oil - 1 tablespoon honey (or maple syrup for a vegan option) - Sesame seeds for garnish - Fresh cilantro for garnish - Salt and pepper to taste These ingredients create a vibrant and tasty dish. The ginger and garlic add warmth and depth. The bright veggies make every bite a treat. To boost the flavor, consider adding: - Red pepper flakes for heat - Mushrooms for a savory touch - Carrots for added sweetness and color - Cashews for crunch and richness These options can enhance the dish and make it your own. You can swap ingredients based on your needs: - Use gluten-free noodles if you need a gluten-free option. - Replace soy sauce with tamari for a gluten-free sauce. - For a vegan dish, make sure to use maple syrup instead of honey. These swaps let everyone enjoy a delicious Ginger Garlic Noodle Stir Fry. Check out the Full Recipe for more details on how to put it all together! First, you need to make your rice noodles. Boil water in a pot. Add 8 oz. of rice noodles and cook them according to the package instructions. This usually takes about 5-7 minutes. Once they are soft, drain them in a colander. Rinse them with cold water to stop the cooking. Toss the noodles with a bit of oil. This will help keep them from sticking together. Now, let’s get cooking! Heat 2 tablespoons of vegetable oil in a skillet or wok over medium-high heat. Wait until the oil shimmers. Add 1 tablespoon of minced ginger and 4 cloves of minced garlic. Stir them quickly for about 30 seconds. You want them fragrant, not burnt. Next, toss in your julienned bell pepper. Stir-fry this for 2-3 minutes until it's slightly soft. Now, add 1 cup of broccoli florets and 1 cup of snap peas. Keep stirring for another 3-4 minutes. Your veggies should be bright and tender-crisp. If they look dull or mushy, you’ve cooked them too long! In a small bowl, mix together 3 tablespoons of soy sauce, 1 tablespoon of sesame oil, and 1 tablespoon of honey or maple syrup. Pour this sauce over the cooked veggies. Add your prepared rice noodles to the skillet. Toss everything together gently. Make sure the noodles and veggies are well combined and heated through. Finally, season your dish with salt and pepper to taste. Fold in 2 chopped green onions for a fresh touch. Serve your Ginger Garlic Noodle Stir Fry hot. Garnish with sesame seeds and fresh cilantro for that perfect finish. This dish is not only easy but also packed with flavor. Enjoy your meal! For the full recipe, check out the details above. To get the best texture, keep your heat high. Hot oil helps cook food fast. Cut your veggies thin for quick cooking. Stir them often to avoid burning. Don't crowd the pan; it can make your veggies soggy. Work in batches if needed. You want that crisp bite! Start with fresh ginger and garlic. They create a strong base for flavor. Sauté them quickly to release their oils. Use a mix of sauces for depth. Soy sauce adds saltiness, while sesame oil gives richness. Honey or maple syrup offers a sweet touch. Taste as you go to balance flavors. One big mistake is overcooking the veggies. They should stay bright and crunchy. Avoid using old oil; it can ruin the taste. Don't skip the seasoning; it elevates the dish. Lastly, remember to toss everything together well. This ensures each bite is packed with flavor. Make sure to check out the [Full Recipe] for all the steps! {{image_2}} You can easily make this dish vegetarian or vegan. Just skip the meat and use more veggies. Try adding mushrooms, zucchini, or carrots for extra taste. Use maple syrup instead of honey to keep it vegan. This keeps the dish sweet and delicious. Adding protein can make your meal heartier. Chicken works well and cooks quickly. Simply cut it into bite-sized pieces and stir-fry it before adding veggies. Tofu is another great choice. Use firm tofu and cube it. Fry until golden for a tasty crunch. Shrimp also adds flavor. Cook them until they turn pink, then mix them in. You can change the taste by swapping some ingredients. Instead of rice noodles, try whole wheat or soba noodles for a different texture. Use dark soy sauce for a richer flavor. Add chili flakes or sriracha if you like heat. You can also try different vegetables like bok choy or asparagus for variety. For the full recipe and more tips, check out the Full Recipe section! After you enjoy your Ginger Garlic Noodle Stir Fry, store any leftovers. Use an airtight container. This helps keep it fresh. Let the stir fry cool to room temperature first. Avoid putting hot food in the fridge. This can raise the temperature inside, which is not safe. Place the container in the fridge. It will last up to three days. When you’re ready to eat leftovers, reheat carefully. Use a skillet for best results. Heat it on medium heat. Add a splash of water or oil to keep it moist. Stir it gently until heated through. This keeps the noodles from getting too dry or sticky. You can also use the microwave. Just cover the bowl with a damp paper towel. Heat for one minute at a time, stirring in between. You can freeze Ginger Garlic Noodle Stir Fry for later. Use a freezer-safe container or bag. Make sure to remove as much air as possible. This helps prevent freezer burn. It will stay good for up to two months. When you’re ready to eat it, thaw it overnight in the fridge. Reheat it in a skillet for best taste and texture. You can follow the steps for reheating leftovers. Using this method keeps the flavors fresh. For the full recipe, check out the previous sections. Making Ginger Garlic Noodle Stir Fry takes about 20 minutes total. You need 10 minutes to prep and another 10 to cook. This quick time makes it perfect for busy days when you want a tasty meal fast. Yes, you can use different noodles for this recipe. Options like egg noodles or udon work well. You can also try whole wheat or gluten-free noodles if you prefer. Just remember to adjust the cooking time based on the noodles you choose. Ginger and garlic offer many health benefits. Ginger can help with digestion and reduce nausea. It also has anti-inflammatory properties. Garlic can boost your immune system. It may help lower blood pressure and improve heart health. Both add flavor and nutrition to your meals, making them great choices in cooking. You've learned to make a delicious Ginger Garlic Noodle Stir Fry. We covered key ingredients, techniques, and helpful tips to ensure your dish shines. Dietary variations allow everyone to enjoy this meal. Proper storage keeps leftovers fresh, while reheating maintains great flavor. Follow these steps and you'll impress at the dinner table. Remember, with practice, you'll master this stir fry and tweak it to fit your taste. Enjoy cooking and sharing this simple, tasty dish!](https://dailydishlab.com/wp-content/uploads/2025/07/2e7dc7f2-8fff-4ba0-8595-d5dc5059986b-768x768.webp)