Honey Garlic Shrimp Tacos Flavorful and Easy Recipe
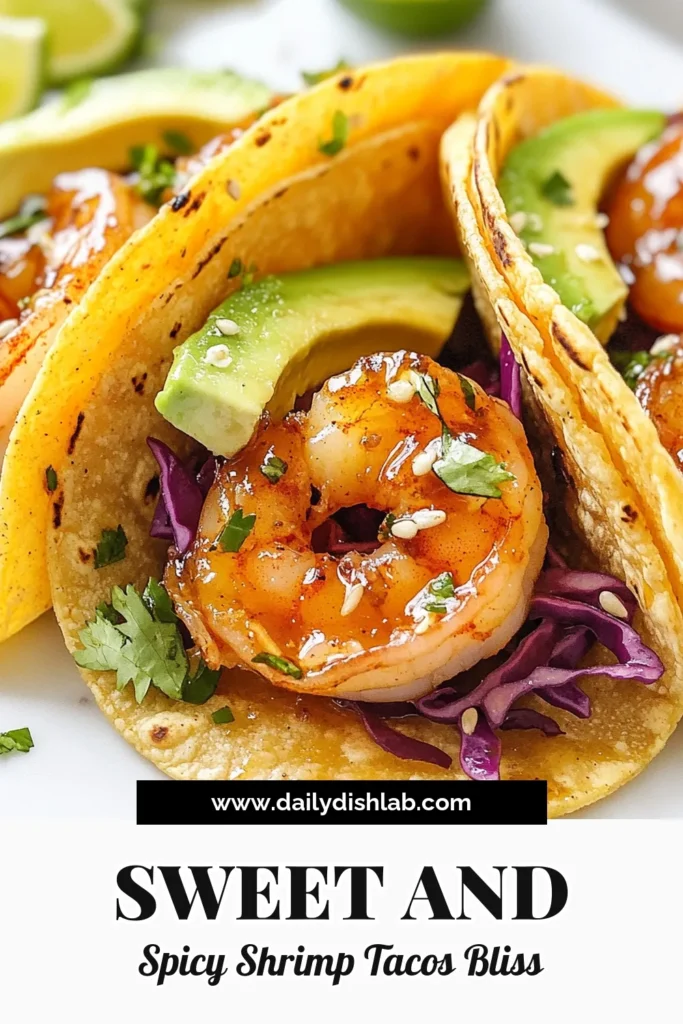
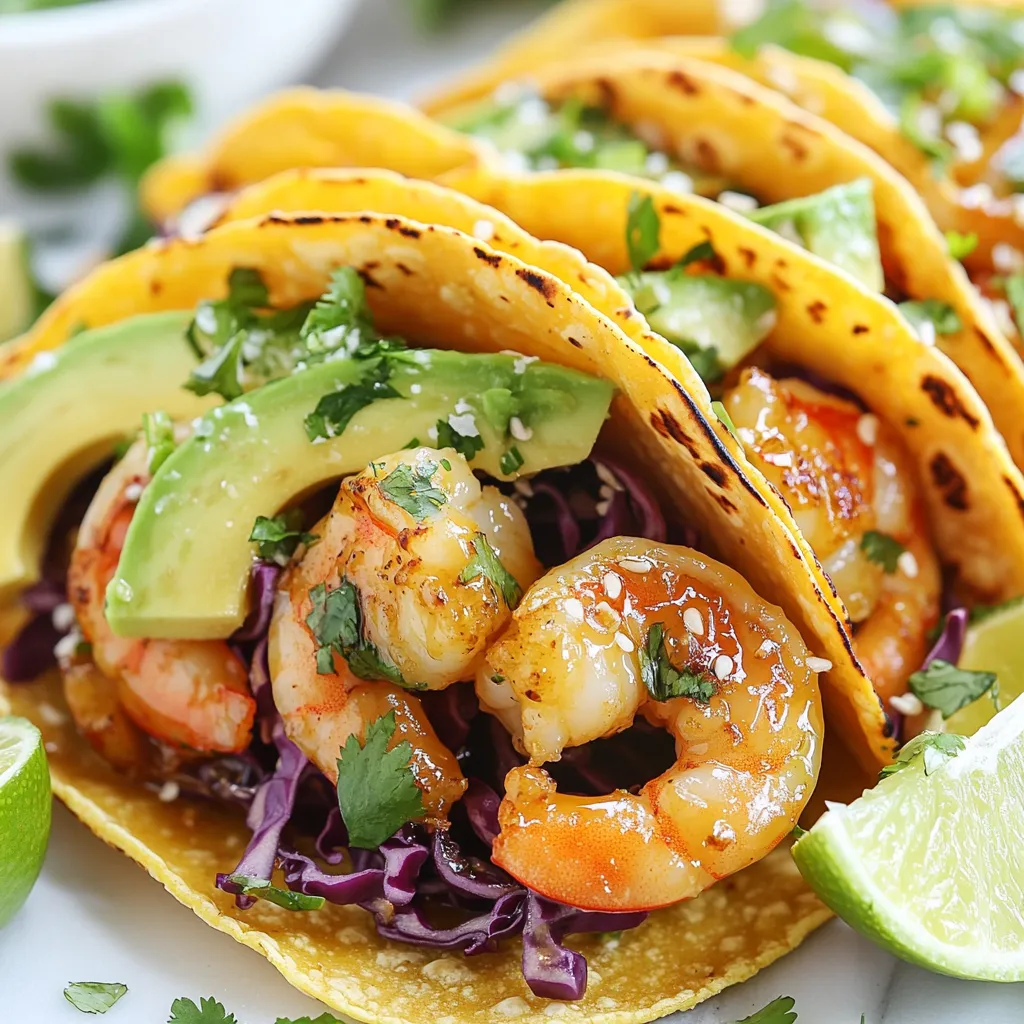
Are you ready to spice up your dinner routine? Honey Garlic Shrimp Tacos are not only flavorful but also super easy to make. With just a few fresh ingredients and simple steps, you can create a tasty meal that everyone will love. Join me as we explore this delicious recipe, packed with tips and tricks to make your tacos perfect every time. Let’s dive into this mouthwatering dish!
Why I Love This Recipe
- Simple to Prepare: This recipe comes together quickly, making it perfect for a weeknight dinner.
- Flavorful Marinade: The combination of honey, garlic, and ginger creates a deliciously balanced flavor.
- Fresh Ingredients: Loaded with fresh cabbage and avocado, these tacos are as nutritious as they are tasty.
- Customizable: Feel free to add your favorite toppings or adjust the spice level to your liking!
Ingredients
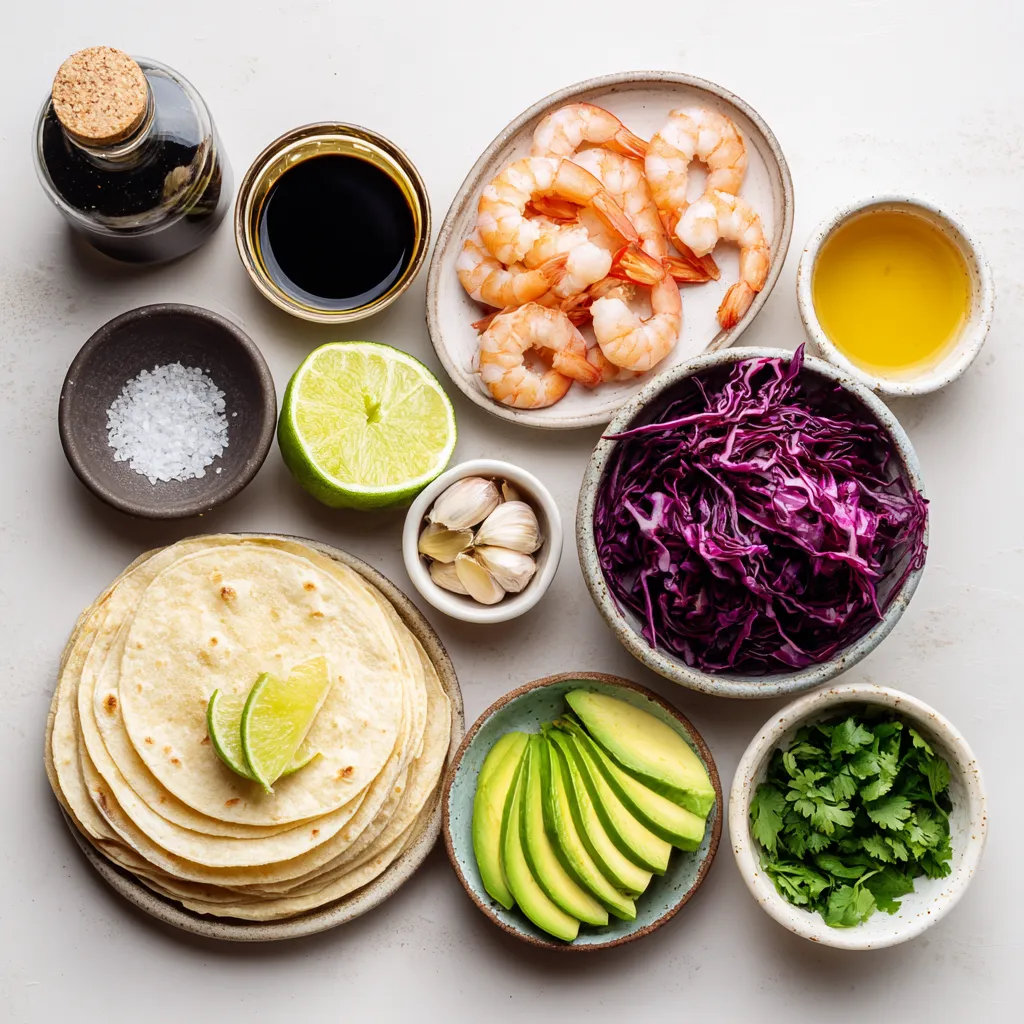
Main Ingredients for Honey Garlic Shrimp Tacos
To make these tacos, gather the following main ingredients:
- 1 lb shrimp, peeled and deveined
- 1/4 cup honey
- 2 tablespoons soy sauce
- 3 cloves garlic, minced
- 1 tablespoon fresh ginger, grated
- 1 tablespoon lime juice
- 1 tablespoon olive oil
- 8 small corn tortillas
- 1 cup red cabbage, thinly sliced
- 1 avocado, sliced
- 1/4 cup fresh cilantro, chopped
- Lime wedges for serving
- Salt and pepper to taste
These ingredients come together to create a sweet and savory flavor. The shrimp soak up the honey and soy sauce, making each bite delicious.
Optional Toppings and Garnishes
You can enhance your tacos with these tasty toppings:
- Sliced jalapeños for heat
- Sour cream for creaminess
- Crumbled queso for a cheesy touch
- Fresh lime juice for extra zing
Each topping adds a unique twist to the dish. Feel free to mix and match based on your taste.
Necessary Kitchen Tools
To prepare these tacos, you will need the following tools:
- Medium bowl for mixing the marinade
- Large skillet for cooking shrimp
- Whisk for blending ingredients
- Tongs for flipping shrimp
- Cutting board and knife for slicing
- Serving platter for tacos
Having these tools ready will make the cooking process smooth and easy. Enjoy your time in the kitchen!
Step-by-Step Instructions
Preparing the Marinade
To start, grab a medium bowl. In this bowl, whisk together the following:
- 1/4 cup honey
- 2 tablespoons soy sauce
- 3 cloves garlic, minced
- 1 tablespoon fresh ginger, grated
- 1 tablespoon lime juice
- 1 tablespoon olive oil
- A pinch of salt and pepper
Mix these ingredients well. This marinade brings the sweet and savory flavors to the shrimp.
Marinating the Shrimp
Next, add 1 pound of peeled and deveined shrimp to the marinade. Toss the shrimp gently to coat them well. Let the shrimp sit in the marinade for about 15 to 20 minutes. This step is key. It allows the shrimp to soak in all those tasty flavors.
Cooking the Shrimp and Warming Tortillas
Now, heat a large skillet over medium heat. Once hot, add the marinated shrimp. Cook the shrimp for 2 to 3 minutes on each side. They should turn pink and opaque. This shows they are cooked perfectly. While the shrimp cooks, warm 8 small corn tortillas in another skillet. You can also warm them over a stovetop flame for a few seconds on each side until soft and pliable.
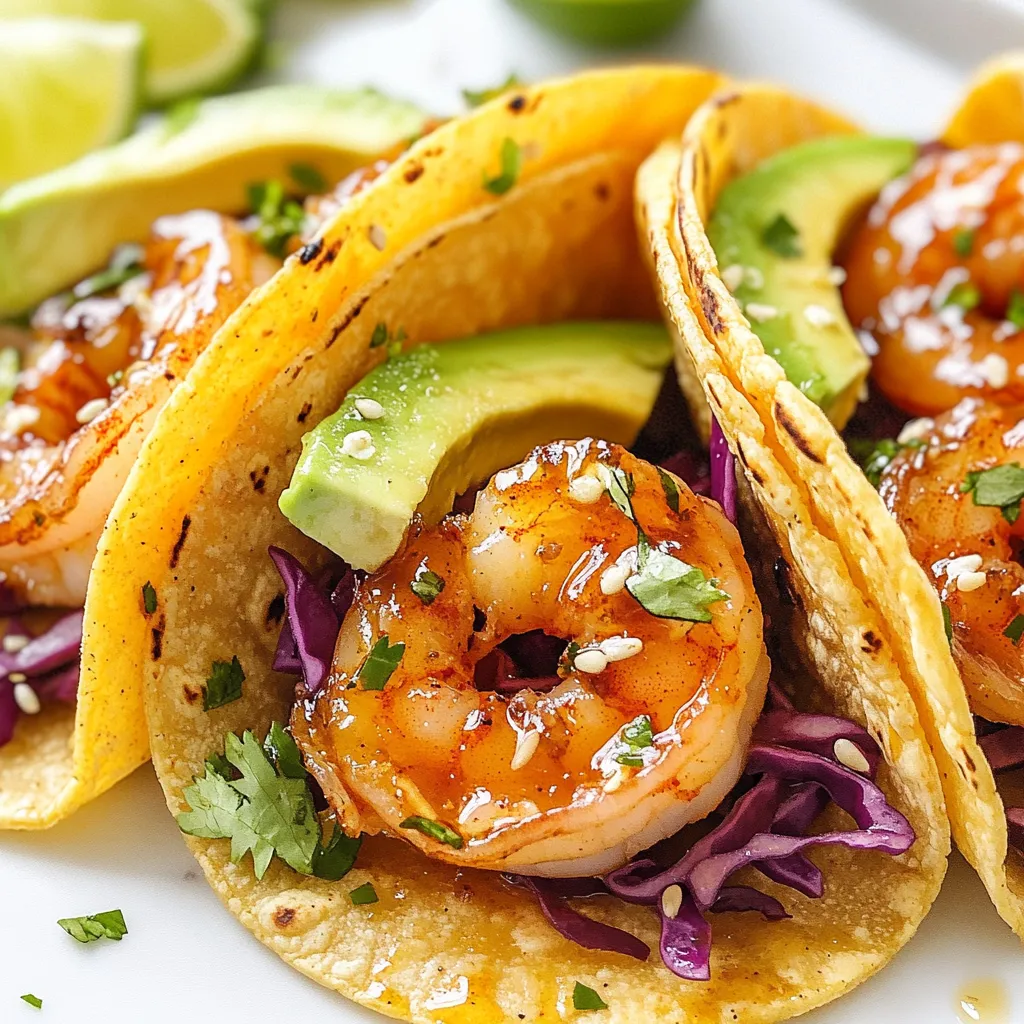
Assembling the Tacos
Time to build your tacos! Place a few shrimp on each warmed tortilla. Top them with sliced avocado, shredded red cabbage, and a sprinkle of fresh cilantro. For an extra kick, serve with lime wedges on the side. Squeeze some lime juice over the tacos before eating for a burst of freshness. Enjoy every bite!
Tips & Tricks
Perfecting the Shrimp Cooking Process
To get the best shrimp, use fresh shrimp. Good shrimp cooks fast. I cook them for only 2-3 minutes on each side. They turn pink and opaque when done. Overcooked shrimp become rubbery. Watch them closely as they cook. If you buy frozen shrimp, remember to thaw them before cooking. Thaw them in the fridge overnight or under cold water for 30 minutes.
Ensuring Tortilla Freshness
Fresh tortillas make a big difference. For the best taste, warm corn tortillas before using. Heat them in a skillet over medium heat. Cook each side for 10-15 seconds. You can also warm them directly over the stove flame. Just make sure to flip them quickly. Soft, warm tortillas hold the shrimp and toppings well.
Flavor Enhancements and Substitutions
You can change the flavors in many ways. Try adding chili powder or cayenne for heat. For a bit of crunch, include diced peppers or radishes. If you love citrus, add more lime juice or zest. Want a creamier touch? Use sour cream or Greek yogurt on top. You can also swap shrimp for chicken or tofu. These changes keep the dish exciting.
Pro Tips
- Marinate for Maximum Flavor: Allow the shrimp to marinate for at least 20 minutes, but not more than 30 minutes, to ensure they absorb the sweet and savory flavors without becoming mushy.
- Perfect Tortilla Heating: Heat the tortillas just until pliable to prevent them from cracking. Use a skillet or tongs over an open flame for a smoky flavor.
- Fresh Ingredients Matter: Use fresh cilantro and lime for garnish, as they brighten the dish and enhance the flavors, making your tacos even more delicious.
- Customize Your Toppings: Feel free to add other toppings like diced tomatoes, jalapeños, or sour cream to cater to your taste preferences and add variety.
Variations
Alternative Proteins for Tacos
You can swap shrimp for other proteins. Chicken works great with the same marinade. Just make sure to cook it well. Fish like tilapia or salmon also adds nice flavor. For a fun twist, try using pork. It absorbs the honey garlic taste well.
Vegetarian Options
If you prefer a meat-free meal, consider tofu or tempeh. Both soak up flavors nicely. You can marinate them just like the shrimp. Another option is black beans. They are filling and nutritious. Top with avocado and cabbage for a tasty taco.
Different Flavor Profiles to Try
You can change the marinade for new tastes. Add sriracha for heat or lime zest for brightness. Consider using coconut aminos instead of soy sauce for a sweeter note. You could even try adding spices like cumin or smoked paprika. These will give your tacos a unique twist.
Storage Info
How to Store Leftover Tacos
To store leftover tacos, first, remove the shrimp and toppings from the tortillas. This keeps the tortillas from getting soggy. Place the shrimp and toppings in separate airtight containers. You can keep them in the fridge for up to two days. Always label the containers with the date. This way, you won’t forget about them.
Reheating Instructions
When you’re ready to enjoy the leftovers, reheat the shrimp in a skillet. Heat it over medium heat for about 2-3 minutes. Stir often so it warms evenly. You can also reheat the tortillas. Place them in a skillet on low heat for about 30 seconds on each side. This brings back their soft texture.
Freezing Tips for Ingredients
If you have extra shrimp or toppings, you can freeze them. Place the shrimp in a freezer bag. Squeeze out the air before sealing. This keeps them fresh for up to three months. For toppings like cabbage or cilantro, chop and freeze them in small bags. When you are ready to use them, just thaw in the fridge overnight. Use them quickly for the best taste.
FAQs
How can I make these honey garlic shrimp tacos spicier?
To add heat to your tacos, try adding diced jalapeños or a splash of hot sauce. You can also mix in red pepper flakes with the marinade. Another great option is to use spicy garlic sauce instead of regular soy sauce. This will give your shrimp a nice kick while keeping the sweet flavor from the honey.
Can I use frozen shrimp for this recipe?
Yes, you can use frozen shrimp! Just make sure to thaw them before cooking. Place the shrimp in cold water for about 15 minutes to defrost them. After thawing, pat them dry with a towel. This will help the shrimp absorb more of the marinade and cook evenly.
What sides pair well with honey garlic shrimp tacos?
Several sides go well with these tacos. You can serve them with a fresh salad or a side of rice. Black beans or corn salsa will also add flavor and color to your meal. For extra crunch, try serving tortilla chips with guacamole or salsa.
How to ensure shrimp is perfectly cooked?
Cook shrimp until they turn pink and opaque. This usually takes about 2-3 minutes on each side. Be careful not to overcook them, as they may become tough. To check for doneness, cut one shrimp in half. If it is fully opaque inside, it’s ready to serve!
You learned how to make tasty honey garlic shrimp tacos. We covered key ingredients, from shrimp to toppings. I shared step-by-step instructions for cooking and assembling. Tips helped you improve flavor and freshness.
Try different proteins or vegetarian options for fun twists. Proper storage ensures you enjoy leftovers later. Remember, cooking shrimp just right makes the dish shine. Enjoy your taco nigh

Honey Garlic Shrimp Tacos
Ingredients
- 1 lb shrimp, peeled and deveined
- 1 cup honey
- 2 tablespoons soy sauce
- 3 cloves garlic, minced
- 1 tablespoon fresh ginger, grated
- 1 tablespoon lime juice
- 1 tablespoon olive oil
- 8 small corn tortillas
- 1 cup red cabbage, thinly sliced
- 1 whole avocado, sliced
- 1 4 fresh cilantro, chopped
- 1 whole lime wedges for serving
- to taste salt and pepper
Instructions
- In a medium bowl, whisk together honey, soy sauce, minced garlic, ginger, lime juice, olive oil, salt, and pepper to create the marinade.
- Add the shrimp to the marinade and toss to coat. Let it marinate for about 15-20 minutes.
- In a large skillet over medium heat, add the marinated shrimp and cook for 2-3 minutes on each side, or until they turn pink and opaque. Remove from heat.
- While the shrimp is cooking, warm the corn tortillas on another skillet or directly over the stovetop flame for a few seconds on each side until pliable.
- To assemble the tacos, place a few shrimp on each tortilla. Top with sliced avocado, shredded red cabbage, and a sprinkle of fresh cilantro.
- Serve immediately with lime wedges on the side for squeezing over the tacos.
. Marinating chicken is key to great taste. It allows the flavors to blend well. I suggest marinating for at least 15 minutes. For deeper flavor, let it sit for 2 hours in the fridge. Fresh ingredients also make a big difference. Choose bright, crisp asparagus and quality truffle honey. This will elevate the dish. To make sure your chicken is cooked through, check its internal temperature. Aim for 165°F (75°C) to ensure safety. For the asparagus, cook it until tender but still crisp. This keeps the bright color and fresh taste. Do not overload the baking sheet. Give each piece enough space to roast evenly. Garnishing can make your dish stand out. A sprinkle of fresh parsley adds color and freshness. You can also drizzle some pan juices over the chicken. This enhances flavor and looks beautiful. Serve the chicken and asparagus on a large platter. This makes for an inviting presentation. For more ideas, check the full recipe and explore your creativity! {{image_4}} You can easily swap proteins in this dish. Try using shrimp or tofu for a fun twist. Each option brings a new texture and flavor. For veggies, consider seasonal choices like broccoli or bell peppers. They add color and nutrients to your plate. You can mix and match to keep things fresh and exciting. Want to change the taste? Consider adding herbs like thyme or rosemary. They enhance the dish with earthy notes. You can also adjust the sweetness. Add more truffle honey for a sweeter flavor or use less for a more savory bite. A splash of balsamic vinegar can add a nice acidity, balancing the sweetness. Not in the mood for baking? Try grilling the chicken for a smoky flavor. Just preheat your grill and cook until the chicken is done. You can also use an Instant Pot for quick cooking. Simply add the chicken and marinade, set it to high pressure, and cook for about 10 minutes. This method is fast and keeps the chicken juicy. Explore these variations to make Truffle Honey Chicken with Asparagus your own. For the full recipe, check out the details earlier in the article. To keep your Truffle Honey Chicken with Asparagus fresh, use these steps: - Refrigeration: Store leftovers in an airtight container. This keeps the chicken and asparagus moist. Place it in the fridge within two hours of cooking. - Freezing: If you want to freeze it, wrap the chicken and asparagus tightly in plastic wrap. Then, place them in a freezer-safe bag. This way, you can enjoy them later. To enjoy your meal again, follow these reheating tips: - Best methods: Use an oven or microwave to reheat. For the oven, preheat to 350°F (175°C) and heat for about 10-15 minutes. In the microwave, use medium power and heat in short bursts. - Ensuring quality: Make sure the chicken reaches 165°F (75°C) when reheating. This keeps it safe and tasty. Wondering how long your dish lasts? Here’s what you need to know: - How long will it last in the fridge?: It can stay fresh in the fridge for up to 3 days. - Signs of spoilage: Check for changes in color, smell, or texture. If anything seems off, don’t eat it. Always trust your senses! For the full recipe, check out the [Full Recipe] section above. You can enjoy this dish with several tasty sides. Here are some great options: - Rice: A fluffy white or brown rice pairs well with the chicken. - Potatoes: Mashed or roasted potatoes add heartiness. - Salad: A fresh green salad brings a nice crunch. - Bread: Crusty bread is perfect for soaking up the juices. These sides will balance the dish and enhance your meal. If you find the dish too sweet, you can adjust a few ingredients. Here’s how: - Use Less Truffle Honey: Cut the honey to one tablespoon. - Add More Lemon Juice: This will brighten the dish and balance sweetness. - Increase Dijon Mustard: A little extra mustard will add tanginess. Feel free to taste as you go. This way, you can find the perfect balance for your palate. Yes, you can prep this dish in advance. Here’s how to do it: - Marinate the Chicken: You can marinate it up to two hours ahead. - Prepare Asparagus: You can trim and season asparagus ahead of time. - Store in Fridge: Cover and keep the chicken and asparagus in the fridge. When you are ready to cook, just follow the baking steps. It makes dinner easier! Truffle honey gives a unique flavor, but you can substitute it. Here are some ideas: - Regular Honey: Use regular honey for sweetness without the truffle flavor. - Maple Syrup: This adds a different but pleasant sweetness. - Balsamic Glaze: It gives a sweet and tangy profile. Each substitute will change the dish, but it can still be delicious. In this blog post, I shared a delicious recipe for Truffle Honey Chicken with Asparagus. We covered the key ingredients, step-by-step instructions, and useful tips to enhance flavor. I provided options for ingredient swaps and variations for a personal touch. Lastly, I discussed storage and reheating tips to keep your meal fresh. This dish offers great taste and flexibility. Now, you can enjoy this meal any night of the week!](https://dailydishlab.com/wp-content/uploads/2025/06/fb120668-62a7-469e-8438-ab137e53e136-768x768.webp)
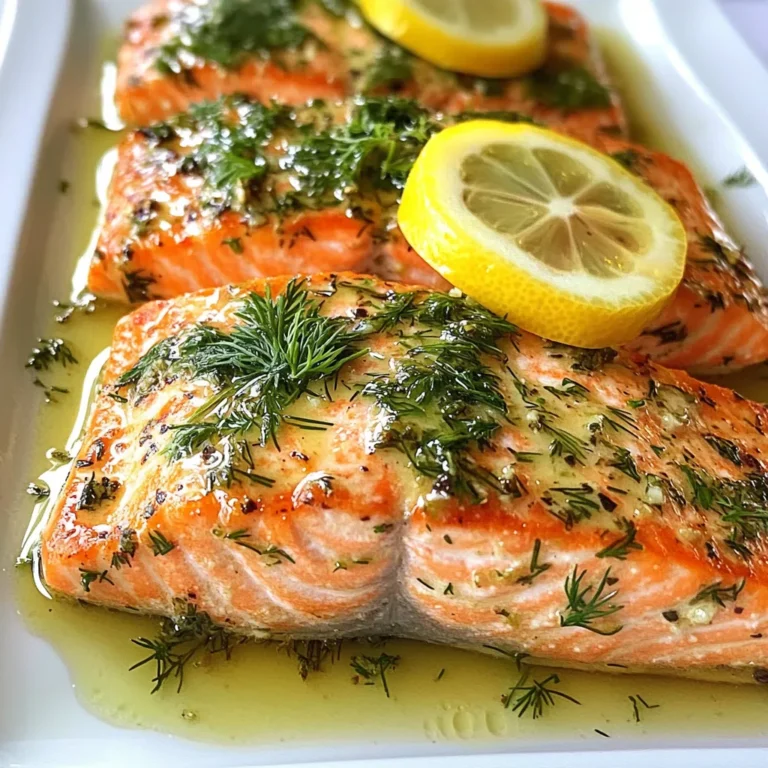
![To make Lemon Dill Grilled Salmon, you need a few simple yet fresh ingredients. Here’s the list: - Fresh Salmon Fillets - Fresh Dill - Lemon - Garlic - Olive Oil - Honey - Seasoning: Salt and Pepper - Lemon Slices for Garnish Each ingredient plays a key role in creating the bright and delicious taste of this dish. Fresh salmon fillets give you a rich flavor and perfect texture. The fresh dill adds a fragrant herb note that pairs well with the fish. Lemon provides the zesty brightness that cuts through the richness of the salmon. Garlic gives depth, while olive oil adds a smooth finish. Honey balances the flavors with just a hint of sweetness. Finally, salt and pepper enhance everything, and lemon slices make for a lovely garnish. You can find the full recipe with detailed steps to prepare this dish easily. Enjoy the process of cooking and savor the delightful taste! - In a mixing bowl, combine the chopped dill, lemon zest, lemon juice, minced garlic, olive oil, honey, salt, and pepper. - Whisk the ingredients together until well blended to create a marinade. This step is key. The mix of flavors will soak into the salmon. - Place the salmon fillets in a resealable plastic bag or shallow dish. Pour the marinade over the top. - Seal the bag or cover the dish. This ensures the salmon gets coated well. Marinate in the refrigerator for 30 minutes to 1 hour for maximum flavor. The longer you marinate, the more taste you get. - Preheat your grill to medium-high heat. This helps cook the salmon evenly. - Remove the salmon from the marinade and let any excess drip off. Discard the marinade for safety. - Grease the grill grates with a little olive oil. This helps prevent sticking. - Place the salmon fillets skin-side down on the grill. Grill for 4-6 minutes without moving them. This allows the skin to become crispy. - Carefully flip the salmon fillets using a wide spatula. Grill for an additional 4-6 minutes. The fish should be opaque and flake easily with a fork. Adjust the time based on the thickness of your fillets. - Remove the salmon from the grill and let it rest for a couple of minutes. Resting helps keep it juicy. - Serve the grilled salmon garnished with fresh lemon slices and a sprinkle of additional dill if desired. Enjoy the fresh taste! For the complete recipe, check out the Full Recipe link. To enhance flavor with the marinade, use fresh ingredients. Fresh dill, garlic, and lemon add zest to the salmon. Combine these ingredients in a bowl and whisk until well mixed. This step makes every bite burst with flavor. Marinating is key, too. Let the salmon sit in the marinade for at least 30 minutes. This time allows the flavors to soak in deeply. For best results, aim for one hour. To prevent sticking on the grill, grease the grates with olive oil. This simple tip helps the salmon slide off easily. Place the salmon skin-side down on the grill first. Grill for 4-6 minutes without moving it. This helps the skin get crispy. To check for doneness, look for opaque flesh that flakes easily. If your salmon is thick, it may need a bit more time. Always use a wide spatula when flipping. This supports the fillet and keeps it intact. For a complete meal, pair your salmon with fresh vegetables or a light salad. Steamed asparagus or roasted broccoli complement the dish well. You can also serve it with rice or quinoa for a filling side. Don’t forget to garnish with lemon slices. They add a bright touch and extra flavor. Enjoy your delicious meal! For the full recipe, check out the detailed steps above. {{image_2}} Alternative Herbs and Spices You can switch up the herbs in this dish. Try fresh parsley or basil instead of dill. These herbs add unique tastes and aromas. Adding a pinch of red pepper flakes gives a bit of heat. This twist can make your salmon extra special. Different Citrus Options Lemon is great, but don’t stop there. Use lime or orange juice for a different kick. Each citrus option brings its own flavor. You can mix citrus juices for a fun blend. This variation makes the dish exciting and fresh. Oven-Baked Lemon Dill Salmon Baking salmon is simple and tasty. Preheat your oven to 375°F. Place the marinated salmon on a baking sheet. Bake for 15 to 20 minutes. Check for flakiness to know when it's done. This method keeps the salmon moist and flavorful. Pan-Seared Lemon Dill Salmon Pan-searing gives a crispy outer layer. Heat oil in a pan over medium heat. Add the salmon skin-side down and cook for 4-5 minutes. Flip and cook for another 4-5 minutes. This method enhances the flavor and adds a nice texture. Low-Carb and Keto Options This recipe is already low in carbs. You can keep it keto-friendly by using healthy fats. Olive oil works great here. You can also serve it with low-carb veggies like zucchini or asparagus. Gluten-Free Modifications This dish is naturally gluten-free. Just make sure all your ingredients are gluten-free. Check the labels on the olive oil and honey. This way, you can enjoy this dish without any worries. For the full recipe, check the earlier section and get started on this delicious meal! After grilling your lemon dill salmon, you may have some leftovers. To keep your salmon fresh, follow these best practices for refrigeration: - Cool it down first. Let the salmon reach room temperature before storing. - Use an airtight container. This helps prevent odors and keeps the salmon moist. - Refrigerate within two hours. This keeps bacteria from growing. If you want to enjoy your salmon later, freezing is a great option. Here's how to freeze salmon safely: - Wrap each fillet tightly. Use plastic wrap or aluminum foil to prevent freezer burn. - Place in a freezer bag. Squeeze out as much air as possible before sealing. - Label and date it. This helps you keep track of how long it’s been in the freezer. When it's time to enjoy your leftover salmon, reheating correctly is key to keeping the flavor and texture. Here are some recommended methods: - Oven method: Preheat your oven to 275°F (135°C). Place the salmon on a baking sheet and cover it with foil. Heat for about 15 minutes. - Stovetop method: Heat a non-stick skillet over medium-low heat. Add a splash of water or broth. Place the salmon in the skillet, cover, and heat for 5-7 minutes. To maintain the flavor and texture, avoid using a microwave. Microwaving can dry out the salmon and make it tough. Enjoy your delicious lemon dill grilled salmon again with these easy tips. And don't forget to check out the Full Recipe for more details! Marinating salmon for 30 minutes to 1 hour works best. This time allows the flavors to soak in without overpowering the fish. If you marinate for too long, the texture may change. Always keep it in the fridge while marinating to keep it fresh. Yes, you can use dried dill instead of fresh. Use about one-third of the amount since dried herbs are stronger. Fresh dill gives a brighter flavor, but dried dill still works well in a pinch. Grill your salmon at medium-high heat, around 375°F to 400°F. This heat helps create a nice sear while keeping the inside tender. If your grill runs hotter, reduce the heat slightly. - What if my salmon fillets are thick or thin? For thick fillets, increase the grilling time by a few minutes. For thin fillets, decrease the time. Always check for doneness by seeing if the fish flakes easily with a fork. Salmon is rich in omega-3 fatty acids, which are good for your heart. It also has high-quality protein that helps build muscle. Salmon is packed with vitamins like B12, D, and selenium. Eating salmon can boost brain health and improve mood. For the full recipe, please refer to [Full Recipe]. This blog post gives you the keys to grill perfect salmon. We covered essential ingredients, marinating tips, and grilling techniques. With the right marinade and careful cooking, you'll impress at every meal. Plus, explore tasty variations to keep it fresh and exciting. Store leftovers smartly and reheat without losing flavor. By following these steps, you can enjoy delicious salmon that is healthy and easy to make. Embrace these tips to make every salmon dish a hit!](https://dailydishlab.com/wp-content/uploads/2025/06/c925202d-eb72-4cda-aa67-938206b6f665-768x768.webp)