Honey Mustard Chicken Thighs Flavorful and Easy Dish

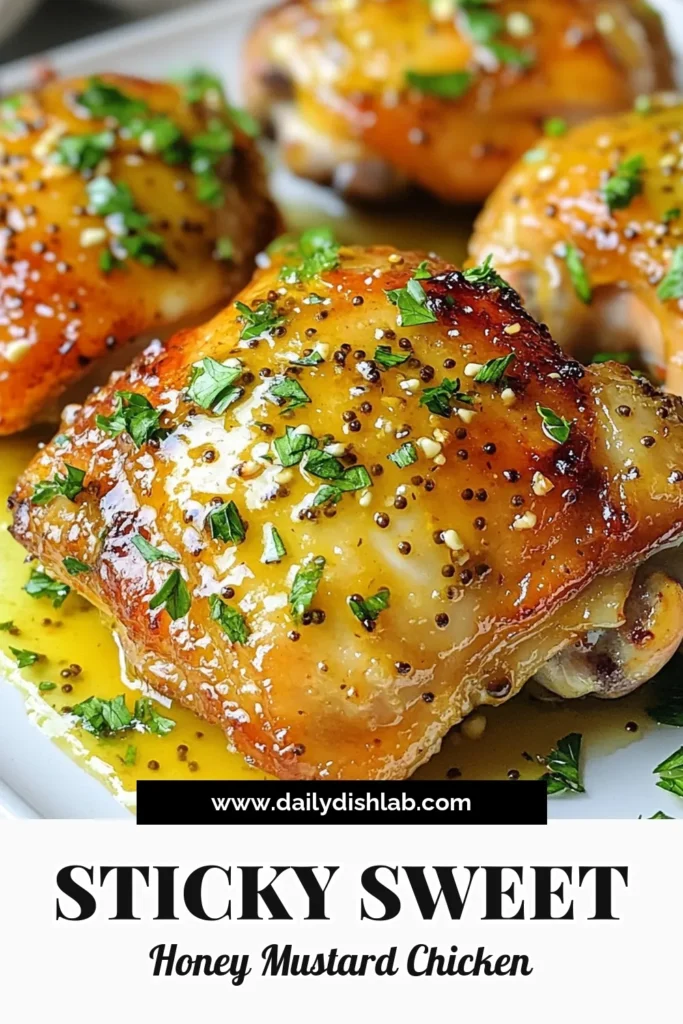
If you’re looking for a quick dinner that’s packed with flavor, you’ve found it! Honey Mustard Chicken Thighs are both easy to make and delicious. The sweet and tangy glaze will have your taste buds dancing in delight. With just a handful of ingredients and simple steps, you’ll have a meal everyone will love. Let’s dive into this tasty dish and get cooking!
Why I Love This Recipe
- Delicious Flavor Combination: The blend of honey and whole grain mustard creates a perfect balance of sweetness and tanginess that elevates the chicken.
- Simple Preparation: With minimal prep time and easy-to-follow steps, this recipe is perfect for busy weeknights.
- Versatile Dish: These honey mustard chicken thighs pair well with a variety of sides, making them suitable for any meal.
- Impressive Presentation: The golden-brown skin and fresh parsley garnish make this dish visually appealing for family dinners or gatherings.
Ingredients
Main Ingredients
- 4 bone-in, skin-on chicken thighs
- 1/4 cup whole grain mustard
- 1/4 cup honey
Additional Ingredients
- 2 tablespoons olive oil
- 3 cloves garlic, minced
- 1 teaspoon dried thyme
- 1 teaspoon paprika
Seasoning
- Salt and pepper to taste
- Fresh parsley for garnish
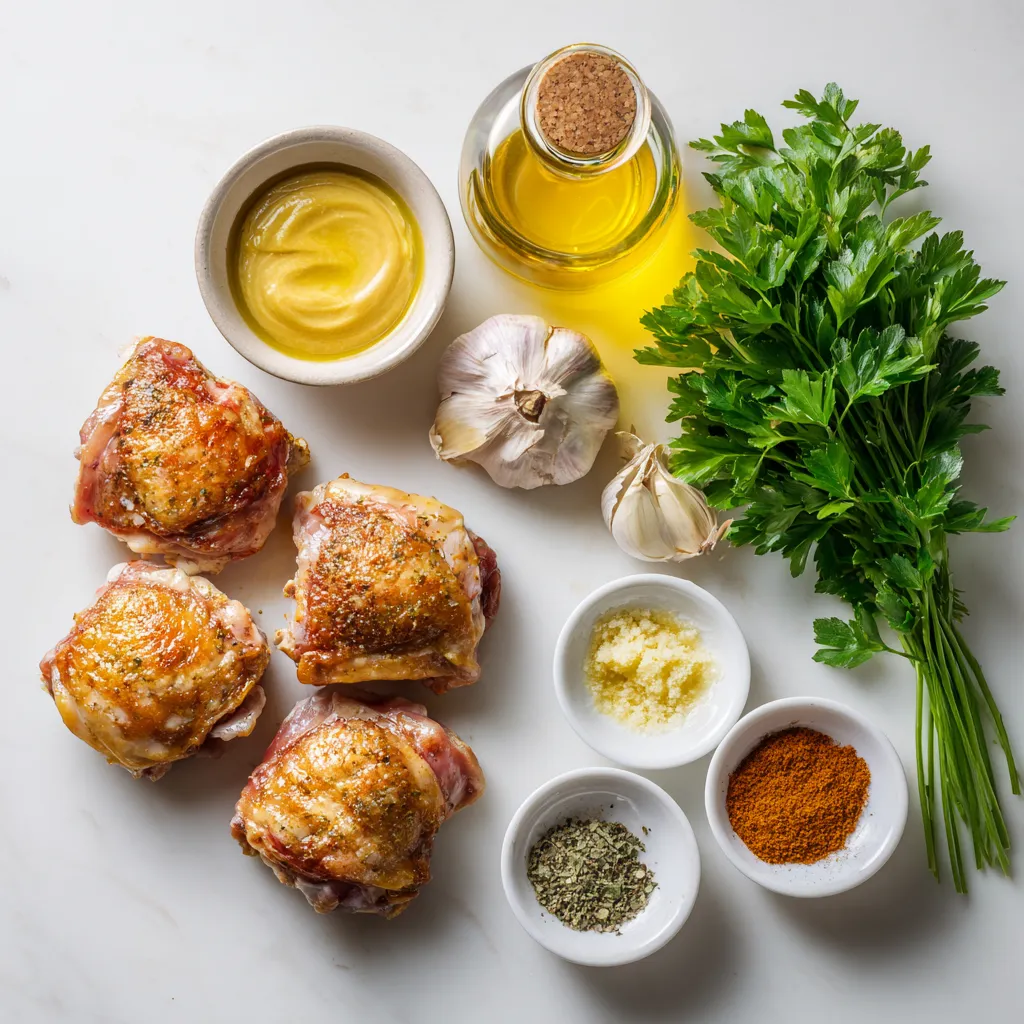
For this honey mustard chicken thighs recipe, I love using bone-in, skin-on chicken thighs. They stay juicy and have great flavor. Whole grain mustard gives a nice texture and bite to the sauce. Honey adds sweetness and balances the tanginess of the mustard.
You only need a few more items. Olive oil helps the chicken brown nicely. Minced garlic adds depth to the flavor. Dried thyme gives an earthy note, while paprika adds a warm color and mild spice.
Don’t forget salt and pepper! They enhance all the flavors in the dish. Fresh parsley makes for a beautiful garnish. It adds a bright touch and fresh flavor when you serve the chicken.
Gather these simple ingredients, and you’ll have everything you need for this delightful dish. Each ingredient plays an important role, making the chicken tasty and easy to prepare. Enjoy the cooking process as much as the delicious meal you will create!
Step-by-Step Instructions
Preparation Steps
1. Preheat your oven to 400°F (200°C). This heats the oven for even cooking.
2. Pat the chicken thighs dry with paper towels. This helps the skin get crispy.
3. Season both sides of the chicken thighs with salt and pepper. This adds flavor.
Sauce Preparation
1. In a mixing bowl, combine the whole grain mustard and honey.
2. Add olive oil, minced garlic, dried thyme, paprika, and a pinch of salt and pepper.
3. Stir until the mixture is well mixed. This creates a tasty honey mustard sauce.
Cooking Steps
1. Place the chicken thighs in a baking dish or a zip-top bag.
2. Pour the honey mustard mixture over the chicken. Make sure each thigh is well coated.
3. If you can, marinate in the fridge for 30 minutes to an hour. This makes the chicken extra tasty.
4. Put the marinated chicken thighs in the preheated oven. Bake for 35-40 minutes.
5. Check that the skin is golden brown and the internal temperature reaches 165°F (75°C).
6. Baste the chicken with the sauce halfway through cooking for extra flavor.
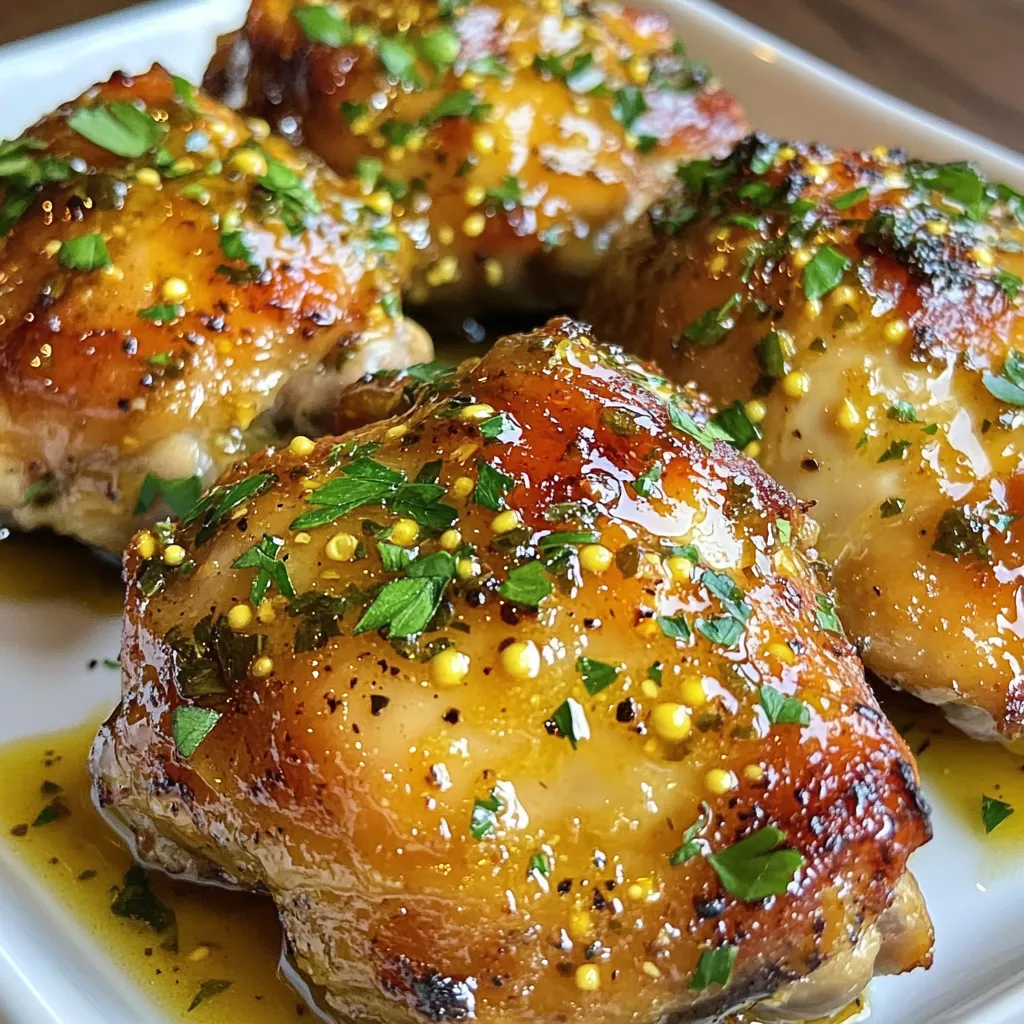
7. Once cooked, take the chicken out of the oven. Let it rest for 5-10 minutes before serving.
8. Garnish with fresh parsley and drizzle any remaining sauce on top for added taste.
Tips & Tricks
Ensuring Flavor
Marinating chicken makes a big difference. It helps the meat soak up all the great flavors. I recommend marinating for at least 30 minutes. If you have more time, one hour is even better! This way, the honey mustard mix really gets into the chicken. Basting is also key. Halfway through cooking, brush some sauce on the chicken. This keeps it moist and adds more flavor.
Cooking Tips
For the best results, use a glass or ceramic baking dish. These types of dishes heat evenly and help the chicken cook well. To check if the chicken is done, use a meat thermometer. The chicken should reach 165°F (75°C) in the thickest part. If you don’t have a thermometer, cut into the chicken. The juices should run clear, not pink.
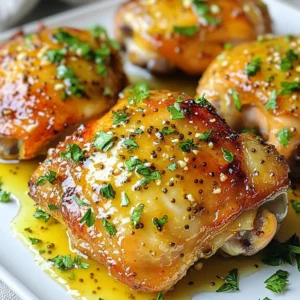
Presentation Tips
Garnishes make your dish pop! Fresh parsley adds a nice color and a fresh taste. You can also drizzle any leftover sauce from the dish over the chicken before serving. For serving ideas, pair the chicken with roasted veggies or a simple salad. This makes for a lovely and colorful plate that looks and tastes great!
Pro Tips
- Marinating Time: For the best flavor, marinate the chicken thighs for at least 30 minutes, or up to overnight. This allows the flavors to penetrate the meat deeply.
- Skin Crispy: To achieve a crispy skin, make sure the chicken thighs are patted dry before seasoning and baking. Excess moisture can prevent crisping.
- Check Temperature: Use a meat thermometer to ensure the chicken has reached an internal temperature of 165°F (75°C) for safe consumption.
- Leftover Use: If you have any leftover honey mustard chicken, shred the meat and use it in salads, sandwiches, or tacos for a quick meal.
Variations
Flavor Variations
You can change the flavor of the honey mustard chicken thighs easily. Try adding some heat! Mix in a few dashes of hot sauce or cayenne pepper for a sweet and spicy honey mustard. This adds a kick that many enjoy. You can also add fresh herbs like rosemary or thyme. Fresh herbs give a bright taste that pairs well with the honey and mustard.
Cooking Method Variations
Cooking methods can change the texture and flavor of this dish. Grilling the chicken thighs gives a smoky flavor and crispy skin. Just marinate the chicken as usual, then grill over medium heat until cooked through. If you prefer baking, follow the recipe for juicy, tender chicken.
For those who love slow cooking, this dish works well in a slow cooker. Place the chicken and the sauce in the cooker. Set it on low for 6-8 hours or high for 3-4 hours. You will get fall-off-the-bone chicken!
Dietary Adjustments
If you need gluten-free options, choose gluten-free mustard. Most honey is safe, but check the label just in case. For a low-sugar alternative, use sugar-free honey or maple syrup instead of regular honey. This gives you a sweet taste without the sugar.
These simple changes let you enjoy honey mustard chicken thighs while meeting your dietary needs.
Storage Info
Storing Leftovers
To keep your honey mustard chicken thighs fresh, follow these steps:
- Refrigeration: Place the leftover chicken in an airtight container. This helps prevent moisture loss and keeps it tasty.
- Freezing: If you want to store it longer, wrap the chicken tightly in plastic wrap or aluminum foil. Then, place it in a freezer-safe bag. This keeps it safe for up to three months.
Reheating Methods
When it’s time to enjoy your leftovers, you have a couple of options:
- Oven Reheating: Preheat your oven to 350°F (175°C). Place the chicken in a baking dish and cover it with foil. Heat for about 15-20 minutes. This method keeps the chicken juicy.
- Microwave Reheating: If you’re short on time, use the microwave. Place the chicken on a microwave-safe plate and cover it with a damp paper towel. Heat in 1-minute intervals until warm. This method is fast but can dry the chicken out if overcooked.
Shelf Life
How long will your honey mustard chicken last?
- Refrigerated: It stays good in the fridge for up to 3-4 days.
- Frozen: If frozen, it can last for about three months. After that, the flavor may fade. Always check for signs of spoilage before eating.
FAQs
What can I serve with honey mustard chicken thighs?
You can pair honey mustard chicken thighs with many sides. Here are some great options:
- Steamed broccoli
- Roasted potatoes
- Rice pilaf
- Mixed green salad
- Garlic bread
These sides add color and flavor to your meal. They also complement the sweet and tangy taste of the chicken.
Can I use boneless chicken thighs instead?
Yes, you can use boneless chicken thighs. They cook faster than bone-in thighs. Adjust the baking time to about 25-30 minutes. Always check the temperature to make sure they reach 165°F.
How do I know when the chicken is properly cooked?
To check if your chicken is cooked, use a meat thermometer. Insert it into the thickest part of the thigh. The chicken is safe to eat at 165°F. If you don’t have a thermometer, cut into the chicken. The juices should run clear, not pink.
- Is it safe to eat chicken at 165°F?
Yes, it is safe. Cooking chicken to this temperature kills harmful bacteria. Always ensure your chicken reaches this temperature for safe eating.
This blog post covered how to make tasty honey mustard chicken thighs. We started with the key ingredients: chicken, mustard, and honey. I shared step-by-step cooking and preparation tips to boost flavor. Next, we explored fun variations and smart storage advice.
In conclusion, you now have the tools to make chicken that’s both easy and delicious. Enjoy cooking and experimenting with flavors. Your meals can be simple yet full of tast
Honey Mustard Chicken Thighs
Ingredients
- 4 pieces bone-in, skin-on chicken thighs
- 0.25 cup whole grain mustard
- 0.25 cup honey
- 2 tablespoons olive oil
- 3 cloves garlic, minced
- 1 teaspoon dried thyme
- 1 teaspoon paprika
- to taste salt and pepper
- for garnish fresh parsley
Instructions
- Prep Chicken: Preheat your oven to 400°F (200°C). Pat the chicken thighs dry with paper towels, then season both sides with salt and pepper.
- Make Sauce: In a mixing bowl, combine whole grain mustard, honey, olive oil, minced garlic, dried thyme, paprika, and a pinch of salt and pepper. Stir until well mixed.
- Marinate: Place the chicken thighs in a baking dish or a zip-top bag, pour the honey mustard mixture over them, and make sure each thigh is well coated. If you have time, marinate in the fridge for 30 minutes to an hour for added flavor.
- Bake Chicken: Place the marinated chicken thighs in the preheated oven and bake for 35-40 minutes, or until the skin is golden brown and the internal temperature reaches 165°F (75°C). Baste the chicken with the sauce halfway through cooking for extra flavor.
- Rest and Serve: Once cooked, remove from the oven and let the chicken rest for 5-10 minutes before serving. This will ensure the juices are sealed in.
- Garnish: Serve the chicken thighs garnished with fresh parsley. Drizzle any remaining sauce from the baking dish over the top for extra flavor.
![- 1 lb boneless, skinless chicken breasts, sliced into thin strips - 2 tablespoons olive oil - 1 tablespoon lime juice - 1 teaspoon ground cumin - 1 teaspoon chili powder - 1 teaspoon garlic powder - 1 teaspoon onion powder - Salt and pepper to taste - 1 red bell pepper, sliced - 1 green bell pepper, sliced - 1 medium onion, sliced - 4 small flour tortillas For a great chicken fajita, the main ingredients matter. Start with fresh chicken. You want boneless, skinless breasts. Slice them thin for quick cooking. The next star is the bell peppers. I love a mix of red and green. They add color and crunch. Don't forget the onion. It adds sweetness when cooked. Seasonings make the fajitas pop. Ground cumin gives warmth. Chili powder adds a nice kick. Garlic and onion powders boost the flavor. A splash of lime juice brightens everything up. Always use salt and pepper to taste. - Fresh cilantro - Sour cream - Guacamole Garnishes can elevate your meal. Fresh cilantro adds a burst of freshness. Sour cream brings creaminess and coolness. Guacamole adds richness. You can mix and match these sides for a fun twist. - Skillet or cast-iron pan - Mixing bowl - Tongs You don't need fancy tools to make fajitas. A good skillet or cast-iron pan heats evenly. A mixing bowl works well for marinating chicken. Tongs help flip the chicken and veggies easily. With these basics, you're ready for a tasty night! For the full recipe, check out the link provided. Marinating the chicken Start by slicing 1 pound of boneless, skinless chicken breasts into thin strips. In a large bowl, mix the chicken with 2 tablespoons of olive oil, 1 tablespoon of lime juice, 1 teaspoon of ground cumin, 1 teaspoon of chili powder, 1 teaspoon of garlic powder, 1 teaspoon of onion powder, and salt and pepper. Stir until the chicken is well coated. Let it marinate for at least 15 minutes. This step adds flavor and keeps the chicken juicy. Cooking the chicken Preheat a large skillet or cast-iron pan over medium-high heat. Once hot, add the marinated chicken to the skillet. Cook the chicken for about 5 to 7 minutes. Stir it occasionally until the chicken is cooked through and lightly browned. Remove the chicken from the skillet and set it aside on a plate. Preparing bell peppers and onions While the chicken cools, slice 1 red bell pepper, 1 green bell pepper, and 1 medium onion. These veggies will add color and crunch to your fajitas. Cooking the vegetables In the same skillet, add the sliced bell peppers and onion. Sauté them for about 3 to 4 minutes. You want them tender but still crisp. The leftover flavor from the chicken will enhance the veggies. Tossing chicken and vegetables together After the vegetables are cooked, add the chicken back into the skillet. Toss everything together for another 2 minutes to heat it all through. This step mixes the flavors perfectly. Heating the tortillas Warm 4 small flour tortillas in a separate dry skillet or microwave for a few seconds. This makes them soft and easy to fold. Now you are ready to serve your chicken fajitas! Enjoy this simple yet tasty dish with fresh cilantro, sour cream, and guacamole. For the full recipe, check the details above. Marinating the chicken is key for great taste. It allows flavors to soak in well. I recommend marinating for at least 30 minutes. If you have time, longer is better. Use these seasonings for a tasty mix: - 1 teaspoon ground cumin - 1 teaspoon chili powder - 1 teaspoon garlic powder - 1 teaspoon onion powder - Salt and pepper to taste These spices add warmth and depth. They make the chicken truly delicious. To get the best results, heat your skillet to medium-high. A hot skillet helps brown the chicken. Stir the chicken often while cooking. This keeps it from sticking and helps it cook evenly. Cook for 5-7 minutes until the chicken is done. The edges should look golden brown. When cooking the veggies, sauté them for about 3-4 minutes. You want them tender but still crisp. This gives a nice texture to your fajitas. Serving fajitas is fun and easy! Start by placing a warm tortilla on a plate. Add a generous scoop of the chicken and veggie mix in the center. Top it off with fresh cilantro for color and flavor. You can also serve sour cream and guacamole on the side. This adds creaminess and richness to each bite. For a colorful plate, think about adding lime wedges too. They add a bright touch and a zesty kick. Enjoy your meal! {{image_2}} If you want to switch up the protein in your chicken fajitas, you have great options. You can use beef or shrimp for a different taste. Beef fajitas are juicy and rich. Shrimp cooks fast and adds a seafood twist. For those who prefer no meat, try using firm tofu or portobello mushrooms. These vegetarian options soak up spices well and taste great. The spice level is key to making fajitas your own. You can keep them mild, go for medium, or make them hot. To add heat, use jalapeños or serrano peppers. You can also add hot sauce or chili flakes. Start with small amounts and taste as you go. This way, you can find that perfect balance you love. Choosing the right tortilla can change your fajitas. Flour tortillas are soft and chewy, while corn tortillas are more traditional with a nice crunch. If you need gluten-free options, there are great corn tortillas available. You can also find gluten-free flour tortillas. Each choice will give your dish a different feel and flavor. For the full recipe, click [Full Recipe]. To keep your chicken fajitas fresh, store them in the fridge. Use an airtight container. Make sure to cool them first. They stay good for about 3 to 4 days. If you want to keep them longer, freeze your fajitas. Place them in a freezer-safe bag. They can last up to 3 months in the freezer. Reheating your fajitas can be easy. Use a skillet over medium heat for the best results. This method keeps the chicken and veggies nice and warm. You can also use a microwave. Just heat in short bursts. Stir in between to avoid hot spots. To keep your fajitas from getting soggy, don't cover them tightly while reheating. Chicken fajitas are safe to eat for 3 to 4 days in the fridge. If you freeze them, they last up to 3 months. Check for signs of spoilage before eating. Look for any off smells or changes in color. If they seem odd, it’s best to toss them. Enjoy your meal safely! For the full recipe, check out [Full Recipe]. To make chicken fajitas from scratch, follow these steps: 1. Marinate the Chicken: In a bowl, mix sliced chicken with olive oil, lime juice, cumin, chili powder, garlic powder, onion powder, salt, and pepper. Ensure each piece is well coated. 2. Cook the Chicken: Heat a skillet over medium-high heat. Add the marinated chicken and cook for 5-7 minutes. Stir until it turns golden brown and is cooked through. 3. Sauté the Veggies: Remove the chicken and set it aside. In the same skillet, add sliced bell peppers and onion. Cook for about 3-4 minutes until they are tender yet crisp. 4. Combine: Return the chicken to the skillet. Toss everything together for 2 more minutes to blend flavors. 5. Warm Tortillas: Heat flour tortillas in a dry skillet or microwave for a few seconds. 6. Serve: Place the chicken and veggies in the center of each tortilla. Add fresh cilantro, and serve with sour cream and guacamole. For the full recipe, check out the complete guide. Yes, you can use frozen chicken for fajitas. However, there are a few things to consider: - Thawing: Thaw the chicken in the fridge overnight or use the defrost setting on your microwave. - Cooking Time: Frozen chicken may take longer to cook. Ensure it reaches an internal temperature of 165°F. - Flavor: Fresh chicken may absorb marinades better than frozen. If using frozen, marinate it after thawing for better flavor. Toppings can enhance your chicken fajitas. Here are popular choices: - Fresh Cilantro: Adds brightness to each bite. - Sour Cream: Provides a creamy texture and coolness. - Guacamole: Offers rich flavor and creaminess. - Shredded Cheese: Adds a savory touch. - Salsa: Brings extra zest and freshness. - Lime Wedges: A squeeze of lime can brighten the dish. Feel free to mix and match to find your perfect topping combination! In this article, we explored classic chicken fajitas, from ingredients to cooking steps. You learned about marinating chicken, sautéing veggies, and the best serving tips. I also shared ways to customize flavors and storage info. Remember, a good fajita needs quality ingredients and care. Enjoy experimenting with different proteins and spice levels! Fajitas are fun and easy, so get cooking and share your delicious results.](https://dailydishlab.com/wp-content/uploads/2025/06/66375333-28c8-40a4-a8c4-3c36aa5b429f-768x768.webp)
. To start, you need to preheat your oven. Set it to 400°F (200°C). This step is key for even cooking. Let the oven warm up while you prepare the glaze. Next, you’ll make the honey lemon garlic mixture. Take a small bowl and add: - 1/4 cup honey - 2 tablespoons fresh lemon juice - 3 cloves garlic, minced - 2 tablespoons olive oil - Salt and pepper to taste - 1 teaspoon paprika Whisk these ingredients together until they blend well. This glaze gives the salmon its sweet and tangy flavor. Now, grab your salmon fillets. Place them skin-side down on a parchment-lined baking sheet. This helps with easy cleanup and prevents sticking. Then, brush that tasty honey lemon garlic mixture generously over each fillet. Make sure to coat them well. This step adds flavor and keeps the salmon moist. Bake your salmon in the preheated oven for about 12 to 15 minutes. The ideal temperature is 400°F. To check for doneness, look for the salmon to flake easily with a fork. If it does, it’s ready! If not, give it a few more minutes. To get the perfect texture for salmon, follow these steps: - Choose the right salmon: Fresh, wild-caught salmon has better flavor and texture. - Avoid overcooking: Bake the salmon for 12-15 minutes. It should flake easily. - Rest the salmon: Let it sit for a few minutes after baking. This keeps it juicy. For the best honey and garlic combination, try these tips: - Use fresh garlic: Freshly minced garlic gives the best flavor. Avoid powdered garlic. - Balance sweetness and acidity: Adjust the honey and lemon juice to your taste. This balance makes the dish shine. Creative plating ideas can enhance your meal: - Use a decorative platter: Place the salmon fillets on a colorful plate. Drizzle extra glaze over the top. - Garnish thoughtfully: Add lemon slices and fresh parsley around the salmon. This adds color and freshness. Pairing suggestions can make your meal even better: - Choose sides wisely: Serve with steamed veggies or rice. These sides complement the salmon well. - Wine pairing: Light white wine, like Sauvignon Blanc, works great. It enhances the flavors of the dish. For the full recipe, including steps and tips, check out the Honey Lemon Garlic Salmon section. {{image_2}} You can change how you cook honey lemon garlic salmon to suit your taste. Here are two methods: - Grilling honey lemon garlic salmon: Grilling gives the salmon a nice smoky flavor. Preheat your grill to medium-high. Place the salmon on the grill and cook for about 6-8 minutes per side. Brush it with the honey lemon garlic mix while it cooks. This method adds a crispy char and enhances the dish's flavor. - Pan-searing for a crispy finish: This method can create a great crust. Heat a skillet over medium heat with olive oil. Place the salmon skin-side down. Cook for 4-5 minutes, then flip and cook for another 3-4 minutes. Use the honey lemon garlic mix to glaze the salmon during the last minute of cooking. This method gives a beautiful golden-brown color. You can swap out ingredients to fit your needs: - Replacing salmon with other fish: If you can’t find salmon, try trout or tilapia. Both fish work well with the honey lemon garlic mix. They cook in similar times and will soak up the flavors nicely. - Vegan alternatives for a similar recipe: For a plant-based option, use tofu or tempeh. Marinate them in the same honey lemon garlic mix. Bake or grill them just like you would the salmon. This will give you a similar sweet and tangy taste while keeping it vegan. For the full recipe, check out the guidelines I provided earlier. Enjoy experimenting with these variations! To keep your honey lemon garlic salmon fresh, store it in the fridge. Place leftovers in an airtight container. This helps keep the salmon moist and flavorful. Ideally, eat it within three days for the best taste. If you want to save it for longer, consider freezing it. For freezing salmon, make sure it's completely cool. Wrap each piece in plastic wrap, then place it in a freezer bag. Remove as much air as possible to prevent freezer burn. You can freeze it for up to two months. When you’re ready to eat, thaw it in the fridge overnight. Reheating salmon can be tricky. You don't want to dry it out. The best method is to use the oven. Preheat it to 300°F (150°C). Place the salmon on a baking sheet and cover it with foil. Heat for about 10-15 minutes. This keeps it moist and tasty. You can also use the microwave, but be careful. Set it at a low power level. Heat in short bursts, checking often. Serve it right after reheating for the best taste. Enjoy your meal! What is the best type of salmon to use? I recommend using wild-caught salmon. It has richer flavor and better texture. Sockeye and king salmon are both great choices. They are firm and hold up well during cooking. Farmed salmon is also fine but may be fattier. Can I prepare the glaze in advance? Yes, you can make the glaze ahead of time. Just mix honey, lemon juice, and garlic. Store it in the fridge for up to two days. When you're ready to cook, simply take it out and use it. How do I know when the salmon is fully cooked? Look for a few signs. The salmon should be opaque and flake easily with a fork. An internal temperature of 145°F (63°C) means it's done. If you’re unsure, use a food thermometer for accuracy. Can I use bottled lemon juice instead of fresh? You can use bottled lemon juice, but fresh is best. Fresh lemon juice has a brighter taste. Bottled juice can be more tart or less flavorful. If you must use bottled, choose a high-quality brand for the best effect. Nutritional benefits of salmon and the ingredients used Salmon is packed with omega-3 fatty acids, which are good for your heart. It also has high protein and vitamins like B12. Honey adds natural sweetness and antioxidants. Garlic offers health benefits like boosting the immune system. Is honey lemon garlic salmon suitable for special diets? Yes, this dish fits many diets. It is gluten-free and low-carb. If you are vegan, you can substitute salmon with tofu or chickpeas. Just adjust the cooking time to fit the new ingredients. For those watching sugar, you can reduce the honey amount. For the full recipe, check out the Honey Lemon Garlic Salmon section! This blog post explored how to make a delicious honey lemon garlic salmon. We covered required ingredients, preparation, and cooking steps to get it just right. I shared some tips for perfect texture and presentation. You also learned variations and storage methods for leftovers. Enjoy trying this recipe in your kitchen! With practice, you'll impress your family with a tasty, healthy meal.](https://dailydishlab.com/wp-content/uploads/2025/07/2945a810-a7cd-4e48-9023-917694da23c6-768x768.webp)
![- 2 cups cooked shredded chicken - 1 can (15 oz) black beans, drained and rinsed - 1 can (15 oz) corn, drained - 1 packet taco seasoning - 1 cup salsa The main ingredients create the base of your casserole. The chicken offers protein and flavor. Black beans add fiber and a nice texture. Corn brings a touch of sweetness. Taco seasoning gives it that classic taco flavor. Salsa adds moisture and a pop of zest. - 1 cup sour cream - 2 cups shredded cheddar cheese (divided) The creamy layer makes this dish rich and smooth. Sour cream balances the spices with its coolness. The cheddar cheese melts beautifully, adding a great taste. Using two cups lets you have some on top for that golden finish. - 8 small corn tortillas, cut into quarters - 1 jalapeño, diced (optional) - Fresh cilantro, sliced avocado, and lime wedges for serving Corn tortillas are the backbone of this casserole. They soak up flavors and keep the layers together. You can add jalapeños for a spicy kick. Fresh cilantro, avocado, and lime make great garnishes. They brighten the dish and add freshness. For the full recipe, check out the details provided earlier. - Preheat oven to 350°F (175°C). - In a large mixing bowl, combine cooked chicken, black beans, corn, taco seasoning, and salsa. Mix well until combined. This step is key. It brings all the flavors together. The chicken adds protein, while beans and corn give texture. Taco seasoning provides that classic flavor we all love. Salsa adds moisture and zest. - In another bowl, mix sour cream with 1 cup of cheddar cheese. This makes a creamy layer. - In a 9x13 inch baking dish, spread half of the tortilla quarters. - Layer half of the chicken mixture over the tortillas. - Spread half of the sour cream and cheese mixture on top. You want to build layers for great taste. The tortillas give a base. The chicken mixture adds heartiness, and the creamy layer keeps it rich. - Repeat these layers using the remaining tortillas, chicken mixture, and creamy layer. - Top with the last cup of cheddar cheese. If using jalapeños, add them now. This final layer of cheese melts beautifully. It forms a golden crust that is hard to resist. - Cover the dish with foil. Bake for 30 minutes. - After 30 minutes, remove the foil. Bake for another 10-15 minutes until bubbly and golden. Baking warms everything through. The covered dish helps steam the casserole. Once uncovered, the cheese gets that nice golden color. For the full recipe, refer to the earlier section. Enjoy the process! To make your chicken taco casserole truly shine, use homemade or high-quality taco seasoning. The right seasoning packs a punch and enhances the flavor of your dish. Also, let the casserole cool slightly before serving. This small step brings out the flavors even more, making every bite enjoyable. Serve your casserole hot, and don’t skip the garnishes! Fresh cilantro and avocado add a burst of flavor. You can also pair it with a side salad or rice. These sides make for a complete meal that everyone will love. To make this dish, you will need a few simple tools: - Large mixing bowl - 9x13 inch baking dish - Aluminum foil These tools help ensure your casserole cooks evenly and looks great on your table. Don't forget to check the full recipe for detailed steps! {{image_2}} You can easily mix things up in your chicken taco casserole. If you want a different flavor, swap the chicken for ground turkey or beef. Both meats add a unique taste and texture. You can also use black-eyed peas or pinto beans instead of black beans. This change keeps the dish hearty and adds extra protein. Do you like heat? Add more jalapeños for a spicy kick. You can also include diced green chiles for extra flavor. These spicy ingredients boost the taste and make your casserole really pop. Adjust the amount based on your spice preference. If you're looking for a meatless meal, try a vegetarian version. You can substitute the chicken with a mix of extra vegetables like bell peppers, zucchini, or mushrooms. You can also use plant-based proteins like lentils or tofu. This way, you can enjoy a tasty and filling casserole without any meat. For the full recipe, check out the [Full Recipe]. After you enjoy your chicken taco casserole, store leftovers in an airtight container. This keeps the flavors fresh. You can refrigerate it for up to 3-4 days. Just make sure to let it cool before sealing. If you want to keep it longer, freezing works well. You can freeze the casserole in individual portions or freeze the whole dish. It stays good for up to 3 months. When you're ready to eat, just thaw it in the fridge overnight. To reheat, you have two options. You can heat it in the oven at 350°F until it is warmed through. If you're in a hurry, use the microwave. Just make sure it heats evenly so every bite is nice and hot. Enjoy your meal! Yes, leftover rotisserie chicken works great for this recipe. It saves time and adds flavor. Just shred or chop the chicken before mixing it in. This method makes the dish even easier. You'll love how the chicken blends with the other ingredients. You can use flour tortillas as a substitute. They will work just as well. Cut them into quarters like corn tortillas. This small change won’t affect the taste much. You'll still enjoy the same delicious flavors in your casserole. Ensure to use gluten-free tortillas and check seasonings for gluten. Many brands offer gluten-free options. Look for taco seasoning that is labeled gluten-free. These small changes keep this dish safe for everyone. Enjoy your flavorful casserole without worry! This chicken taco casserole is a tasty and simple dish to make. We covered key ingredients like cooked chicken, black beans, and corn. The creamy layer with sour cream and cheddar adds flavor, while the tortillas bring it together. You can customize it with different meats or make it vegetarian. Store leftovers easily, or freeze them for later. Enjoy this dish hot with your favorite garnishes. I hope you find joy in making this recipe and sharing it with others.](https://dailydishlab.com/wp-content/uploads/2025/06/a9a43d40-fc95-41bf-8f1f-f0e9c5c83338-768x768.webp)