No-Bake Cheesecake Jars Simple and Creamy Delight

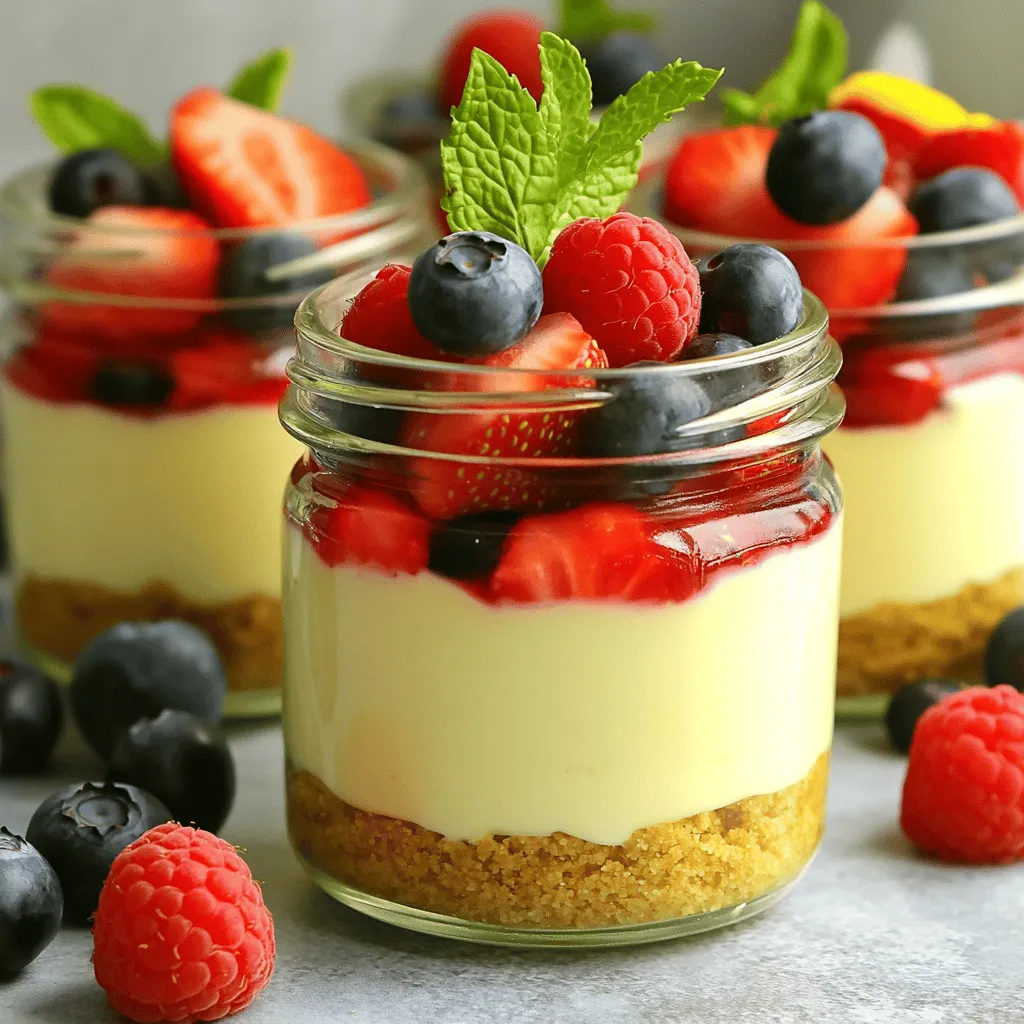
If you’re craving a sweet treat that’s both simple and satisfying, No-Bake Cheesecake Jars are your answer! These little delights require no oven time, yet offer a creamy, rich flavor that will impress anyone. From the classic cheesecake filling to a crunch graham cracker base, I’ll guide you through every step. Get ready to whip up a dessert that shines at any gathering or even just for yourself!
Why I Love This Recipe
- Quick and Easy: This no-bake cheesecake recipe is simple and takes just 25 minutes to prepare, making it perfect for last-minute desserts.
- Customizable: Feel free to switch up the toppings with your favorite fruits or even add chocolate or caramel for extra indulgence.
- Perfect Portion Control: Serving the cheesecake in jars allows for individual portions, making it easy to enjoy without the hassle of slicing a traditional cheesecake.
- Fresh and Delicious: The combination of creamy cheesecake and fresh berries creates a delightful balance of flavors that everyone will love.
Ingredients
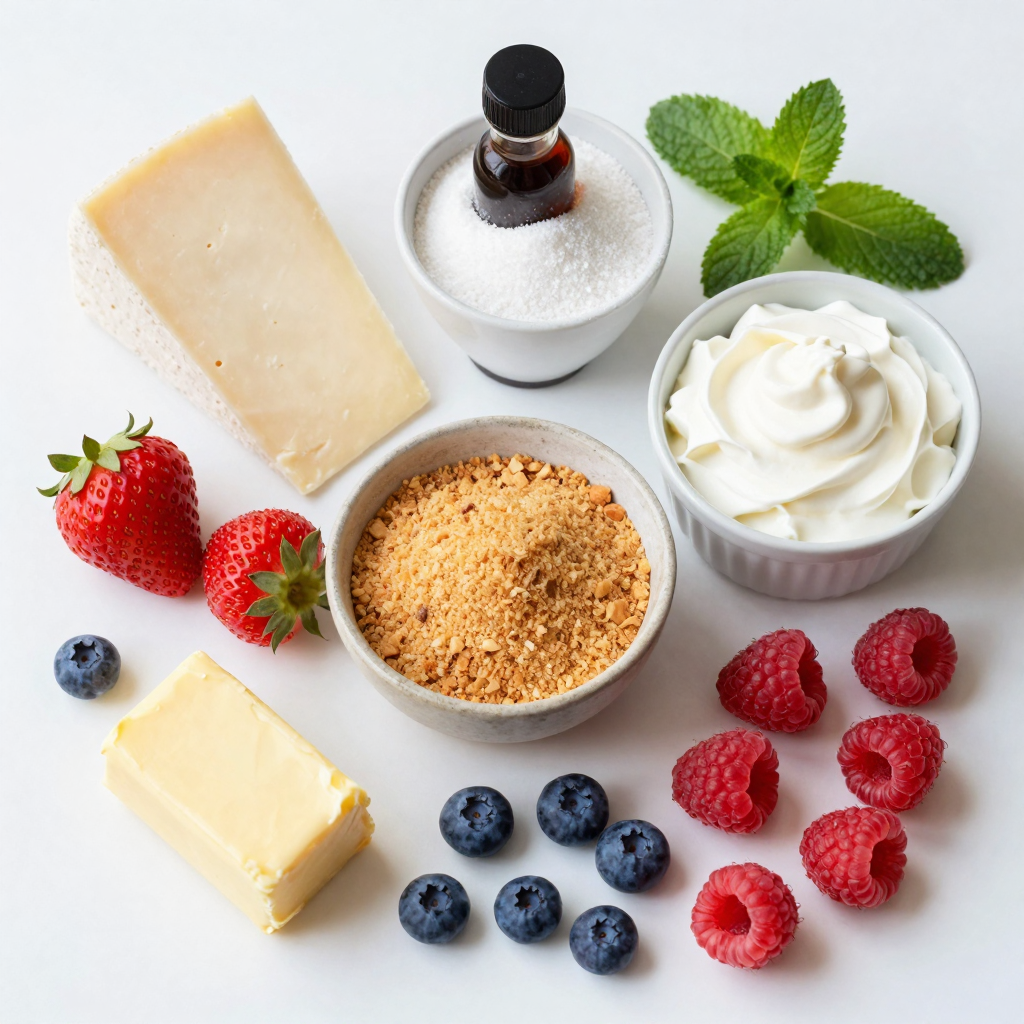
Gathering quality ingredients is key for a great no-bake cheesecake. Here’s what you need:
- 8 ounces cream cheese, softened
- 1 cup powdered sugar
- 1 teaspoon vanilla extract
- 1 cup heavy whipping cream
- 1 cup graham cracker crumbs
- 1/4 cup unsalted butter, melted
- 1 cup fresh berries (strawberries, blueberries, or raspberries) for topping
- Mint leaves for garnish (optional)
Each ingredient plays a role in the flavor and texture of your cheesecake. Cream cheese gives it that rich, creamy base. The powdered sugar sweetens it just enough. Vanilla extract adds a warm flavor that enhances the sweetness. Heavy whipping cream makes the dessert light and fluffy.
Graham cracker crumbs form the crust. Mixing them with melted butter helps them stick together. Fresh berries add color and a burst of flavor on top. If you want a touch of green, add mint leaves.This no-bake cheesecake jars recipe is easy and fun to make!

Step-by-Step Instructions
Preparation of Cheesecake Filling
1. Start by beating the cream cheese in a large bowl. Use an electric mixer to make it creamy and smooth.
2. Gradually blend in the powdered sugar and vanilla extract. Mix until fully combined.
3. In another bowl, whip the heavy cream with a mixer until stiff peaks form.
4. Gently fold the whipped cream into the cream cheese mixture. Mix carefully to keep the air in the whipped cream.
Preparing the Crust
1. In a small bowl, mix the graham cracker crumbs with the melted butter. Stir until all crumbs are moistened.
2. This mixture forms the base layer for each jar.
Assembling the Jars
1. Add a layer of the graham cracker mixture at the bottom of each jar.
2. Next, spoon in a generous layer of the cheesecake filling on top of the crumbs.
3. Repeat the layers until the jars are full. End with a layer of cheesecake filling on top.
4. Refrigerate the jars for at least 2 hours to set.
Enjoy this simple and creamy delight!
Pro Tips
- Use Room Temperature Cream Cheese: This helps to achieve a smoother and creamier cheesecake filling without lumps.
- Whip the Cream Properly: Ensure the heavy cream is whipped to stiff peaks; this adds volume and lightness to your cheesecake mixture.
- Chill for Best Results: Refrigerating the jars for at least 2 hours allows the flavors to meld and the filling to set perfectly.
- Customize Your Toppings: Feel free to mix and match berries or even add a drizzle of chocolate or caramel for extra flavor.
Tips & Tricks
Achieving the Perfect Texture
Softened cream cheese is key for a creamy filling. It blends well and avoids lumps. Take it out of the fridge 30 minutes before use. This simple step makes mixing much easier.
When folding in whipped cream, be gentle. Use a spatula and a light touch. This keeps the air in the whipped cream. If you stir too hard, your mixture may lose its fluffy texture.
Serving Suggestions
For a fun presentation, use clear jars. This lets the layers shine. You can also add colorful toppings. Fresh berries look great and taste amazing. A sprig of mint adds a nice touch too.
Pair your jars with coffee or tea. These drinks balance the sweet taste of the cheesecake. You can also serve with a scoop of ice cream for extra fun.
Sweetener Alternatives
If you want a healthier option, try sugar substitutes. Stevia or monk fruit sweetener works well. They can add sweetness without extra calories.
When using substitutes, adjust the amount. Read the package for guidance. Mix these sweeteners with cream cheese just like sugar. They blend in smoothly and keep the taste delicious.

Variations
Flavor Variations
You can get creative with your no-bake cheesecake jars. One fun way is to add chocolate or caramel. Swirl in some melted chocolate or drizzle caramel sauce on top. This adds a rich taste that many love. You can also mix in different fruits based on the season. Try strawberries in spring or pumpkin puree in fall. Each fruit brings its own flavor, making your jars unique.
Dietary Adjustments
If you need gluten-free options, look for gluten-free graham crackers. These work just as well for the crust. You can also try almond flour or oats for a new twist. For a dairy-free version, use a plant-based cream cheese. Coconut cream is a great alternative for the heavy cream. These swaps keep the taste yummy while fitting different diets.
Occasion-Based Ideas
No-bake cheesecake jars are great for special events. You can make them festive by adding holiday-themed toppings. Use red and green fruits for Christmas or pastel colors for Easter. Mini jars also make perfect party favors. Fill small jars for guests to take home. They will love the cute, personal touch!
Storage Info
Refrigeration Guidelines
You should store no-bake cheesecake jars in the fridge. They last for about 5 days. To keep them fresh, cover the jars with lids or plastic wrap. This helps to prevent any odors from mixing in. If you want to keep them longer, you can freeze them.
Freezing Instructions
To freeze your no-bake cheesecake jars, make sure they are sealed tightly. You can use freezer-safe containers or wrap them in plastic wrap. They will stay good in the freezer for about 2 months. When you want to eat them, take them out and thaw them in the fridge overnight. Do not rush the thawing process. This keeps the texture creamy and smooth.
FAQs
Can I use light cream cheese?
Yes, you can use light cream cheese. It may change the texture. The cheesecake might be less rich and creamy. Light cream cheese has less fat, so the filling may turn out a bit softer. If you want a firmer texture, stick to regular cream cheese.
How long do these last in the fridge?
These no-bake cheesecake jars last about 3 to 5 days in the fridge. Store them in an airtight container to keep them fresh. If you top them with berries, add those just before serving. This way, they stay colorful and tasty.
What can I substitute for graham crackers?
You can use crushed cookies, nuts, or even oats for the crust. Some good options include:
- Oreos
- Digestive biscuits
- Almonds or walnuts (crushed)
When layering, make sure the crust is even at the bottom. This helps keep your jars stable.
Can I make these ahead of time?
Yes, you can make these jars ahead of time. It’s great for parties or gatherings. You can prepare the cheesecake and crust a day before. Just layer them in the jars and chill. Before serving, add fresh berries and mint for a nice touch. This keeps the dessert fresh and ready to enjoy!
You can create delicious no-bake cheesecake jars using simple ingredients. Start with cream cheese, mix in sugar, and fold in whipped cream. Layer this with a graham cracker crust and let it chill. Add fresh berries or mint for extra flair. Remember, you can tweak flavors or use substitutes too. Store these jars in the fridge or freeze them for later. Enjoy the ease and fun of serving dessert in a jar! Experiment with variations to make this treat your own.

No-Bake Cheesecake Jars
Ingredients
8 ounces cream cheese, softened
1 cup powdered sugar
1 teaspoon vanilla extract
1 cup heavy whipping cream
1 cup graham cracker crumbs
1/4 cup unsalted butter, melted
1 cup fresh berries (strawberries, blueberries, or raspberries) for topping
Mint leaves for garnish (optional)
Instructions
In a large mixing bowl, beat the softened cream cheese with an electric mixer until creamy and smooth.
Gradually add the powdered sugar and vanilla extract, continuing to blend until fully incorporated.
In a separate bowl, whip the heavy whipping cream until stiff peaks form.
Gently fold the whipped cream into the cream cheese mixture until combined, being careful not to deflate the whipped cream.
In a small bowl, mix the graham cracker crumbs with the melted butter until all crumbs are moistened.
To assemble the jars, start by adding a layer of the graham cracker mixture at the bottom of each jar.
Next, add a generous layer of the cheesecake filling on top of the graham crumbs.
Repeat the layers until the jars are filled, finishing with a final layer of cheesecake filling on top.
Refrigerate the jars for at least 2 hours to set.
Before serving, top each jar with fresh berries and a mint leaf for a pop of color and freshness.
Prep Time: 25 minutes | Total Time: 2 hours 25 minutes | Servings: 4

No-Bake Cheesecake Jars
Ingredients
- 8 ounces cream cheese, softened
- 1 cup powdered sugar
- 1 teaspoon vanilla extract
- 1 cup heavy whipping cream
- 1 cup graham cracker crumbs
- 1 4 cup unsalted butter, melted
- 1 cup fresh berries (strawberries, blueberries, or raspberries) for topping
- Mint leaves for garnish (optional)
Instructions
- In a large mixing bowl, beat the softened cream cheese with an electric mixer until creamy and smooth.
- Gradually add the powdered sugar and vanilla extract, continuing to blend until fully incorporated.
- In a separate bowl, whip the heavy whipping cream until stiff peaks form.
- Gently fold the whipped cream into the cream cheese mixture until combined, being careful not to deflate the whipped cream.
- In a small bowl, mix the graham cracker crumbs with the melted butter until all crumbs are moistened.
- To assemble the jars, start by adding a layer of the graham cracker mixture at the bottom of each jar.
- Next, add a generous layer of the cheesecake filling on top of the graham crumbs.
- Repeat the layers until the jars are filled, finishing with a final layer of cheesecake filling on top.
- Refrigerate the jars for at least 2 hours to set.
- Before serving, top each jar with fresh berries and a mint leaf for a pop of color and freshness.


![To make these brownies, you need specific ingredients. Here’s what you’ll gather: - 1 cup unsalted butter (2 sticks) - 2 cups granulated sugar - 4 large eggs - 1 teaspoon vanilla extract - 1 cup all-purpose flour - 1 cup unsweetened cocoa powder - 1/2 teaspoon salt - 1 cup chopped pecans - 1 cup caramel sauce (store-bought or homemade) - 1/2 cup chocolate chips (semi-sweet or dark) - 1/4 teaspoon sea salt (for topping) Each ingredient plays a key role in creating the rich, fudgy texture and flavor you will love. While the essential ingredients are perfect, you can add more for extra flavor. Consider these options: - A dash of espresso powder can deepen the chocolate taste. - A splash of bourbon or rum brings warmth and complexity. - Use dark chocolate chips for a richer finish. - Add sea salt flakes on top for a contrast in taste. These optional ingredients can take your brownies to the next level. To make the process smooth, you'll need some tools. Here’s what I recommend: - A medium saucepan for melting butter. - A mixing bowl for combining wet ingredients. - A separate bowl for dry ingredients. - A whisk for mixing eggs and vanilla. - A spatula to fold in the nuts and chips. - A 9x13 inch baking pan lined with parchment paper. These tools help you create the perfect caramel pecan turtle brownies. For the full recipe, you can check the complete steps and tips. Enjoy your baking! To create your brownie batter, start with the basics. First, preheat your oven to 350°F (175°C). Next, grease a 9x13 inch baking pan and line the bottom with parchment paper. This step helps with easy removal later. In a medium saucepan, melt 1 cup of unsalted butter over low heat. Once it melts, add 2 cups of granulated sugar and stir until mixed well. Remove the saucepan from heat and let it cool for a few minutes. This cooling step is important to avoid cooking the eggs. Now, whisk in 4 large eggs, one at a time. Add 1 teaspoon of vanilla extract and mix until smooth. In another bowl, sift together 1 cup of all-purpose flour, 1 cup of unsweetened cocoa powder, and 1/2 teaspoon of salt. Gradually add the dry mix to the wet mix. Stir gently until just combined. Overmixing can lead to tough brownies. Fold in 1 cup of chopped pecans and 1/2 cup of chocolate chips, saving a few pecans for the topping. Now it’s time to layer your brownies. Pour half of the brownie batter into the prepared pan and spread it evenly. Drizzle half of the caramel sauce over this layer. Then spoon the rest of the batter on top and spread it gently. Drizzle the remaining caramel sauce over this layer. Sprinkle the reserved pecans on top and add a pinch of sea salt to enhance the flavor. Bake in your preheated oven for 30 to 35 minutes. To check for doneness, insert a toothpick in the center. It should come out with a few moist crumbs, not wet batter. After baking, remove the pan from the oven. Let the brownies cool in the pan for at least 30 minutes. Use the parchment paper to lift them out. Slice them into squares for serving. For a special touch, serve the brownies warm. Drizzle with extra caramel sauce and sprinkle with sea salt. This adds a lovely finishing touch that enhances the flavor. Enjoy your delicious creation! For the complete recipe, check out the [Full Recipe]. One big mistake is overmixing the batter. When you mix too much, it makes brownies tough. Mix until just combined for a softer bite. Another common error is not measuring ingredients well. Use dry measuring cups for flour and cocoa powder. Level the tops with a knife for accuracy. For that perfect chewy texture, use melted butter. This gives your brownies a rich flavor. Don't forget to let the batter rest for a few minutes before baking. It helps the ingredients meld together. Also, bake just until a toothpick shows a few moist crumbs. Too long makes them dry. Serve brownies warm to enjoy their gooey center. Drizzle extra caramel sauce on top for added sweetness. A sprinkle of sea salt can enhance the flavors. Pair with a scoop of vanilla ice cream for a delightful treat. Enjoy your Caramel Pecan Turtle Brownies with friends and family for a memorable dessert. Check out the Full Recipe for more tips! {{image_2}} If you want to change the taste, try other nuts. Almonds, walnuts, or hazelnuts can work well. Each nut gives a unique flavor. Almonds add a sweet crunch. Walnuts bring a rich, earthy taste. Hazelnuts give a hint of chocolate flavor. Just chop them as you would with pecans and mix them in. You can even toast the nuts lightly for extra flavor! Making your own caramel sauce is easy and fun. You need just sugar, butter, and cream. Start by melting sugar in a pan. Watch it closely so it doesn’t burn. Once it melts and turns golden, add butter and let it melt. Then, pour in heavy cream slowly and stir. Let it cool before using it in your brownies. This sauce adds a fresh taste that store-bought cannot match. Want to make these brownies gluten-free? Use gluten-free all-purpose flour instead of regular flour. Check that your caramel sauce is also gluten-free. Many brands are safe, but always read the label. This way, you can enjoy rich, gooey brownies without worry. The taste remains just as delightful, and your friends will never know the difference! Don't forget to check out the Full Recipe for all the details on making these sweet treats! To keep your caramel pecan turtle brownies fresh, store them in an airtight container. Place parchment paper between layers to avoid sticking. They can last up to a week at room temperature. For longer storage, put them in the fridge. This helps maintain their chewy texture and flavor. Freezing brownies is a great way to save some for later. First, allow them to cool completely. Then, cut them into squares. Wrap each piece tightly in plastic wrap. Put them in a freezer-safe bag or container. They can stay frozen for up to three months. When you’re ready to enjoy, just thaw them in the fridge overnight. To enjoy your brownies warm, reheat them in the microwave. Use a low power setting to avoid drying them out. Heat for about 10-15 seconds. You can also warm them in the oven. Set the oven to 350°F (175°C) and place the brownies in for about 5-10 minutes. This brings back that fresh-baked taste. For extra delight, drizzle some caramel sauce on top before serving. Turtle brownies get their name from the classic turtle candy. This candy has caramel, pecans, and chocolate. In our brownies, I mix these same flavors. The caramel adds sweetness, the pecans give a nice crunch, and the chocolate ties it all together. When you bite into these brownies, you taste the rich chocolate and gooey caramel. It's like a treat you can hold in your hand! Yes, you can. If you want to skip the eggs, you can use a few substitutes. Applesauce is a great choice. Use 1/4 cup of unsweetened applesauce for each egg. You can also use a flaxseed meal. Mix one tablespoon of flaxseed meal with three tablespoons of water. Let it sit for a few minutes until it gets thick. Both options work well and keep the brownies moist. These brownies stay fresh for about four to five days when stored properly. Keep them in an airtight container at room temperature. If you want them to last longer, you can freeze them. Just wrap them well in plastic wrap and place them in a freezer bag. They can last up to three months in the freezer. When you're ready to enjoy, just thaw them at room temperature or warm them in the microwave for a few seconds. Remember, for the full recipe, check our earlier section! In this post, we explored how to make delicious caramel pecan turtle brownies. We discussed essential and optional ingredients, the tools you need, and easy step-by-step instructions. I also shared useful tips to avoid common mistakes and achieve the perfect texture. Plus, we looked at variations, storage info, and common questions. Enjoying these brownies can be a fun baking adventure. I hope you try these tips and enjoy every bite!](https://dailydishlab.com/wp-content/uploads/2025/07/cd6252c4-9eb9-4ecc-b5d9-7ffc816e6e24-768x768.webp)

