Air Fryer Cinnamon Roll Bites Tasty and Easy Treat

Are you ready for a warm, gooey treat? Air Fryer Cinnamon Roll Bites offer a quick and tasty way to enjoy the flavors of cinnamon rolls without the fuss. In just a few simple steps, you can whip up these delightful bites that are perfect for breakfast, snacks, or a sweet treat anytime. Let’s dive into the ingredients and make something delicious together!
Why I Love This Recipe
- Quick and Easy: This recipe takes just 20 minutes from start to finish, making it perfect for a fast snack or dessert.
- Deliciously Fluffy: The air fryer gives the cinnamon roll bites a light and fluffy texture, while still achieving that golden brown exterior.
- Customizable Toppings: You can easily adjust the toppings, whether you prefer cream cheese frosting or a simple dusting of powdered sugar.
- Fun for Sharing: These bite-sized treats are great for sharing with friends and family, making them a hit at gatherings.
Ingredients
Main Ingredients List
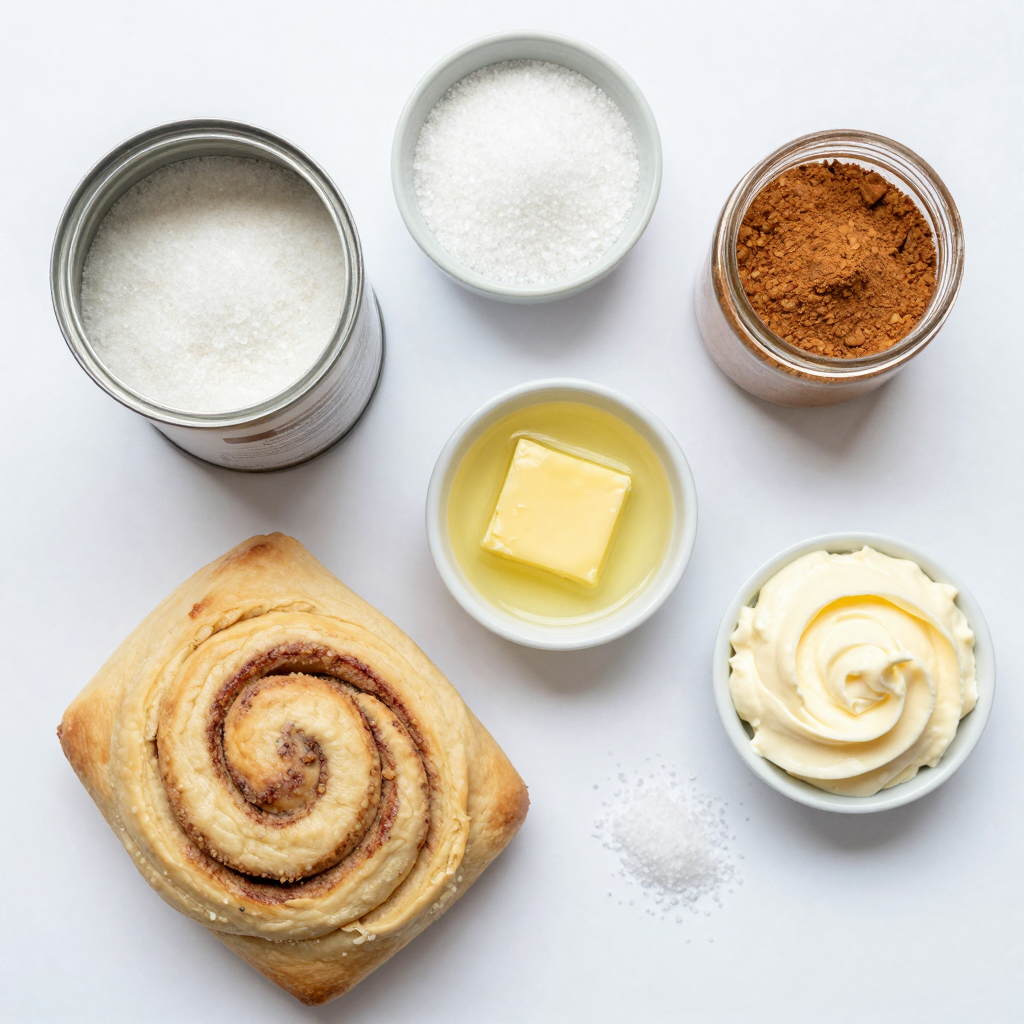
To make the Air Fryer Cinnamon Roll Bites, you will need:
- 1 can of refrigerated cinnamon roll dough (8 rolls)
- 1/4 cup granulated sugar
- 2 teaspoons ground cinnamon
- 2 tablespoons melted butter
- 1/2 cup cream cheese frosting (from the cinnamon roll package or homemade)
- Optional: a pinch of sea salt for garnish
These simple ingredients create a warm and sweet treat. The cinnamon roll dough brings the classic flavor. The sugar and cinnamon mix adds that perfect sweet spice.
Suggested Add-ins
Want to get creative? Here are some add-ins you might try:
- Chopped nuts (like pecans or walnuts)
- Mini chocolate chips
- Raisins or dried cranberries
- Sprinkles for fun color
These add-ins can add texture and flavor. Just toss them in with the dough pieces before air frying.
Alternative Frosting Options
You can switch up the frosting if you like. Here are some fun options:
- Vanilla icing
- Maple glaze
- Chocolate ganache
- Peanut butter drizzle
These frostings can change the flavor. Choose one that fits your mood or the season. Each option makes these bites even more special.

Step-by-Step Instructions
Preheating the Air Fryer
Start by turning on your air fryer. Set it to 350°F (175°C). Preheating helps cook the cinnamon rolls evenly. This step takes just a few minutes but is very important.
Preparing the Cinnamon Roll Dough
Next, grab a can of refrigerated cinnamon roll dough. There are eight rolls in one can. Open it carefully and pull out each roll. Cut each roll into four equal pieces. This makes bite-sized treats.
In a small bowl, mix granulated sugar and ground cinnamon. You need 1/4 cup of sugar and 2 teaspoons of cinnamon. Stir them together well and set the bowl aside.
Now, take a mixing bowl and add your cut cinnamon roll pieces. Drizzle 2 tablespoons of melted butter over them. Toss the pieces gently until they are all coated with butter.
Sprinkle the cinnamon sugar mixture over the buttered dough. Toss again to coat all pieces evenly.
Cooking the Cinnamon Roll Bites
Place the cinnamon roll bites in the air fryer basket. Make sure they are in a single layer and not crowded. If you have a lot, cook in batches for the best results.
Air fry the bites for 8-10 minutes. Shake the basket halfway through to help them cook evenly. They should turn golden brown and puff up as they cook.
Once they are done, take them out and let them cool for a few minutes. Drizzle some cream cheese frosting over the warm bites. You can warm the frosting in the microwave for easier drizzling.
For an extra touch, sprinkle a pinch of sea salt on top. This adds a nice flavor contrast. Enjoy your tasty and easy air fryer cinnamon roll bites!
Pro Tips
- Uniform Size: Ensure all cinnamon roll pieces are cut to a similar size to guarantee even cooking and browning.
- Air Fryer Capacity: Do not overcrowd the air fryer basket; cook in batches if necessary to allow proper air circulation for crispiness.
- Frosting Warmth: Warm the cream cheese frosting slightly in the microwave to make it easier to drizzle over the bites.
- Flavor Boost: Add a pinch of nutmeg or vanilla extract to the cinnamon sugar mixture for an extra layer of flavor.
Tips & Tricks
How to Achieve the Perfect Texture
To get the best texture, keep an eye on the cooking time. Start with 8 minutes. Check if they are golden brown. If they need more time, add a minute or two. The bites should be puffed and soft inside. This balance makes them chewy yet crispy on the outside.
Best Practices for Air Frying
Air frying is easy, but you need to follow some rules. First, preheat the air fryer to 350°F (175°C). This step helps cook the bites evenly. Place the dough pieces in a single layer. Overcrowding will lead to uneven cooking. Shake the basket halfway to ensure all sides get that golden touch.
Enhancing Flavor with Additional Ingredients
You can boost the flavor of your cinnamon roll bites. Try adding a splash of vanilla extract to the melted butter. This small change makes a big difference. You can also mix in nuts or chocolate chips. These add-ins give extra taste and texture. For a salty-sweet kick, sprinkle sea salt on top after drizzling the frosting. Enjoy experimenting!

Variations
Different Fillings for Cinnamon Roll Bites
You can change up the filling in your cinnamon roll bites for fun. Instead of the classic cinnamon filling, try adding chocolate chips or nuts. You can even mix in some fruit, like diced apples or berries. Just sprinkle these extra goodies on the dough before you roll it up. This small change makes a big difference in taste.
Using Different Types of Frosting
While cream cheese frosting is delicious, other frostings can work too. You can use vanilla, chocolate, or even maple frosting. Each type adds a unique flavor. If you want to get creative, try a peanut butter frosting for a nutty twist. You can make your frosting or use store-bought ones for quick prep.
Healthier Alternatives
If you want a lighter version, consider using whole-wheat dough. You can also cut back on sugar or use a sugar substitute. For a dairy-free option, try using coconut yogurt in place of cream cheese frosting. These changes keep the treats tasty while making them a bit healthier. Enjoying these bites can be fun and guilt-free!
Storage Info
How to Store Leftover Cinnamon Roll Bites
Store leftover cinnamon roll bites in an airtight container. Keep them in the fridge. They stay fresh for up to three days. If you want them warm, don’t stack them too high. This helps avoid sogginess.
Reheating Instructions
To reheat, place cinnamon roll bites in the air fryer for about 3-4 minutes at 350°F (175°C). This brings back their crispy texture. You can also use a microwave. Heat them for 10-15 seconds. Just be careful, as they can get chewy.
Freezing Cinnamon Roll Bites
You can freeze these tasty bites for later! Allow them to cool completely first. Then, place them in a freezer-safe bag or container. They can last up to two months in the freezer. When you’re ready to eat, reheat them straight from the freezer in the air fryer.
FAQs
Can I use frozen cinnamon roll dough?
Yes, you can use frozen cinnamon roll dough. Just let it thaw first. Follow package instructions for cooking times and temperatures. You may need to adjust the air frying time. Check for doneness by ensuring they puff up and turn golden brown.
How long do Air Fryer Cinnamon Roll Bites last?
Air Fryer Cinnamon Roll Bites taste best fresh. However, they can last for about two days in an airtight container. Store them at room temperature. If you want them to stay fresh longer, consider refrigeration.
What can I serve with these cinnamon roll bites?
These cinnamon roll bites pair well with coffee or hot chocolate. You can also serve them with fresh fruit or a scoop of vanilla ice cream. For a fun twist, try adding a drizzle of caramel or chocolate sauce.
In this post, I covered how to make delicious Air Fryer Cinnamon Roll Bites. We explored key ingredients, step-by-step cooking methods, and helpful tips for the perfect treat. I shared variations, storage info, and answers to common questions.
These bites bring joy in every bite. With a few tweaks, you can make them your own. Enjoy experimenting with flavors and share these bites with friends and family!

Air Fryer Cinnamon Roll Bites
Ingredients
1 can of refrigerated cinnamon roll dough (8 rolls)
1/4 cup granulated sugar
2 teaspoons ground cinnamon
2 tablespoons melted butter
1/2 cup cream cheese frosting (from the cinnamon roll package or homemade)
Optional: a pinch of sea salt for garnish
Instructions
Preheat your air fryer to 350°F (175°C).
In a small bowl, mix the granulated sugar and ground cinnamon together. Set aside.
Open the can of cinnamon roll dough and separate the rolls. Cut each roll into quarters to create bite-sized pieces.
In a mixing bowl, toss the cinnamon roll pieces in the melted butter until evenly coated.
Sprinkle the cinnamon sugar mixture over the buttered dough and toss again until all pieces are well coated.
Carefully arrange the cinnamon roll bites in a single layer in the air fryer basket, making sure they are not overcrowded. You may need to cook them in batches.
Air fry the cinnamon roll bites for 8-10 minutes, shaking the basket halfway through to ensure even cooking, until golden brown and puffed up.
Once cooked, remove the bites from the air fryer and allow them to cool for a few minutes.
Drizzle cream cheese frosting over the warm cinnamon roll bites. You can warm the frosting slightly in the microwave for easier drizzling if desired.
Optional: Sprinkle a pinch of sea salt on top for an added flavor contrast.
Prep Time: 10 min | Total Time: 20 min | Servings: 4

Air Fryer Cinnamon Roll Bites
Ingredients
- 1 can refrigerated cinnamon roll dough (8 rolls)
- 1 4 cup granulated sugar
- 2 teaspoons ground cinnamon
- 2 tablespoons melted butter
- 1 2 cup cream cheese frosting
- 1 pinch sea salt (optional for garnish)
Instructions
- Preheat your air fryer to 350°F (175°C).
- In a small bowl, mix the granulated sugar and ground cinnamon together. Set aside.
- Open the can of cinnamon roll dough and separate the rolls. Cut each roll into quarters to create bite-sized pieces.
- In a mixing bowl, toss the cinnamon roll pieces in the melted butter until evenly coated.
- Sprinkle the cinnamon sugar mixture over the buttered dough and toss again until all pieces are well coated.
- Carefully arrange the cinnamon roll bites in a single layer in the air fryer basket, making sure they are not overcrowded. You may need to cook them in batches.
- Air fry the cinnamon roll bites for 8-10 minutes, shaking the basket halfway through to ensure even cooking, until golden brown and puffed up.
- Once cooked, remove the bites from the air fryer and allow them to cool for a few minutes.
- Drizzle cream cheese frosting over the warm cinnamon roll bites. You can warm the frosting slightly in the microwave for easier drizzling if desired.
- Optional: Sprinkle a pinch of sea salt on top for an added flavor contrast.

![To create these tasty caramel apple crisp bars, you need a few key ingredients. Here’s what you’ll need: - 2 cups rolled oats - 1 cup all-purpose flour - 1/2 cup brown sugar, packed - 1/2 cup unsalted butter, melted - 1 teaspoon baking soda - 1/2 teaspoon cinnamon - 1/4 teaspoon salt - 3 cups diced apples (about 3 medium apples, peeled and cored) - 1/2 cup granulated sugar - 1 tablespoon lemon juice - 1/2 cup caramel sauce (store-bought or homemade) These ingredients blend together to make a deliciously sweet and crunchy treat. If you need to convert measurements, here are some handy tips: - 1 cup equals 8 ounces. - 1/2 cup equals 4 ounces. - 1 tablespoon equals 15 milliliters. - 1 teaspoon equals 5 milliliters. These conversions help you scale the recipe if needed. You can get creative with your bars! Here are a few optional ingredients: - 1/4 cup chopped nuts, like pecans or walnuts - 1/2 teaspoon vanilla extract - A pinch of nutmeg for warmth - A sprinkle of sea salt on top for contrast Adding these flavors can really elevate your caramel apple crisp bars. If you want, you can mix and match! For the full recipe and instructions, check out the [Full Recipe]. Start by preheating your oven to 350°F (175°C). This step is key for even baking. Next, take a 9x9-inch baking dish and line it with parchment paper. Leave some paper hanging over the edges. This helps when you remove the bars later. In a mixing bowl, combine these ingredients: - 2 cups rolled oats - 1 cup all-purpose flour - 1/2 cup brown sugar, packed - 1/2 cup unsalted butter, melted - 1 teaspoon baking soda - 1/2 teaspoon cinnamon - 1/4 teaspoon salt Stir until the mix looks crumbly. Now, take about two-thirds of this mixture and press it into the bottom of your lined dish. This forms the crust layer. Make sure it is even and compact. Next, grab another bowl and toss together: - 3 cups diced apples (about 3 medium apples, peeled and cored) - 1/2 cup granulated sugar - 1 tablespoon lemon juice Toss until the apples are well coated. Spread this apple mixture evenly over your crust. Drizzle half of the caramel sauce over the apples. This adds a sweet touch. Now, take the remaining oat mixture and crumble it over the apples and caramel. This topping will create a lovely crisp. Once you have done this, you are ready to bake! Follow the [Full Recipe] for the baking time and enjoy the delicious smell that fills your kitchen! Choosing the right apples is key. I recommend using tart apples like Granny Smith. They balance the sweet caramel well. You can also mix sweet apples, like Fuji or Honeycrisp, for extra flavor. Look for firm apples without bruises. They should feel heavy for their size. Fresh apples give a great texture in your bars. For a smooth caramel, heat it gently. If you use store-bought, warm it in a microwave. Stir it every 20 seconds until it’s easy to drizzle. If you make it at home, keep stirring to avoid burning. Let it cool slightly before drizzling. This helps it stick better to the apples and crust. You want that perfect, gooey layer. To keep your bars fresh, store them in an airtight container. This keeps them moist and tasty. You can place parchment paper between layers to avoid sticking. If you have a lot left, freeze them. Just wrap individual bars in plastic wrap, then place them in a freezer bag. They stay good for up to three months. Enjoy your delicious caramel apple crisp bars whenever you want! {{image_2}} You can try different toppings for your caramel apple crisp bars. Add chopped nuts like walnuts or pecans for crunch. You can also sprinkle some shredded coconut for a tropical twist. If you love chocolate, drizzle some melted chocolate on top. These toppings make the dessert even more fun and tasty. If you want a gluten-free crust, swap all-purpose flour with gluten-free flour. Make sure it’s a blend that works well in baking. You can also use almond flour or oat flour for a nutty taste. This way, everyone can enjoy these bars without worry. As the seasons change, so can your bars. In fall, add pumpkin spice to the apple filling. Mix cinnamon, nutmeg, and clove for a warm flavor. For summer, use peaches or berries instead of apples. Each season brings new fun to this recipe. Enjoy the Full Recipe for more ideas! Storing caramel apple crisp bars is simple. Once they cool, place them in an airtight container. You can keep them at room temperature for up to three days. If you want them to last longer, store them in the fridge. This keeps them fresh and tasty. Just make sure they are sealed well to avoid drying out. If you want to save some bars for later, freezing is a great option. First, wrap each bar in plastic wrap. Then, place them in a freezer-safe bag or container. They can stay in the freezer for up to three months. To enjoy later, just thaw them in the fridge overnight. You can also let them sit at room temperature for an hour before eating. Reheating your caramel apple crisp bars can bring back their warm, gooey goodness. To do this, preheat your oven to 350°F (175°C). Place the bars on a baking sheet and cover them with foil. Heat for about 10-15 minutes. This method keeps the bars soft and the caramel melty. You can also use a microwave, but heat them in short bursts to avoid drying them out. Enjoy them warm for a delightful treat! Yes, you can! I love using Granny Smith apples for their tartness. They balance well with the sweet caramel. Honeycrisp apples add a nice crunch and sweetness. You can also mix different types for more flavor. Just make sure the apples are firm and fresh for the best results. To make these bars vegan, swap the unsalted butter for coconut oil or a vegan butter substitute. Use brown sugar, as it is usually vegan. You can also find vegan caramel sauce or make your own. This way, everyone can enjoy the deliciousness of caramel apple crisp bars! After the bars cool, use a sharp knife to cut them. I recommend lifting the whole batch out of the pan using the parchment paper. This makes it easy. For neat squares, wipe the knife clean after each cut. You’ll get perfect pieces to share with friends and family! For the full recipe, check out the details above. Caramel apple crisp bars are simple to make. We covered key ingredients and measurements. You learned how to prepare, create layers, and perfect the caramel drizzle. I shared tips on apple selection and storage. Variations let you explore new flavors, even gluten-free options. In the end, these bars are a fun treat. They work for any season and occasion. Try making them your own! Enjoy the sweet, warm taste today.](https://dailydishlab.com/wp-content/uploads/2025/07/dc1cd077-e04f-4984-9460-89b9559f5089-768x768.webp)


![- 1 cup coconut milk - 1/2 cup chia seeds - 1 ripe mango, diced - 2 tablespoons maple syrup or honey (adjust to taste) - 1 teaspoon vanilla extract - Pinch of salt - Toasted coconut flakes for garnish (optional) - Fresh mint leaves for garnish (optional) Coconut milk offers healthy fats that boost energy. It also helps with digestion. Chia seeds are full of fiber, which aids in digestion and keeps you full longer. Mango is rich in vitamins A and C, which support your immune system and skin. Maple syrup or honey adds natural sweetness and contains antioxidants. Vanilla extract gives flavor and may help reduce stress. Salt enhances taste and can help balance fluids in your body. Toasted coconut flakes add crunch and fiber, while mint adds freshness and aids digestion. If you don't have coconut milk, use almond or oat milk for a different taste. For chia seeds, you can use ground flaxseeds, but the texture will change. Any ripe fruit can replace mango, like bananas or berries, for varied flavors. Maple syrup can be swapped with agave syrup or stevia for a lower-calorie option. If you want a sugar-free choice, skip the sweetener and let the fruit shine. You can use vanilla bean paste instead of extract for a richer flavor. This recipe for Mango Coconut Chia Pudding is simple and packed with flavor. To make Mango Coconut Chia Pudding, start with the coconut milk. In a mixing bowl, combine: - 1 cup coconut milk - 2 tablespoons maple syrup or honey - 1 teaspoon vanilla extract - A pinch of salt Whisk these ingredients until they blend well. Next, add the chia seeds. Gradually whisk in: - 1/2 cup chia seeds This step is key. Make sure the seeds spread evenly in the liquid. Cover the bowl, or move the mix to a container with a lid. Place it in the fridge for at least 4 hours. For best results, leave it overnight. This waiting time lets the chia seeds absorb the coconut milk. After chilling, check the pudding. Stir it well to break up clumps. Now it’s ready for serving! To get the right texture, use fresh chia seeds. Old seeds may not thicken well. If your pudding is too thick, add a bit more coconut milk. For a creamier texture, use full-fat coconut milk. Remember to stir well after chilling. This helps avoid clumps and ensures smoothness. For a beautiful presentation, layer the pudding in clear glasses. Start with a layer of chia pudding, then add: - Diced mango Repeat the layers until the glass is full. Finish with a sprinkle of toasted coconut flakes and fresh mint leaves. This adds color and flavor. Serve it cold for a refreshing treat. For the full recipe, check below! You can make this pudding your own. Here are my favorite tips: - Add spices: A sprinkle of cinnamon or nutmeg can bring warmth. - Mix fruits: Try adding berries or pineapple for a tropical twist. - Change sweeteners: Use agave nectar or stevia instead of maple syrup. - Include nuts: Chopped almonds or walnuts add crunch and nutrition. Watch out for these common errors to get the best pudding: - Not whisking well: Make sure to mix the chia seeds fully into the liquid. - Skipping the chill time: Let the pudding sit for at least four hours. - Using too much liquid: Stick to the recipe for the right balance. - Not stirring before serving: A quick stir helps mix any settled chia seeds. You can boost both flavor and texture with some easy tricks: - Layer with fruit: Diced mango between layers adds freshness and color. - Garnish well: Use toasted coconut and mint leaves for a beautiful finish. - Serve chilled: This pudding tastes best when cold and creamy. - Experiment with toppings: Yogurt, granola, or seeds can add fun textures. For the full recipe, check out the detailed instructions above! {{image_2}} You can change the mango in this pudding for other fruits. Pineapple, kiwi, or passion fruit work great. Each fruit adds its own flavor and texture. You might want to mix in diced fruit before chilling the pudding. This way, each spoonful has a burst of tropical taste. You can also top the pudding with extra fruit for a colorful look. Coconut milk is a star in this recipe. If you want to try something different, use almond or oat milk. Both options are dairy-free and still creamy. Just keep in mind that each milk will change the flavor a bit. If you want a thicker base, add more chia seeds. This will help you achieve that creamy texture you love. Maple syrup or honey gives sweetness to the pudding. If you want a sugar-free option, try stevia or agave syrup. Both are great for adding sweetness without calories. You can also use ripe bananas for natural sweetness. Just mash them well and mix them into the base. This adds a new flavor while keeping the pudding healthy. For the full recipe, you can check the earlier section. Enjoy these fun variations! To keep your mango coconut chia pudding fresh, store it in airtight containers. This helps prevent any unwanted odors or flavors from seeping in. Make sure to place the pudding in the fridge right after it cools. You can also layer it in small jars for easy serving later. Mango coconut chia pudding lasts about 5 days in the fridge. If you want to keep it longer, you can freeze it. Pour the pudding into ice cube trays for easy portions. Just remember to thaw it in the fridge before serving. Do not refreeze after thawing. If your pudding thickens too much in the fridge, simply add a splash of coconut milk. Stir well to achieve your desired consistency. You can also mix in fresh mango pieces for a flavor boost. Enjoy it cold or let it sit at room temperature for a few minutes before digging in. Chia pudding is a simple dish made from chia seeds and liquid. When you mix chia seeds with coconut milk, they absorb the liquid. This makes a thick, creamy texture. To make it, whisk coconut milk, maple syrup, vanilla, and salt. Then, stir in chia seeds. Cover and chill for at least four hours. This lets the seeds swell and form a pudding. Yes, you can use different types of milk. Almond, soy, or oat milk work well. Each type adds its own flavor. Coconut milk gives a rich, tropical taste. Try what you like best to find your favorite! Mango coconut chia pudding lasts about four to five days in the fridge. Store it in an airtight container to keep it fresh. If you notice any changes in smell or texture, it is best to throw it away. Yes, chia pudding is very healthy. Chia seeds are high in fiber and protein. They also contain omega-3 fatty acids. Coconut milk provides good fats and vitamins. This dish is great for breakfast or a snack. To make chia pudding without sugar, skip the sweeteners. Use ripe mango for natural sweetness. You can also add spices like cinnamon or nutmeg for flavor. This makes the pudding tasty without added sugar. Here’s how to make it: - 1 cup coconut milk - 1/2 cup chia seeds - 1 ripe mango, diced - 2 tablespoons maple syrup or honey (adjust to taste) - 1 teaspoon vanilla extract - Pinch of salt - Toasted coconut flakes for garnish (optional) - Fresh mint leaves for garnish (optional) Follow the [Full Recipe] for step-by-step details on how to prepare this delicious treat! Mango coconut chia pudding is simple and fun to make. We explored key ingredients, their health perks, and ways to swap them out. I provided clear steps to prepare the dish and serve it just right. We looked at tips to enhance flavors and avoid common mistakes. You can try tropical fruit variations and find dairy-free options too. Proper storage ensures your pudding stays fresh and tasty. With these insights, you can create a delicious treat that fits your tastes and lifestyle. Enjoy your chia pudding adventure!](https://dailydishlab.com/wp-content/uploads/2025/07/e4ad1822-a4f3-41e3-be5e-fabc0a8bd60a-768x768.webp)
. To get that perfect soft and chewy texture, use room temperature butter. This helps create a great blend with the sugars. Cream the butter and sugars until they feel light and fluffy. Mix only until combined when adding flour. Over-mixing can lead to tough cookies. Baking time is key too. Take them out when the edges turn golden but the centers still look soft. One common mistake is using cold butter. This won’t mix well and will affect the texture. Another issue is not measuring flour correctly. Too much flour makes cookies dry. Don’t skip the sea salt on top. It enhances the flavors and balances the sweetness. Lastly, don’t overcrowd the baking sheet. Cookies need space to spread. To keep cookies fresh, store them in an airtight container. They stay soft for days that way. For longer storage, freeze them. Just make sure to wrap them well. When you want them warm, pop them in the oven at 350°F for a few minutes. This brings back their soft, chewy goodness. You can also microwave them for about 10 seconds, but be careful not to overheat. Enjoy your cookies as they were meant to be! For more on making these cookies, check out the Full Recipe. {{image_2}} You can choose between classic milk chocolate and rich dark chocolate. The classic version is sweet and creamy. It brings back childhood memories. Dark chocolate has a bold taste, with a hint of bitterness. I love using dark chocolate chips, especially those with 70% cocoa or more. They add depth and contrast to the sweet cookie dough. For a fun twist, mix both types of chocolate. This combo makes for a delightful surprise in every bite. Want to switch things up? Add nuts or spices to your cookies. Chopped walnuts or pecans give the cookies a nice crunch. They also add a warm, nutty flavor. You can also try adding a pinch of cinnamon or a dash of sea salt. These additions elevate the taste. If you want a fruity twist, fold in some dried cherries or cranberries. This adds a chewy texture and a burst of flavor. Each option brings a new life to the classic recipe. You can easily modify this recipe for special diets. For a vegan option, replace the butter with coconut oil. Use flax eggs instead of chicken eggs. To make gluten-free cookies, swap all-purpose flour with almond or oat flour. These swaps work well and still taste great. You can experiment and find the best fit for your needs. Just remember, the texture might change slightly. For more ideas, check the Full Recipe related to adaptations. To keep your cookies soft and chewy, store them in an airtight container. Place a slice of bread in the container. The bread adds moisture and helps the cookies stay fresh. You can also use parchment paper between layers of cookies. This keeps them from sticking together. Freezing cookie dough is easy. First, scoop the dough into balls. Place the balls on a baking sheet. Freeze until firm, about 1-2 hours. Then transfer the dough balls to a freezer bag. Label the bag with the date and type of cookie. This way, you can enjoy fresh cookies later. To thaw frozen cookie dough, move it from the freezer to the fridge overnight. If you need cookies fast, you can bake them straight from the freezer. Just add a minute or two to the baking time. For reheating baked cookies, pop them in the microwave for about 10-15 seconds. This brings back the soft, warm texture. Enjoy your homemade treats with every bite! Chocolate chip cookies stay fresh for about one week at room temperature. Place them in an airtight container to keep them soft. You can also store them in the fridge for longer life. Just remember, cold cookies might lose their soft feel. Yes, you can use oil instead of butter. The cookies may spread a bit more, but they will still taste great. Use a little less oil than the butter amount. For example, if the recipe calls for one cup of butter, use about three-quarters cup of oil. If your dough feels sticky, add a bit more flour. Start with one tablespoon and mix it in. Keep adding until the dough holds together but is still soft. You want it to be easy to scoop but not too wet. To get chewy cookies, use more brown sugar than white sugar. Brown sugar adds moisture. Also, try chilling the dough for at least an hour before baking. This helps the cookies stay thicker and chewier. You can find the full recipe for my decadent dark chocolate chip cookies to see all the tips in action! Now you know how to make the best chocolate chip cookies. We covered key ingredients, step-by-step baking, and tips for the perfect cookie. You can customize your cookies to fit any diet. Remember to store them properly to keep them fresh. With these tips, you can enjoy delicious cookies anytime. Happy baking!](https://dailydishlab.com/wp-content/uploads/2025/06/fa49041d-95ac-4bc8-8fd4-5b20d3bd1dd4-768x768.webp)