Air Fryer Corn Ribs with Chili Lime Flavor Burst

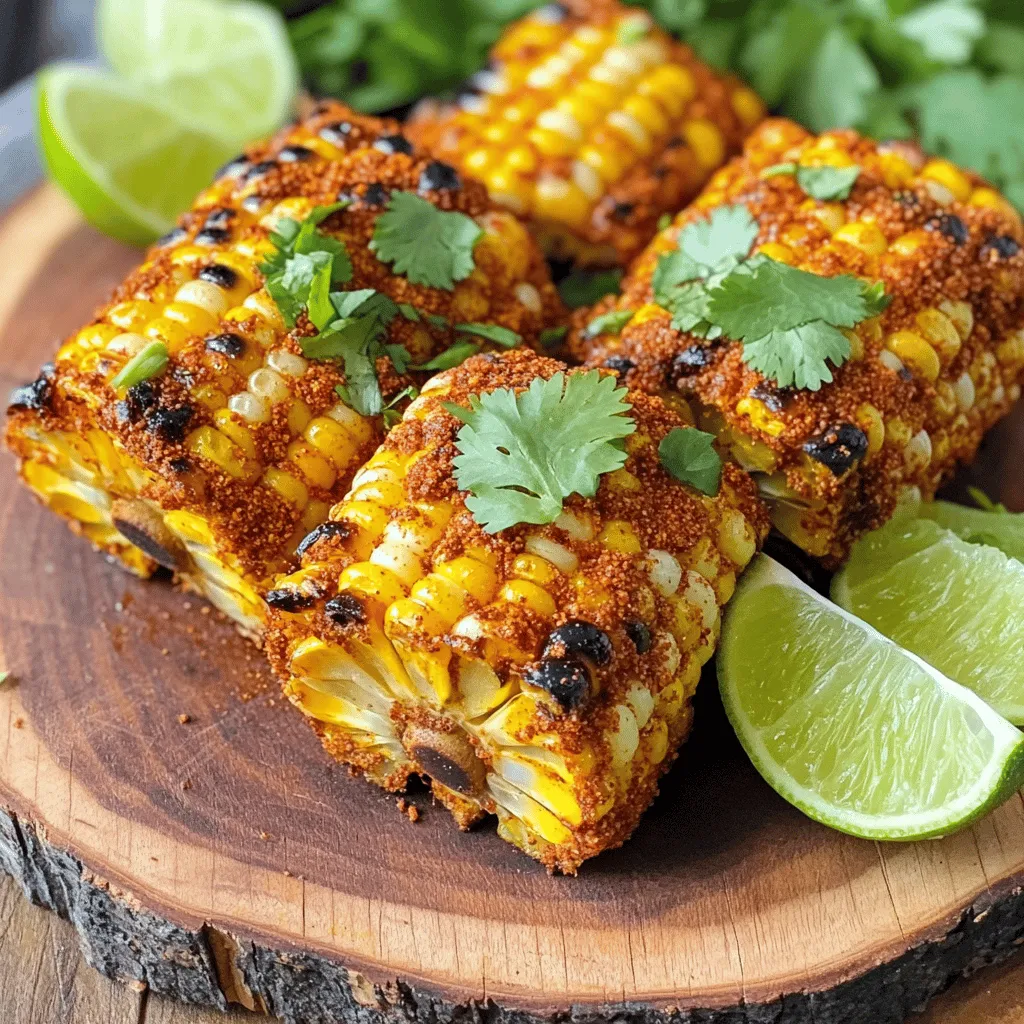
Looking for a fun and tasty twist on corn? You’ll love these Air Fryer Corn Ribs with a zesty chili lime flavor! Ready in under 20 minutes, this dish is perfect for snacks or as a side. I’ll guide you through the simple steps to make these crispy, juicy corn ribs that burst with flavor. Get your air fryer ready, and let’s get cooking!
Why I Love This Recipe
- Unique Flavor Combination: The blend of chili powder, smoked paprika, and lime zest brings an exciting twist to classic corn on the cob.
- Healthier Alternative: Cooking in an air fryer allows for a crispy texture without the excess oil, making it a lighter option.
- Quick and Easy: With a total preparation time of just 25 minutes, this dish is perfect for a quick side or snack.
- Customizable: You can easily adjust the seasoning to your taste or add your favorite toppings for a personal touch.
Ingredients
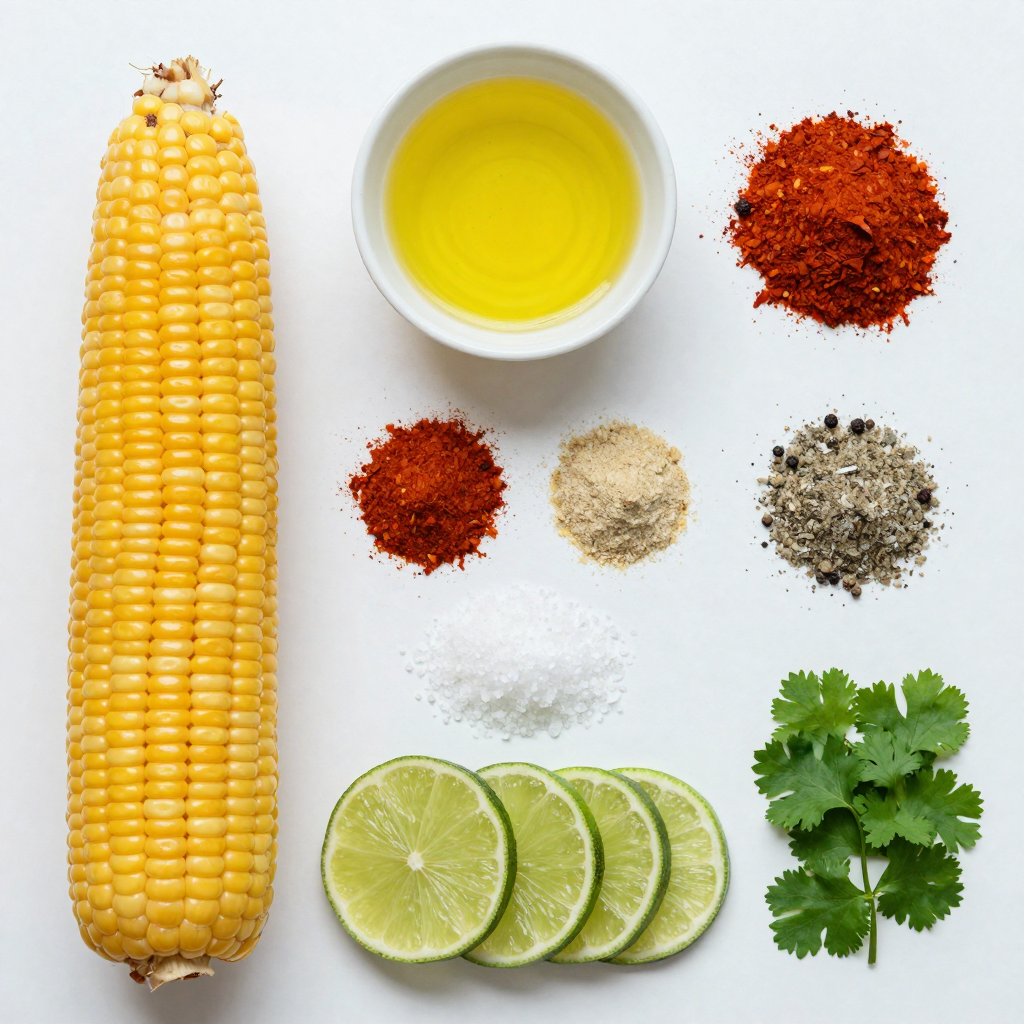
To make Air Fryer Corn Ribs with Chili Lime, you’ll need a few simple ingredients that pack a big flavor punch. Here’s what you’ll gather:
- 2 large ears of corn
- 2 tablespoons olive oil
- 1 teaspoon chili powder
- 1 teaspoon smoked paprika
- 1 teaspoon garlic powder
- 1/2 teaspoon salt
- 1/2 teaspoon black pepper
- Zest of 1 lime
- 1 tablespoon fresh lime juice
- Fresh cilantro, chopped (for garnish)
- Lime wedges (for serving)
These ingredients come together to create a vibrant dish. The corn provides a sweet base, while the spices add warmth and depth. The lime juice and zest offer a bright finish. Make sure to use fresh ingredients for the best taste. You can mix and match spices if you want to explore new flavors. This recipe is flexible, and you can adjust as you go!

Step-by-Step Instructions
Preparing the Corn
1. Start by carefully removing the husks and silk from the two large ears of corn. This step is key for a clean bite.
2. Stand the corn upright in a sturdy bowl. With a sharp knife, cut each ear into quarters. This way, you get nice, even pieces.
Seasoning the Corn
1. In a large mixing bowl, mix 2 tablespoons of olive oil with the spices. Combine 1 teaspoon of chili powder, 1 teaspoon of smoked paprika, 1 teaspoon of garlic powder, 1/2 teaspoon of salt, and 1/2 teaspoon of black pepper.
2. Add the zest of 1 lime to this blend. This will pack in that zesty flavor. Stir well until the spices are fully combined.
Air Frying the Corn
1. Preheat your air fryer to 375°F (190°C). This helps the corn cook evenly and get crispy.
2. Place the seasoned corn ribs in the air fryer basket in a single layer. If your air fryer is small, you might need to cook in batches.
3. Air fry the corn ribs for about 12-15 minutes. Flip them halfway through cooking to ensure they crisp up all over.
4. Check for doneness. The corn should be golden and crispy. If it needs more time, give it a few extra minutes.
Enjoy the process, and remember to savor each step!
Pro Tips
- Use Fresh Corn: For the best flavor, use fresh, in-season corn. It’s sweeter and more tender than frozen or canned corn.
- Adjust Spice Levels: Feel free to adjust the amount of chili powder to suit your taste. You can also add cayenne pepper for extra heat.
- Experiment with Seasonings: Try adding other spices like cumin or paprika to customize the flavor of your corn ribs.
- Don’t Overcrowd the Air Fryer: Make sure to air fry the corn ribs in a single layer for even cooking and crispiness.
Tips & Tricks
Ensuring Even Cooking
To cook corn ribs well, place them in a single layer in the air fryer. This step is key. If you stack them, some parts won’t cook right. If your air fryer is small, cook in batches. This way, each piece gets the heat it needs.
Achieving the Best Flavor
Use fresh lime juice for the best taste. It adds a bright kick. You can also try other spices. Adding cayenne pepper gives heat. Fresh herbs like cilantro or parsley can enhance flavor. They bring freshness to each bite.
Serving Suggestions
Garnish the corn ribs with chopped cilantro for color and taste. Lime wedges on the side add extra zest. Serve with dips like avocado or hummus. These pair well and will impress your guests. You can also enjoy them with a fresh salad for a complete meal.

Variations
Different Seasoning Options
You can mix up the flavors of your corn ribs easily. Here are some ideas:
- Spicy additions: If you like heat, add cayenne pepper or red pepper flakes. A pinch goes a long way!
- Herbed variations: Fresh herbs like parsley or basil can boost flavor. Try adding them right before serving.
Cooking Method Alternatives
You can also cook corn ribs in different ways. Here are two great options:
- Oven-baked corn ribs: Preheat your oven to 400°F (200°C). Place seasoned corn on a baking sheet. Bake for 20-25 minutes, flipping halfway through.
- Grilled corn ribs: Preheat your grill to medium heat. Cook corn ribs for about 10-12 minutes, turning often for even grilling.
Dietary Adjustments
Making your corn ribs fit your diet is simple. Here are some tips:
- Vegetarian or vegan options: This recipe is already plant-based! Just ensure any toppings are vegan.
- Gluten-free considerations: All ingredients here are gluten-free. Enjoy worry-free!
Feel free to mix and match these ideas. They can take your corn ribs to a whole new level!
Storage Info
Refrigeration Recommendations
To store leftovers, place the corn ribs in an airtight container. This helps keep them fresh. You can also wrap them in plastic wrap. They will stay good for about three days in the fridge.
Reheating Instructions
To reheat in the air fryer, preheat it to 375°F (190°C). Place the corn ribs in a single layer. Heat for about 5 minutes, flipping halfway through. This keeps them crispy. If you don’t have an air fryer, you can use an oven. Heat the oven to 350°F (175°C) and bake for 8-10 minutes.
Freezing Corn Ribs
If you want to freeze corn ribs, wrap them tightly in plastic wrap. Then, place them in a freezer bag. This prevents freezer burn. They can last up to three months in the freezer. When you’re ready to eat them, thaw them in the fridge overnight. For quicker thawing, you can use the microwave on defrost mode.
FAQs
What are corn ribs?
Corn ribs are a fun way to enjoy corn on the cob. You take an ear of corn and cut it into quarters. Each piece looks like a rib. These are perfect for air frying. They get nice and crispy. You can season them with spices for extra flavor.
Can I use frozen corn?
Using frozen corn is possible, but it can change the taste. Frozen corn may have more water. This can make the ribs less crispy. If you use frozen corn, thaw it first. Pat it dry with a towel to remove extra moisture. This helps keep them crunchy.
How to tell when corn ribs are done?
You can tell corn ribs are done by looking at their color. They should be golden brown. They will also feel crispy when you touch them. If they are soft, give them more time in the air fryer. Flipping them halfway helps them cook evenly.
How to customize the spice level?
You can change the spice level easily. If you like it hot, add more chili powder or cayenne. For milder flavor, reduce the chili powder. You can also try adding other spices, like cumin or paprika. Taste the seasoning mix before coating the corn. Adjust to your liking for the best flavor.
This blog covered tasty corn ribs. You learned to prepare, season, and cook them. The tips and variations help you add your touch to the dish. Remember to store leftovers correctly for the best flavor. With these methods, you can impress anyone at your next meal. Enjoy experimenting with spice levels and cooking methods! Your kitchen adventures await. Happy cooking!

Air Fryer Corn Ribs with Chili Lime
Ingredients
2 large ears of corn
2 tablespoons olive oil
1 teaspoon chili powder
1 teaspoon smoked paprika
1 teaspoon garlic powder
1/2 teaspoon salt
1/2 teaspoon black pepper
Zest of 1 lime
1 tablespoon fresh lime juice
Fresh cilantro, chopped (for garnish)
Lime wedges (for serving)
Instructions
Prepare the Corn: Start by removing the husks and silk from the ears of corn. Cut each ear of corn into quarters. To do this safely, stand the corn upright in a sturdy bowl and slice downward with a sharp knife.
Season the Corn: In a large mixing bowl, combine the olive oil, chili powder, smoked paprika, garlic powder, salt, black pepper, and lime zest. Mix well to create a seasoning blend.
Coat the Corn: Add the corn quarters to the bowl and toss them in the seasoning mixture until they are evenly coated.
Air Frying: Preheat your air fryer to 375°F (190°C). Place the seasoned corn ribs in the air fryer basket in a single layer. You may need to do this in batches, depending on the size of your air fryer.
Cook the Corn: Air fry the corn ribs for about 12-15 minutes, flipping them halfway through cooking, until they are golden and crispy.
Finish with Lime: Once cooked, remove the corn ribs from the air fryer and drizzle them with fresh lime juice. Toss to coat.
Garnish and Serve: Transfer the corn ribs to a serving platter and garnish with chopped cilantro. Serve with lime wedges on the side for an extra zesty kick.
Prep Time: 10 minutes | Total Time: 25 minutes | Servings: 4

Air Fryer Corn Ribs with Chili Lime
Ingredients
- 2 large ears corn
- 2 tablespoons olive oil
- 1 teaspoon chili powder
- 1 teaspoon smoked paprika
- 1 teaspoon garlic powder
- 1/2 teaspoon salt
- 1/2 teaspoon black pepper
- 1 zest lime
- 1 tablespoon fresh lime juice
- to taste fresh cilantro, chopped (for garnish)
- to serve lime wedges
Instructions
- Prepare the Corn: Start by removing the husks and silk from the ears of corn. Cut each ear of corn into quarters. To do this safely, stand the corn upright in a sturdy bowl and slice downward with a sharp knife.
- Season the Corn: In a large mixing bowl, combine the olive oil, chili powder, smoked paprika, garlic powder, salt, black pepper, and lime zest. Mix well to create a seasoning blend.
- Coat the Corn: Add the corn quarters to the bowl and toss them in the seasoning mixture until they are evenly coated.
- Air Frying: Preheat your air fryer to 375°F (190°C). Place the seasoned corn ribs in the air fryer basket in a single layer. You may need to do this in batches, depending on the size of your air fryer.
- Cook the Corn: Air fry the corn ribs for about 12-15 minutes, flipping them halfway through cooking, until they are golden and crispy.
- Finish with Lime: Once cooked, remove the corn ribs from the air fryer and drizzle them with fresh lime juice. Toss to coat.
- Garnish and Serve: Transfer the corn ribs to a serving platter and garnish with chopped cilantro. Serve with lime wedges on the side for an extra zesty kick.


![To make delicious Deep-Dish Pizza Muffins, gather these simple ingredients: - 2 cups all-purpose flour - 1 tablespoon baking powder - 1 teaspoon garlic powder - ½ teaspoon salt - 1 cup shredded mozzarella cheese - ½ cup pepperoni, diced - ½ cup green bell pepper, finely chopped - ½ cup marinara sauce (plus extra for serving) - 1 cup milk - ⅓ cup olive oil - 1 large egg - Italian seasoning, for garnish These ingredients create a tasty muffin that bursts with pizza flavor. Each one is packed with cheese, pepperoni, and veggies. You can mix and match these items to fit your taste. For example, you can swap pepperoni for veggies or try different cheeses. The options are endless! When you gather your ingredients, make sure they are fresh. Fresh ingredients make the muffins taste better. You can find all these items at your local grocery store. If you want, you can even get organic or local options for a healthier choice. Don't forget to check out the Full Recipe for more details on making these muffins, including cooking times and tips! 1. Preheat your oven to 375°F (190°C). This step is key for even baking. 2. Prepare a standard muffin tin by greasing each cup with cooking spray or olive oil. This keeps the muffins from sticking. 3. In a large bowl, mix together the all-purpose flour, baking powder, garlic powder, and salt. Make sure to whisk them well. 4. Now, gently fold in the shredded mozzarella cheese, diced pepperoni, and finely chopped green bell pepper. Mix until they are evenly spread in the flour blend. 1. In another bowl, whisk together the milk, olive oil, and egg. This helps create a smooth mixture for the batter. 1. Slowly pour the wet mix into the dry ingredients. Stir gently until just combined. The batter should be slightly lumpy. 2. Spoon the batter into the prepared muffin tin. Fill each cup about three-quarters full. 3. For a fun twist, add a small dollop of marinara sauce on top of each muffin. 4. Sprinkle some Italian seasoning over the muffins to enhance the flavor. 5. Bake in the preheated oven for 20-25 minutes. The muffins will rise and turn golden brown. 6. To check if they are done, insert a toothpick in the center of a muffin. If it comes out clean, they are ready. 7. Let the muffins cool in the tin for a few minutes, then transfer them to a wire rack to cool completely. This quick process will lead you to delicious Deep-Dish Pizza Muffins! For the complete recipe, refer to the [Full Recipe]. To make the best deep-dish pizza muffins, avoid overmixing the batter. Overmixing can make the muffins tough. Mix just enough until the ingredients come together. To check for doneness, insert a toothpick into the center of a muffin. If the toothpick comes out clean, the muffins are ready. If it has wet batter, bake a few more minutes. For a great presentation, serve the muffins warm on a rustic wooden board. This adds a cozy touch. Include a small bowl of extra marinara sauce for dipping. This makes every bite even better! Garnish with fresh basil leaves for color and taste. Pair these muffins with a simple salad or garlic bread. They make a great meal or snack. You can swap ingredients for different flavors. Try using cheddar or pepper jack cheese for a twist. For a meatless option, add mushrooms or diced zucchini. Adjust the spice level by adding red pepper flakes or using spicy pepperoni. You can customize each batch to suit your taste! {{image_4}} You can change the cheese in these muffins for new tastes. Try using cheddar cheese for a sharp bite. Pepper jack cheese adds a spicy kick. Mixing mozzarella with these cheeses gives a creamy texture. Experimenting with cheese can make your muffins unique. If you want a vegetarian version, skip the pepperoni. You can use mushrooms for a hearty feel. Chopped spinach or zucchini also works well. These veggies add flavor and moisture. Using different toppings keeps the muffins fresh and fun. The dough you choose can change the whole muffin. You can use pizza dough for a chewy texture. Or, try biscuit dough for a fluffy muffin. Each option brings a new twist to the dish. Experiment with dough types to find your favorite. Don't forget to check the Full Recipe for more ideas! To keep your deep-dish pizza muffins fresh at room temperature, place them in an airtight container. This helps prevent them from drying out. If you plan to eat them within two days, they will stay tasty and soft. If you have more, consider freezing them. For best results, freeze the muffins after they cool completely. Wrap each muffin in plastic wrap. Then, place them in a freezer bag. This keeps them fresh for up to three months. To thaw, leave them in the fridge overnight or set them on the counter for a few hours. To reheat the muffins without drying them out, use the oven. Preheat it to 350°F (175°C). Place the muffins on a baking sheet and cover them with foil. Heat for about 10-15 minutes. This method keeps them moist and warm, ready for you to enjoy. For a quick option, you can microwave them for about 20-30 seconds, but they may dry out more this way. Deep-Dish Pizza Muffins come from Chicago's famous deep-dish pizza. This style of pizza started in the 1940s. It became popular for its thick crust and plenty of toppings. These muffins take that rich flavor and make it bite-sized. They are fun, easy to share, and perfect for parties. You get all the classic tastes in a new form. Yes, you can make these muffins ahead of time. After baking, let them cool completely. Store them in an airtight container at room temperature. They stay fresh for about two days. You can also freeze them. Wrap each muffin tightly and place them in a freezer bag. They can last up to three months. When ready to eat, thaw them in the fridge overnight. Warm them in the oven for the best taste. Absolutely! You can use gluten-free flour for these muffins. Just make sure to choose a good blend. A cup-for-cup gluten-free flour works well. This makes it easy to substitute without changing the recipe. The muffins may be slightly different in texture but still taste great. Enjoy your tasty treat without worry! This blog post guides you through making delicious deep-dish pizza muffins. We covered the key ingredients needed, each step, and helpful tips for the best results. Remember to avoid overmixing the batter and check for doneness to achieve perfect muffins. You can customize the recipe with different toppings and adjust flavors to suit your tastes. These muffins freeze well and reheat easily. Enjoy your baking, and watch these tasty treats impress your family and friends!](https://dailydishlab.com/wp-content/uploads/2025/06/d9a1d58c-7d1e-421a-bb26-4a1991aecf18-768x768.webp)


