

Are you ready to transform your snack game? Let’s make Air Fryer Parmesan Zucchini Fries that are both crispy and flavorful! This easy recipe will take your zucchini to the next level with just a few key ingredients. From choosing the best zucchini to achieving that perfect crunch, I’ll guide you every step of the way. Get your air fryer ready—these fries will become your new favorite!
Why I Love This Recipe
- Healthy Alternative: These zucchini fries are a great way to enjoy a crunchy snack without the guilt of traditional fries.
- Easy to Make: The preparation is quick and straightforward, making it perfect for busy weeknights.
- Customizable: You can easily modify the seasoning or dipping sauces to match your favorite flavors.
- Family-Friendly: This recipe is a hit with both kids and adults, making it a great addition to any meal.
Ingredients
Main Ingredients
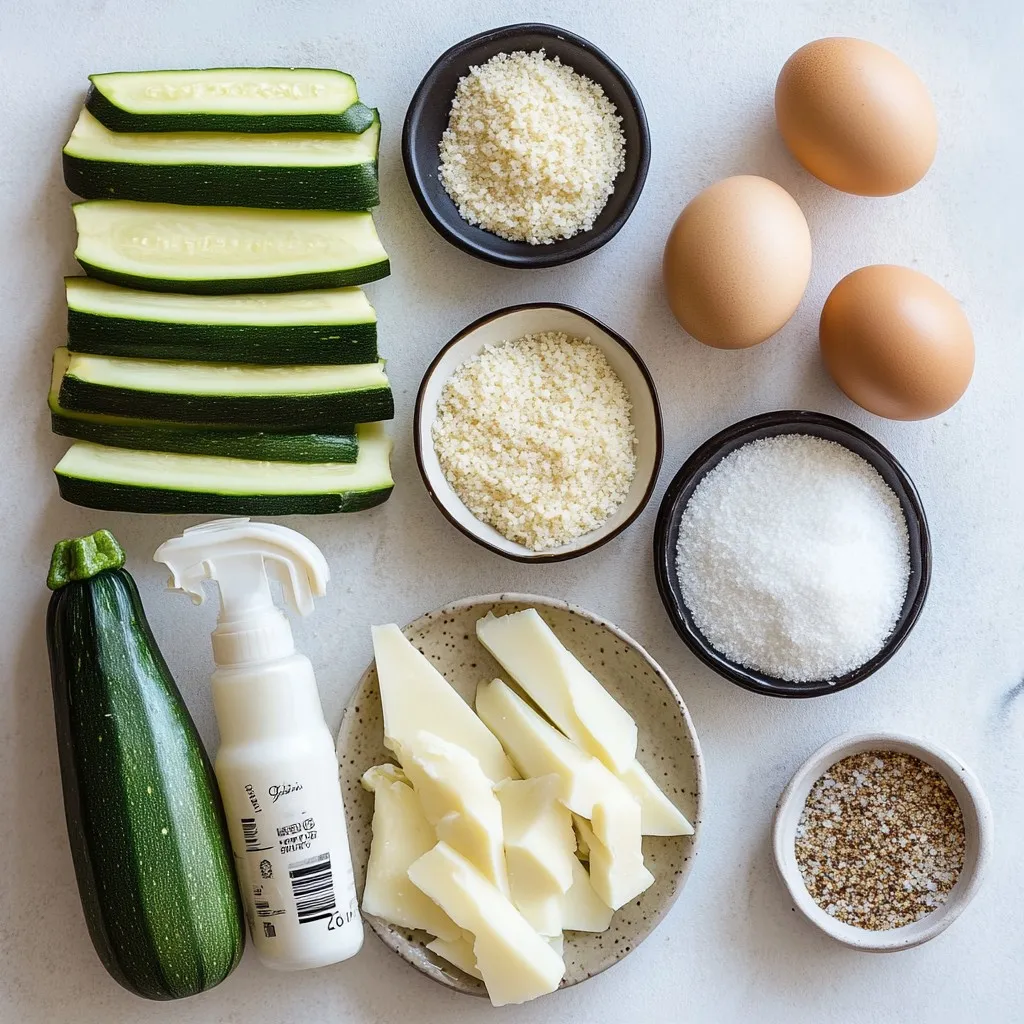
– 2 medium zucchinis
– 1 cup breadcrumbs (preferably whole wheat)
– ½ cup grated Parmesan cheese
Zucchini serves as the star of this dish. They offer a mild taste and a satisfying crunch. Choose firm zucchinis for the best results. Breadcrumbs give the fries a crispy coating, while Parmesan cheese adds a rich, savory flavor. The blend of these three ingredients creates a delicious base.
Seasoning Components
– 1 teaspoon garlic powder
– 1 teaspoon Italian seasoning
– Salt and pepper to taste
Garlic powder brings a warm, savory note to the fries. Italian seasoning adds a mix of herbs that enhance the flavor. Salt and pepper round out the taste, making each bite more enjoyable. These seasonings transform simple zucchini into a tasty treat.
Additional Ingredients
– 2 large eggs
– Cooking spray
Eggs act as a binder, helping the breadcrumb mixture stick to the zucchini. They add a nice layer of richness too. Cooking spray ensures that the fries get crisp without excess oil. It helps achieve that perfect golden-brown finish that we all love.
Step-by-Step Instructions
Preparation Steps
– Preheat air fryer: Start by preheating your air fryer to 400°F (200°C). This helps your fries cook evenly.
– Cut zucchinis into fries: Wash your zucchinis first. Next, cut them into thick strips. Aim for a fry shape, about half an inch thick. Set them aside for now.
Coating Process
– Mixing breadcrumbs and seasonings: In a shallow bowl, combine 1 cup of breadcrumbs, ½ cup of grated Parmesan cheese, 1 teaspoon of garlic powder, 1 teaspoon of Italian seasoning, and some salt and pepper. Stir this mixture well.
– Dipping zucchini fries in egg and breadcrumb mixture: In another bowl, beat 2 large eggs. Take each zucchini fry and dip it into the eggs. Let any extra egg drip off. Then, coat it in the breadcrumb mix, pressing gently to help it stick.
Air Frying Instructions
– Arranging fries in the air fryer: Place your coated zucchini fries in the air fryer basket. Make sure they lie in a single layer. They should not touch. You may need to fry them in batches if your air fryer is small.
– Cooking time and flipping steps: Lightly spray the tops of the fries with cooking spray. This adds extra crunch. Air fry the zucchini fries for 10-12 minutes. Flip them halfway through. You want them to be golden brown and crispy when done.
Tips & Tricks
Perfecting Crispiness
To get your zucchini fries crispy, avoid overcrowding the air fryer basket. When fries touch, they steam instead of crisping up. Cook them in batches if needed. A light layer of cooking spray helps too. It creates a nice crunch on the surface, making each fry golden and tasty.
Zucchini Selection
Choose medium-sized zucchinis for the best fries. Look for firm, shiny ones without soft spots. Cut them into thick strips, about the size of regular fries. This helps them cook evenly and hold their shape. A steady hand will make your cuts neat and uniform.
Serving Suggestions
Zucchini fries are great with dips. Try marinara sauce or garlic aioli for a tasty kick. For a pop of color, garnish with fresh parsley. It makes your dish look fancy and inviting. Serve them warm for the best flavor and crunch.
Pro Tips
- Choose the Right Zucchini: Select firm zucchinis that are medium-sized for the best texture and flavor. Avoid oversized zucchinis as they tend to be watery and less flavorful.
- Make It Gluten-Free: Substitute the breadcrumbs with gluten-free alternatives like almond flour or gluten-free panko for a delicious gluten-free version.
- Enhance Flavor: Experiment with additional spices such as smoked paprika or cayenne pepper to give your zucchini fries an extra kick of flavor.
- Storage Tips: If you have leftovers, store them in an airtight container in the fridge. Reheat in the air fryer for a few minutes to regain their crispiness.
Variations
Different Seasonings
You can easily spice up your zucchini fries. For a spicy kick, add cayenne pepper to the breadcrumb mix. Start with a pinch and adjust to your taste. If you love herbs, try fresh herbs like basil or oregano. These add a bright flavor and make your fries even better.
Cheese Alternatives
Switching up the cheese can change the flavor. Cheddar cheese is a great option if you want a sharper taste. Just replace the Parmesan with the same amount of cheddar. If you prefer a vegan option, use nutritional yeast instead of cheese. You can also use flax eggs instead of regular eggs for binding.
Alternative Cooking Methods
Don’t worry if you don’t have an air fryer. You can bake these fries in the oven. Preheat your oven to 425°F (220°C) and spread the fries on a baking sheet. Bake for about 20 minutes, flipping halfway through. If you enjoy deep-frying, you can use a conventional deep fryer. Fry the zucchini fries in hot oil until golden brown. This method gives a crunchy outside, but it adds more fat.
Storage Info
How to Store Leftover Zucchini Fries
To keep your leftover zucchini fries fresh, place them in an airtight container. This helps retain their crispness. Line the bottom of the container with a paper towel. The towel absorbs extra moisture. You can store them in the fridge for up to three days.
Reheating Instructions
To reheat the fries, use your air fryer. Set it to 350°F (175°C) and heat for about 5 minutes. This method keeps them crispy. You can also use an oven. Preheat it to 350°F (175°C) and bake for about 10 minutes. Avoid the microwave, as it makes them soggy.
Freezing Tips
Yes, you can freeze zucchini fries! To prepare them for freezing, let them cool completely first. Spread them on a baking sheet in a single layer. Freeze for about two hours. Then, transfer them to a freezer bag or container. Remove as much air as possible. They can stay in the freezer for up to three months.
FAQs
Can I use frozen zucchini for this recipe?
Yes, you can use frozen zucchini, but it changes the texture. Frozen zucchini tends to be softer when cooked. This can lead to fries that are less crispy. If you use frozen, adjust the cooking time. Cook them a bit longer to ensure they heat through.
How can I make zucchini fries without breadcrumbs?
You can make these fries without breadcrumbs by using crushed nuts or seeds. Almond flour or ground flaxseed works well. You can also coat the zucchini in cheese. This makes a tasty, gluten-free alternative.
What dipping sauces pair well with zucchini fries?
Many sauces go well with zucchini fries. Marinara sauce is a classic choice. Garlic aioli adds a rich flavor. Ranch dressing is another great option. You can even try spicy salsas for a kick.
In this article, we covered how to make delicious zucchini fries. We looked at the key ingredients, like zucchini and Parmesan. I explained the step-by-step method, from cutting to air frying. You learned tips for perfect crispiness and seasoning variations.
For your next snack, give these zucchini fries a try. They’re easy, tasty, and have many options. Enjoy customizing your recipe, and don’t forget your favorite dip


