Baked Chicken Parmesan Sliders Tasty and Easy Recipe

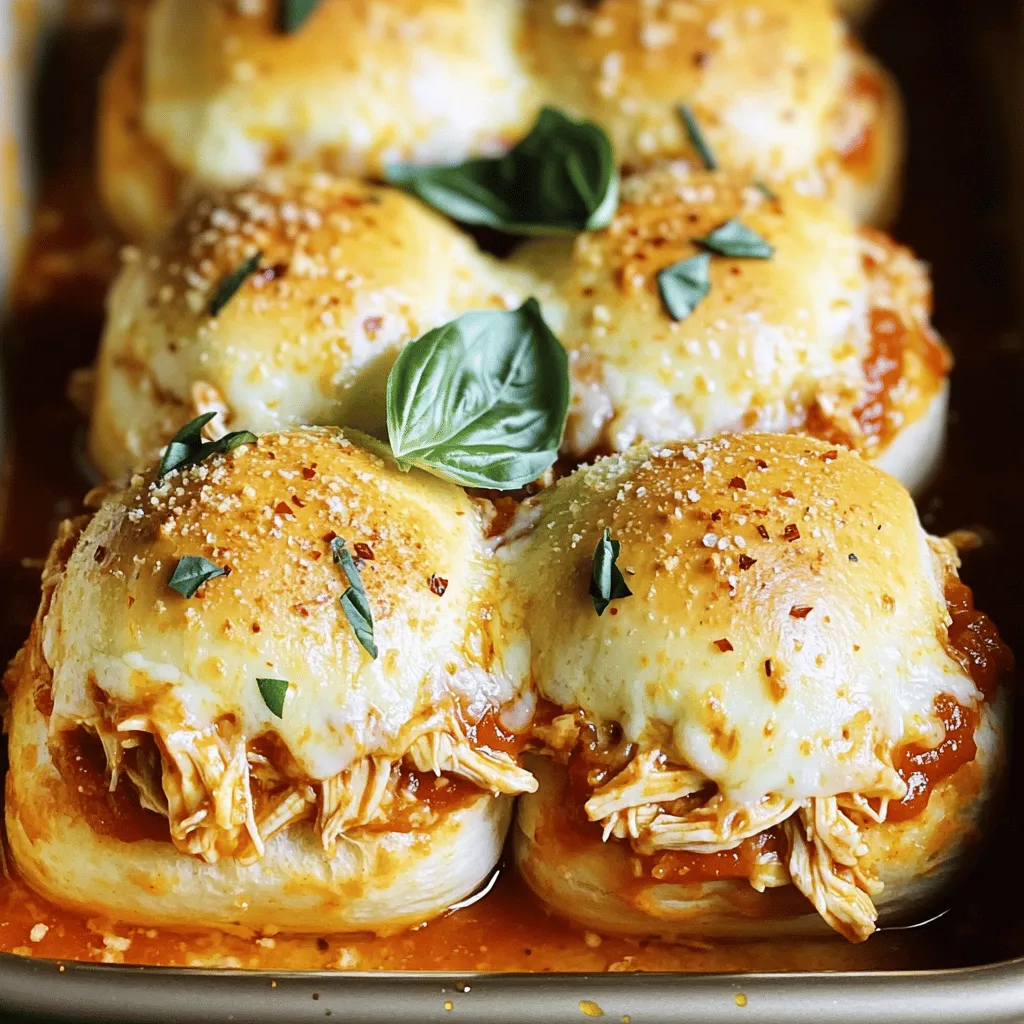
Are you ready to take your slider game to the next level? Baked Chicken Parmesan Sliders are not only tasty but also super easy to make! This recipe combines juicy chicken, zesty marinara, and gooey cheese, all tucked into soft slider rolls. Perfect for game day, family dinners, or any time you crave comfort food. Let’s dive into the details and whip up a dish that will impress everyone at the table!
Why I Love This Recipe
- Easy to Make: This recipe comes together quickly, making it perfect for busy weeknights or last-minute gatherings.
- Flavor Packed: The combination of marinara, mozzarella, and Parmesan brings a burst of Italian flavor that everyone loves.
- Perfect for Sharing: These sliders are great for parties or family dinners, allowing everyone to enjoy a tasty bite.
- Customizable: You can easily swap out the chicken for other proteins or add your favorite toppings to make it your own.
Ingredients
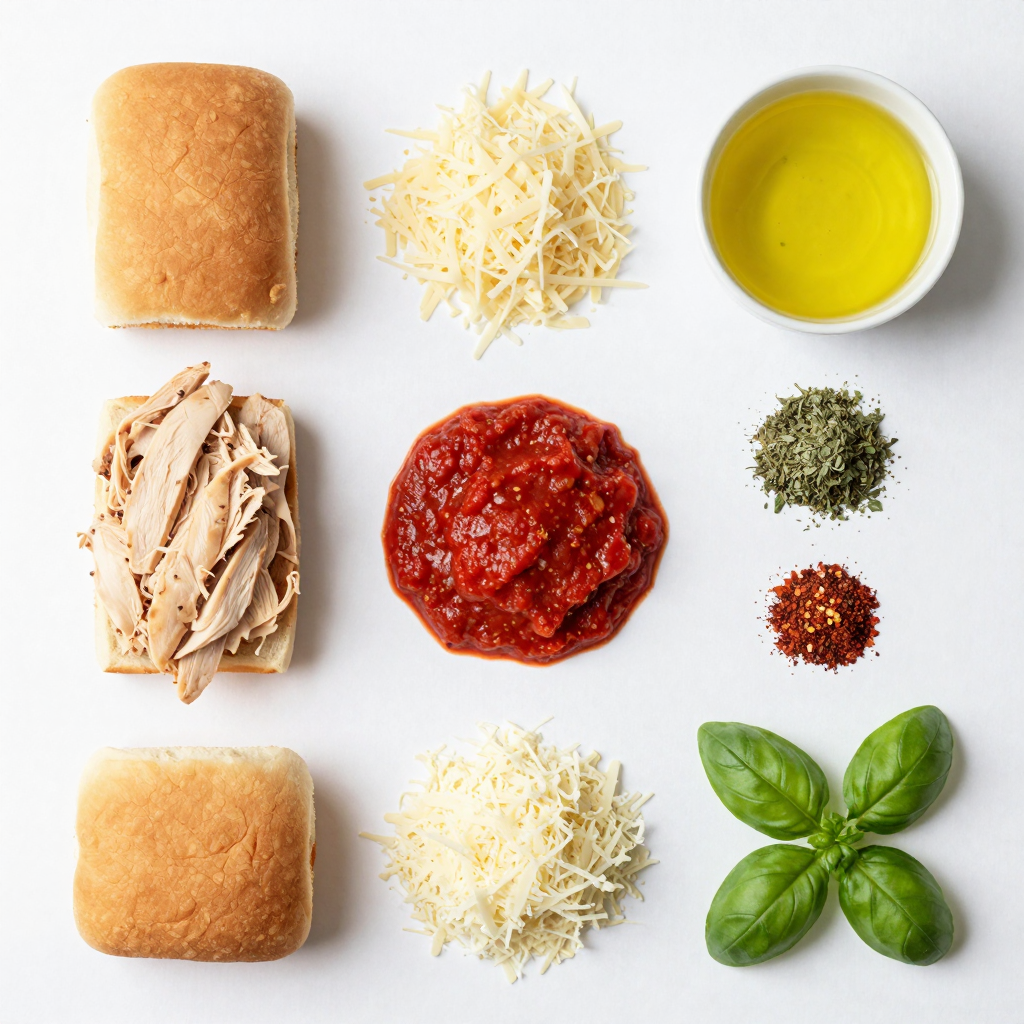
Essential Ingredients
- 12 slider rolls
- 2 cups cooked chicken, shredded
- 1 cup marinara sauce
- 1 cup mozzarella cheese, shredded
- ½ cup Parmesan cheese, grated
- 2 tablespoons olive oil
- 1 teaspoon garlic powder
- 1 teaspoon dried oregano
To make Baked Chicken Parmesan Sliders, start with these essential ingredients. Slider rolls are the base, soft and perfect for holding the toppings. Cooked chicken, shredded, provides protein and flavor. Marinara sauce adds moisture and a rich taste. Cheese is key; use mozzarella for meltiness and Parmesan for a salty bite. Seasonings like garlic powder and oregano give depth to the dish.
Optional Ingredients
- ½ teaspoon red pepper flakes
- Fresh basil leaves for garnish
You can jazz up your sliders with optional ingredients. Red pepper flakes add a nice kick, making each bite exciting. Fresh basil gives a burst of color and fresh flavor. These little touches can elevate your sliders from tasty to amazing. Feel free to mix and match according to your taste!

Step-by-Step Instructions
Prepping the Oven and Baking Dish
First, preheat your oven to 350°F (175°C). This step warms the oven evenly. Next, grab a baking dish and grease it lightly. This helps the sliders not stick.
Assembling the Sliders
In a bowl, mix your cooked chicken with the marinara sauce. Make sure the chicken is well coated. Now, take the bottom halves of the slider rolls and place them in your greased baking dish. Spoon the chicken mixture evenly over the rolls. Then, sprinkle the shredded mozzarella cheese on top of the chicken. For added flavor, layer the grated Parmesan cheese over the mozzarella. Finally, place the top halves of the slider rolls on the cheese.
Baking and Serving
In a small bowl, mix the olive oil, garlic powder, oregano, and red pepper flakes if you want a kick. Brush this mixture on the tops of the slider rolls. Cover your baking dish with aluminum foil and bake for 15 minutes. Next, remove the foil and bake for another 10 minutes. You want the tops to be golden brown and the cheese to be bubbling. Once baked, take the sliders out and let them cool for a few minutes. Slice them into individual sliders. If you like, garnish with fresh basil leaves before serving warm.
Pro Tips
- Use Leftover Chicken: If you have leftover rotisserie chicken, this is a perfect way to use it up and add more flavor to your sliders.
- Customize Your Cheese: Feel free to mix different cheeses like provolone or cheddar for a unique flavor profile.
- Make Ahead: You can prepare the sliders a few hours in advance and refrigerate them until you’re ready to bake.
- Garnish for Flavor: Adding fresh basil or crushed red pepper flakes just before serving enhances the flavor and presentation.
Tips & Tricks
Best Practices for Juicy Sliders
- Choosing the right chicken: Use cooked chicken that is moist and flavorful. Shredded rotisserie chicken works well. It saves time and adds great taste.
- Marinara sauce options: Pick a marinara sauce you love. A chunky sauce adds texture. You can also make a homemade version for a personal touch.
Customizing Your Baked Chicken Parmesan Sliders
- Different cheese combinations: Mozzarella is a must, but mix in provolone or gouda for extra flavor. These cheeses melt nicely and bring richness.
- Adding veggies or spices: Toss in some spinach or roasted red peppers. They add color and nutrients. For spice, try a pinch of cayenne or some Italian herbs.
Serving Suggestions
- Pairing with sides: Serve with a fresh salad or crispy fries. These add crunch and balance to your meal.
- Ideal dips and complements: Marinara on the side is perfect for dipping. A creamy ranch dressing can also enhance the flavors.

Variations
Healthier Alternatives
You can make your sliders healthier. Start with whole grain slider rolls. They add fiber and nutrients. Next, choose low-fat cheese options. This will cut calories while keeping the taste. Look for part-skim mozzarella or reduced-fat Parmesan.
Flavor Variations
To amp up the flavor, consider adding pesto or sun-dried tomatoes. These ingredients add a rich taste. If you like heat, try a spicy version with jalapeños. They bring a nice kick to the dish.
Cooking Methods
You can adapt this recipe to a slow cooker. Simply layer the ingredients and cook on low for a few hours. Another method is grilling the sliders. This gives them a smoky flavor that enhances the overall taste.
Storage Info
How to Store Leftovers
To keep your baked chicken Parmesan sliders fresh, store them properly. Refrigerate them in an airtight container. They will stay good for up to three days. If you want to keep them longer, freezing is a great option. Wrap each slider individually in plastic wrap, then place them in a freezer bag. They can last for about two months in the freezer.
Reheating Instructions
When it’s time to enjoy your sliders again, reheating is key. The best method is to use the oven. Preheat it to 350°F (175°C). Place the sliders on a baking sheet and cover them with foil. Bake for about 10 to 15 minutes, until they’re warm. This method helps keep the bread soft and the cheese melty.
If you’re in a hurry, you can use the microwave. Place the sliders on a microwave-safe plate. Heat them for 30 seconds, then check if they are warm. Add more time if needed, but be careful not to overdo it. This can make the bread tough.
To maintain the texture, avoid reheating them too long. Keeping an eye on them helps ensure they stay tasty.
FAQs
How do I make Baked Chicken Parmesan Sliders without meat?
You can replace chicken with plant-based options. Try using jackfruit or mushrooms. Mix them with marinara sauce just like the chicken. Top with mozzarella and Parmesan cheese for a tasty layer.
Can I prepare the sliders ahead of time?
Yes! You can assemble the sliders a day before. Just cover them and place them in the fridge. Bake them when you are ready to serve. This keeps them fresh and easy.
What can I substitute for marinara sauce?
If you don’t have marinara, try Alfredo or pesto sauce. You could even use barbecue sauce for a twist. Each option will change the flavor but still taste great.
How to make sliders crispy and not soggy?
To keep sliders crispy, follow these tips:
- Use fresh rolls for better texture.
- Bake them uncovered for the last few minutes.
- Don’t over-saturate with sauce; a light layer works best.
What is the nutrition information for the sliders?
Each slider has about 250 calories. It contains protein from chicken and cheese. You also gain vitamins from the marinara sauce.
Baked Chicken Parmesan Sliders are a tasty and easy dish that anyone can make. We covered essential ingredients and how to assemble them. I shared tips for making them juicy and tasty, plus fun variations and storage tips. Remember, you can get creative with flavors and textures. Enjoy these sliders with your favorite sides or dips for a fun meal. Try it out and impress your family or friends with this simple dish!

Baked Chicken Parmesan Sliders
Ingredients
12 slider rolls
2 cups cooked chicken, shredded
1 cup marinara sauce
1 cup mozzarella cheese, shredded
½ cup Parmesan cheese, grated
2 tablespoons olive oil
1 teaspoon garlic powder
1 teaspoon dried oregano
½ teaspoon red pepper flakes (optional)
Fresh basil leaves for garnish (optional)
Instructions
Preheat your oven to 350°F (175°C).
Slice the slider rolls in half horizontally and place the bottom halves in a greased baking dish.
In a bowl, mix the shredded chicken with marinara sauce until the chicken is well coated.
Spoon the chicken mixture evenly over the bottom halves of the slider rolls.
Sprinkle the shredded mozzarella cheese generously over the chicken mixture.
Add the grated Parmesan cheese on top of the mozzarella for added flavor.
Place the top halves of the slider rolls on the cheese layer.
In a small bowl, mix olive oil, garlic powder, oregano, and red pepper flakes (if using). Brush this mixture onto the tops of the slider rolls.
Cover the baking dish with aluminum foil and bake for 15 minutes.
Remove the foil and bake for an additional 10 minutes, or until the tops are golden brown and the cheese is bubbling.
Take out the sliders and allow them to cool for a few minutes before slicing them into individual sliders.
Garnish with fresh basil leaves, if desired, and serve warm.
Prep Time: 10 minutes | Total Time: 35 minutes | Servings: 6

Baked Chicken Parmesan Sliders
Ingredients
- 12 rolls slider rolls
- 2 cups cooked chicken, shredded
- 1 cup marinara sauce
- 1 cup mozzarella cheese, shredded
- 0.5 cup Parmesan cheese, grated
- 2 tablespoons olive oil
- 1 teaspoon garlic powder
- 1 teaspoon dried oregano
- 0.5 teaspoon red pepper flakes (optional)
- 1 leaves fresh basil leaves for garnish (optional)
Instructions
- Preheat your oven to 350°F (175°C).
- Slice the slider rolls in half horizontally and place the bottom halves in a greased baking dish.
- In a bowl, mix the shredded chicken with marinara sauce until the chicken is well coated.
- Spoon the chicken mixture evenly over the bottom halves of the slider rolls.
- Sprinkle the shredded mozzarella cheese generously over the chicken mixture.
- Add the grated Parmesan cheese on top of the mozzarella for added flavor.
- Place the top halves of the slider rolls on the cheese layer.
- In a small bowl, mix olive oil, garlic powder, oregano, and red pepper flakes (if using). Brush this mixture onto the tops of the slider rolls.
- Cover the baking dish with aluminum foil and bake for 15 minutes.
- Remove the foil and bake for an additional 10 minutes, or until the tops are golden brown and the cheese is bubbling.
- Take out the sliders and allow them to cool for a few minutes before slicing them into individual sliders.
- Garnish with fresh basil leaves, if desired, and serve warm.


![- 1 lb ground chicken - 1 bell pepper (red or yellow), diced - 1 cup carrots, julienned - 1 cup snap peas, trimmed - 3 cloves garlic, minced - 1 tablespoon ginger, freshly grated - 3 tablespoons soy sauce (low sodium) - 1 tablespoon hoisin sauce - 1 tablespoon sesame oil - 1 head of butter lettuce or iceberg lettuce, leaves separated - 2 green onions, sliced (for garnish) - Sesame seeds (for garnish) - Salt and pepper to taste To make great lettuce wraps, you need fresh, high-quality ingredients. Start with ground chicken. Look for lean meat with a light pink color. This gives a nice taste and texture. Next, pick a firm bell pepper. Red or yellow works best. They add color and sweetness to your dish. For crunch, use fresh snap peas. They should feel crisp and bright green. Carrots are another key part. Julienne them thinly for easy eating. Garlic and ginger add flavor, so choose fresh ones. Fresh herbs and spices make your dish pop. When you gather your ingredients, don’t forget the sauces. Low sodium soy sauce and hoisin sauce work well together. They add depth and a sweet touch. Sesame oil gives a nutty flavor and aroma. Finally, get butter or iceberg lettuce. The leaves should be crisp and intact for wrapping. These fresh ingredients will make your Simple Chicken Stir Fry Lettuce Wraps shine. For the complete recipe, check out the Full Recipe section. - Prepare all vegetables by washing, peeling, and cutting as needed. - Measure out sauces and spices. Start by washing your bell pepper, carrots, and snap peas. Peel the carrots and cut them into thin strips, called julienne. Dice the bell pepper into small pieces. Trim the snap peas by removing their ends. This makes them easy to eat. Measure out the soy sauce, hoisin sauce, and sesame oil. Having everything ready helps the cooking go faster. - Heat sesame oil in the skillet. - Cook garlic and ginger until fragrant. - Brown ground chicken, add vegetables, and cook until tender. Next, heat a large skillet or wok over medium-high heat. Add the sesame oil and let it warm up. Then, toss in the minced garlic and freshly grated ginger. Cook them for about 30 seconds. You will smell a lovely aroma. Now, add the ground chicken. Use a spatula to break it apart. Cook until it turns brown and is no longer pink. This should take about 5 to 7 minutes. Now, stir in the diced bell pepper, julienned carrots, and snap peas. Cook for another 3 to 5 minutes. You want the veggies to be tender but still a little crisp. Pour in the soy sauce and hoisin sauce. Mix everything well and cook for 2 more minutes. Taste and add salt and pepper if needed. - Spoon the mixture into lettuce leaves. - Garnish and serve on a platter. Once the mixture cools for a minute, it’s time to serve. Take a lettuce leaf and spoon some of the chicken and veggie mix into it. Fold the leaf around the filling to make a wrap. Place the wraps on a large platter. Garnish with sliced green onions and a sprinkle of sesame seeds. This makes your dish look extra special. You can also serve a small bowl of extra soy sauce or hoisin sauce for dipping. Enjoy your tasty creation! For the full recipe, check [Full Recipe]. - To get the best texture in your chicken stir fry, use high heat. - Make sure to cut your vegetables small. This helps them cook quickly. - Stir the chicken often while it cooks. This keeps it from sticking. - Avoid overcooking the veggies. They should stay crisp and bright. - To prevent soggy lettuce wraps, dry the lettuce leaves well. - Serve the filling warm, not hot, to keep the lettuce fresh. - You can make the chicken stir fry ahead of time. Store it in an airtight container. - Let the stir fry cool before refrigerating. This keeps the lettuce crisp. - Chop your veggies a day before. Store them in a sealed bag. - Prepare the sauces and keep them separate until serving time. - For side dishes, serve with rice or quinoa. They pair well with the wraps. - You can also add a fresh salad on the side for extra crunch. - For dips, try a soy sauce or hoisin sauce. They enhance the flavor. - Sriracha or chili garlic sauce adds a nice kick if you like spice. For the [Full Recipe](#), follow these tips to make your chicken stir fry lettuce wraps shine! {{image_2}} You can swap chicken for turkey or beef. Turkey has a similar taste but is leaner. Beef adds a rich flavor, perfect for a hearty meal. For vegetarians, tempeh or tofu works great. Tempeh has a nutty flavor, while tofu absorbs sauces well. Want some heat? Add chili flakes or a splash of sriracha. Both give a nice kick to your wraps. You can also change up the sauces. Try teriyaki for a sweet touch or peanut sauce for something creamy and rich. Use seasonal veggies for the best taste. In spring, add asparagus or snap peas. In summer, try bell peppers or zucchini. These fresh ingredients make your wraps even more vibrant. Customize your wraps based on what's in season. This keeps your meals exciting and tasty. For the full recipe, check out the link provided. To store leftover chicken stir fry, let it cool first. Place it in an airtight container. This helps keep the flavors fresh. You can keep it in the fridge for up to three days. For the lettuce wraps, store the chicken mix and lettuce separately. This keeps the lettuce crisp. Wrap the leaves in a damp paper towel to maintain moisture. Use a zip-top bag for easy access. Yes, you can freeze cooked chicken stir fry. Let it cool completely before freezing. Use a freezer-safe container or bag. It can last up to three months in the freezer. When you’re ready to eat, thaw it in the fridge overnight. For reheating, warm it in a skillet over low heat. Add a splash of water to keep it moist. These wraps last about three days in the fridge. Check for any signs of spoilage. If the chicken looks or smells off, throw it away. Slimy or discolored lettuce also means it's no longer good. Always trust your senses when it comes to food safety. It takes about 20 minutes in total. You need 10 minutes to prep. The cooking time is about 10 minutes. This quick meal fits well into busy days. Yes, you can make these wraps ahead. Cook the chicken stir fry and cool it. Store it in an airtight container in the fridge for up to three days. When ready to eat, just reheat the filling and serve in fresh lettuce. If you want alternatives, try using rice paper wrappers or collard greens. You can also serve the stir fry over rice or quinoa. Each option gives a unique twist to the meal. Yes, but check your sauces. Use gluten-free soy sauce and hoisin sauce. This way, you can enjoy the meal without worry if you have gluten sensitivity. These chicken stir fry lettuce wraps are simple and delicious. We covered all ingredients, equipment, and tips needed for perfect wraps. You can customize them easily with different proteins and flavors. Meal prep makes these wraps a great choice for busy days. Remember, fresh ingredients lead to the best taste. Enjoy creating your unique version of this recipe, and don’t forget to share with friends!](https://dailydishlab.com/wp-content/uploads/2025/06/ecf7ad89-f46b-423b-a9d0-b97a9473e493-768x768.webp)

