Baked Parmesan Crusted Tilapia Delicious and Easy Meal

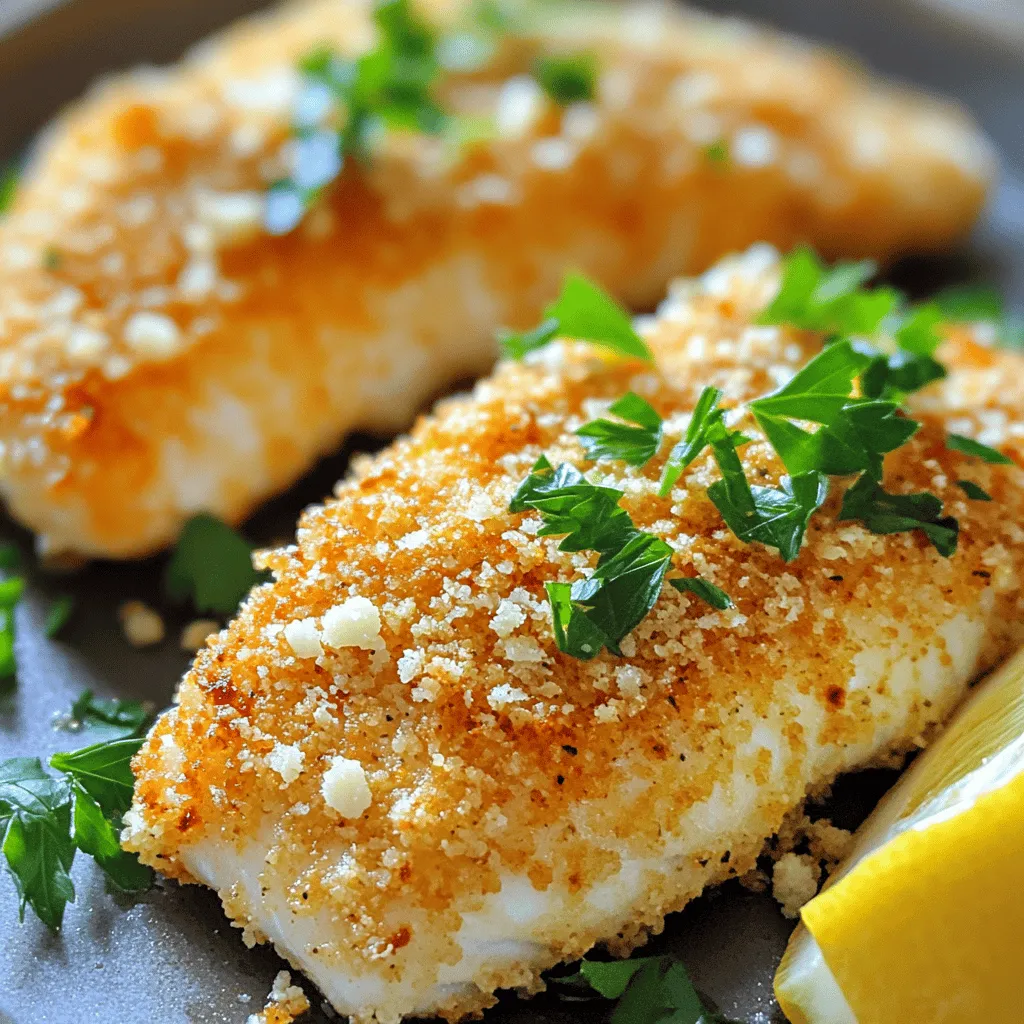
Looking for a quick and tasty dinner? Baked Parmesan Crusted Tilapia is your answer! This easy recipe combines crispy breadcrumbs and rich Parmesan for a delicious meal ready in no time. I’ll guide you through each step to create a flavorful dish your whole family will love. Let’s dive into these simple ingredients and get cooking!
Ingredients
List of Ingredients
- 4 tilapia fillets
- 1 cup grated Parmesan cheese
- 1 cup panko breadcrumbs
- 2 tablespoons fresh parsley, chopped
- 1 teaspoon garlic powder
- 1 teaspoon onion powder
- 1 teaspoon paprika
- ½ teaspoon black pepper
- ½ teaspoon salt
- 2 tablespoons olive oil
- 1 tablespoon lemon juice
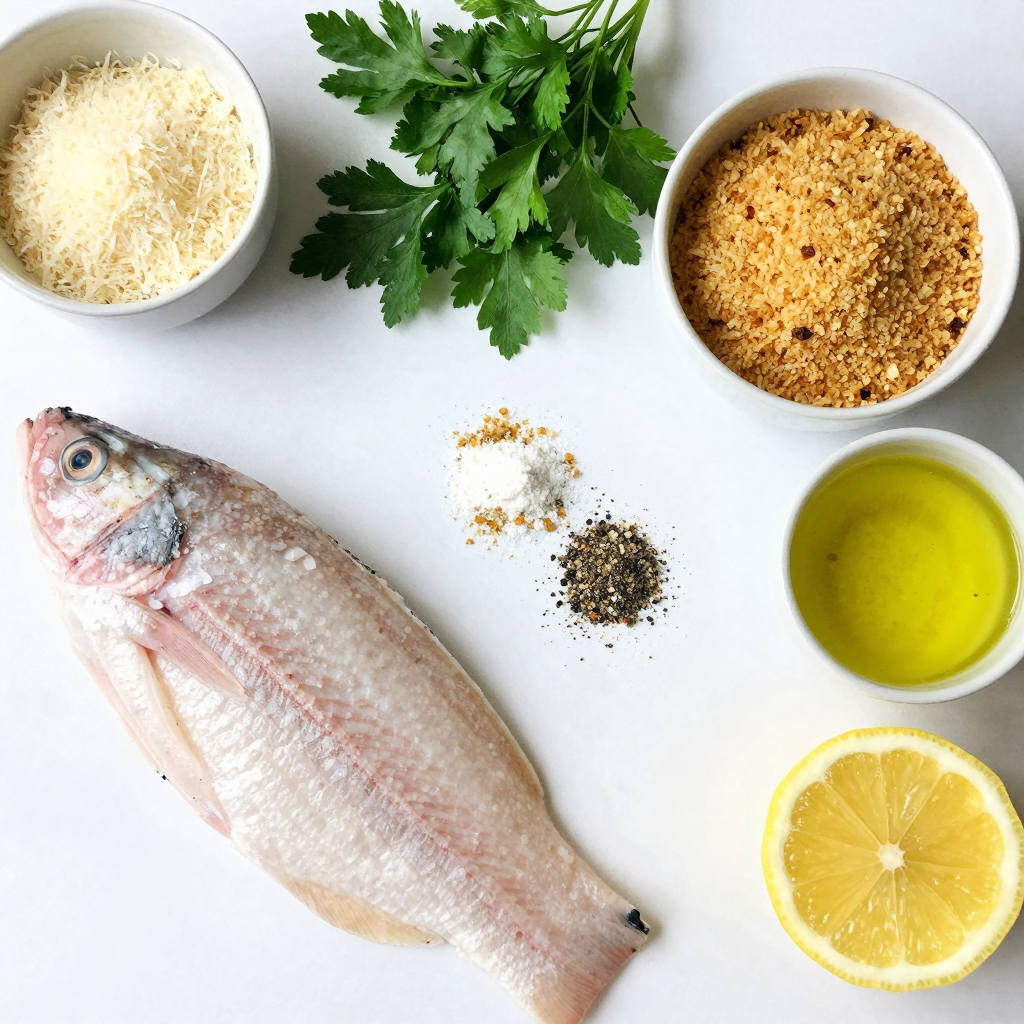
The first step to making baked Parmesan crusted tilapia is gathering your ingredients. Fresh tilapia is the star of this dish. It’s mild and flaky, perfect for a light meal. I use grated Parmesan cheese for a salty kick and panko breadcrumbs for that ideal crunch.
Chopping fresh parsley adds a pop of color and brightness. Garlic powder and onion powder give a savory depth to the flavor. Paprika adds warmth and a touch of color.
The black pepper and salt are essential for balancing the dish. Olive oil and lemon juice not only add rich flavor but also help the crust stick to the fish.
Nutritional Information
- Calories per serving: Approximately 300 calories
- Protein content: About 25 grams
- Dietary considerations: Low in carbs, high in protein
This meal is not only delicious but also nutritious. Each serving packs around 300 calories, making it a great choice for a healthy meal. With about 25 grams of protein, it supports muscle health. This dish is low in carbs, making it suitable for various diets.
Choosing fresh, sustainable fish supports healthy eating. With simple ingredients, you can create a meal that tastes gourmet and feels good to eat.
Step-by-Step Instructions
Preparing the Oven and Baking Sheet
- Preheat your oven to 400°F (200°C).
- Prepare the baking sheet with parchment paper. This helps with easy cleanup.
Mixing the Ingredients
- In a bowl, combine 1 cup of grated Parmesan cheese, 1 cup of panko breadcrumbs, 2 tablespoons of chopped parsley, 1 teaspoon of garlic powder, 1 teaspoon of onion powder, 1 teaspoon of paprika, ½ teaspoon of black pepper, and ½ teaspoon of salt. Mix well.
- In another bowl, whisk together 2 tablespoons of olive oil and 1 tablespoon of lemon juice. This will add flavor and moisture to the fish.
Coating the Tilapia
- Dip each tilapia fillet into the olive oil and lemon mixture. Make sure to coat both sides evenly.
- Then, press the fillet into the breadcrumb mixture. Ensure both sides get a nice coat.
- Place the coated fillets on the prepared baking sheet. Space them out for even cooking.
Baking the Fish
- Bake your tilapia in the preheated oven for 15-20 minutes.
- Check for doneness. The fish should flake easily with a fork and have a golden crust. This means it is ready to serve!
Tips & Tricks
Achieving the Perfect Crust
To get that crunchy crust on your tilapia, use panko breadcrumbs. They create a light, airy texture. You can also mix regular breadcrumbs with panko for added depth. Press the breadcrumbs onto the fish firmly. This helps them stick better while baking.
Bake the fish at 400°F for 15 to 20 minutes. Check for a golden color on the crust. The fish should flake easily when done. For best results, do not crowd the baking sheet. Give each fillet space to crisp up.
Enhancing Flavor
You can jazz up the flavor of your tilapia with more spices. Try adding a pinch of cayenne pepper for heat or Italian seasoning for a twist. Fresh herbs, like basil or dill, also add a nice touch.
After baking, garnish with fresh parsley. It adds color and a burst of flavor. A squeeze of lemon juice enhances the taste even more.
Serving Suggestions
Pair your tilapia with sides that complement its flavor. Steamed vegetables, like broccoli or carrots, work well. A fresh salad with a light vinaigrette is also a great match.
For dips, consider a tangy tartar sauce or a zesty aioli. These sauces add creaminess and balance the crunchy crust of the fish. Enjoy your meal!

Variations
Different Fish Options
You can use many types of fish for this recipe. Catfish, cod, and haddock all work well. Each fish has a unique taste and texture. Adjust cooking time based on the fish thickness. Thicker pieces need more time, while thinner ones cook faster. Keep an eye on them to avoid overcooking.
Gluten-Free Options
To make this dish gluten-free, swap panko breadcrumbs with gluten-free varieties. Almond flour or crushed cornflakes are great substitutes too. For binding, you can use ground flaxseed mixed with water. This mix helps the crust stick to the fish. You can also try using cornmeal for a crunchy texture.
Flavor Profiles
Experiment with spices to make this dish your own. Try adding cayenne for heat or dill for a fresh taste. Lemon zest brightens up the flavor. You can also use lime juice for a tangy twist. Feel free to mix and match spices to find your perfect blend.
Storage Info
Storing Leftovers
To keep your baked Parmesan crusted tilapia fresh, place it in the fridge. Use an airtight container to prevent moisture loss. Let the fish cool to room temperature before sealing it. This helps maintain its flavor and texture.
Reheating Tips
When reheating, the oven is your best friend. Preheat it to 350°F (175°C). Place the fish on a baking sheet. Bake for about 10 minutes, or until hot. This keeps the crust crispy. You can use a microwave, but it may make the fish soggy. If you use the microwave, heat in short bursts of 30 seconds.
Freezing Guidelines
You can freeze tilapia before or after baking. If freezing raw, wrap each fillet tightly in plastic wrap. Then, place them in a freezer bag. For baked tilapia, let it cool, then wrap it up. When ready to cook, thaw the fish overnight in the fridge. Bake it straight from the fridge or at a lower temperature for even cooking.
FAQs
How long to bake tilapia at 400°F?
Bake tilapia at 400°F for 15 to 20 minutes. The fish will be done when it flakes easily with a fork. This method ensures a crispy crust and tender fish. Timing may vary based on the thickness of the fillets. Always check the fish to avoid overcooking.
Can I use frozen tilapia fillets?
Yes, you can use frozen tilapia fillets. Thaw them in the fridge overnight or run them under cold water. Pat them dry before coating. This step helps the crust stick better. Baking time may be slightly longer if they are not fully thawed.
What can I substitute for Parmesan cheese?
You can use other cheeses like Pecorino Romano or nutritional yeast for a dairy-free option. Both will give you a nice flavor. If you want a milder taste, try using mozzarella. Just remember, each cheese will change the dish’s taste slightly.
How to tell when tilapia is done cooking?
Check if the fish flakes easily with a fork. The internal temperature should reach 145°F. If the fish is opaque and firm, it’s likely done. Overcooked tilapia can become dry, so watch it closely as it bakes.
Can I make this dish ahead of time?
You can prepare the tilapia ahead. Coat the fillets, then cover and store them in the fridge for up to 24 hours. When ready, just bake them as directed. This makes for an easy meal when you are short on time.
This blog post covered a simple and tasty way to prepare tilapia. I shared key ingredients, from tilapia fillets to Parmesan cheese and seasonings. You learned step-by-step instructions for mixing, coating, and baking the fish. I provided tips for achieving a perfect crust and serving ideas to enhance your meal.
Now, enjoy experimenting with variations and store any leftovers properly. Cooking tilapia can be quick and fun. Trust me, you will love the results!


![To make the best honey soy sauce chicken marinade, you'll need some simple ingredients. Each one adds its own special touch. Here’s what you’ll need: - 4 bone-in, skin-on chicken thighs - 1/4 cup low sodium soy sauce - 1/4 cup honey - 2 tablespoons sesame oil - 2 cloves garlic, finely minced - 1 tablespoon fresh ginger, grated - 1 tablespoon rice vinegar - 1/2 teaspoon black pepper - 1/2 teaspoon red pepper flakes (optional for heat) - 2 green onions, finely chopped - A sprinkle of sesame seeds This mix of flavors comes together to create a sweet and savory marinade. The honey gives a nice glaze, while the soy sauce adds depth. Garlic and ginger bring in warmth. You can adjust the red pepper flakes based on how spicy you like it. I enjoy this recipe for its simplicity and taste. You can find the full recipe in the Honey Soy Glaze Chicken Delight section. To start, gather your ingredients. In a medium bowl, combine the low sodium soy sauce, honey, sesame oil, minced garlic, grated ginger, rice vinegar, black pepper, and red pepper flakes. Use a whisk to mix everything well. This step is key as it brings out all the flavors. You want a smooth blend that coats the chicken nicely. Next, take your chicken thighs. Place them in a large Ziploc bag or a shallow dish. Pour the marinade over the chicken, making sure it covers each piece. Seal the bag tightly or cover the dish with plastic wrap. Let the chicken marinate in the fridge for at least 2 hours. For the best flavor, let it sit overnight. This allows the chicken to soak up all those tasty flavors. Now it's time to bake. Preheat your oven to 375°F (190°C). While it heats up, prepare your baking sheet by lining it with parchment paper or aluminum foil. This makes for easy clean-up later. After marinating, take the chicken out of the bag or dish. Place the thighs skin-side up on the baking sheet. Bake the chicken for 35-40 minutes. Every 15 minutes, baste it with the reserved marinade. This keeps the chicken juicy and adds even more flavor. You know it’s done when the internal temperature hits 165°F (74°C). Once ready, let the chicken rest for 5 minutes before serving. This keeps it tender and full of flavor. For a final touch, sprinkle chopped green onions and sesame seeds on top. This adds a nice crunch and makes your dish look great. If you want more details, check out the Full Recipe. Marinating is key to great flavor. I recommend marinating your chicken for at least two hours. But if you can wait, do it overnight. This time lets the flavors soak in well. You can adjust the taste too. If you like it sweeter, add more honey. For saltiness, use a bit more soy sauce. Just remember, balance is the goal. You want a marinade that excites your taste buds without being overpowering. Baking your chicken at 375°F (190°C) works best. This temperature ensures even cooking. Bake for 35 to 40 minutes. Use a meat thermometer to check for doneness. Chicken should reach 165°F (74°C) inside. To keep it juicy, baste the chicken with the marinade every 15 minutes. This step adds flavor and keeps the meat moist. After baking, let it rest for about five minutes. This helps the juices redistribute, giving you a tender bite. Garnishing makes a big difference. I love using chopped green onions and sesame seeds for a nice touch. They add color and crunch. When it comes to sides, think rice or steamed vegetables. They complement the honey soy sauce chicken well. You could also serve it with a light salad for some freshness. For more ideas, check out the [Full Recipe]. {{image_4}} You can change the protein in the recipe. Try using pork, beef, or tofu. Each option brings its own taste. Pork absorbs the sauce well, while tofu soaks up flavors beautifully. You can also switch the vinegar. Rice vinegar is mild, but apple cider vinegar adds a fruity touch. If you want a strong flavor, use balsamic vinegar. Each vinegar creates a different taste profile. To amp up the flavor, think about adding spices or herbs. Garlic and ginger are great, but you can try adding five-spice powder for a warm kick. Fresh herbs like cilantro or basil can freshen the dish. You can also mix in fruit juices. Pineapple juice gives sweetness and a tropical twist. Orange juice is another sweet option that works well. This adds a nice layer to the marinade. Grilling the chicken gives it a smoky taste. It creates a char that is hard to beat. Just make sure to monitor the heat to avoid burning. Slow-cooking is another excellent method. It makes the chicken very tender and juicy. The longer it cooks, the more the flavors blend. You can set it in the morning and enjoy it by dinner. For the full recipe, check out the Honey Soy Glaze Chicken Delight. You can keep leftover marinade in the fridge for up to five days. Store it in an airtight container. Make sure to label the container with the date. If you want to keep it longer, freeze it! Use a freezer-safe bag or container. Just remember to leave some room for expansion as it freezes. Frozen marinade can last for about three months. Once your chicken is cooked, let it cool down. After cooling, place it in a sealed container. Store it in the fridge for up to four days. For longer storage, you can freeze the chicken. Wrap it tightly in plastic wrap or foil, then place it in a freezer bag. Cooked chicken can last up to three months in the freezer. To reheat, you can use the microwave or oven. For the microwave, place the chicken on a plate and cover it with a damp paper towel. Heat it in short bursts, checking often. If using the oven, preheat to 350°F (175°C) and bake for about 15-20 minutes. The marinade can last in the fridge for five days. If frozen, it is good for three months. Cooked chicken can stay fresh in the fridge for four days. If you freeze it, it can last up to three months. Always check for any signs of spoilage before using. To add heat, try adding red pepper flakes. Start with a half teaspoon. If you want more spice, use a full teaspoon. You can also add fresh chopped chili peppers. Sriracha sauce is another great option. Mix any of these into your marinade for a nice kick. Yes, you can use boneless chicken. Boneless thighs or breasts work well. Just remember, they will cook faster. Check for doneness at about 25-30 minutes. Use a meat thermometer to ensure the chicken reaches 165°F (74°C) for safety. The flavor will still be great with boneless cuts. This dish pairs well with steamed rice or quinoa. You can also serve it with stir-fried vegetables. A fresh salad or roasted sweet potatoes make nice sides too. For a fun twist, try serving it with Asian-style slaw. Each option adds a different texture and flavor. Absolutely! If you want more, just double all the ingredients. Use the same marinating time. Cooking time may vary a bit. If using more chicken, check it at the same time. You may need an extra 5-10 minutes to ensure it’s cooked through. The prep time is about 15 minutes. You will need at least 2 hours for marinating. Cooking the chicken takes about 40 minutes. So, in total, you are looking at around 2 hours and 55 minutes. For best flavor, marinate overnight if you can. Check out the Full Recipe for all the details! You now have a complete guide for making honey soy sauce chicken. We covered the ingredients to create a tasty marinade, along with each step to bake the chicken perfectly. Tips for adjusting flavors, serving ideas, and variations make this dish even better. Remember, marinating is key for flavor. Enjoy experimenting with new ingredients and cooking methods. This recipe is simple, fun, and delicious. You’ll impress everyone at your next meal. Let your creativity shine as you cook!](https://dailydishlab.com/wp-content/uploads/2025/06/bd272301-b7e3-46d4-98e1-9d012cb49af4-768x768.webp)
![- 6 boneless, skinless chicken thighs - 1/4 cup honey - 1/4 cup soy sauce - 1 tablespoon rice vinegar - 4 cloves garlic, minced - 1 tablespoon fresh ginger, grated For this dish, the main star is the chicken thighs. They are juicy and tender. The honey adds sweetness, while soy sauce brings depth. Rice vinegar gives a nice tang. Garlic and ginger add a burst of flavor. - 2 green onions, thinly sliced - Sesame seeds Garnishes make the dish pop. Green onions add a fresh crunch. Sesame seeds add a nutty touch. These small details can elevate your meal. - 2 tablespoons olive oil - Salt and pepper to taste - 1 teaspoon sesame oil Seasoning is key for great taste. Olive oil helps with cooking and flavor. Salt and pepper enhance the natural flavors. Sesame oil adds a rich aroma. You can adjust these to fit your taste. For the complete recipe, check out the [Full Recipe]. To start, gather your ingredients. In a medium bowl, whisk together: - 1/4 cup honey - 1/4 cup soy sauce - 1 tablespoon rice vinegar - 4 cloves garlic, minced - 1 tablespoon fresh ginger, grated - 2 tablespoons olive oil - 1 teaspoon sesame oil Mix until smooth. This honey garlic blend will give your chicken a sweet and tangy taste. Next, place the 6 boneless, skinless chicken thighs into a large resealable plastic bag or bowl. Pour the marinade over the chicken. Make sure each piece gets coated well. Seal the bag or cover the bowl. Refrigerate the chicken for at least 30 minutes. For even better flavor, marinate for up to 4 hours. You can choose to grill or pan-sear your chicken. - Grilling: Preheat your grill to medium-high heat. - Pan-searing: Heat a large skillet over medium heat. Once ready, take the chicken out of the marinade. Let the excess marinade drip off. Season your chicken with salt and pepper. Cook the chicken thighs for about 6-7 minutes on each side. Make sure they reach an internal temperature of 165°F (75°C) and get a nice caramelized look. In the last few minutes, you can brush some reserved marinade over the chicken. Just remember, only use marinade that has not touched raw chicken. Enjoy your meal! The full recipe is easy to follow, making a delicious dish. For the best flavor, marinate your chicken thighs for at least 30 minutes. You can let them sit for up to 4 hours for a bolder taste. Use a large resealable bag or a bowl to coat the chicken fully. Make sure you flip the bag or stir the bowl occasionally. This helps the marinade reach every spot. To check if your chicken is done, use a meat thermometer. The safe internal temperature is 165°F (75°C). This ensures the chicken is juicy and safe to eat. Always wash your hands and surfaces after touching raw chicken. It’s key to avoid cross-contamination. For serving, place the chicken thighs on a big platter. Drizzle some honey or leftover marinade over them for extra shine. Serve with steamed rice or colorful stir-fried vegetables for a complete meal. Garnish with green onions and sesame seeds for a beautiful look. Enjoy your dish! {{image_2}} You can add a bright flavor to your honey garlic chicken thighs. Just include some orange or lemon zest. This little move gives your dish a fresh taste. The citrus adds a nice zing that works well with the sweet honey. Simply mix the zest into your marinade for a tasty twist! Want to kick it up a notch? Try adding chili flakes or sriracha. This gives your chicken a spicy kick that balances the sweetness of the honey. Start with a little, then taste as you go. You can adjust the heat to match your preference. It’s a fun way to switch up the flavor! If you're looking for a lighter meal, use skinless chicken thighs. This keeps your dish flavorful without the extra fat. You can also swap regular soy sauce for low-sodium soy sauce. This small change makes your honey garlic chicken healthier while still tasting great. Small tweaks can lead to big benefits! For the full recipe, check out the detailed instructions to create your flavorful dish. Store your leftover honey garlic chicken thighs in an airtight container. This keeps them fresh. Ensure they cool down before sealing. They will stay good for up to four days in the fridge. If you want to eat them later, avoid leaving them out for more than two hours. This helps prevent bacteria growth. You can freeze cooked chicken thighs too. First, let them cool completely. Then, wrap each thigh in plastic wrap. Place them in a freezer-safe bag or container. They will last up to three months in the freezer. When you're ready to eat, move them to the fridge for overnight thawing. To reheat, use the oven for best results. Preheat the oven to 350°F (175°C). Place the chicken on a baking sheet and cover with foil. Heat for about 15-20 minutes, or until warmed through. You can also use a microwave. Just place the chicken on a plate, cover it, and heat for about 1-2 minutes. Check every 30 seconds to avoid overcooking. Reheating this way keeps the chicken juicy and tasty. For more detailed steps, check the Full Recipe. To make Honey Garlic Chicken Thighs, follow these simple steps: 1. Prepare the marinade by mixing honey, soy sauce, rice vinegar, minced garlic, grated ginger, olive oil, and sesame oil in a bowl. 2. Marinate the chicken in a bag or bowl for at least 30 minutes. 3. Cook the chicken on a grill or in a pan for about 6-7 minutes per side. 4. Glaze the chicken with some reserved marinade in the last minutes of cooking. 5. Rest and serve the chicken after cooking, garnished with green onions and sesame seeds. This process creates juicy, flavorful chicken with a sticky glaze that you will love. You have many options for side dishes that pair well with Honey Garlic Chicken Thighs: - Steamed rice - Stir-fried vegetables - Quinoa salad - Garlic mashed potatoes - Roasted broccoli Each of these sides complements the sweet and savory notes of the chicken. Yes, you can use chicken breasts, but there are pros and cons: - Pros: Chicken breasts are leaner and cook faster. - Cons: They can dry out more easily than thighs if overcooked. Chicken thighs offer more flavor and tenderness, making them a great choice for this recipe. Yes, this recipe is perfect for meal prep. Here are some tips: - Cook a larger batch and store in airtight containers. - Divide into single servings for easy lunches or dinners. - Keep the chicken in the fridge for up to four days or freeze for longer storage. Meal prepping makes it easy to enjoy delicious Honey Garlic Chicken Thighs all week! For the complete cooking process, check out the [Full Recipe]. This blog post covered a simple recipe for Honey Garlic Chicken Thighs. We explored the main ingredients, the marinade process, and cooking methods. I shared tips on marinating, cooking, and presenting your dish. You also learned about variations and how to store leftovers. In closing, enjoy the rich flavor of this dish. It’s easy to make, healthy, and perfect for sharing. Experiment with the variations to keep your meals exciting. Whether you grill or pan-sear, this recipe is sure to impress. Happy cooking!](https://dailydishlab.com/wp-content/uploads/2025/07/290d04f4-f0f3-4f16-8110-9751a8193952-768x768.webp)
![To make tasty spicy black bean tacos, you need a few key ingredients. Here’s what you will need: - 2 cups canned black beans, drained and rinsed - 1 medium red onion, finely chopped - 2 cloves garlic, minced - 1 jalapeño, finely diced (remove seeds for less heat) - 1 teaspoon ground cumin - 1 teaspoon smoked paprika - 1 teaspoon chili powder - 1 tablespoon olive oil - Salt and pepper to taste - 8 small corn tortillas - 1 avocado, sliced - Fresh cilantro, chopped (for garnish) - Lime wedges (for serving) These ingredients come together to create a rich and bold flavor. The black beans are hearty and filling. The spices add warmth and depth. You can customize your tacos with optional toppings. Here are some great ideas: - Shredded cheese - Sour cream or Greek yogurt - Salsa or pico de gallo - Diced tomatoes - Sliced radishes - Pickled jalapeños These toppings add extra flavor and texture. Feel free to mix and match based on your taste. For a well-rounded meal, consider these accompaniments: - A fresh green salad - Mexican rice or quinoa - Grilled corn on the cob - Tortilla chips with guacamole These side dishes enhance your taco experience and bring more flavors to the table. If you want the full recipe, check out the [Full Recipe]. Enjoy your cooking! First, heat a medium skillet over medium heat. Add one tablespoon of olive oil and let it warm. Next, add the chopped red onion. Cook it until it turns soft and clear, about five minutes. Then, toss in the minced garlic and diced jalapeño. Stir for two minutes. The smell will be amazing! After that, add the black beans, cumin, smoked paprika, and chili powder. Mix everything well. Cook for five to seven minutes until it’s warm. Add salt and pepper to make it taste great. While the bean mixture cooks, get another skillet. Heat it over medium heat, but do not add any oil. Warm each corn tortilla for about thirty seconds on each side. They should become soft and flexible. Keep them warm in a clean kitchen towel or a plate covered with foil. Now, it’s time to build your tacos! Take a warm tortilla and add a big scoop of the spicy black bean mixture. Next, add some slices of avocado. Sprinkle fresh cilantro on top for a nice touch. Serve the tacos with lime wedges on the side for a zesty flavor boost. If you want the full recipe, check out the details above! To make your tacos taste even better, use fresh ingredients. Fresh herbs like cilantro add brightness. Squeeze fresh lime over the tacos for a zesty kick. You can also add a dash of hot sauce for an extra punch. Mixing in corn or diced tomatoes with the black beans gives added sweetness and texture. You can prep the bean mixture ahead. Store it in the fridge for up to two days. Heat it before serving. Warm the tortillas right before you eat. This keeps them soft and fresh. You can also slice the avocado and chop the cilantro in advance. Just add them just before serving to keep them fresh. If you want to serve many people, double or triple the recipe. Cook the bean mixture in a large pot or skillet. Keep the tortillas warm in the oven at a low temperature. Set up a taco bar with all the toppings. This way, everyone can build their own tacos. It makes for a fun and interactive meal. For the full recipe, check the details above. {{image_2}} You can keep these tacos vegetarian and still enjoy great flavor. Use more veggies! Try adding bell peppers, corn, or zucchini. These extras will add crunch and sweetness. You might also add some spinach or kale for more greens. This way, you make the dish colorful and nutritious. If you want more protein, add meat or meat substitutes. Ground turkey, chicken, or beef works well. If you prefer plant-based options, try tofu or tempeh. Cook them in the skillet with the same spices. This makes it easy to blend flavors. You can even add cooked quinoa for extra texture. Adjusting spiciness is simple. If you like it hot, add more jalapeños or some chopped serrano peppers. For a milder taste, remove the jalapeño seeds. You can also use less chili powder or smoked paprika. If you want a unique kick, add a splash of hot sauce. This ensures you get the heat just right for your taste. After enjoying your spicy black bean tacos, you may have some leftovers. Store them in an airtight container. Make sure to separate the bean mixture from the tortillas. This keeps the tortillas from getting soggy. Leftover tacos can last in the fridge for about three days. To reheat the bean mixture, place it in a skillet. Heat it on medium until warm, stirring occasionally. For the tortillas, warm them in a dry skillet for about 30 seconds on each side. This will make them soft again. You can also use the microwave. Just cover the tortillas with a damp paper towel and heat for about 20 seconds. If you want to save your tacos for later, freezing works well. Place the bean mixture in a freezer-safe bag. Make sure to remove as much air as possible. Seal it tightly. You can freeze the mixture for up to three months. When you’re ready to eat, thaw it in the fridge overnight. Reheat as mentioned above. Enjoy your tasty meal whenever you like! For the full recipe, check the earlier sections. Yes, these tacos can be vegan! The main ingredient, black beans, is already plant-based. Use corn tortillas, which are often vegan too. Just skip any dairy toppings, like cheese or sour cream. Instead, add extra veggies or guacamole for creaminess. If you don't have black beans, you can use pinto beans or kidney beans. Both will give you a nice texture. You can also try lentils for a unique taste. Just make sure to cook them well before adding to the tacos. To spice things up, add more jalapeños or use a hotter pepper. You can also add hot sauce or a splash of chili oil. Another option is to mix in cayenne pepper or crushed red pepper flakes into the bean mixture. Adjust these to your heat level. You can find the full recipe for these spicy black bean tacos in the article above. It includes all the steps to make this tasty dish. Enjoy your cooking! In this blog post, we covered spicy black bean tacos from start to finish. We explored key ingredients and optional toppings, along with step-by-step instructions for preparing and assembling. I shared useful tips, variations, and storage info to help you enjoy these tacos anytime. Get creative with flavors and spices to make these tacos your own. Whether serving a crowd or prepping for later, these tips ensure delicious result every time. Enjoy your cooking adventure!](https://dailydishlab.com/wp-content/uploads/2025/07/24da9d38-3af0-410a-b83a-c3df1b14161f-768x768.webp)
