
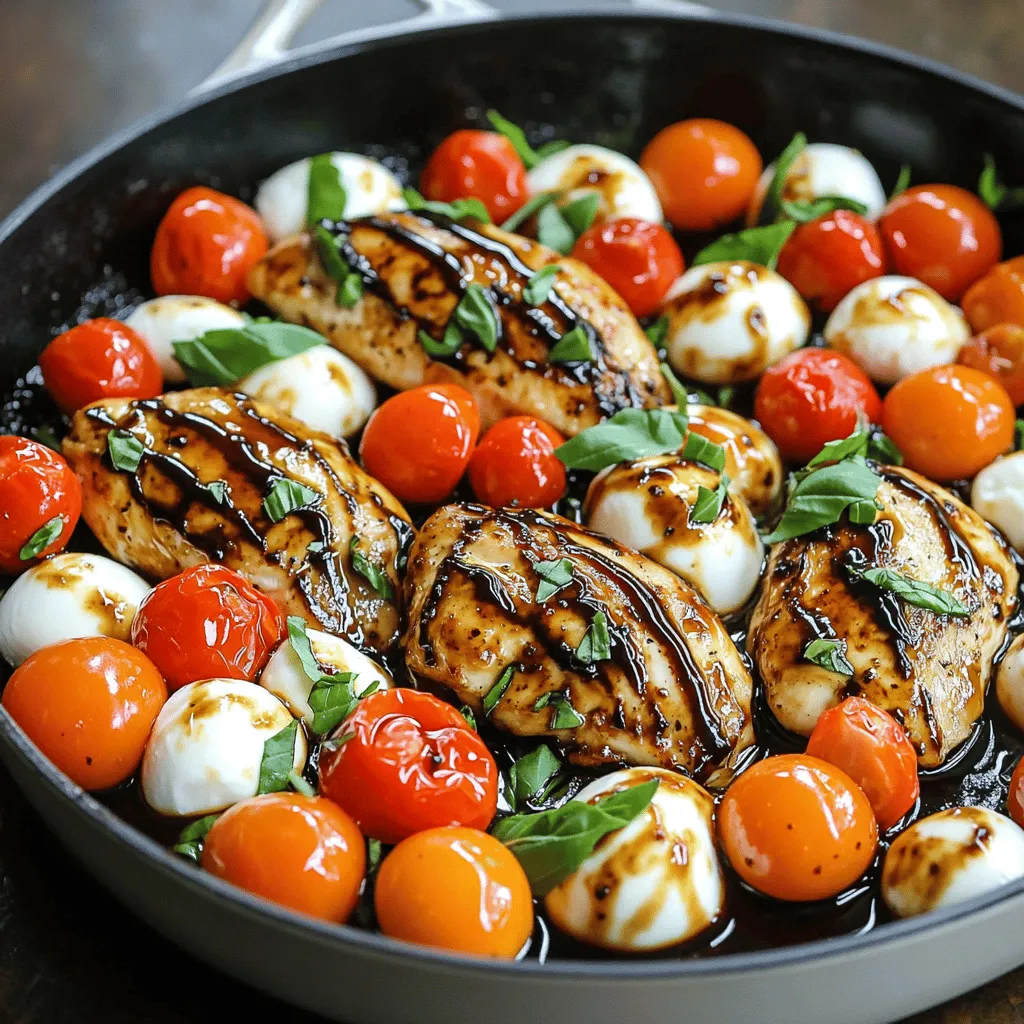
Are you ready to impress your family with a quick and tasty meal? My Balsamic Glazed Caprese Chicken recipe is here to save your dinner time! With juicy chicken breasts, sweet cherry tomatoes, and creamy mozzarella, this dish bursts with flavor. Plus, it’s simple enough for any home cook to master. Let’s dive into this delicious recipe that will have everyone asking for seconds!
Why I Love This Recipe
- Flavorful Combination: The tangy balsamic glaze perfectly complements the juicy chicken, making every bite a delightful experience.
- Fresh Ingredients: The use of fresh tomatoes, mozzarella, and basil brings a burst of color and flavor, enhancing the overall dish.
- Easy to Prepare: With simple ingredients and straightforward steps, this recipe is perfect for both novice and experienced cooks.
- Versatile Dish: This caprese chicken can be served with pasta, a salad, or on its own, making it a versatile option for any meal.
Ingredients
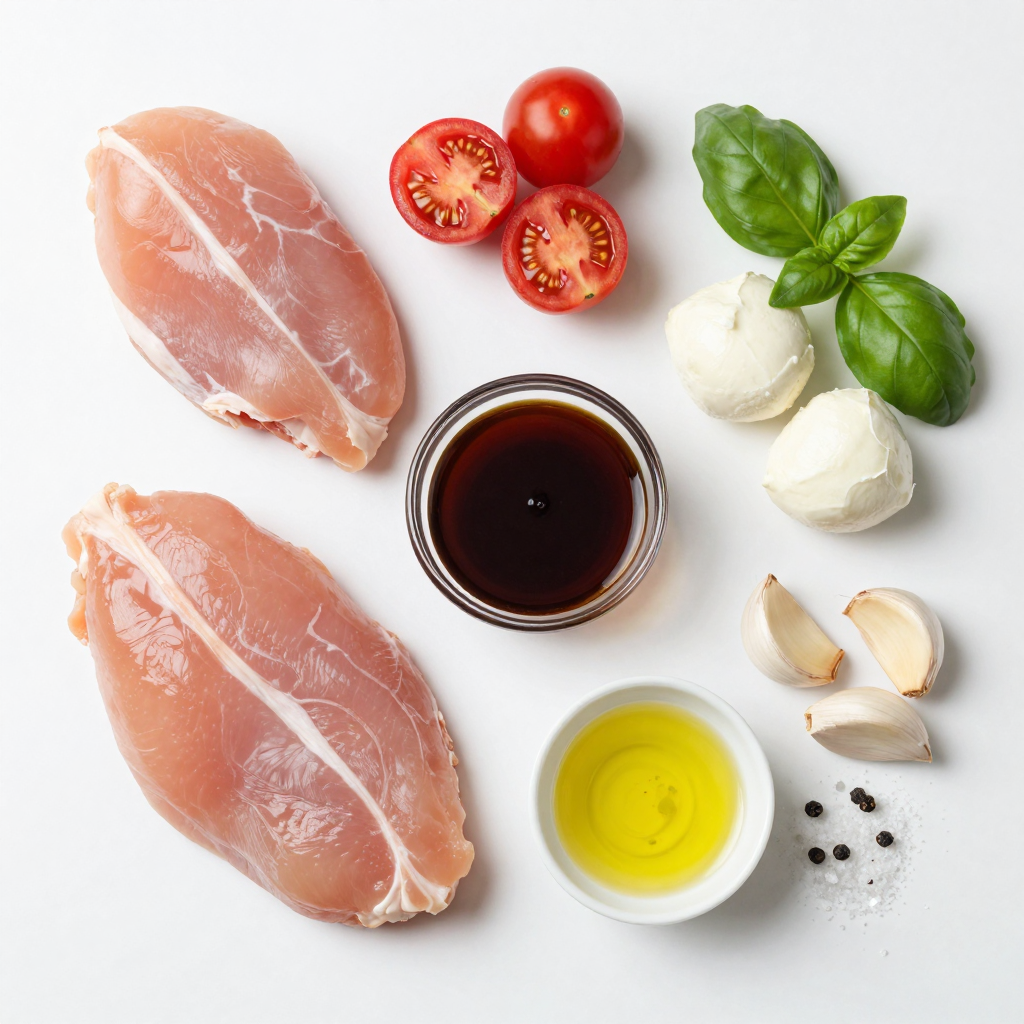
List of Ingredients
– 4 boneless, skinless chicken breasts
– 1 cup cherry tomatoes, halved
– 1 cup fresh mozzarella balls, halved
– 1/4 cup fresh basil, chopped
– 1/2 cup balsamic glaze
– 2 tablespoons olive oil
– 2 cloves garlic, minced
– Salt and pepper to taste
Optional Ingredients for Customization
You can add different flavors to this dish. Try using:
– Spinach for added greens
– Red onion for sharper taste
– Avocado for creaminess
– Fresh oregano for an herby kick
Substitutions for Dietary Needs
If you have specific needs, try these swaps:
– Use chicken thighs instead of breasts for juiciness.
– Replace mozzarella with vegan cheese for a dairy-free option.
– Use cauliflower for a low-carb meal.
– Swap balsamic glaze with lemon juice for a zesty twist.
This recipe is versatile and easy to adapt.
Step-by-Step Instructions
Preparation Steps
1. Preheat your oven to 400°F (200°C). This sets the right heat for baking.
2. Next, prepare the chicken and vegetables. Season the chicken breasts with salt and pepper.
3. Halve the cherry tomatoes and mozzarella balls. Chop the fresh basil. These add great flavors.
Cooking Method
1. In a large, oven-safe skillet, heat 2 tablespoons of olive oil over medium heat.
2. Add 2 cloves of minced garlic. Sauté for about 1 minute until fragrant.
3. Place the seasoned chicken breasts in the skillet. Sear for 5-7 minutes on each side until golden brown.
4. Drizzle half of the balsamic glaze over the chicken. This adds a rich flavor.
5. Scatter the halved cherry tomatoes and mozzarella balls around the chicken.
6. Drizzle the remaining balsamic glaze over the vegetables.
Baking Instructions
1. Transfer the skillet to the preheated oven. Bake for 20 minutes.
2. Check the chicken temperature. It should reach 165°F (74°C) to be fully cooked.
3. Once done, remove it from the oven. Garnish with chopped fresh basil before serving.
Following these steps will help you create a delicious Balsamic Glazed Caprese Chicken.
Pro Tips
- Brining the Chicken: For juicier chicken, consider brining the chicken breasts in a mixture of water and salt for at least 30 minutes before cooking. This helps to lock in moisture and enhances flavor.
- Fresh Basil Alternatives: If fresh basil isn’t available, you can substitute it with fresh parsley or arugula for a different flavor profile that still complements the dish.
- Use Quality Balsamic Glaze: Opt for a high-quality balsamic glaze for richer flavor. The sweetness and acidity balance beautifully with the savory chicken and cheese.
- Resting the Chicken: After baking, allow the chicken to rest for about 5 minutes before slicing. This helps the juices redistribute, keeping the meat tender and moist.
Tips & Tricks
Best Practices for Cooking Chicken
To achieve juicy chicken breasts, start with fresh, high-quality meat. Use a meat thermometer to check doneness. The ideal internal temperature is 165°F (74°C). This ensures your chicken stays moist and safe to eat.
Preventing dryness is key. Sear the chicken on medium heat first. This keeps the juices locked inside. Avoid cooking on high heat, which can dry the meat out quickly. Let the chicken rest for a few minutes after cooking. This helps redistribute the juices for better flavor.
Serving Suggestions
For perfect side dishes, consider pairing with garlic bread or a fresh salad. A simple arugula salad with lemon dressing complements the chicken well. Roasted vegetables also add color and nutrition.
Plating is important for presentation. Use a large white plate to make the colors pop. Stack the chicken slightly off-center and arrange the tomatoes and mozzarella around it. Finish with a sprinkle of fresh basil for a vibrant look.
Enhancements for Flavor
For extra flavor, use fresh herbs like thyme or oregano. They add depth without overpowering the dish. You can also try adding a pinch of red pepper flakes for heat.
Adjusting the balsamic glaze sweetness is easy. If you prefer it sweeter, add a touch of honey or brown sugar. For a tangier taste, mix in some lemon juice or vinegar. This allows you to customize the glaze to fit your taste.
Variations
Ingredient Swaps
You can easily make this dish vegetarian. Swap chicken with tofu or eggplant. Both options soak up flavors well. Tofu provides protein, while eggplant adds a nice texture. For cheese, try different types like goat cheese or feta. Each cheese adds its own unique taste.
Flavor Infusions
Add more veggies to boost flavor. You can mix in bell peppers or spinach. They add color and nutrients. For spices, try adding red pepper flakes for heat or Italian herbs for extra depth. You can also create new balsamic glazes. Mix in honey for sweetness or mustard for tang. Each twist gives a fresh flavor.
Alternative Cooking Methods
You can grill the chicken for a smoky taste. Just marinate it in the balsamic glaze first. Grilling gives great char and flavor. If you need a faster method, use an Instant Pot. Cook on high pressure for about 10 minutes. It saves time and keeps the chicken juicy.
Storage Info
Best Practices for Storing Leftovers
To keep your balsamic glazed caprese chicken fresh, store it in an airtight container. This helps prevent moisture loss and keeps flavors intact. Place it in the fridge if you plan to eat it within three days. If you want to save it longer, freezing is a great option. Wrap the chicken tightly in plastic wrap, then place it in a freezer bag. This will protect it from freezer burn.
Reheating Instructions
When reheating, it’s best to maintain the chicken’s juicy texture. For the best results, use the oven. Preheat to 350°F (175°C) and place the chicken on a baking dish. Cover it with foil to keep moisture in and heat for about 15-20 minutes. If you’re short on time, you can use the microwave. Heat in short bursts, checking often to avoid overcooking.
Shelf Life and Safety Tips
Leftovers last about three to four days in the fridge. If frozen, they can stay good for about three months. To check for spoilage, look for changes in color or smell. If the chicken seems off, it’s best to throw it away. Always prioritize safety when storing and reheating your meals.
FAQs
What is balsamic glaze and how is it made?
Balsamic glaze is a thick, sweet sauce made from balsamic vinegar. It adds a rich flavor to dishes. To make it, cook balsamic vinegar in a pot over low heat. Stir it as it reduces. This process thickens the vinegar and enhances its sweetness. You can also buy it pre-made. Both options work well for Balsamic Glazed Caprese Chicken.
Can I prepare Balsamic Glazed Caprese Chicken in advance?
Yes, you can prepare this dish in advance. Cook the chicken and add the toppings. Let it cool, then store it in the fridge. When ready to eat, reheat it in the oven. This keeps the flavors fresh and delicious. Make sure the chicken reaches 165°F when reheating.
What should I serve with Balsamic Glazed Caprese Chicken?
– Ideal wine pairings: A light, crisp white wine works best. Try a Sauvignon Blanc or Pinot Grigio. These wines balance the strong flavors of the dish.
– Complementary salad options: A simple green salad pairs nicely. Use mixed greens with a light vinaigrette. You can also add sliced cucumbers and cherry tomatoes for color and crunch.
This blog post covered the key ingredients for Balsamic Glazed Caprese Chicken. We explored cooking steps, tips, and variations. You learned how to keep the chicken juicy and flavorful. Remember, you can adjust the recipe to fit your needs. Feel free to get creative with ingredients. Balsamic Glazed Caprese Chicken is a simple dish that impresses. Enjoy making it and sharing it with others!


