Better Than Takeout Spicy Kung Pao Shrimp Recipe

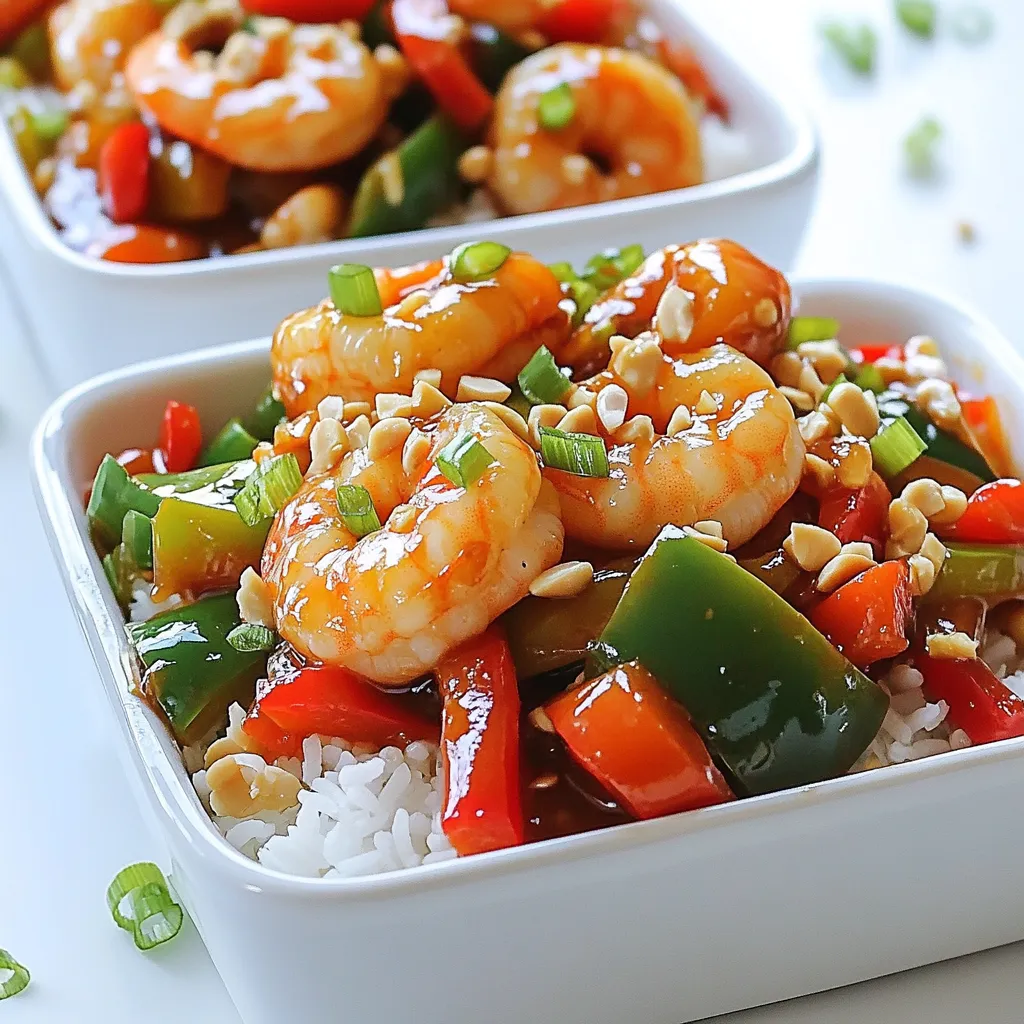
Tired of takeout? You’re in for a treat with my Spicy Kung Pao Shrimp recipe. This dish features tender shrimp, crisp veggies, and a savory sauce that packs a punch. With fresh ingredients and easy steps, you’ll whip up a restaurant-quality meal right in your kitchen. Let’s dive into the flavorful world of Kung Pao and turn your dinner into a bold adventure!
Why I Love This Recipe
- Quick and Easy: This recipe comes together in just 20 minutes, making it perfect for busy weeknights when you crave something delicious without spending hours in the kitchen.
- Customizable Heat: The spice level can be easily adjusted by modifying the amount of chili paste, allowing you to cater to your taste preferences and those of your guests.
- Fresh Ingredients: Using fresh vegetables and shrimp ensures that each bite is packed with flavor and nutrients, making it a healthier alternative to takeout.
- One-Pan Wonder: Everything cooks in one skillet, which means less cleanup and more time to enjoy your meal with family or friends.
Ingredients
Main Ingredients
- 1 lb large shrimp, peeled and deveined
- 2 tablespoons vegetable oil
- 1 red bell pepper, diced
- 1 green bell pepper, diced
Flavor Enhancers
- 2 cloves garlic, minced
- 1 teaspoon fresh ginger, minced
- 3 green onions, chopped
- 1 cup unsalted peanuts
Sauces and Seasonings
- 2 tablespoons soy sauce
- 1 tablespoon rice vinegar
- 1 tablespoon hoisin sauce
- 1 tablespoon chili paste
- Salt and black pepper to taste
To make Better Than Takeout Spicy Kung Pao Shrimp, gather these key ingredients. The shrimp give the dish its main flavor and protein. The vegetable oil helps to cook everything evenly and adds richness. The bell peppers provide a nice crunch and color.
For flavor, garlic and ginger are essential. They bring warmth and depth. Green onions add a fresh taste and a pop of color. Peanuts give a delightful crunch and nutty flavor.
The sauces create a balance of sweet, salty, and spicy. Soy sauce is salty and umami-rich. Rice vinegar adds acidity. Hoisin sauce brings sweetness. Chili paste gives the heat. Don’t forget salt and black pepper to enhance all these flavors.
Having fresh ingredients makes a big difference. They add more vibrant flavors. This recipe is quick and easy, making it perfect for a weeknight meal. Grab your ingredients, and let’s get cooking!

Step-by-Step Instructions
Preparing the Shrimp
- Heat 1 tablespoon of vegetable oil in a skillet over medium-high heat.
- Add 1 pound of large shrimp, peeled and deveined, to the hot oil.
- Season the shrimp with salt and black pepper.
- Cook the shrimp for 2-3 minutes until they turn pink and opaque.
- Remove the shrimp from the skillet and set them aside.
Cooking the Sauce and Vegetables
- In the same skillet, add the remaining tablespoon of vegetable oil.
- Sauté 2 cloves of minced garlic and 1 teaspoon of minced ginger for about 30 seconds until fragrant.
- Add 1 diced red bell pepper and 1 diced green bell pepper to the skillet.
- Stir-fry the peppers for 3-4 minutes until they are tender-crisp.
- Include the white parts of 3 chopped green onions at this stage.
Combining Ingredients
- Return the cooked shrimp to the skillet with the peppers.
- Pour in 2 tablespoons of soy sauce, 1 tablespoon of rice vinegar, 1 tablespoon of hoisin sauce, and 1 tablespoon of chili paste.
- Mix everything well to coat the shrimp and vegetables with the sauce.
- To thicken the sauce, add the cornstarch slurry made of 1 tablespoon of cornstarch mixed with 2 tablespoons of water.
- Stir well and cook for an additional 1-2 minutes until the sauce thickens slightly.
- Finally, stir in 1 cup of unsalted peanuts and the green parts of the green onions, cooking for another minute.
Pro Tips
- Fresh Shrimp is Key: Use the freshest shrimp you can find for the best flavor and texture. Look for shrimp that are firm and have a mild ocean scent.
- Customize Your Heat Level: Adjust the amount of chili paste according to your spice tolerance. For a milder dish, reduce the paste, or add it in increments until you reach your desired heat.
- Perfectly Cooked Peppers: Stir-fry the bell peppers just until they are tender-crisp to maintain their vibrant color and crunchy texture. Overcooking can lead to a mushy consistency.
- Serving Suggestions: Serve your Kung Pao shrimp over not just rice, but also try it with quinoa or cauliflower rice for a healthier option.
Tips & Tricks
Achieving the Perfect Flavor
To make your Kung Pao shrimp stand out, adjust the spice level with chili paste. Start with one tablespoon and taste. If you like more heat, add another spoonful. Remember, it’s easier to add than to take away!
Seasoning the shrimp is key. Use salt and pepper while cooking. This adds flavor to the shrimp from the start. Don’t skip this step; it makes a big difference.
Cooking Techniques
For stir-frying, use high heat and a large skillet or wok. Heat the skillet before adding oil. This helps the shrimp cook fast and stay tender. If the skillet is too cool, the shrimp will steam instead of sear.
Always keep the ingredients moving in the skillet. This ensures even cooking and prevents burning. Stir-fry quickly for the best texture.
Presentation Suggestions
Garnish your dish with chopped green onions for a fresh look. Add them just before serving for a pop of color. This small touch makes your meal feel gourmet.
Serve your Kung Pao shrimp over cooked white or brown rice. The rice soaks up the sauce well. It balances the heat and adds a nice base to the dish. Enjoy your meal hot for the best flavor!

Variations
Ingredient Substitutions
You can change the shrimp for other proteins. Tofu is a great plant-based option that soaks up flavors well. Chicken also works nicely if you prefer meat. For veggies, think beyond bell peppers. Broccoli and carrots add a nice crunch and color. Feel free to mix and match based on what you have.
Dietary Modifications
If you are gluten-free, use tamari instead of soy sauce. It tastes great and keeps the dish flavorful. For those watching carbs, skip the rice or use cauliflower rice. It’s a healthy swap that still fills you up.
Flavor Variations
Want more heat? Add cayenne pepper or Szechuan pepper to spice things up. Adjust the amount based on your taste. For a sweet and sour twist, mix in some sugar or honey. This adds a fun layer to your dish and balances the heat nicely.
Storage Info
Refrigeration Instructions
To keep your Kung Pao shrimp fresh, store leftovers in the fridge. Use an airtight container to prevent air and moisture from getting in. This keeps your dish tasty. The shrimp will stay good for up to three days.
Reheating Tips
When you want to reheat your Kung Pao shrimp, avoid losing flavor. The stovetop is the best method. Heat a skillet over medium heat and add the leftovers. Stir gently for a few minutes until hot. If you use the microwave, do it in short bursts. Stir in between to heat evenly.
Freezing Guidelines
Yes, you can freeze this dish! To freeze, let it cool completely first. Place it in a freezer-safe container. Leave some space at the top for the shrimp to expand. When you’re ready to eat, thaw it in the fridge overnight. Reheat as mentioned above for the best results.
FAQs
What is Kung Pao shrimp?
Kung Pao shrimp is a popular dish from Chinese cuisine. It features shrimp stir-fried with vegetables, peanuts, and a savory sauce. The dish comes from Sichuan province, known for its bold flavors. It originally used chicken, but shrimp became a favorite in many homes. The mix of spicy, sweet, and salty makes it a delight.
How spicy is Kung Pao shrimp?
The spice level in Kung Pao shrimp can vary. It usually includes chili paste, which adds heat. You can adjust the spice by adding more or less chili paste. If you like it mild, use just a little. For a kick, add more. The balance of flavors allows you to find your perfect level.
Can I make Kung Pao shrimp ahead of time?
Yes, you can prepare Kung Pao shrimp ahead of time. Cook the shrimp and veggies, then store them in the fridge. Keep the sauce separate to avoid sogginess. When ready to eat, heat everything together and add the sauce. This helps keep the dish fresh and tasty while saving time.
In this post, we explored Kung Pao shrimp, covering its key ingredients, cooking steps, and tips. I shared how to achieve the perfect flavor and offered variations for dietary needs. Proper storage and reheating methods ensure your dish stays fresh. Kung Pao shrimp is not just tasty; it’s also flexible. You can adapt it to suit your taste. Enjoy making this dish and impress your family with your cooking skills.

Better Than Takeout Spicy Kung Pao Shrimp
Ingredients
1 lb large shrimp, peeled and deveined
2 tablespoons vegetable oil (divided)
1 red bell pepper, diced
1 green bell pepper, diced
1 cup unsalted peanuts
2 cloves garlic, minced
1 teaspoon fresh ginger, minced
3 green onions, chopped (white and green parts separated)
2 tablespoons soy sauce
1 tablespoon rice vinegar
1 tablespoon hoisin sauce
1 tablespoon chili paste (adjust for spice level)
1 tablespoon cornstarch mixed with 2 tablespoons water (slurry)
Salt and black pepper to taste
Cooked white rice or brown rice for serving
Instructions
In a large skillet or wok, heat 1 tablespoon of vegetable oil over medium-high heat.
Once hot, add the shrimp and season with salt and pepper. Cook for 2-3 minutes until the shrimp turn pink and are opaque. Remove from skillet and set aside.
In the same skillet, add the remaining tablespoon of oil. Sauté the minced garlic and ginger for about 30 seconds until fragrant.
Add the diced red and green bell peppers and the white parts of the green onions. Stir-fry for 3-4 minutes until the peppers are tender-crisp.
Return the cooked shrimp to the skillet, and add the soy sauce, rice vinegar, hoisin sauce, and chili paste. Mix well to coat the shrimp and vegetables.
Pour the cornstarch slurry into the skillet and stir well. Cook for an additional 1-2 minutes until the sauce thickens slightly.
Stir in the unsalted peanuts and green parts of the green onions, cooking for another minute.
Serve hot over a bed of rice and enjoy your spicy, homemade Kung Pao shrimp that’s better than takeout!
Prep Time: 10 minutes | Total Time: 20 minutes | Servings: 4

Better Than Takeout Spicy Kung Pao Shrimp
Ingredients
- 1 lb large shrimp, peeled and deveined
- 2 tablespoons vegetable oil (divided)
- 1 cup unsalted peanuts
- 1 red bell pepper diced
- 1 green bell pepper diced
- 2 cloves garlic, minced
- 1 teaspoon fresh ginger, minced
- 3 green onions chopped (white and green parts separated)
- 2 tablespoons soy sauce
- 1 tablespoon rice vinegar
- 1 tablespoon hoisin sauce
- 1 tablespoon chili paste (adjust for spice level)
- 1 tablespoon cornstarch mixed with 2 tablespoons water (slurry)
- Salt and black pepper to taste
- Cooked white rice or brown rice for serving
Instructions
- In a large skillet or wok, heat 1 tablespoon of vegetable oil over medium-high heat.
- Once hot, add the shrimp and season with salt and pepper. Cook for 2-3 minutes until the shrimp turn pink and are opaque. Remove from skillet and set aside.
- In the same skillet, add the remaining tablespoon of oil. Sauté the minced garlic and ginger for about 30 seconds until fragrant.
- Add the diced red and green bell peppers and the white parts of the green onions. Stir-fry for 3-4 minutes until the peppers are tender-crisp.
- Return the cooked shrimp to the skillet, and add the soy sauce, rice vinegar, hoisin sauce, and chili paste. Mix well to coat the shrimp and vegetables.
- Pour the cornstarch slurry into the skillet and stir well. Cook for an additional 1-2 minutes until the sauce thickens slightly.
- Stir in the unsalted peanuts and green parts of the green onions, cooking for another minute.
- Serve hot over a bed of rice and enjoy your spicy, homemade Kung Pao shrimp that’s better than takeout!


![To make this creamy spinach stuffed salmon, you need simple and fresh ingredients. Here’s what you will use: - 4 salmon fillets, skinless - 2 cups fresh spinach, chopped - 1 cup cream cheese, softened - 1/2 cup feta cheese, crumbled - 1/4 cup grated Parmesan cheese - 2 cloves garlic, minced - 1 tablespoon olive oil - 1 teaspoon lemon juice - Salt and pepper to taste These ingredients create a rich, flavorful filling that pairs perfectly with salmon. The cream cheese adds creaminess, while feta offers tang. Spinach gives a fresh taste. Adding garnishes makes the dish look great and taste even better. Here are some options: - Fresh dill or parsley - Lemon wedges These garnishes add color and freshness. They also enhance the flavor of your dish. Having the right tools helps make cooking easier. You will need: - A skillet - A mixing bowl - A baking dish - Toothpicks (if needed) - A knife These tools help you prepare and cook the salmon. They ensure everything goes smoothly. If you want to see the full recipe, check it out here: [Full Recipe]. To start, gather your ingredients. You need: - 4 salmon fillets, skinless - 2 cups fresh spinach, chopped - 1 cup cream cheese, softened - 1/2 cup feta cheese, crumbled - 1/4 cup grated Parmesan cheese - 2 cloves garlic, minced - 1 tablespoon olive oil - 1 teaspoon lemon juice - Salt and pepper to taste - Fresh dill or parsley, for garnish First, preheat your oven to 375°F (190°C). This step helps cook the salmon evenly. Next, heat a skillet over medium heat. Add the olive oil and sauté minced garlic for about 1 minute. You want it fragrant but not burnt. Then, add the chopped spinach to the skillet. Cook until it wilts, which takes about 2-3 minutes. Remove the skillet from heat and let the spinach cool a bit. In a bowl, mix the softened cream cheese, feta cheese, grated Parmesan, sautéed spinach, lemon juice, salt, and pepper. Stir until combined, creating a creamy filling. Now, take your salmon fillets and place them on a cutting board. Make a slit in the side of each fillet. This creates a pocket for your filling. Next, generously fill each pocket with the creamy mixture. If needed, use toothpicks to secure the openings. Place the stuffed salmon fillets in a lightly greased baking dish. Bake in the preheated oven for 20-25 minutes. The salmon should cook through and flake easily with a fork. This timing ensures a moist and flavorful dish. To ensure you cook the salmon just right, use a meat thermometer. The internal temperature should reach 145°F (63°C). This helps you avoid overcooking, which can make the fish dry. Let the salmon rest for a few minutes after baking. This allows the juices to redistribute. For a beautiful finish, garnish with fresh dill or parsley. Serve it on a bed of sautéed asparagus or a light salad for a colorful plate. Enjoy your creamy spinach stuffed salmon! If you want the full recipe, check out the [Full Recipe]. When picking salmon, freshness is key. Look for bright, shiny skin without any brown spots. The flesh should be firm and spring back when you press it. Wild-caught salmon often has a richer taste than farmed salmon. If you can, ask your fishmonger for the best catch of the day. You can prepare this dish ahead for a busy weeknight. Make the creamy spinach filling and stuff the salmon up to one day before cooking. Wrap the salmon tightly in plastic wrap and store it in the fridge. This way, the flavors meld nicely. Just bake it when you’re ready to eat! Avoid these pitfalls for the best results. First, do not overstuff the salmon. Too much filling can make it hard to cook evenly. Second, don’t skip the resting time after baking. Letting it rest helps the juices settle. Lastly, be careful not to overcook the salmon. It should flake easily but still be moist. Enjoy your delicious meal! {{image_2}} You can switch up the cheeses in this recipe. Cream cheese gives a rich taste. Feta adds a nice tang. You can try goat cheese for a creamy twist. Mozzarella works well for a mild flavor. Each cheese brings a unique taste to the dish. Want to make this dish lighter? Use low-fat cream cheese. You can also swap out feta for a lower-fat cheese. Instead of olive oil, try using a cooking spray. This will cut down on extra calories while keeping the flavors intact. Adding fresh herbs can boost the dish's taste. Try basil or thyme for a fresh kick. A sprinkle of red pepper flakes adds heat if you want spice. For a zesty touch, squeeze more lemon juice before serving. These simple changes bring new life to the salmon. For the full recipe, check the details above. To store leftovers of creamy spinach stuffed salmon, let it cool first. Place the salmon in an airtight container. Keep it in the fridge for up to three days. This helps maintain its flavor and texture. If you have extra stuffing, store it in a separate container. Reheat the salmon gently to avoid drying it out. Preheat your oven to 350°F (175°C). Place the salmon on a baking sheet. Cover it with foil to keep moisture in. Heat for about 10-15 minutes. You can also use a microwave. Heat it on low power in short intervals. Check to ensure it warms evenly. You can freeze creamy spinach stuffed salmon for longer storage. Wrap each piece tightly in plastic wrap. Then, place it in a freezer-safe bag. It can last for up to three months in the freezer. To thaw, move it to the fridge overnight before reheating. This keeps the salmon moist and tasty. For the best results, avoid refreezing after thawing. Yes, you can use frozen salmon. Just make sure to thaw it first. Place it in the fridge overnight or submerge it in cold water for faster thawing. Frozen salmon works well, but fresh salmon gives the best flavor and texture. You can pair this dish with many sides. Here are a few ideas: - Sautéed asparagus - Lemon rice - Garlic mashed potatoes - A light salad with vinaigrette - Steamed broccoli These sides will balance the rich flavors of the salmon. To check if salmon is cooked, look for a few signs: - The flesh should be opaque and flake easily with a fork. - The internal temperature should reach 145°F (63°C). - The color should change from bright pink to pale pink. These tips will help ensure your salmon is safe and tasty. For the full recipe, check the details above. In this article, we covered how to make creamy spinach stuffed salmon. We looked at key ingredients, preparation, and baking steps. I shared tips for choosing the best salmon, making ahead, and avoiding common mistakes. You also learned about tasty cheese swaps and ways to enhance flavor. Lastly, I explained how to store, reheat, and freeze leftovers. Enjoy this dish that combines ease and flavor. With practice, you’ll master it!](https://dailydishlab.com/wp-content/uploads/2025/07/597501d1-48c7-4a9b-bedb-1c262109b33c-768x768.webp)