Brussels Sprout Caesar Salad Delightfully Crisp Side

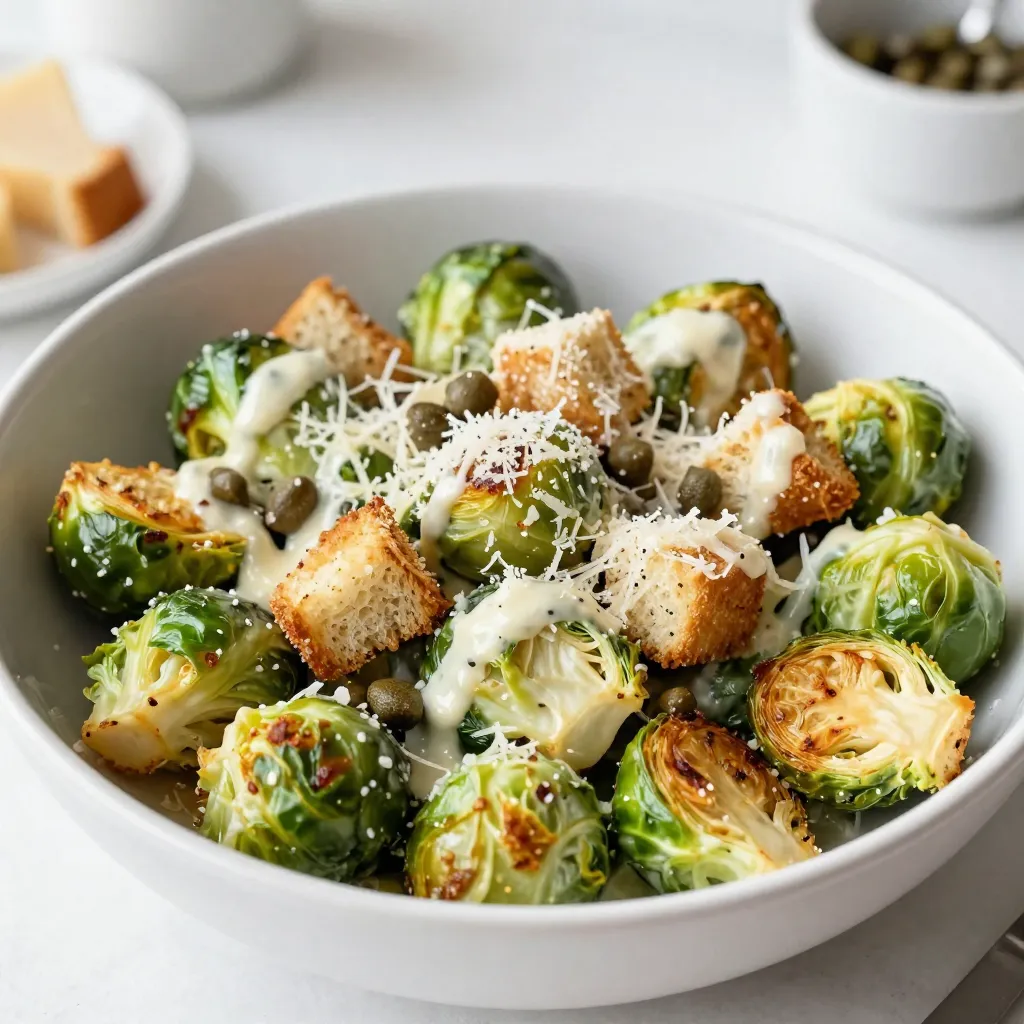
Looking for a fresh twist on a classic dish? This Brussels Sprout Caesar Salad is your new go-to side! With crisp sprouts and a creamy dressing, it’s both tasty and fun to make. In this post, I’ll guide you through simple steps to create this delightfully crunchy salad. From ingredient tips to serving ideas, you’ll find everything you need to impress at your next meal. Let’s dive in!
Why I Love This Recipe
- Bold Flavor Profile: This salad combines the nutty taste of roasted Brussels sprouts with the tangy Caesar dressing, creating a delightful contrast that excites the palate.
- Crunchy Texture: The crispy Brussels sprouts and homemade croutons add a satisfying crunch that makes each bite enjoyable.
- Healthy Twist: Using Greek yogurt in the dressing offers a creamy texture while cutting down on calories and adding protein.
- Quick and Easy: This recipe comes together in just 35 minutes, making it a perfect option for a weeknight dinner or a quick lunch.
Ingredients
Main Ingredients for Brussels Sprout Caesar Salad
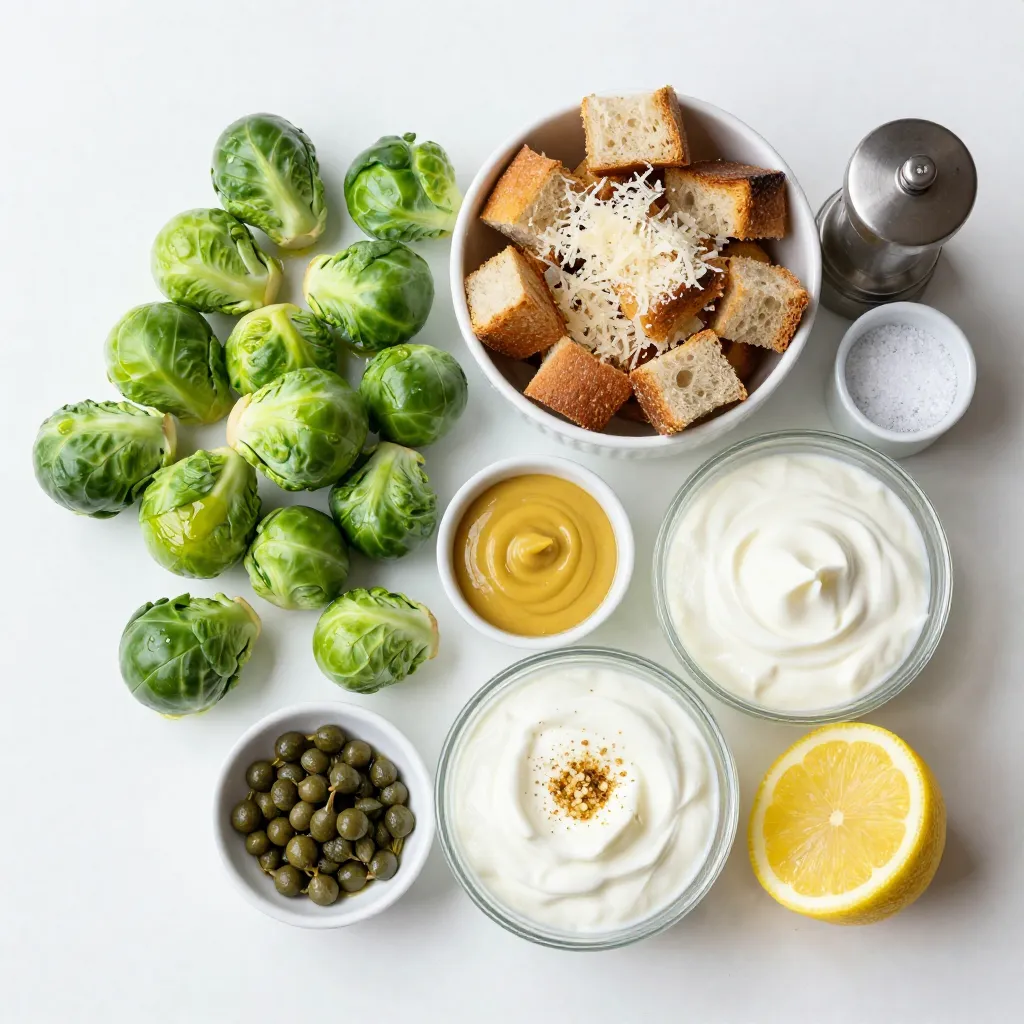
- 1 lb Brussels sprouts, trimmed and halved
- 3 tablespoons olive oil
- Salt and pepper to taste
- 1 cup homemade croutons (use day-old bread)
- 1/4 cup grated Parmesan cheese
I love using fresh Brussels sprouts for this salad. They add a nice crunch and earthy flavor. Halving them helps them roast nicely. The olive oil gives them a rich taste. Don’t forget the salt and pepper! They enhance the sprouts’ natural flavor. The homemade croutons add a fun texture to the dish. You can make them from old bread. Just cut it up and toast it until golden. The grated Parmesan cheese brings a creamy, salty kick to the salad.
Dressing Ingredients
- 2 tablespoons Dijon mustard
- 2 tablespoons lemon juice
- 1 tablespoon Worcestershire sauce
- 1 teaspoon garlic powder
- 1/2 cup Greek yogurt (for a creamy dressing)
- 1 tablespoon capers, chopped (for a briny kick)
This dressing is what makes the salad special. I love the mix of creamy Greek yogurt and sharp Dijon mustard. The lemon juice adds a bright touch. Worcestershire sauce gives it depth. Garlic powder adds that wonderful savory flavor. Chopped capers bring a little briny punch. It’s easy to whisk all these together for a smooth dressing.
Tools Needed for Preparation
- Baking sheet
- Large mixing bowl
- Small bowl for dressing
- Whisk
- Large serving bowl
You need a baking sheet to roast the Brussels sprouts. A large mixing bowl helps you toss the sprouts with oil and seasonings. For the dressing, use a small bowl and a whisk. This keeps everything tidy. Finally, a large serving bowl is perfect for combining all your delicious ingredients.

Step-by-Step Instructions
Preparing the Brussels Sprouts
First, you need to preheat your oven to 400°F (200°C). This step helps get the Brussels sprouts nice and crispy. Next, take 1 pound of Brussels sprouts. Trim the ends and cut them in half. Place them in a large mixing bowl. Add 3 tablespoons of olive oil, salt, and pepper to taste. Toss everything together until the sprouts are well coated.
Now, spread the Brussels sprouts on a baking sheet. Make sure they are in a single layer. This helps them roast evenly. Roast them for about 20 to 25 minutes. Flip them halfway through to ensure even cooking. They should turn golden brown and crispy when done.
Making the Caesar Dressing
While the Brussels sprouts roast, let’s make the dressing. In a small bowl, add 1/2 cup of Greek yogurt. Then mix in 2 tablespoons of Dijon mustard, 2 tablespoons of lemon juice, and 1 tablespoon of Worcestershire sauce. Add 1 teaspoon of garlic powder and 1 tablespoon of chopped capers for a briny kick. Whisk all these ingredients together until smooth. Taste and adjust the seasoning with salt and pepper if needed.
Assembling the Salad
Once the Brussels sprouts are done, take them out of the oven and let them cool for a few minutes. In a large serving bowl, combine the roasted Brussels sprouts, 1 cup of homemade croutons, and 1/4 cup of grated Parmesan cheese. Drizzle the prepared dressing over the salad. Gently toss everything until well coated. Serve your salad right away. You can add more Parmesan cheese and some fresh pepper on top for extra flavor. Enjoy your crisp and tasty Brussels sprout Caesar salad!
Tips & Tricks
How to Achieve Crispy Brussels Sprouts
To make your Brussels sprouts perfectly crispy, start by cutting them in half. This helps them roast evenly. Toss the sprouts with olive oil, salt, and pepper in a bowl. Use just enough oil to coat them lightly. Spread them on a baking sheet in a single layer. This spacing allows hot air to circulate around each sprout. Roast in a preheated oven at 400°F for about 20-25 minutes. Flip them halfway through for even crisping. Look for a golden brown color to know they are done.
Substitutions for Ingredients
You can easily swap ingredients if needed. For a dairy-free option, use vegan cheese instead of Parmesan. If you don’t have Greek yogurt, try sour cream or a plant-based yogurt. Dijon mustard can be replaced with yellow mustard. If you want a sweeter dressing, add a bit of honey or maple syrup. For a different flavor, use balsamic vinegar instead of lemon juice. These swaps can still give you a tasty salad.
Serving Suggestions
This salad is great on its own or as a side. It pairs well with grilled chicken or fish. You can also serve it with whole-grain bread for a complete meal. For a fun twist, add nuts like walnuts or almonds for crunch. Try garnishing with fresh herbs like parsley or chives to brighten the dish. Serve it right after tossing so the sprouts stay crisp. Enjoy your salad fresh for the best taste!
Pro Tips
- Freshness Matters: Use the freshest Brussels sprouts you can find for the best flavor and texture. Look for bright green sprouts that are firm and tightly packed.
- Crouton Crunch: For extra crunchy croutons, consider toasting them in the oven for a few minutes before adding them to the salad. You can also sprinkle them with a bit of garlic powder for added flavor.
- Dressing Delight: If you prefer a thinner dressing, simply add a splash of water or extra lemon juice to achieve your desired consistency without losing flavor.
- Make it Ahead: You can roast the Brussels sprouts and make the dressing in advance. Combine them just before serving to keep everything fresh and crisp.
Variations
Additions for Extra Flavor
To make your Brussels sprout Caesar salad even better, try adding some fun extras. Here are a few ideas:
- Bacon bits: Cook some crispy bacon. Add it for a savory crunch.
- Anchovies: They bring a strong umami flavor. Chop them finely and mix into the dressing.
- Nuts: Add walnuts or almonds for a nice crunch. Toast them for more flavor.
- Herbs: Fresh herbs like parsley or basil can add brightness. Sprinkle them on top before serving.
These additions will enhance your salad and make it unique.
Vegan and Gluten-Free Options
You can easily make this salad vegan and gluten-free. Here’s how:
- Dressing: Replace Greek yogurt with silken tofu. Blend it until smooth. Add lemon juice and Dijon mustard for flavor.
- Croutons: Use gluten-free bread for your croutons. You can make them at home or buy them.
- Parmesan cheese: Swap with nutritional yeast for a cheesy flavor without dairy.
These swaps keep the taste great while meeting different diets.
Seasonal Ingredient Swaps
Using seasonal ingredients makes your salad fresh and exciting. Here are some swaps for each season:
- Spring: Add fresh peas or radishes. They add sweetness and crunch.
- Summer: Try cherry tomatoes or cucumbers. They bring a juicy, refreshing taste.
- Fall: Add roasted sweet potatoes or butternut squash. They give a nice sweetness.
- Winter: Include pomegranate seeds for a pop of color and tartness.
These seasonal ingredients will keep your salad vibrant and delicious all year round.
Storage Info
How to Store Leftover Salad
If you have leftover Brussels sprout Caesar salad, you should store it in the fridge. Use an airtight container to keep it fresh. This helps the salad stay crisp longer. Do not mix the dressing in if you plan to save some. Keep the dressing separate to avoid soggy sprouts.
Best Practices for Reheating
Reheating this salad is not the best option. The Brussels sprouts lose their crispness when heated. If you must warm them, do it gently. Use a microwave on low power. Heat for just a few seconds. Check to see if they are warm enough.
Shelf Life of Ingredients
The salad stays fresh for about 2-3 days in the fridge. The Brussels sprouts hold well, but the croutons will go soft. The dressing lasts about a week. Check for any off smells or changes in color before using. Always trust your senses when it comes to food safety.
FAQs
What can I substitute for Greek yogurt?
You can use sour cream instead of Greek yogurt. Both give a creamy texture. If you want a dairy-free option, try cashew cream or silken tofu. Blend the tofu until smooth for a nice consistency.
Can I make this salad ahead of time?
Yes, you can prep this salad ahead. Roast the Brussels sprouts and make the dressing early. Keep them separate until you are ready to serve. This keeps everything fresh and crisp.
Is this salad suitable for meal prep?
This salad works great for meal prep! Store the components in separate containers. This way, your salad stays fresh for a few days. Just mix it up when you are ready to eat.
How many calories are in a serving of Brussels Sprout Caesar Salad?
A serving of this salad has about 250 calories. This estimate may change based on specific brands and portions. It’s a healthy option packed with flavor and nutrients.
This blog post covered how to make a tasty Brussels sprout Caesar salad. We explored the main ingredients, the creamy dressing, and the tools you need. I shared step-by-step tips for prepping the sprouts, making the dressing, and assembling the salad. You also learned great tricks for crispy sprouts and serving ideas. Remember, leftovers can stay fresh with proper storage. Enjoy experimenting with flavors and options for dietary needs. Now, dive into making this salad, and savor every crunchy bit

Crispy Brussels Sprout Caesar Salad
Ingredients
- 1 lb Brussels sprouts, trimmed and halved
- 3 tablespoons olive oil
- to taste Salt and pepper
- 1 cup homemade croutons
- 1 4 cup grated Parmesan cheese
- 2 tablespoons Dijon mustard
- 2 tablespoons lemon juice
- 1 tablespoon Worcestershire sauce
- 1 teaspoon garlic powder
- 1 2 cup Greek yogurt
- 1 tablespoon capers, chopped
Instructions
- Preheat your oven to 400°F (200°C).
- In a large mixing bowl, toss the halved Brussels sprouts with olive oil, salt, and pepper until well coated.
- Spread the Brussels sprouts on a baking sheet in a single layer and roast in the oven for about 20-25 minutes, or until they are golden brown and crispy, flipping halfway through.
- While the Brussels sprouts are roasting, prepare the Caesar dressing: In a small bowl, whisk together the Greek yogurt, Dijon mustard, lemon juice, Worcestershire sauce, garlic powder, and chopped capers until smooth. Adjust the seasoning with salt and pepper.
- Once the Brussels sprouts are done, remove them from the oven and let them cool slightly.
- In a large serving bowl, combine the roasted Brussels sprouts, homemade croutons, and grated Parmesan cheese.
- Drizzle the prepared dressing over the salad and gently toss until everything is well coated.
- Serve immediately, garnished with additional Parmesan cheese and a sprinkle of fresh pepper if desired.


![- 1 pound ground beef (or turkey) - 1/2 cup breadcrumbs (plain or seasoned) - 1/4 cup grated Parmesan cheese - 1/4 cup finely chopped onion - 1 egg - 2 cloves garlic, minced The main ingredients for honey garlic slow cooker meatballs are simple yet flavorful. Ground beef or turkey serves as a great base, giving the meatballs a hearty texture. I like to use breadcrumbs to hold everything together while adding a nice crunch. Adding grated Parmesan cheese gives the meatballs a savory kick. Finely chopped onion and minced garlic infuse rich flavors that blend perfectly. Finally, one egg binds all these ingredients and keeps the meatballs moist. - 1/3 cup honey - 1/4 cup soy sauce (or tamari for gluten-free) - 1 tablespoon apple cider vinegar - 1 teaspoon ground ginger - 1/4 teaspoon black pepper For the sauce, honey is the star. Its sweetness balances well with the salty soy sauce. You can use tamari if you want a gluten-free option. A splash of apple cider vinegar adds a tangy note, while ground ginger brings warmth and depth. Just a sprinkle of black pepper rounds out the flavors nicely. - Chopped green onions - Sesame seeds Garnishes can elevate your dish. Chopped green onions add a fresh crunch, while sesame seeds give a nice nutty flavor. You can add these right before serving for a beautiful finish. For the full recipe, refer to [Full Recipe]. - Combine the main ingredients in a bowl. Mix 1 pound of ground beef or turkey, 1/2 cup of breadcrumbs, 1/4 cup of grated Parmesan cheese, 1/4 cup of finely chopped onion, 1 egg, and 2 minced garlic cloves. - Form the mixture into small meatballs, about 1 inch in diameter. Set them aside on a plate. - In a separate bowl, whisk together the sauce ingredients. Mix 1/3 cup of honey, 1/4 cup of soy sauce, 1 tablespoon of apple cider vinegar, 1 teaspoon of ground ginger, and 1/4 teaspoon of black pepper. - Place the meatballs in the slow cooker. Arrange them in a single layer for even cooking. - Pour the honey garlic sauce over the meatballs. Make sure they are well coated. - Cook on low for 4-5 hours or on high for 2-3 hours. Check that the meatballs are cooked through and tender. - After cooking, gently stir the meatballs. Let them soak up the sauce for about 10 minutes before serving. - Garnish with chopped green onions and sesame seeds if you want. Enjoy these tasty bites! For the full recipe, check out the detailed instructions. To make great honey garlic meatballs, start by ensuring even cooking. This means forming your meatballs to the same size. Aim for about one inch in diameter. This way, they cook at the same rate. If you make them too big, they may not cook through. For cooking time, I recommend using low heat for about 4 to 5 hours. If you are short on time, use high heat for 2 to 3 hours. Either way, check the meatballs near the end. They should be tender and fully cooked. You can also use a meat thermometer to check for doneness. The internal temperature should reach 165°F. Honey garlic meatballs shine with simple sides. Serve them with steamed rice, noodles, or even a fresh salad. These pair well with the sweet and savory flavors of the meatballs. For presentation, arrange the meatballs on a large platter. Drizzle extra sauce over them for a glossy look. Sprinkle chopped green onions and sesame seeds on top. This adds color and a fresh crunch. When making meatballs, some issues may pop up. If your meatballs fall apart, it could be too much moisture. Ensure you use the right amount of breadcrumbs. Another common problem is dry meatballs. This can happen if you overcook them. Always check your cooking time and temperature. If they seem dry, serve them with more sauce to help. These tips can guide you through making perfect honey garlic slow cooker meatballs. For the full recipe, check back to the main section. {{image_2}} You can easily switch the meat you use. Ground turkey works well instead of beef. If you want a plant-based option, use lentils or chickpeas. Both are tasty and healthy. When it comes to breadcrumbs, you can use gluten-free options. Look for gluten-free bread or crushed rice crackers. This swap keeps the dish friendly for those with gluten issues. To boost the taste, think about adding spices. A pinch of red pepper flakes gives a nice kick. Fresh herbs like basil or cilantro can add a fresh twist. You can also adjust the sweetness. If you want it less sweet, cut back on the honey. To add saltiness, consider a splash more soy sauce. Each of these changes can make your dish unique. You don’t have to use a slow cooker for this recipe. You can bake the meatballs in the oven. Just preheat it to 400°F. Place the meatballs on a baking sheet. Bake for about 20 minutes until they are golden brown. For stovetop cooking, heat a skillet over medium heat. Brown the meatballs on all sides. Then add the sauce and simmer until cooked through. Each method brings a different texture and flavor to the dish. Remember, you can find the full recipe in the earlier section. To store leftover meatballs, place them in an airtight container. Make sure to cover them well. This keeps the meatballs fresh and tasty. You can store them in the fridge for up to 4 days. If you want to enjoy them later, freezing may be a better choice. For the best results, freeze meatballs in a single layer on a baking sheet. Once they are frozen, place them in a freezer bag. This helps prevent them from sticking together. You can freeze them for up to 3 months. When you're ready to eat, thaw the meatballs in the fridge overnight. Reheat them in the slow cooker or microwave until hot. Preparing ahead is a great way to save time. You can mix and form the meatballs a day in advance. Just store them in the fridge until you're ready to cook. Portioning is also key. Consider making small bags with the right amount for meals. This makes it easy for quick dinners during busy days. For a delightful meal, try the Full Recipe for Honey Garlic Slow Cooker Meatballs. You can tell meatballs are done by checking their internal temperature. Use a meat thermometer. The safe temperature for ground meat is 165°F (74°C). Insert the thermometer into the center of a meatball. If it reads 165°F, they are ready to eat. If not, cook them a bit longer. Yes, you can prepare honey garlic meatballs in advance. Mix the meatball ingredients and form them into balls. Place them in the fridge for up to 24 hours before cooking. You can also freeze them for later. Just thaw them in the fridge overnight before cooking. This saves time on busy days. Definitely! You can swap ground beef for turkey or a plant-based option. For gluten-free diets, use gluten-free breadcrumbs and tamari instead of soy sauce. If you prefer less sugar, reduce the amount of honey or use a sugar-free substitute. There are many options to fit your needs. Honey garlic meatballs pair well with various side dishes. Here are some great options: - Steamed rice or quinoa - Roasted vegetables - Noodles, like rice or soba - A fresh green salad - Mashed potatoes These sides complement the sweet and savory flavors of the meatballs. Enjoy mixing and matching to find your favorite combination! For the complete recipe, check the Full Recipe section. This blog post covered how to make juicy honey garlic meatballs. We explored the main ingredients, including ground beef and Parmesan cheese. Then, we discussed the sauce, which combines honey and soy sauce, and provided cooking tips. Plus, we shared variations and storage tips for leftovers. Whether you follow the recipe or make your own tweaks, you can enjoy delicious meatballs. Now, it's your turn to try this easy dish and share it with your loved ones!](https://dailydishlab.com/wp-content/uploads/2025/07/f340aba1-8a32-460a-95c5-e4b0f40aca57-768x768.webp)


![- 2 ripe avocados - 1 cup cherry tomatoes, halved - 1 ball of fresh mozzarella, sliced These main ingredients create the heart of your Caprese avocado toast. Ripe avocados give a rich, creamy base. Cherry tomatoes add a sweet and juicy burst. Fresh mozzarella brings a soft, milky flavor that ties it all together. - 1/4 cup fresh basil leaves - 2 tablespoons balsamic glaze - 1 tablespoon olive oil - Salt and pepper to taste Fresh basil leaves add a fragrant touch. Balsamic glaze gives a sweet and tangy finish. Olive oil enhances the richness. Don’t forget to season with salt and pepper for a full flavor experience. - 4 slices of whole grain - 4 slices of sourdough Choosing the right bread is key. Whole grain bread offers a nutty flavor and healthy fiber. Sourdough gives a tangy taste and a chewy texture. Both options will hold up well under the toppings. With these ingredients, you can easily create a fresh and flavorful Caprese avocado toast. Check out the Full Recipe for more details on how to bring this dish to life! Toasting the bread is key. You want it crispy but not burnt. I recommend using whole grain or sourdough. Start by placing your bread slices in a toaster or on a skillet. Toast them until they turn a nice golden brown. This crispiness will hold up well against the creamy avocado. It adds a great texture to your Caprese avocado toast. Next, grab your ripe avocados. Cut each avocado in half and remove the pit. Use a spoon to scoop the flesh into a bowl. Mash the avocado with a fork. You can make it smooth or leave some chunks for texture. Season it with salt and pepper. This step is vital for flavor. A well-mashed avocado will elevate your toast. Now comes the fun part: assembling your toast. Start by spreading a generous layer of mashed avocado on each slice of bread. Next, place sliced fresh mozzarella on top of the avocado. Follow this with halved cherry tomatoes. The colors and flavors mix beautifully. Drizzle olive oil over the toast and sprinkle fresh basil leaves on top. Lastly, add a drizzle of balsamic glaze. This adds sweetness and tang. For a bit more kick, sprinkle some extra salt and freshly cracked pepper. Enjoy your fresh and flavorful Caprese avocado toast! For the complete recipe, check out the [Full Recipe]. To get the best avocado mash, start with ripe fruit. A ripe avocado is slightly soft when you press it. Cut the avocado in half, remove the pit, and scoop the flesh into a bowl. Use a fork to mash it. Aim for a creamy, yet chunky texture. If you like, you can add a splash of lemon juice. This keeps the color bright and adds a nice flavor. You can boost the flavor of your Caprese Avocado Toast easily. Try adding a pinch of garlic powder or onion powder. A dash of red pepper flakes adds a bit of heat. Fresh herbs like chives or dill can give a fresh twist. For a savory touch, sprinkle some feta cheese on top. These extras make your toast pop with taste and excitement. Caprese Avocado Toast is great on its own, but you can pair it with more. A fresh side salad adds crunch and color. You can also serve it with a light soup. For a heartier meal, add a poached egg on top. This boosts protein and makes your toast filling. You can find the full recipe above to get started right away! {{image_2}} You can easily make a vegan version of Caprese avocado toast. Instead of fresh mozzarella, try using vegan cheese. Look for brands that melt well and are made from nuts or soy. For the balsamic glaze, ensure it has no added dairy. You can also use a splash of lemon juice for added zest. These swaps keep the flavor while making it vegan-friendly. Want to boost the protein in your toast? Try adding a poached egg on top. The yolk adds creaminess and richness. If you enjoy meat, prosciutto pairs well with the flavors. Just layer it on the toast before adding the basil. You can also sprinkle seeds or nuts for crunch, like pine nuts or sunflower seeds. These options make your meal more filling and tasty. Don't be afraid to play with flavors. Instead of balsamic glaze, use a fruity vinegar like raspberry or fig. These can bring a new twist to your dish. You can also swap olive oil for flavored oils, such as garlic or chili oil. Each change can create a unique taste. Experiment to find your favorite combination! For more details on the Caprese avocado toast, check the Full Recipe. To store leftover ingredients, keep the avocados in an airtight container. This helps slow down browning. Place sliced tomatoes and mozzarella in their own containers. You can keep them fresh by adding a bit of olive oil. Store everything in the fridge and use within two days for the best taste. You should not freeze the assembled toast. Freezing changes the texture of the bread and avocado. However, you can freeze the ingredients separately. Just mash ripe avocados before freezing. Use a bit of lemon juice to help keep the color. Frozen tomatoes and mozzarella work well in cooked dishes but lose their fresh taste when thawed. To maintain ingredient quality, buy the freshest produce you can find. Store avocados at room temperature until ripe. Once ripe, place them in the fridge. Keep tomatoes out of the fridge to avoid losing flavor. Use fresh basil right away for the best aroma. To keep your balsamic glaze fresh, seal it tightly and store it in a cool, dark place. Following these tips helps ensure you enjoy Caprese Avocado Toast at its best, as shown in the Full Recipe. Caprese Avocado Toast is a tasty dish that combines fresh ingredients. It features ripe avocados, juicy tomatoes, and creamy mozzarella. This dish takes inspiration from the classic Caprese salad, which hails from Italy. It's perfect for breakfast, lunch, or a snack. The vibrant colors and flavors make it a delight to eat. To make your avocado toast creamy, choose ripe avocados. They should yield slightly when you press them. Mash them well with a fork until smooth. You can add a little olive oil for extra creaminess. Mixing in salt and pepper will enhance the flavor, too. If you want a twist, try adding a squeeze of lemon juice. This not only adds creaminess but also keeps the avocado fresh. Yes, you can prep some parts of this recipe ahead of time. You can mash the avocado and store it in an airtight container. Just remember to add lemon juice to keep it green. Slice the tomatoes and mozzarella ahead of time as well. Keep them in the fridge until you are ready to assemble the toast. For the best taste, toast the bread right before serving. This keeps it crispy and delicious. For the full recipe, check out the previous section. In this article, we explored the delicious world of Caprese Avocado Toast. We broke down the key ingredients like ripe avocados and fresh mozzarella. You learned how to toast the bread for the right crunch and prepare a creamy avocado mash. I shared tips for perfecting flavor and serving options. Try different variations and toppings to make it your own. Remember to store ingredients properly for freshness. Enjoy creating this simple yet tasty dish that offers endless possibilities!](https://dailydishlab.com/wp-content/uploads/2025/07/79be3167-b52a-4185-ab5b-4217b6e27db0-768x768.webp)
