Buttery Garlic Knots Flavorful and Simple Recipe

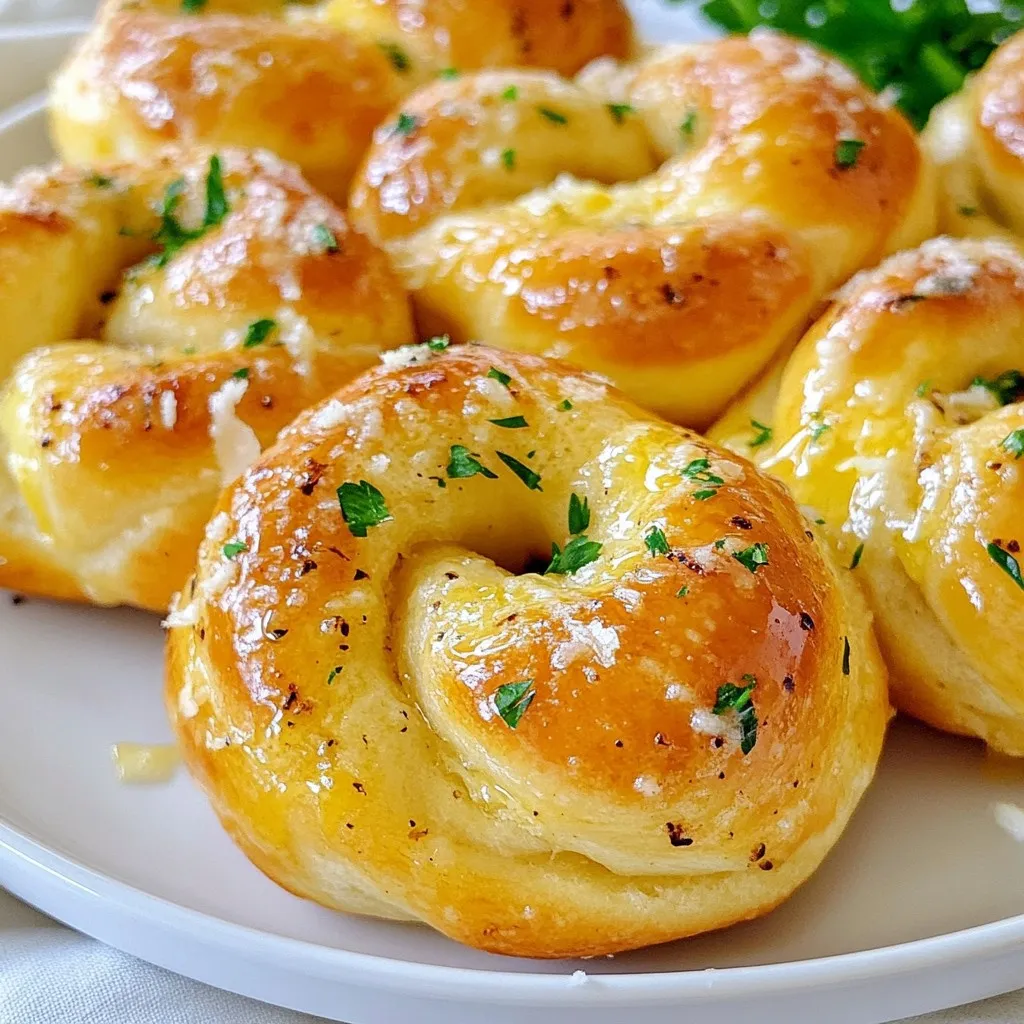
Looking for a tasty snack that’s easy to make? In this post, I’ll show you how to whip up buttery garlic knots that are flavorful and simple. With just a few fresh ingredients and easy steps, you’ll surprise everyone with your baking skills. From perfecting the knot shape to flavor variations, I’ve got all the tips you need. Let’s get started on making your kitchen smell amazing!
Why I Love This Recipe
- Easy to Make: With just a few simple ingredients and steps, these buttery garlic knots are perfect for both beginner and seasoned cooks.
- Versatile: These knots can be enjoyed as a side dish, appetizer, or even as a snack on their own, making them a great addition to any meal.
- Irresistible Flavor: The combination of garlic, butter, and fresh herbs creates a mouthwatering flavor that will have everyone coming back for more.
- Perfect for Sharing: These knots are great for parties and gatherings, allowing everyone to enjoy a warm, cheesy bite together.
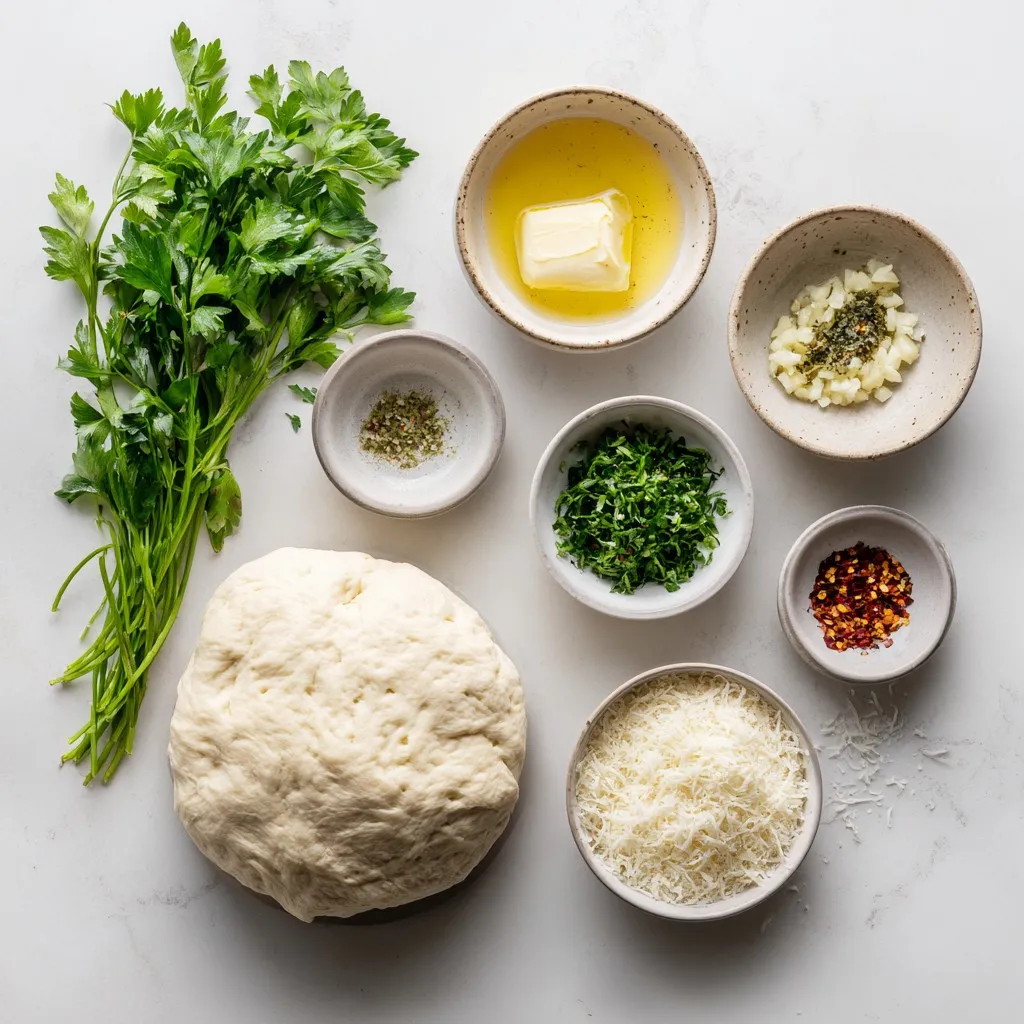
Ingredients
List of Ingredients
- 1 batch of pizza dough (store-bought or homemade)
- 4 tablespoons unsalted butter, melted
- 4 cloves garlic, minced
- 2 tablespoons fresh parsley, chopped
- 1 teaspoon Italian seasoning
- ½ teaspoon salt
- ¼ teaspoon red pepper flakes (optional)
- Grated Parmesan cheese for sprinkling (optional)
Substitutions and Alternatives
You can change the pizza dough. Use bread dough if you want a chewier texture. If you don’t have fresh parsley, use dried parsley instead. It works well too. For a kick, add more red pepper flakes. You can skip them if you prefer no heat. If you want a cheesy twist, try adding mozzarella or cheddar inside the knots.
Tips on Selecting Fresh Ingredients
When picking garlic, look for firm, dry bulbs. They should feel heavy for their size. Choose fresh parsley with bright green leaves. Avoid any brown spots. For butter, select high-quality unsalted butter for the best flavor. If you can, buy local dairy products. They often taste fresher. Always check the dough packaging date. Fresh dough gives better results.

Step-by-Step Instructions
Prep Work
First, gather your ingredients. You need pizza dough, butter, garlic, parsley, and spices. If you use store-bought dough, it saves time. Preheat your oven to 375°F (190°C). This step is important for a perfect bake. Line your baking sheet with parchment paper. This makes cleanup easy and keeps the knots from sticking.
Preparing the Dough
Next, roll out the pizza dough. Use a lightly floured surface to prevent sticking. Form a rectangle with the dough. Cut it into strips about 1 inch wide and 8 inches long. Take each strip and tie it into a knot. Create a loop and pull the ends through the center. Place the knots on your baking sheet with space in between.
Baking Process
In a small bowl, mix melted butter, minced garlic, chopped parsley, Italian seasoning, salt, and red pepper flakes if you like heat. Brush this garlic butter generously over each knot. This adds lots of flavor. Bake the knots for 15-20 minutes until golden brown. When they come out of the oven, brush any leftover garlic butter on top. Optionally, sprinkle grated Parmesan cheese for extra taste. Let them cool slightly before serving. Enjoy your buttery garlic knots warm!
Tips & Tricks
Achieving the Perfect Knot Shape
To shape your garlic knots, start with strips of dough. Cut them about 1 inch wide and 8 inches long. Tie each strip into a knot by making a loop. Pull the ends through the center of the loop. Keep the knots tight but not too tight. This helps them rise well in the oven. Practice makes perfect, so don’t worry if they aren’t perfect on your first try.
Ensuring Maximum Flavor
For the best taste, use fresh garlic and parsley. Mince the garlic finely for a strong flavor. Chop the parsley small to spread its taste evenly. Mix these with melted butter, along with Italian seasoning and salt. Brush this mixture on each knot before baking. If you like heat, add red pepper flakes. After baking, brush on any extra garlic butter for even more flavor. Top with grated Parmesan for a rich finish.
Storage and Reheating Tips
If you have leftovers, store them in an airtight container. They last up to three days at room temperature. For longer storage, freeze them. Wrap each knot in plastic wrap and place them in a freezer bag. To reheat, bake them at 350°F (175°C) for about 10 minutes. This keeps them soft and warm. You can also microwave them for about 20 seconds, but they may lose some crispness.
Pro Tips
- Use Fresh Ingredients: For the best flavor, use fresh garlic and parsley. Fresh herbs can enhance the taste of your buttery garlic knots significantly.
- Knead the Dough Well: If you are making homemade pizza dough, ensure to knead it well for a smooth and elastic texture. This will help the knots hold their shape during baking.
- Don’t Skip the Butter: Generously brushing the knots with garlic butter before and after baking adds a rich flavor. It also helps achieve a beautiful golden-brown color.
- Experiment with Toppings: Feel free to customize your garlic knots by adding different toppings like sesame seeds or even a sprinkle of Italian herbs for extra flavor.

Variations
Cheese-Stuffed Garlic Knots
You can take your garlic knots to the next level by adding cheese. For cheese-stuffed knots, use mozzarella or cheddar. After cutting the dough into strips, place a small piece of cheese in the center. Then, tie the dough into a knot around the cheese. When baked, the cheese will melt and add a gooey, delicious surprise!
Herb and Spice Variations
Feel free to mix herbs and spices to match your taste. You can use fresh basil, oregano, or even rosemary. For a kick, add more red pepper flakes. You can also swap the parsley for cilantro or chives. This way, each bite of your buttery garlic knots can offer a new flavor twist.
Using Different Dips
Dips can make your buttery garlic knots even better. Try serving them with marinara sauce for a classic touch. You can also use ranch, garlic aioli, or even a spicy sriracha dip. Each dip adds a unique flavor and makes the eating experience fun and varied!
Storage Info
Best Practices for Storing Leftovers
To keep your buttery garlic knots fresh, let them cool first. Place them in an airtight container. Use parchment paper between layers to avoid sticking. Store them in the fridge for up to three days. If you need to store them longer, consider freezing.
Freezing Buttery Garlic Knots
To freeze your knots, first cool them completely. Then, wrap each knot in plastic wrap. Place the wrapped knots in a freezer bag. Remove as much air as possible before sealing. They can last in the freezer for about three months. When you are ready, simply thaw them in the fridge overnight.
Reheating Techniques
Reheat your garlic knots to bring back their warm, buttery goodness. Preheat your oven to 350°F (175°C). Place the knots on a baking sheet and cover them with foil. Bake for about 10-15 minutes. You can also microwave them for a quick fix. Just heat for about 20-30 seconds. Enjoy your tasty knots warm!
FAQs
How long do buttery garlic knots last?
Buttery garlic knots stay fresh for about 2 to 3 days. Store them in an airtight container at room temperature. To keep them soft, wrap them in a clean kitchen towel. If you need to keep them longer, you can freeze them. Just place them in a freezer-safe bag. They can last up to 2 months in the freezer.
Can I use pre-made dough from the store?
Yes, you can use store-bought dough. It saves time and effort. Just make sure to let it rise as needed. Many brands offer great options, like pizza dough or bread dough. This makes it easy for anyone to enjoy homemade garlic knots without the fuss.
What can I serve with buttery garlic knots?
Buttery garlic knots pair well with many dishes. You can serve them with marinara sauce for dipping. They also go great with salads or pasta. For a fun twist, try them with a creamy garlic sauce. You can even enjoy them on their own as a snack.
In this article, I covered how to make tasty buttery garlic knots from scratch. I discussed key ingredients, substitutions, and tips for selecting the best ones. I outlined simple steps for prepping, baking, and creating the perfect knot shape. We explored fun variations and helpful storage tips too.
Remember, these knots are great warm or cold. Serve them with your favorite dip for an extra kick. Enjoy making and sharing these delicious bite

Buttery Garlic Knots
Ingredients
- 1 batch pizza dough (store-bought or homemade)
- 4 tablespoons unsalted butter, melted
- 4 cloves garlic, minced
- 2 tablespoons fresh parsley, chopped
- 1 teaspoon Italian seasoning
- 0.5 teaspoon salt
- 0.25 teaspoon red pepper flakes (optional)
- to taste Grated Parmesan cheese for sprinkling (optional)
Instructions
- Preheat your oven to 375°F (190°C) and line a baking sheet with parchment paper.
- On a lightly floured surface, roll out the pizza dough into a rectangle. Cut the dough into strips about 1 inch wide and 8 inches long.
- Take each strip and tie it into a knot by creating a loop and pulling the ends through the center. Place the knots on the prepared baking sheet, spaced evenly apart.
- In a small bowl, combine the melted butter, minced garlic, chopped parsley, Italian seasoning, salt, and red pepper flakes (if using). Mix well.
- Brush the garlic butter mixture generously over each knot, ensuring they are well coated.
- Bake the knots in the preheated oven for 15-20 minutes or until they are golden brown.
- Once out of the oven, brush any remaining garlic butter over the knots and sprinkle with grated Parmesan cheese, if desired.
- Allow them to cool slightly before serving.


![- 1 can (15 oz) chickpeas, drained and rinsed - 4 cloves of garlic, roasted - 1/4 cup tahini - 2 tablespoons lemon juice - 2 tablespoons olive oil (plus extra for drizzling) - 1/2 teaspoon ground cumin - Salt, to taste - Water, as needed for desired consistency These core ingredients create the base of your roasted garlic hummus. The chickpeas offer a creamy texture and protein. Roasted garlic brings a sweet, mellow flavor that warms the dish. Tahini adds a nutty element, while olive oil gives richness. Lemon juice brightens the flavor, and cumin adds depth. - Fresh parsley - Paprika - Additional olive oil drizzle Garnishes elevate your hummus. Fresh parsley adds a nice color and freshness. Paprika offers a hint of smokiness and a pop of color. A drizzle of olive oil not only makes it look great, but it enhances the flavor too. For the full recipe, visit [Full Recipe]. Roasting the garlic First, preheat your oven to 400°F (200°C). Take four cloves of garlic. Wrap them in aluminum foil. Roast the garlic for about 20-25 minutes. It should be soft and fragrant. Let it cool a bit before you touch it. Preparing chickpeas Grab one can of chickpeas. Drain the chickpeas and rinse them well under cold water. This step helps remove extra sodium and gives a better taste. Now, you’re ready to blend! Combining all ingredients in a food processor In your food processor, combine the roasted garlic, chickpeas, tahini, lemon juice, olive oil, and ground cumin. Add a pinch of salt too. This mix will create that rich, creamy texture we love. Achieving the desired consistency Blend the mixture until smooth. If it looks too thick, add water one tablespoon at a time. Keep blending until you reach that perfect hummus consistency. Taste it and adjust the seasoning if needed. Presentation tips Scoop the hummus into a serving bowl. Drizzle a bit of olive oil on top. Sprinkle paprika and some fresh parsley for color. This makes it look great! Pairing ideas Serve your hummus with warm pita bread, fresh veggies, or crunchy crackers. It also goes well with grilled meats or as a dip for a party. Enjoy your tasty creation! For the full recipe, check out the [Full Recipe]. To get the best roasted garlic flavor, I recommend roasting at 400°F (200°C) for 20-25 minutes. This time and heat bring out a sweet, mellow taste. The garlic should feel soft when you squeeze it. Using regional garlic varieties can also help. Each type has its own unique flavor. Local garlic often tastes fresher and can add a nice twist to your hummus. The thickness of your hummus can change based on your preference. If it's too thick, add water slowly, one tablespoon at a time. Blend well after each addition until you reach the right texture. If you want to avoid using water, try adding olive oil or lemon juice. These ingredients can help adjust the thickness while also enhancing the flavor. To make your hummus even better, consider adding spices like smoked paprika or cayenne pepper. These can give a nice kick to your dish. Incorporating fresh herbs can also elevate the taste. Parsley and cilantro work well, adding color and flavor. Experiment with different herbs to find your favorite mix. For the full recipe, check out the [Full Recipe]. {{image_2}} You can easily switch up the flavors in roasted garlic hummus. One popular option is spicy roasted garlic hummus. To make it, add a pinch of cayenne pepper or some chopped jalapeños. This gives your hummus a nice kick. Another great choice is herbed roasted garlic hummus. You can mix in fresh herbs like basil or cilantro. This adds a fresh taste and vibrant color to your dip. Sometimes you might want to change a few ingredients. For a lighter option, try low-fat tahini. You can find brands that reduce fat but still keep great flavor. If you need a chickpea substitute, consider using white beans or lentils. They blend well and give a similar creamy texture. When it comes to serving, think outside the box! Vegetable dippers like carrots, celery, or bell pepper strips are excellent. They add crunch and freshness to each bite. You can also serve hummus with crackers or pita bread. Both options are great for scooping. Plus, they complement the rich flavors of the hummus. For the full recipe, check out the detailed instructions above. To keep your roasted garlic hummus fresh, use airtight containers. Glass jars work well. They seal tightly and prevent air from getting in. Plastic containers are also good but make sure they are BPA-free. In the fridge, your hummus will stay fresh for about five to seven days. Always check for any off smells or changes in color before eating. If it looks or smells funny, it's best to toss it. You can freeze hummus for later use. To do this, scoop it into a freezer-safe container. Leave some space at the top. Hummus expands as it freezes. When you want to use it, move the container to the fridge. Let it thaw overnight. For quick thawing, you can also place it in warm water for about 30 minutes. After thawing, stir it well. You may need to add a bit of water to get the right consistency. Enjoy your hummus again! For more details on making this delicious dish, check the Full Recipe. Roasted garlic hummus is a smooth dip made from chickpeas and roasted garlic. It has a rich, savory flavor that is both nutty and creamy. The roasted garlic adds a sweet and mellow taste, making it a favorite among many. You can enjoy it as a snack, spread, or party appetizer. Store roasted garlic hummus in the fridge for up to five days. Look for signs of spoilage such as an off smell or mold. If you see either, it’s best to toss it. Yes, you can make roasted garlic hummus ahead of time. Prepare it two to three days before your event. Store it in an airtight container in the fridge to keep it fresh. You can find roasted garlic hummus at most grocery stores. Look in the deli section or refrigerated aisle. Brands like Sabra and Tribe often carry this flavor. For fresh options, check your local farmer's market. For a homemade option, try my Full Recipe for roasted garlic hummus. Roasted garlic hummus is simple and fun to make. You need key ingredients like chickpeas, roasted garlic, and tahini. Follow our easy steps to blend them into a creamy dip. Feel free to try different flavors or pair it with veggies or crackers. Store any leftovers properly to keep them fresh. This hummus is versatile and can spice up any meal. I hope you're excited to make your own tasty hummus at home. Enjoy experimenting with different flavors!](https://dailydishlab.com/wp-content/uploads/2025/06/d9475f29-a73b-4d87-94b9-fefa292024dd-768x768.webp)


![Here are the key ingredients you need for the Healthy No Mayo Potato Salad: - 4 medium-sized Yukon Gold potatoes, diced - 1 cup cherry tomatoes, halved - 1 cucumber, diced (seeds removed) - 1/2 cup red onion, finely chopped - 1/3 cup plain Greek yogurt - 2 tablespoons Dijon mustard - 2 tablespoons apple cider vinegar - 1 tablespoon extra virgin olive oil - 1 teaspoon garlic powder or 1 clove minced garlic - Salt and freshly cracked black pepper - Fresh parsley, chopped Each ingredient plays a vital role in this dish. The potatoes provide the main base and texture. Cherry tomatoes add a burst of sweetness, while cucumber brings a nice crunch. The red onion offers a bit of sharpness. Greek yogurt serves as a creamy, tangy substitute for mayo, making it lighter and healthier. Dijon mustard and apple cider vinegar add depth and tanginess to the dressing. Olive oil enhances the flavors and provides richness. Garlic powder or fresh garlic brings aromatic warmth, while salt and pepper are essential for seasoning. Finally, parsley adds freshness and a pop of color. For the full recipe, check out the Healthy No Mayo Potato Salad. - Start by filling a large pot with water. - Add a generous pinch of salt. - Bring the water to a rolling boil over high heat. - Carefully add the diced Yukon Gold potatoes. - Cook for about 10 to 15 minutes until fork-tender but not falling apart. - Drain the potatoes in a colander. - Allow them to cool to room temperature. - In a spacious mixing bowl, combine Greek yogurt, Dijon mustard, apple cider vinegar, and olive oil. - Add garlic powder, salt, and pepper. - Mix with a whisk until you achieve a smooth and creamy dressing. - Once the potatoes have cooled, gently add them to the bowl with the dressing. - Add halved cherry tomatoes, diced cucumber, and finely chopped red onion. - Gently fold all the ingredients together. - Be careful not to mash the potatoes. - Taste the salad and adjust the seasoning as needed. - Cover the bowl and refrigerate for at least 30 minutes. - This allows the flavors to meld and deepen. - Before serving, sprinkle freshly chopped parsley on top for a pop of color. This simple method makes a fantastic Healthy No Mayo Potato Salad that is easy and flavorful. You can find the complete details in the Full Recipe. To make sure your potatoes are fork-tender, boil them in salted water. Start with cold water and bring it to a boil. Cook them for 10 to 15 minutes. Check that they are soft but not mushy. If you overcook, it can ruin the salad. When you combine the ingredients, use a gentle hand. Fold the potatoes into the dressing slowly. This way, they stay intact and don't turn into mush. Adjust the seasoning to match your taste. You can add more salt or pepper as needed. If you like a bit of sweetness, add more Dijon mustard. It brings out the flavors of the other ingredients. For a smoother dressing, whisk the yogurt and mustard well. You want it creamy but not too thick. If it feels too thick, a splash of water can help. This salad pairs well with grilled chicken or fish. You can also serve it with fresh greens for a light meal. For a crunchy twist, top it with some sunflower seeds or nuts. Adding fresh herbs like dill or chives can also brighten the dish. Enjoy it as a side at picnics or barbecues. It’s a hit with everyone! {{image_4}} You can switch up the veggies in your potato salad. Instead of Yukon Gold potatoes, try red or purple potatoes. These add color and flavor. You can also use sweet potatoes for a sweeter taste. For a crunchier salad, add bell peppers or radishes. They give a nice bite. If you want more greens, toss in some spinach or kale. When it comes to yogurt, feel free to experiment. You can use low-fat plain yogurt or even dairy-free yogurt if you want. A tangy option is coconut yogurt, which adds a unique twist. If you want a vegan version, swap the Greek yogurt for a plant-based yogurt. Choose one that is plain and unsweetened. You can also add avocado for creaminess. For those who need gluten-free meals, this recipe is already safe. Just check that your mustard and vinegar are gluten-free. You can also enjoy this potato salad as a low-calorie dish. Use less oil or yogurt to cut down on calories. You can enjoy this potato salad in many ways. Serve it as a side dish at a barbecue or picnic. It pairs well with grilled meats and veggies. For a filling main dish, add some chickpeas or black beans. This boosts protein and flavor. If you want a fun twist, try serving it in lettuce wraps. Use large leaves like romaine or butter lettuce. This way, you get a fresh, crunchy bite with every scoop. For the complete recipe, check out the Full Recipe section above! To keep your Healthy No Mayo Potato Salad fresh, store it in the fridge. Place it in an airtight container. This helps keep moisture in and odors out. Make sure the lid is tight to avoid spills. If you have a lot of leftovers, divide them into smaller containers. This way, you only open what you plan to eat. Your potato salad will stay fresh for about three to five days in the fridge. Check for signs of spoilage before eating. If you see any mold or it smells off, toss it out. Freshness is key to enjoying the flavors of the salad. Always trust your senses! If you prefer your potato salad cold, serve it straight from the fridge. It tastes great chilled. If you want to refresh the flavors, add a splash of apple cider vinegar or a bit more Greek yogurt. This can help bring back the zing. Mix it gently, and enjoy! Yes, you can make this salad ahead of time. It tastes even better after chilling. To prep in advance, follow these best practices: - Cook and cool the potatoes: Boil the Yukon Gold potatoes and allow them to cool completely. - Mix the dressing: Combine the Greek yogurt, mustard, vinegar, and olive oil in a separate bowl. - Store separately: Keep the dressing and the potatoes in separate containers. This keeps the salad fresh and prevents sogginess. - Combine before serving: When you are ready to eat, mix the potatoes with the dressing and add the veggies. If you need an alternative to Greek yogurt, there are several options. For those with dairy allergies, consider these substitutes: - Silken tofu: Blend it until smooth for a creamy texture. - Dairy-free yogurt: Use almond or coconut yogurt for a similar taste and texture. - Avocado: Mash ripe avocado to add creaminess and healthy fats. These options keep the salad delicious without dairy. Yes, this recipe is perfect for meal prep. Here are some tips for portioning and storing: - Divide into servings: Use small containers to portion out the salad for easy meals. - Keep it fresh: Store in airtight containers in the fridge. - Lasts for days: The salad will stay good for up to four days. - Grab-and-go meals: This makes for a quick lunch or side dish throughout the week. With these steps, you can enjoy healthy meals all week long. For the full recipe, visit the [Full Recipe] link. This healthy no-mayo potato salad is easy and tasty. We covered what to use and how to make it step-by-step. I shared tips for the best texture and flavor, plus ideas for serving it. Remember, you can swap out ingredients to fit your needs. Store leftovers for freshness and enjoy them later. You now have a great recipe for any meal. Get creative and make it your own!](https://dailydishlab.com/wp-content/uploads/2025/06/ab71bdce-7088-4dd4-9c1c-a141d4211174-768x768.webp)

![- 6 large eggs - 1 cup fresh spinach, chopped - 1 medium tomato, diced - 1/2 cup feta cheese, crumbled - 1/4 cup milk (dairy or non-dairy) - 1/4 cup onion, finely chopped - 1 clove garlic, minced - 1 teaspoon dried oregano - Salt and pepper to taste - Olive oil spray or muffin liners Each muffin has about 90 calories. You get around 6 grams of protein, 5 grams of fat, and 6 grams of carbs. They are rich in vitamins A and C from spinach and tomatoes. Feta cheese adds calcium to your diet, while eggs provide essential protein. This makes them a great choice for a healthy breakfast. To get the best flavors, choose fresh spinach with bright green leaves. Look for tomatoes that are firm and slightly soft to the touch. Ripe tomatoes have the best taste. For feta cheese, pick a brand that uses quality milk and has a strong flavor. This will enhance your muffins and make them truly delicious. First, you need to preheat your oven to 375°F (190°C). This step warms the oven for even cooking. Next, prepare your muffin tin. You can spray it with olive oil or use muffin liners. Both options work well and help prevent sticking. In a large mixing bowl, crack six large eggs. Whisk them until they blend well. Then, add 1/4 cup of milk, salt, and pepper. Whisk again until smooth. Next, stir in 1 cup of chopped spinach, 1 medium diced tomato, 1/2 cup of crumbled feta cheese, 1/4 cup of finely chopped onion, 1 clove of minced garlic, and 1 teaspoon of dried oregano. Mix everything well until you see no dry spots. This creates a tasty and colorful egg mixture. Now, it’s time to fill the muffin tin. Pour the egg mixture evenly into each muffin cup. Fill them about 3/4 full to allow for rising. Place the muffin tin in the preheated oven. Bake for 18-20 minutes. The muffins should puff up and look golden. To check if they are done, insert a toothpick into the center. If it comes out clean, your muffins are ready. After baking, let them cool for a few minutes before removing them from the tin. Enjoy your delicious Spinach Tomato Egg Muffins! For the complete recipe, check the [Full Recipe]. When making spinach tomato egg muffins, some common mistakes can ruin the dish. First, avoid overfilling the muffin cups. Fill each cup only 3/4 full. This gives the muffins room to puff up. If you fill them too much, they may spill over. Next, do not underbake them. Check the muffins at 18 minutes. They should be puffed and firm in the center. If a toothpick comes out wet, bake a few more minutes. To achieve a fluffy muffin, whisk the eggs well. This adds air and lightens the mixture. Using fresh eggs also helps. If you want a denser muffin, you can add more cheese or spinach. However, too much can make them heavy. The right balance is key. A mix of fluffy and creamy textures makes these muffins divine. Serve your muffins warm with fresh fruit or a light salad. They pair well with a dollop of yogurt or a splash of hot sauce for extra flavor. For a complete meal, add whole grain toast or avocado slices on the side. You can also sprinkle fresh herbs on top for a vibrant touch. Explore different sides to find your perfect match for these delicious muffins. For the full recipe, check out the detailed instructions above and enjoy your cooking! {{image_2}} You can change the greens in this recipe easily. Try kale, swiss chard, or arugula. Each green gives a unique taste and texture. You can also swap the feta cheese. Try goat cheese, cheddar, or even mozzarella for different flavors. If you want protein, add cooked sausage or bacon bits. You can make these muffins your own! If you need a gluten-free option, use gluten-free milk. You can skip the cheese for a dairy-free version. For a vegan twist, replace the eggs with a mix of silken tofu and nutritional yeast. This keeps the muffins tasty and healthy. Always check that your substitutions fit your diet. Adding spices can make a big difference. Try a pinch of cayenne for heat or smoked paprika for a smoky taste. Fresh herbs like basil or parsley can brighten the flavor. You can also add a splash of hot sauce for some kick. Experiment with these ideas to create your perfect muffin! For the complete recipe, check out the [Full Recipe]. To keep your spinach tomato egg muffins fresh, store them in an airtight container. Place a paper towel inside to absorb moisture. This will help prevent sogginess. You can keep them in the fridge for up to four days. Just reheat in the microwave or oven before serving. If you want to make muffins ahead, freezing is a great option. Wait until they cool completely. Wrap each muffin tightly in plastic wrap. Then, place them in a freezer-safe bag. They can last for up to three months. When ready to eat, thaw them in the fridge overnight. Reheat in the microwave or oven for a warm meal. When stored properly, these muffins last four days in the refrigerator and three months in the freezer. Always check for signs of spoilage before eating. If they look or smell off, it’s best to toss them. Keeping track of your muffin stash helps ensure you enjoy them at their best. To make spinach tomato egg muffins, start by preheating your oven to 375°F (190°C). Prepare a muffin tin with olive oil spray or muffin liners. Next, crack six large eggs in a bowl and whisk them until smooth. Add 1/4 cup of milk, salt, and pepper to taste, and mix well. Now, stir in 1 cup of chopped fresh spinach, 1 medium diced tomato, 1/2 cup crumbled feta cheese, 1/4 cup finely chopped onion, 1 minced clove of garlic, and 1 teaspoon dried oregano. Pour this mixture into the muffin tin, filling each cup about 3/4 full. Bake for 18-20 minutes until puffed. Enjoy your muffins warm or at room temperature! Yes, you can use frozen spinach! Frozen spinach is often just as good as fresh. It is picked and frozen at peak freshness. Just make sure to thaw it first and squeeze out excess water. This will keep your muffins from getting soggy. Use about 1 cup of thawed spinach to replace the fresh spinach in the recipe. These muffins pair well with many sides. You can serve them with a fresh salad for a light meal. They also go great with fruit, like sliced oranges or berries. For drinks, consider pairing them with coffee or fresh juice. These options enhance the meal and make it even more enjoyable! This blog post explained how to make delicious spinach tomato egg muffins. We covered the key ingredients, nutritional facts, and fresh ingredient tips. I shared step-by-step instructions for preparation, baking, and tips to perfect texture. You learned variations, storage methods, and common FAQs. These muffins are easy to customize and perfect for any meal. Enjoy them fresh, or store them for later. You can make them fit your diet easily. Now, get cooking and savor these nutritious muffins!](https://dailydishlab.com/wp-content/uploads/2025/07/f8cd24d9-0783-4450-a45e-f2b92159c1aa-768x768.webp)