Caramel Brownie Cheesecake Bars Irresistible Delight

If you’re craving a sweet treat that combines the best of brownies, cheesecake, and caramel, you’re in for a real treat! My Caramel Brownie Cheesecake Bars are an irresistible delight that will leave you wanting more. With rich layers and a touch of sea salt, these bars are perfect for any occasion. Ready to indulge? Let’s dive into all the delicious details and make this dessert a hit!
Why I Love This Recipe
- Decadent Layers: The combination of fudgy brownies, creamy cheesecake, and rich caramel creates a dessert that’s truly indulgent.
- Perfect for Sharing: These bars are easy to cut and serve, making them ideal for parties, potlucks, or family gatherings.
- Customizable: You can switch up the toppings or mix-ins to suit your taste, whether it’s nuts, fruit, or different types of chocolate.
- Make Ahead: These bars can be made in advance and stored in the fridge, allowing flavors to meld and making your prep stress-free.
Ingredients
Brownie Layer Ingredients
- 1 cup unsalted butter (2 sticks)
- 2 cups granulated sugar
- 1 cup brown sugar, packed
- 4 large eggs
- 1 teaspoon vanilla extract
- 1 cup all-purpose flour
- 1 cup unsweetened cocoa powder
- 1/2 teaspoon salt
- 1 cup chocolate chips
Cheesecake Layer Ingredients
- 16 oz cream cheese, softened
- 1 cup granulated sugar
- 2 large eggs
- 1 teaspoon vanilla extract
- 1/4 cup sour cream
Caramel Topping Ingredients
- 1 cup caramel sauce (store-bought or homemade)
- Sea salt for sprinkling
Gather these ingredients to make the best caramel brownie cheesecake bars.
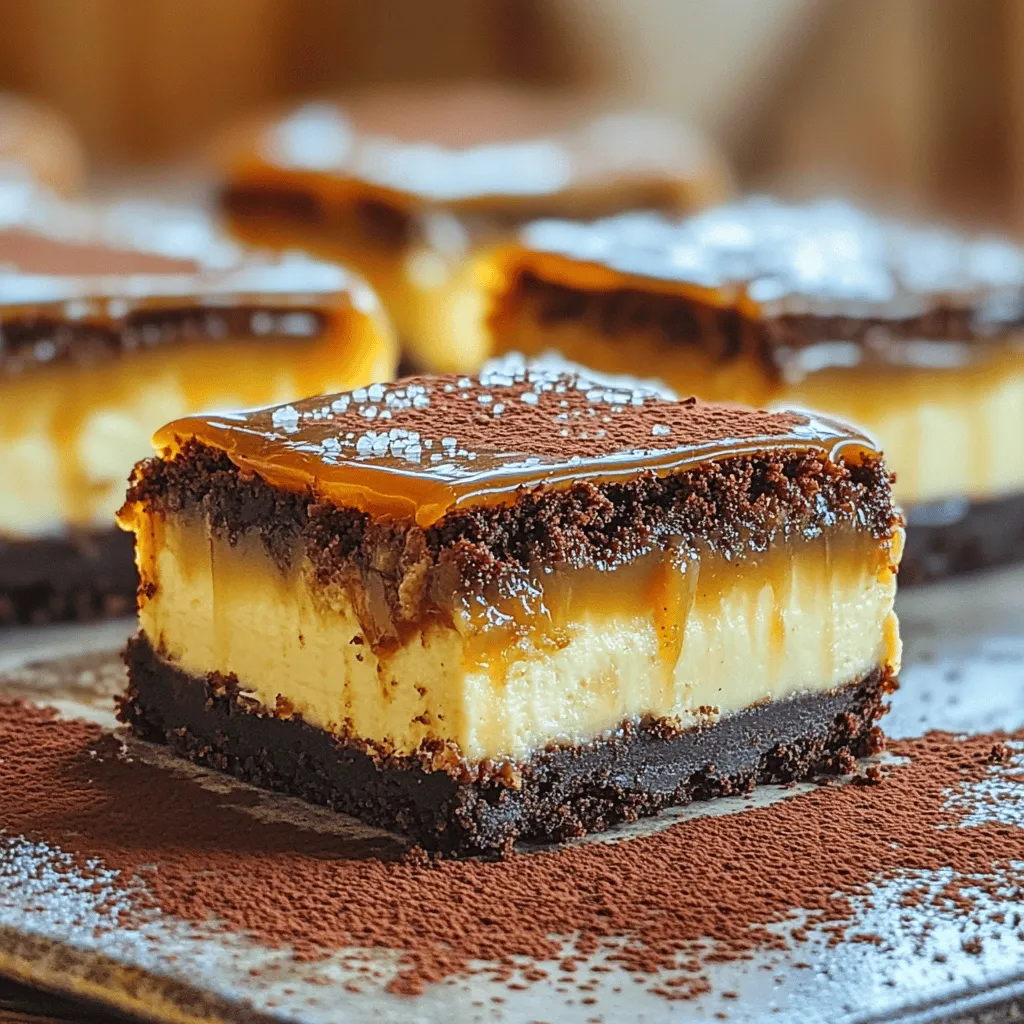
The brownie layer creates a rich base. The cheesecake layer adds creaminess. The caramel topping brings a sweet finish. Each part works together to create a treat that is hard to resist.
Using fresh ingredients helps the flavors shine. Choose high-quality chocolate chips for a richer taste. Use full-fat cream cheese for the best cheesecake texture. This combination makes each bite melt in your mouth.
Make sure to measure your ingredients correctly. This ensures the right balance of flavors. Enjoy the process of layering these treats. It makes the final bars even more enjoyable.

Step-by-Step Instructions
Preparing the Brownie Layer
1. Preheat your oven to 350°F (175°C). Grease a 9×13-inch baking pan or line it with parchment paper.
2. In a medium saucepan, melt 1 cup of unsalted butter over low heat. Remove it from heat and stir in 2 cups of granulated sugar and 1 cup of brown sugar until dissolved. Let it cool a bit.
3. Once cool, mix in 4 large eggs and 1 teaspoon of vanilla extract.
4. In another bowl, sift together 1 cup of all-purpose flour, 1 cup of unsweetened cocoa powder, and 1/2 teaspoon of salt. Fold this into the butter mixture until just combined. Stir in 1 cup of chocolate chips.
5. Spread the brownie batter evenly into the prepared pan. Bake for 20-25 minutes. A toothpick should come out mostly clean but still fudgy.
Making the Cheesecake Layer
1. In a large bowl, beat 16 oz of softened cream cheese until smooth.
2. Gradually add 1 cup of granulated sugar and mix until combined.
3. Add 2 large eggs, one at a time, mixing well after each addition. Then blend in 1 teaspoon of vanilla extract and 1/4 cup of sour cream.
4. Pour the cheesecake mixture over the baked brownie layer. Spread it evenly and tap the pan gently to release air bubbles.
Baking and Cooling Process
1. Return the pan to the oven. Bake for another 25-30 minutes. The cheesecake should be set around the edges but still slightly jiggly in the center.
2. Turn off the oven, crack the door, and let the bars cool in the oven for about 1 hour.
3. Transfer the pan to a wire rack to cool completely.
Pro Tips
- Use Room Temperature Ingredients: Ensure that your cream cheese and eggs are at room temperature before mixing. This helps create a smoother cheesecake layer without lumps.
- Don’t Overbake: To achieve a creamy texture, keep an eye on the cheesecake layer while baking. It should be set around the edges but still slightly jiggly in the center.
- Chill for Best Flavor: Allowing the bars to chill in the refrigerator overnight enhances the flavors and gives the cheesecake time to set properly.
- Experiment with Toppings: Feel free to get creative with your toppings! Consider adding crushed nuts, chocolate shavings, or a drizzle of melted chocolate for an extra touch.
Tips & Tricks
Baking Tips for Perfect Bars
- Use room temperature ingredients. It helps the mixture blend well. Cold cream cheese or eggs can cause lumps.
- Check doneness with a toothpick. Insert it into the center. If it comes out mostly clean, it’s ready.
- Avoid overmixing the batter. Mix just enough to combine. This keeps your bars soft and fudgy.
Customizing Your Dessert
- Add nuts or fruits for extra flavor. Chopped walnuts or berries can enhance taste and texture.
- Try different toppings. A drizzle of chocolate ganache adds richness. You can also use crushed cookies for crunch.
Presentation and Serving Suggestions
- Serve the bars on a stylish platter. Drizzle extra caramel sauce on top for a beautiful look.
- Garnish with a light dusting of cocoa powder. Fresh berries or mint leaves add color and freshness.

Variations
Gluten-Free Option
You can easily make these bars gluten-free. Simply swap the all-purpose flour for gluten-free flour. I suggest using a blend meant for baking. This will help keep the texture light and fluffy. Just remember to check that your baking powder is gluten-free too. It’s a simple change that does not change the taste.
Vegan Version
To make a vegan version, replace the cream cheese with a plant-based cream cheese. You can use coconut or cashew-based options. For the eggs, use flax eggs or applesauce. Use 1 tablespoon of flaxseed meal mixed with 2.5 tablespoons of water for each egg. This keeps the bars moist and delicious. Don’t forget to choose a vegan caramel sauce to finish.
Flavor Infusions
Want to make your bars even more special? Add coffee or mint for a fun twist. Mix in a teaspoon of instant coffee granules into the brownie batter for a rich flavor. For mint, add a few drops of mint extract to the cheesecake layer. Both options add a nice layer of complexity and make your bars unique.
Storage Info
Best Practices for Storing
Store your caramel brownie cheesecake bars in an airtight container. Keep them in the refrigerator at a cool temperature. This helps keep them fresh and tasty. Use a container that fits them snugly so they don’t move around. You can also place parchment paper between layers for added protection.
Freezing Guidelines
To freeze, first cut the bars into squares. Wrap each piece tightly in plastic wrap. Then, place them in a freezer-safe bag or container. Make sure to remove as much air as possible. For best results, thaw the bars in the refrigerator overnight before serving. This will help them regain their creamy texture.
Shelf Life
These bars last about one week in the fridge. Keep an eye out for signs of spoilage. If they develop an off smell, change in color, or strange texture, it’s time to toss them. Enjoy them fresh for the best taste!
FAQs
Can I make these bars ahead of time?
Yes, you can make these bars ahead of time. I recommend preparing them a day before you plan to serve. This allows the flavors to meld beautifully. After you chill them, cover the bars tightly with plastic wrap. They will stay fresh and tasty for up to four days in the fridge.
What is the best way to cut brownie cheesecake bars?
Cutting these bars can be tricky if not done right. Use a sharp knife for clean cuts. To help, dip the knife in hot water, then dry it before cutting. This method warms the blade, making it easier to slice through the layers without tearing.
How do I store leftovers properly?
To store leftovers, place the bars in an airtight container. Keep them in the fridge to maintain their taste and texture. If you want to keep them longer, you can freeze them. Just wrap each bar in plastic wrap, then place them in a freezer bag. They will last for up to three months in the freezer.
Can I use a different type of caramel?
Absolutely! You can use different kinds of caramel. Try salted caramel for a fun twist, or even chocolate caramel for a richer taste. If you like making things from scratch, consider making your own caramel sauce. It adds a personal touch and can enhance the flavor profile of your bars.
You now have a clear guide to making delicious brownie cheesecake bars. We covered the ingredients needed for each layer, from the rich brownie base to the creamy cheesecake topping, followed by that sweet caramel finish. I shared tips to ensure your baking is successful and how to customize each dessert to your liking. Remember, proper storage keeps your bars fresh longer. Enjoy experimenting with flavors and toppings to make these treats your own! Happy baking!

Caramel Brownie Cheesecake Bars
Ingredients
For the Brownie Layer:
1 cup unsalted butter (2 sticks)
2 cups granulated sugar
1 cup brown sugar, packed
4 large eggs
1 teaspoon vanilla extract
1 cup all-purpose flour
1 cup unsweetened cocoa powder
1/2 teaspoon salt
1 cup chocolate chips
For the Cheesecake Layer:
16 oz cream cheese, softened
1 cup granulated sugar
2 large eggs
1 teaspoon vanilla extract
1/4 cup sour cream
For the Caramel Topping:
1 cup caramel sauce (store-bought or homemade)
Sea salt for sprinkling
Instructions
Preheat your oven to 350°F (175°C) and grease a 9×13-inch baking pan or line it with parchment paper for easy removal.
Make the Brownie Layer:
– In a medium saucepan, melt the butter over low heat. Remove from heat and stir in both sugars until fully dissolved. Allow to cool slightly.
– Once cooled, whisk in the eggs and vanilla extract.
– Sift together the flour, cocoa powder, and salt; then fold this into the butter mixture until just combined. Mix in the chocolate chips.
– Spread the brownie batter evenly into the prepared baking pan and bake for 20-25 minutes, or until a toothpick comes out mostly clean but still slightly fudgy.
Make the Cheesecake Layer:
– In a large bowl, beat the softened cream cheese until smooth. Gradually add the sugar and mix until well combined.
– Add the eggs one at a time, mixing well after each addition, and then blend in the vanilla extract and sour cream.
– Pour the cheesecake mixture over the baked brownie layer, spreading it evenly. Tap the pan gently on the countertop to release any air bubbles.
Bake Again:
– Return the pan to the oven and bake for an additional 25-30 minutes, or until the cheesecake is set around the edges but slightly jiggly in the center.
– Turn off the oven, crack open the door, and let the bars cool in the oven for about 1 hour. Then, transfer to a wire rack to cool completely.
Add the Caramel:
– Once cooled, drizzle the caramel sauce over the cheesecake layer. Optional: sprinkle a pinch of sea salt on top for that sweet and salty flavor.
– Chill the bars in the refrigerator for at least 4 hours, or ideally overnight, to set completely.
Cut and Serve:
– Remove the bars from the pan using the parchment edges if lined. Cut into squares using a sharp knife for clean edges.
Prep Time: 30 minutes | Total Time: 5 hours (includes chilling) | Servings: 16-20 bars
– Presentation Tips: Serve the bars on a stylish platter, drizzled with extra caramel sauce and a light dusting of cocoa powder for an elegant finish.

Caramel Brownie Cheesecake Bars
Ingredients
- 1 cup unsalted butter
- 2 cups granulated sugar
- 1 cup brown sugar, packed
- 4 large eggs
- 1 teaspoon vanilla extract
- 1 cup all-purpose flour
- 1 cup unsweetened cocoa powder
- 0.5 teaspoon salt
- 1 cup chocolate chips
- 16 oz cream cheese, softened
- 1 cup granulated sugar
- 2 large eggs
- 1 teaspoon vanilla extract
- 0.25 cup sour cream
- 1 cup caramel sauce
- 1 pinch sea salt for sprinkling
Instructions
- Preheat your oven to 350°F (175°C) and grease a 9x13-inch baking pan or line it with parchment paper for easy removal.
- In a medium saucepan, melt the butter over low heat. Remove from heat and stir in both sugars until fully dissolved. Allow to cool slightly.
- Once cooled, whisk in the eggs and vanilla extract.
- Sift together the flour, cocoa powder, and salt; then fold this into the butter mixture until just combined. Mix in the chocolate chips.
- Spread the brownie batter evenly into the prepared baking pan and bake for 20-25 minutes, or until a toothpick comes out mostly clean but still slightly fudgy.
- In a large bowl, beat the softened cream cheese until smooth. Gradually add the sugar and mix until well combined.
- Add the eggs one at a time, mixing well after each addition, and then blend in the vanilla extract and sour cream.
- Pour the cheesecake mixture over the baked brownie layer, spreading it evenly. Tap the pan gently on the countertop to release any air bubbles.
- Return the pan to the oven and bake for an additional 25-30 minutes, or until the cheesecake is set around the edges but slightly jiggly in the center.
- Turn off the oven, crack open the door, and let the bars cool in the oven for about 1 hour. Then, transfer to a wire rack to cool completely.
- Once cooled, drizzle the caramel sauce over the cheesecake layer. Optional: sprinkle a pinch of sea salt on top for that sweet and salty flavor.
- Chill the bars in the refrigerator for at least 4 hours, or ideally overnight, to set completely.
- Remove the bars from the pan using the parchment edges if lined. Cut into squares using a sharp knife for clean edges.
- Serve the bars on a stylish platter, drizzled with extra caramel sauce and a light dusting of cocoa powder for an elegant finish.

![To make Peach Cream Cheese Danish, you need these key items: - 1 package (8 oz) cream cheese, softened - 1/4 cup granulated sugar - 1 teaspoon vanilla extract - 1 package (1 lb) refrigerated crescent roll dough - 2 ripe peaches, sliced thin - 1 tablespoon lemon juice - 1 teaspoon ground cinnamon - 1 egg, beaten (for egg wash) - Powdered sugar for drizzling These ingredients create a creamy filling and a flaky crust. The peaches add a sweet touch. You can add a few extra ingredients for more taste: - 1 tablespoon honey for sweetness - 1/2 teaspoon almond extract for a nutty note - Chopped nuts for crunch These extras can take your danish to the next level. Try them out for a twist! Gather these tools for easy cooking: - Mixing bowls - Whisk or electric mixer - Baking sheet - Parchment paper - Knife and cutting board Having the right tools makes the process smooth. You will feel like a pro in no time! For the complete recipe, check out the Full Recipe link. To start, gather your cream cheese, sugar, and vanilla extract. Beat the softened cream cheese in a bowl. Add the granulated sugar and vanilla extract next. Mix until you have a smooth and creamy filling. This step is simple but key. You want a rich flavor that pairs well with the peaches. Set this bowl aside as you move on. Now, let’s work with the crescent roll dough. Open the package and unroll it on a floured surface. Pinch the seams to form a rectangle. This helps keep the dough intact. Cut the dough into squares about 4 inches by 4 inches. Make a small indentation in the center of each square. This is where your filling will go. Next, take your sliced peaches. Toss them with lemon juice and ground cinnamon. This mix adds a bright taste. Place a tablespoon of the cream cheese filling in the center of each dough square. Top it with a few peach slices. You can fold the corners over the filling to create a pocket. This keeps the delicious filling inside. Before baking, brush the tops with a beaten egg. This gives the danishes a lovely golden color. Preheat your oven to 375°F (190°C). Line a baking sheet with parchment paper to prevent sticking. Bake the danishes for 15-18 minutes. Look for a golden brown color and puffed dough. Let them cool for a few minutes. Drizzle with powdered sugar for that sweet touch. Enjoy your Peach Cream Cheese Danish as a delightful treat! For the complete recipe, check the [Full Recipe]. To make your Peach Cream Cheese Danish shine, use ripe peaches. They add sweetness and flavor. You can also sprinkle a bit of extra sugar on the peaches before baking. It helps them caramelize and enhances their taste. For a rich creaminess, ensure your cream cheese is at room temperature. This makes it easy to blend with sugar and vanilla. Don’t rush this step. A smooth filling gives the best texture. If your danishes don't puff up, check your oven temperature. An oven that is too cool can lead to flat pastries. Also, ensure you seal the edges well. If they open during baking, the filling will spill out. If the dough is too sticky, add a bit of flour when rolling it out. This will help prevent sticking and make it easier to shape. These danishes are perfect warm. You can serve them with a scoop of vanilla ice cream or a dollop of whipped cream. For a fun twist, try pairing them with a cup of coffee or tea. They also make a great breakfast treat or a delightful dessert. You can find the full recipe to perfect your own Peach Cream Cheese Danish. Enjoy! {{image_2}} You can change up the fruit in your Danish. Try using apples, berries, or pears. Each fruit gives a new taste. Apples add crunch, while berries bring a sweet-tart flavor. For pears, use ripe ones for the best texture. You can mix fruits too! Combine peaches with blueberries for a fun twist. This way, you can create your favorite flavor each time. If you need gluten-free options, look for gluten-free crescent roll dough. Many brands have tasty choices that work well. For a vegan version, swap cream cheese for plant-based cream cheese. Use a vegan egg wash or skip it for a golden look. You can also replace sugar with maple syrup or agave for sweetening. These changes let everyone enjoy the Danish! Want to make your Danish even better? Add spices like nutmeg or ginger for warmth. You can mix in a splash of almond extract for a nutty taste. Try adding a dollop of jam on top of the cream cheese too. You can experiment with different flavors! The possibilities are endless, and you can find your perfect combo. Check the Full Recipe to see how to make your new favorite treat! To keep your Peach Cream Cheese Danish fresh, place it in an airtight container. This will help preserve its flavor and texture. You can store it in the fridge for up to three days. Just make sure it is completely cool before sealing it. If you prefer to keep it longer, freezing is a great option. When you want to enjoy your leftover Danish, reheating is simple. Preheat your oven to 350°F (175°C). Place the Danish on a baking sheet for about 10-15 minutes. This will warm it up nicely and keep the pastry crisp. You can also use a microwave if you're in a hurry, but the oven gives better results. If you want to freeze the Danish, wrap each piece tightly in plastic wrap. Then, place them in a freezer-safe bag. They can last up to three months in the freezer. When you're ready to eat, just thaw them in the fridge overnight. Reheat in the oven for the best taste. For the full recipe, check the earlier sections. Yes, you can use canned peaches. They save time and are easy to find. Just make sure to drain them well. Canned peaches can be softer than fresh ones. This may change the texture slightly. If you want a firmer bite, fresh peaches are best. You will know the danishes are done when they turn golden brown. The dough should be puffy and cooked through. You can also check the bottom. It should feel firm and have a slight crunch. If they look undercooked, give them a few more minutes. Yes, you can prepare the dough ahead of time. Just keep it covered in the fridge. Make sure to use it within a day or two. If you want to freeze it, roll it out and wrap it tightly. When ready, thaw it in the fridge overnight before using. For the complete recipe, check out the Full Recipe link. Enjoy your baking! You now know how to make a delicious Peach Cream Cheese Danish. We covered key ingredients, step-by-step instructions, and handy tips. You can adjust flavors and even swap out fruits. Remember, storing leftovers properly keeps them fresh. Don't shy away from experimenting with options like vegan swaps. Making this treat is fun and easy! Enjoy baking and sharing your tasty danish creations!](https://dailydishlab.com/wp-content/uploads/2025/07/e83a1769-6d69-4dce-85bf-b37ffbe7d076-768x768.webp)


![To create these tasty caramel apple crisp bars, you need a few key ingredients. Here’s what you’ll need: - 2 cups rolled oats - 1 cup all-purpose flour - 1/2 cup brown sugar, packed - 1/2 cup unsalted butter, melted - 1 teaspoon baking soda - 1/2 teaspoon cinnamon - 1/4 teaspoon salt - 3 cups diced apples (about 3 medium apples, peeled and cored) - 1/2 cup granulated sugar - 1 tablespoon lemon juice - 1/2 cup caramel sauce (store-bought or homemade) These ingredients blend together to make a deliciously sweet and crunchy treat. If you need to convert measurements, here are some handy tips: - 1 cup equals 8 ounces. - 1/2 cup equals 4 ounces. - 1 tablespoon equals 15 milliliters. - 1 teaspoon equals 5 milliliters. These conversions help you scale the recipe if needed. You can get creative with your bars! Here are a few optional ingredients: - 1/4 cup chopped nuts, like pecans or walnuts - 1/2 teaspoon vanilla extract - A pinch of nutmeg for warmth - A sprinkle of sea salt on top for contrast Adding these flavors can really elevate your caramel apple crisp bars. If you want, you can mix and match! For the full recipe and instructions, check out the [Full Recipe]. Start by preheating your oven to 350°F (175°C). This step is key for even baking. Next, take a 9x9-inch baking dish and line it with parchment paper. Leave some paper hanging over the edges. This helps when you remove the bars later. In a mixing bowl, combine these ingredients: - 2 cups rolled oats - 1 cup all-purpose flour - 1/2 cup brown sugar, packed - 1/2 cup unsalted butter, melted - 1 teaspoon baking soda - 1/2 teaspoon cinnamon - 1/4 teaspoon salt Stir until the mix looks crumbly. Now, take about two-thirds of this mixture and press it into the bottom of your lined dish. This forms the crust layer. Make sure it is even and compact. Next, grab another bowl and toss together: - 3 cups diced apples (about 3 medium apples, peeled and cored) - 1/2 cup granulated sugar - 1 tablespoon lemon juice Toss until the apples are well coated. Spread this apple mixture evenly over your crust. Drizzle half of the caramel sauce over the apples. This adds a sweet touch. Now, take the remaining oat mixture and crumble it over the apples and caramel. This topping will create a lovely crisp. Once you have done this, you are ready to bake! Follow the [Full Recipe] for the baking time and enjoy the delicious smell that fills your kitchen! Choosing the right apples is key. I recommend using tart apples like Granny Smith. They balance the sweet caramel well. You can also mix sweet apples, like Fuji or Honeycrisp, for extra flavor. Look for firm apples without bruises. They should feel heavy for their size. Fresh apples give a great texture in your bars. For a smooth caramel, heat it gently. If you use store-bought, warm it in a microwave. Stir it every 20 seconds until it’s easy to drizzle. If you make it at home, keep stirring to avoid burning. Let it cool slightly before drizzling. This helps it stick better to the apples and crust. You want that perfect, gooey layer. To keep your bars fresh, store them in an airtight container. This keeps them moist and tasty. You can place parchment paper between layers to avoid sticking. If you have a lot left, freeze them. Just wrap individual bars in plastic wrap, then place them in a freezer bag. They stay good for up to three months. Enjoy your delicious caramel apple crisp bars whenever you want! {{image_2}} You can try different toppings for your caramel apple crisp bars. Add chopped nuts like walnuts or pecans for crunch. You can also sprinkle some shredded coconut for a tropical twist. If you love chocolate, drizzle some melted chocolate on top. These toppings make the dessert even more fun and tasty. If you want a gluten-free crust, swap all-purpose flour with gluten-free flour. Make sure it’s a blend that works well in baking. You can also use almond flour or oat flour for a nutty taste. This way, everyone can enjoy these bars without worry. As the seasons change, so can your bars. In fall, add pumpkin spice to the apple filling. Mix cinnamon, nutmeg, and clove for a warm flavor. For summer, use peaches or berries instead of apples. Each season brings new fun to this recipe. Enjoy the Full Recipe for more ideas! Storing caramel apple crisp bars is simple. Once they cool, place them in an airtight container. You can keep them at room temperature for up to three days. If you want them to last longer, store them in the fridge. This keeps them fresh and tasty. Just make sure they are sealed well to avoid drying out. If you want to save some bars for later, freezing is a great option. First, wrap each bar in plastic wrap. Then, place them in a freezer-safe bag or container. They can stay in the freezer for up to three months. To enjoy later, just thaw them in the fridge overnight. You can also let them sit at room temperature for an hour before eating. Reheating your caramel apple crisp bars can bring back their warm, gooey goodness. To do this, preheat your oven to 350°F (175°C). Place the bars on a baking sheet and cover them with foil. Heat for about 10-15 minutes. This method keeps the bars soft and the caramel melty. You can also use a microwave, but heat them in short bursts to avoid drying them out. Enjoy them warm for a delightful treat! Yes, you can! I love using Granny Smith apples for their tartness. They balance well with the sweet caramel. Honeycrisp apples add a nice crunch and sweetness. You can also mix different types for more flavor. Just make sure the apples are firm and fresh for the best results. To make these bars vegan, swap the unsalted butter for coconut oil or a vegan butter substitute. Use brown sugar, as it is usually vegan. You can also find vegan caramel sauce or make your own. This way, everyone can enjoy the deliciousness of caramel apple crisp bars! After the bars cool, use a sharp knife to cut them. I recommend lifting the whole batch out of the pan using the parchment paper. This makes it easy. For neat squares, wipe the knife clean after each cut. You’ll get perfect pieces to share with friends and family! For the full recipe, check out the details above. Caramel apple crisp bars are simple to make. We covered key ingredients and measurements. You learned how to prepare, create layers, and perfect the caramel drizzle. I shared tips on apple selection and storage. Variations let you explore new flavors, even gluten-free options. In the end, these bars are a fun treat. They work for any season and occasion. Try making them your own! Enjoy the sweet, warm taste today.](https://dailydishlab.com/wp-content/uploads/2025/07/dc1cd077-e04f-4984-9460-89b9559f5089-768x768.webp)