Caramel Chocolate Chip Blondies Sweet and Simple Treat

If you love sweet treats that are easy to make, you’ll adore these Caramel Chocolate Chip Blondies! With rich caramel and smooth chocolate in every bite, they’re perfect for any occasion. I’ll guide you through simple steps to whip up these delicious morsels. Ready to impress your friends and family? Let’s dive into the sweet world of blondies that are sure to become your new favorite dessert!
Why I Love This Recipe
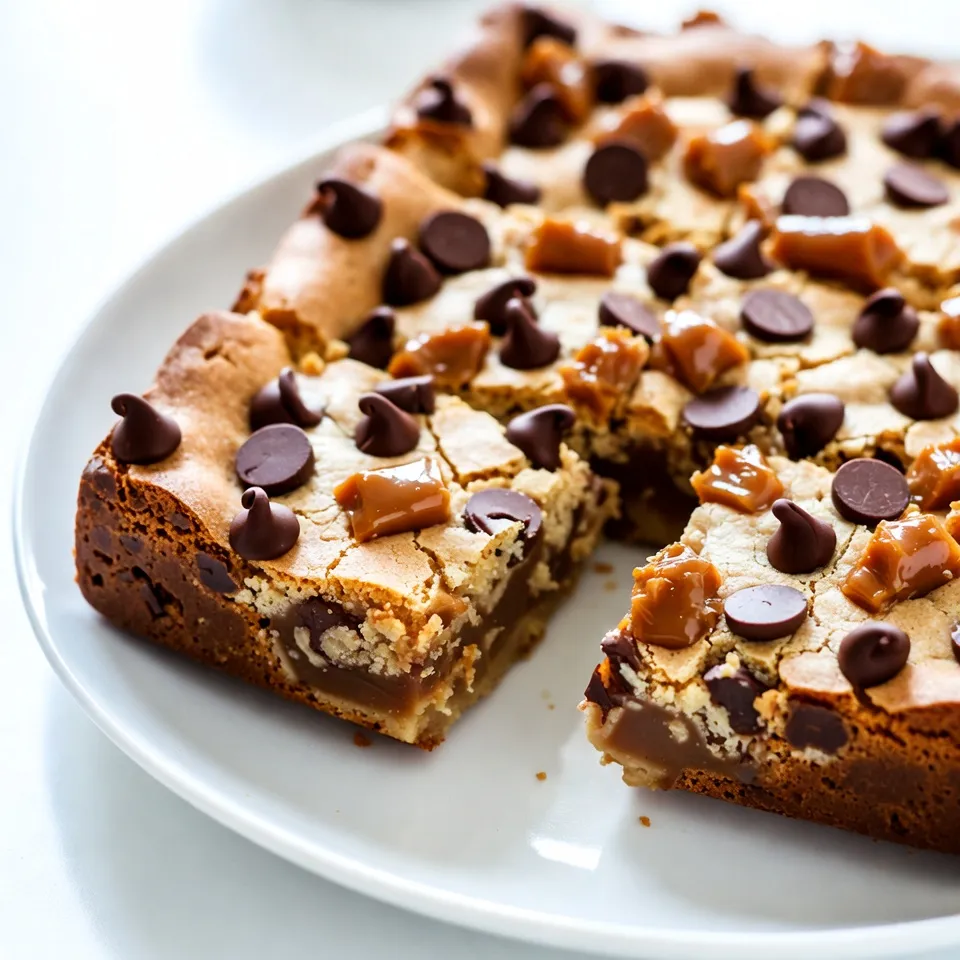
- Rich and Chewy: These blondies are the perfect combination of rich caramel and gooey chocolate, making every bite a delight.
- Easy to Make: The simple ingredients and straightforward process mean you can whip these up in no time, perfect for any occasion!
- Customizable: You can easily swap out the chocolate chips for your favorite mix-ins, like nuts or dried fruit, to make them your own.
- Great for Sharing: These blondies are cut into perfect squares, making them ideal for parties, gatherings, or just sharing with friends and family.
Ingredients
List of Ingredients
- 1 cup unsalted butter, melted
- 1 cup brown sugar, packed
- 1/2 cup granulated sugar
- 2 large eggs
- 1 teaspoon vanilla extract
- 2 cups all-purpose flour
- 1 teaspoon baking powder
- 1/2 teaspoon baking soda
- 1/2 teaspoon salt
- 1 cup chocolate chips (semi-sweet or dark)
- 1 cup caramel bits or squares, unwrapped
Ingredient Substitutions
You can make this recipe fit your needs. Here are some easy swaps:
- For dairy-free options, use coconut oil or a dairy-free butter.
- If you want less sugar, try using half the brown sugar or a sugar substitute.
- For a gluten-free version, use almond flour or a gluten-free blend.
These swaps keep the blondies tasty while matching your dietary needs. Enjoy experimenting with them!

Step-by-Step Instructions
Preparation Steps
1. First, preheat your oven to 350°F (175°C). This step warms the oven for even baking.
2. Prepare a 9×13 inch baking pan by greasing it. Then, line the pan with parchment paper. Leave some paper hanging over the edges. This makes it easy to lift out the blondies later.
3. In a large mixing bowl, add 1 cup of melted unsalted butter. Then, add 1 cup of packed brown sugar and 1/2 cup of granulated sugar. Whisk this mixture until it is smooth and well mixed.
4. Add 2 large eggs to the bowl, one at a time. Whisk after each egg until they blend in fully. Finally, stir in 1 teaspoon of vanilla extract.
Combining Dry Ingredients
1. In a separate bowl, sift together 2 cups of all-purpose flour, 1 teaspoon of baking powder, 1/2 teaspoon of baking soda, and 1/2 teaspoon of salt. Sifting helps to mix ingredients evenly and adds air.
2. Slowly add the dry mix to the wet ingredients. Stir gently until they just combine. Be careful not to overmix! This keeps the blondies soft and chewy.
3. Now, gently fold in 1 cup of chocolate chips and 1 cup of caramel bits. Reserve a small handful of each for later. This makes the top extra special.
Baking the Blondies
1. Pour the blondie batter into the prepared baking pan. Spread it out evenly with a spatula.
2. Sprinkle the reserved chocolate chips and caramel bits on top. This adds a tasty finish.
3. Bake your blondies in the preheated oven for 25–30 minutes. To check if they are done, insert a toothpick into the center. It’s ready when the toothpick comes out with a few moist crumbs.
4. Remove the pan from the oven and let the blondies cool for about 15 minutes. Then, lift them out using the parchment paper. Let them cool completely on a wire rack.
5. Once cooled, cut the blondies into squares. Enjoy your sweet treat!
Tips & Tricks
Perfecting Your Blondies
To make perfect caramel chocolate chip blondies, avoid common mistakes. Overmixing is a big one. Mix just until you see no dry flour. This keeps your blondies soft and chewy.
Next, pay attention to baking time. Bake at 350°F for 25-30 minutes. Check doneness using a toothpick. It should come out with a few moist crumbs. If it’s too dry, they will not be as tasty.
Serving Suggestions
You can serve blondies warm for a gooey treat. Add a scoop of ice cream on top to take it to the next level.
When cooled, cut them into squares for a nice snack. Drizzle extra caramel sauce on top for a sweet touch. You can also sprinkle some sea salt to balance the sweetness. Enjoy them with friends or keep them all to yourself!
Pro Tips
- Use Room Temperature Eggs: This helps the batter mix more evenly, resulting in a better texture.
- Don’t Overmix: Stir the batter until just combined to keep the blondies soft and chewy.
- Cool Completely: Allowing the blondies to cool completely before cutting helps them set and makes for cleaner squares.
- Experiment with Mix-Ins: Feel free to add nuts or dried fruit for added flavor and texture!

Variations
Flavor Variations
You can change the flavors of your blondies easily. Adding nuts gives a nice crunch. I love using chopped walnuts or pecans. You could also add fun mix-ins like M&Ms or dried fruit.
If you want to try different chocolates, swap semi-sweet chips for milk chocolate. White chocolate adds a sweet twist too. You can mix different chocolate types for a fun blend. This makes each bite a new surprise!
Dietary Restrictions
For those who need vegan options, you can make vegan caramel chocolate chip blondies. Replace the butter with coconut oil or vegan butter. Use flax eggs instead of regular eggs. Just mix one tablespoon of flaxseed meal with three tablespoons of water for each egg.
If you want to make nut-free blondies, skip the nuts completely. Always check packages to ensure no nut traces. This way, everyone can enjoy these sweet treats!
Storage Information
How to Store Blondies
To keep your caramel chocolate chip blondies fresh, follow these tips:
- Room Temperature: Store blondies in an airtight container at room temperature. They stay fresh for up to 3 days this way.
- Refrigeration: If you want them to last longer, place them in the fridge. They can stay fresh for about a week.
- Freezing: For longer storage, freeze them. Wrap each blondie in plastic wrap and place them in a freezer bag. They can last for up to 3 months frozen.
Keeping blondies fresh is easy. Just remember to keep air out and seal them well.
Reheating Tips
Reheating caramel chocolate chip blondies can be a treat. Here are the best ways to do it:
- Microwave: Place a blondie on a microwave-safe plate. Heat it for about 10-15 seconds. Check if it’s warm enough. Be careful not to overheat, as it can dry out.
- Oven: Preheat the oven to 350°F (175°C). Wrap a blondie in foil and heat it for about 5-7 minutes. This method keeps them soft and chewy.
Enjoy your blondies warm, just like fresh out of the oven!
FAQs
Common Questions
How long do caramel chocolate chip blondies last?
Caramel chocolate chip blondies can last about a week at room temperature. Store them in an airtight container. If you want them to last longer, keep them in the fridge for up to two weeks.
Can I use different types of caramel?
Yes, you can use different types of caramel. You can use caramel sauce, caramel squares, or even homemade caramel. Each type adds a unique flavor and texture.
How do I know when blondies are done baking?
You can tell blondies are done when a toothpick comes out with a few moist crumbs. If it’s clean, you may have overbaked them. Aim for a soft, chewy texture.
Recipe Troubleshooting
What to do if the batter is too thick?
If your batter is too thick, add a tablespoon of milk at a time. Mix well until you reach a smoother consistency. Be careful not to add too much liquid.
How to fix overbaked blondies?
If your blondies are overbaked, don’t worry! You can serve them warm with a scoop of ice cream. The ice cream adds moisture and makes them more enjoyable.
This blog post covered how to make delicious caramel chocolate chip blondies. I shared lists of ingredients, substitutions, and step-by-step instructions. You also learned tips for perfecting your blondies and serving suggestions. Exploring variations allows you to adjust your recipe to fit any need. Finally, I provided storage information and answered common questions.
Enjoy baking these blondies, and remember, practice makes perfec

Caramel Chocolate Chip Blondies
Ingredients
- 1 cup unsalted butter, melted
- 1 cup brown sugar, packed
- 1 2 granulated sugar
- 2 large eggs
- 1 teaspoon vanilla extract
- 2 cups all-purpose flour
- 1 teaspoon baking powder
- 1 2 baking soda
- 1 2 salt
- 1 cup chocolate chips (semi-sweet or dark)
- 1 cup caramel bits or squares, unwrapped
Instructions
- Preheat your oven to 350°F (175°C). Grease and line a 9x13 inch baking pan with parchment paper, leaving an overhang for easy removal later.
- In a large mixing bowl, combine the melted butter, brown sugar, and granulated sugar. Whisk until the mixture is smooth and well combined.
- Add the eggs to the butter and sugar mixture, one at a time, whisking until fully incorporated. Then stir in the vanilla extract.
- In another bowl, sift together the flour, baking powder, baking soda, and salt. Gradually add the dry ingredients to the wet mixture, stirring until just combined. Be careful not to overmix!
- Gently fold in the chocolate chips and caramel bits. Reserve a handful of each for topping.
- Pour the blondie batter into the prepared baking pan, spreading it evenly. Sprinkle the reserved chocolate chips and caramel bits on top.
- Bake in the preheated oven for 25–30 minutes, or until a toothpick inserted into the center comes out with a few moist crumbs.
- Once baked, remove from the oven and allow to cool in the pan for about 15 minutes. Lift the blondies out using the parchment overhang and let them cool completely on a wire rack.
- Cut into squares and enjoy!


![To make Chocolate Swirl Banana Ice Cream, you will need: - 4 ripe bananas, sliced and frozen - 1 cup coconut milk (or any milk of choice) - 2 tablespoons maple syrup (adjust for sweetness) - 1 teaspoon vanilla extract - 1/4 cup cacao powder (or unsweetened cocoa powder) - A pinch of sea salt These ingredients come together to create a creamy and rich treat. The ripe bananas give sweetness, while the cacao powder adds that lovely chocolate flavor. If you have dietary needs, there are easy swaps. For dairy-free options, use almond milk or oat milk instead of coconut milk. You can replace maple syrup with agave syrup or honey for sweetness. Those who avoid sugar may use a sugar substitute like stevia. For the cacao powder, you can use carob powder for a different taste. This ice cream is not only tasty but also has some health benefits. Each serving contains: - Calories: Around 150 - Protein: 2g - Carbohydrates: 30g - Sugar: 12g (natural sugars from bananas) - Fat: 4g This treat is a great way to enjoy dessert while getting some nutrients from the bananas. It’s a fun way to cool down and feel good about what you eat. For the complete recipe, check out the [Full Recipe]. Start by gathering all your ingredients. You will need: - 4 ripe bananas, sliced and frozen - 1 cup coconut milk (or any milk of choice) - 2 tablespoons maple syrup (adjust for sweetness) - 1 teaspoon vanilla extract - 1/4 cup cacao powder (or unsweetened cocoa powder) - A pinch of sea salt Make sure your bananas are ripe. This will make your ice cream sweet and tasty. Slice the bananas and freeze them for a few hours. Now, let's blend! Take the frozen bananas and put them in a blender. Add the coconut milk, maple syrup, vanilla extract, and sea salt. Blend until everything is smooth and creamy. You may need to stop and scrape down the sides of the blender. This helps everything mix well. Once you see a creamy texture, transfer the banana mix to a big bowl. In a different bowl, mix the cacao powder with a splash of coconut milk. Stir until you make a smooth chocolate sauce. If it is too thick, add a little more milk until it is pourable. Now, drizzle the chocolate sauce over the banana mix in the large bowl. Use a spatula to gently swirl the chocolate into the banana mixture. Create those pretty marbled patterns! Once you finish swirling, transfer the mix into an airtight container. Smooth the top with your spatula and cover it tightly. Freeze it for 2-4 hours until it is firm enough to scoop. For the best experience, let the ice cream sit out for about 5 minutes before serving. This makes it easier to scoop. Enjoy the delightful taste of your homemade Chocolate Swirl Banana Ice Cream! Check out the Full Recipe for more details. To get the right texture, freeze your bananas well. I slice them and freeze them overnight. This gives a creamy base. When blending, add coconut milk slowly. Start with a little, then add more if needed. Blend until smooth, but don’t overdo it. If it's too soft, freeze it longer. You can easily boost the flavor of your ice cream. Try adding a pinch of cinnamon. It adds warmth and depth. You can also swap maple syrup for honey or agave. Each sweetener gives a unique taste. For a nutty twist, mix in some almond extract. This brings a fun twist to the classic flavor. Serve your ice cream in chilled bowls. This keeps it cold longer. Scoop it out after letting it sit for five minutes. This makes scooping easier. Top with fresh banana slices and a drizzle of chocolate sauce. For extra crunch, sprinkle cacao nibs on top. This adds texture and looks pretty too. For the full recipe, check the main article. {{image_2}} If you want a dairy-free treat, use coconut milk. It adds creaminess and a light flavor. You can also try almond milk or oat milk. Both work well in this recipe. Just make sure to pick a milk that you enjoy. You can make your ice cream even better with mix-ins. Try adding chopped nuts or shredded coconut. Chocolate chips are also a fun choice. For toppings, fresh fruit, crushed cookies, or granola add texture and flavor. Drizzle extra chocolate sauce on top for a sweet touch. Feel free to get creative with flavors. Add peanut butter for a rich taste. You might also try adding berries like strawberries or raspberries for a fruity twist. A pinch of cinnamon gives a warm note. Each of these options makes your chocolate swirl banana ice cream unique! Remember, you can find the full recipe above. Enjoy making your ice cream! To keep your chocolate swirl banana ice cream fresh, you need to store it right. Here are some tips to help you. First, always let your ice cream cool to room temperature. This helps to avoid ice crystals. After mixing, transfer it to a container. Make sure it’s airtight. This keeps the air out and prevents freezer burn. If you want to enjoy it later, freeze it for up to a month. Use a sturdy container for your ice cream. Glass and plastic containers work well. Make sure the lid fits tightly. This keeps the ice cream safe from other smells in the freezer. If you want to scoop easily, choose a shallow container. It makes it simple to reach every part of the ice cream. Chocolate swirl banana ice cream stays fresh for about two weeks. After that, it can lose flavor and texture. It’s best to eat it within this time frame for the best taste. If it sits too long, it might become icy. Now, you can enjoy your delightful chocolate swirl banana ice cream, knowing how to store it right! For the full recipe, check out the earlier section. To make chocolate swirl banana ice cream, start by blending frozen bananas, coconut milk, maple syrup, vanilla extract, and sea salt. Blend until smooth. Next, mix cacao powder with some coconut milk to create a chocolate sauce. After blending, transfer the banana mix to a bowl. Drizzle the chocolate sauce over it and gently swirl it in. Finally, put the mixture in an airtight container and freeze it for 2-4 hours. For the full recipe, check out the details above. Yes, you can use any milk you like. Almond milk, soy milk, or oat milk work well too. Each type will give a slightly different taste and texture. Choose the milk that fits your diet or taste. Store homemade ice cream in an airtight container. This keeps it fresh and prevents ice crystals. Make sure to smooth the top before sealing to avoid air pockets. It stays fresh in the freezer for about 1-2 weeks. This blog post covered how to make chocolate swirl banana ice cream. We talked about the right ingredients, step-by-step instructions, and helpful tips. You learned how to customize the recipe with different flavors and toppings. I shared storage advice to keep your ice cream fresh. Now you can enjoy a tasty treat that fits your diet. Get ready to impress your friends and family with your new skills!](https://dailydishlab.com/wp-content/uploads/2025/07/482899ed-90ac-4dc0-8cba-52d6130bf4d8-768x768.webp)
