
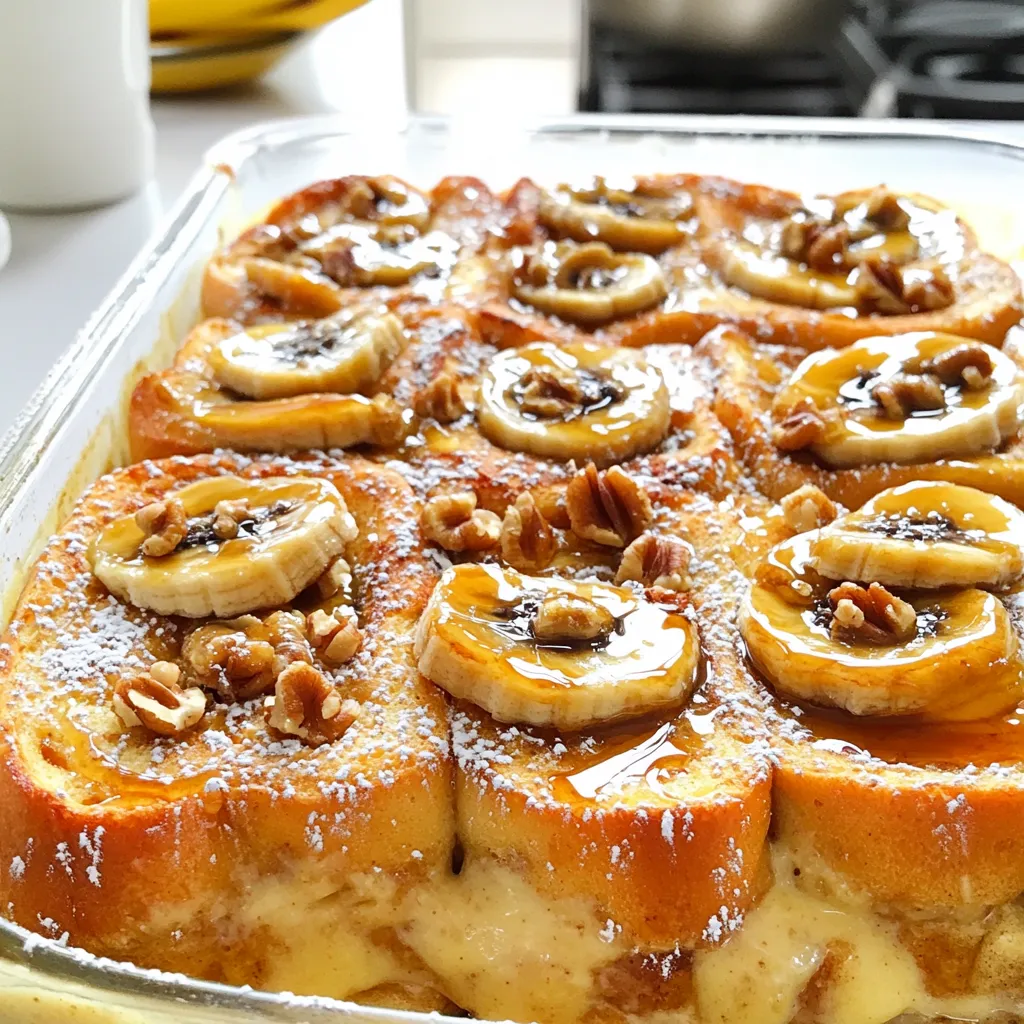
Imagine waking up to the smell of Caramelized Banana French Toast Bake wafting through your home. This simple yet delightful recipe guarantees a breakfast treat everyone will love. Using soft challah or brioche bread, rich eggs, and sweet spices, you will create a dish that delights your senses. Join me as I guide you through the step-by-step process to impress your family and elevate your breakfast game!
Why I Love This Recipe
- Deliciously Indulgent: This French toast bake is a perfect blend of rich flavors, combining the sweetness of bananas with the creaminess of custard.
- Easy to Prepare: With simple steps and straightforward ingredients, this recipe is accessible for cooks of all skill levels.
- Perfect for Gatherings: It serves 6-8 people, making it an ideal choice for brunches, family get-togethers, or special occasions.
- Customizable: You can easily modify this recipe with your favorite toppings, like nuts or fresh berries, to suit your taste.
Ingredients
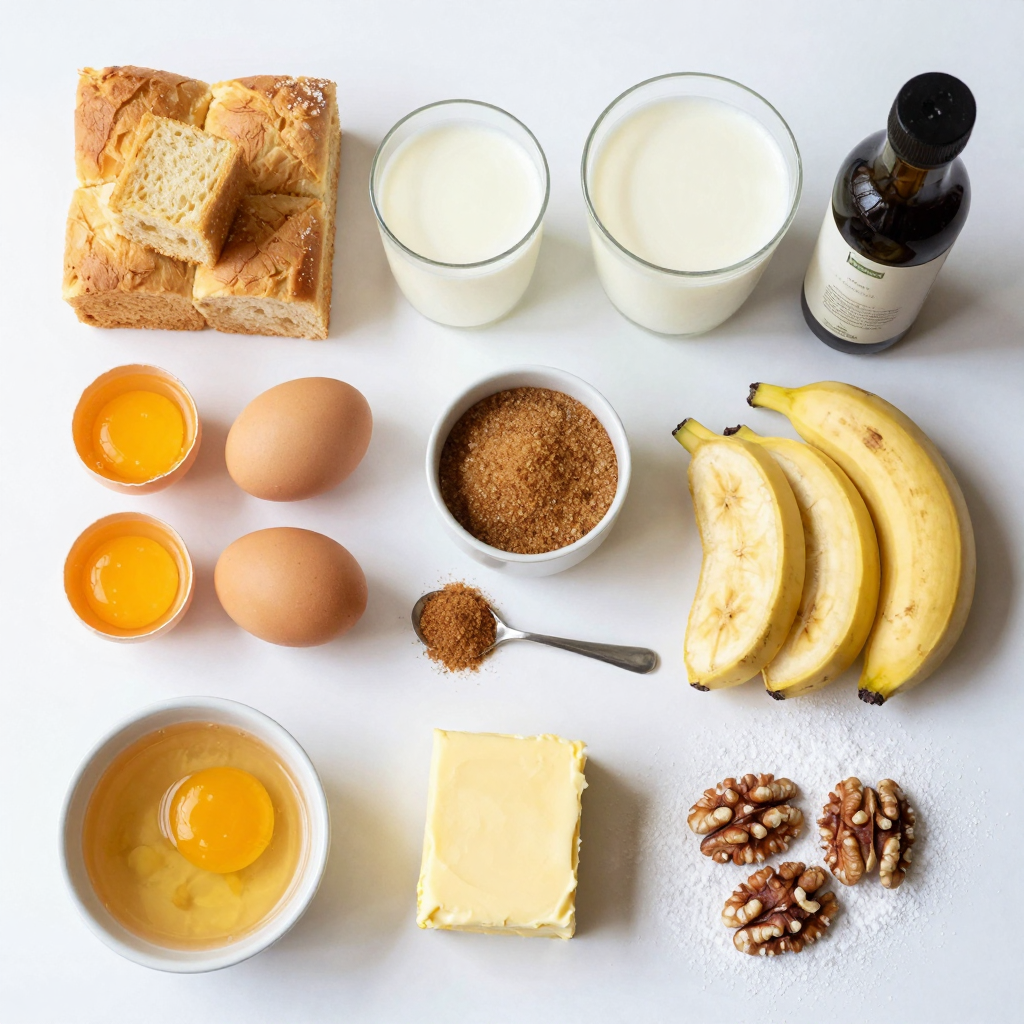
Main Ingredients
– 1 loaf of challah or brioche bread, cut into 1-inch cubes
– 4 large eggs
– 2 cups milk (whole or almond milk)
– 1/2 cup heavy cream
– 1/4 cup brown sugar
– 1 teaspoon vanilla extract
– 1 teaspoon ground cinnamon
– 3 ripe bananas, sliced
– 3 tablespoons butter
– Maple syrup, for serving
The first step is to gather all your main ingredients. The bread is key. Challah or brioche adds a soft, rich texture. You can use whole or almond milk for a twist. Eggs and heavy cream create a creamy custard. Brown sugar, vanilla, and cinnamon give it sweetness and warmth. Bananas add a delightful fruity layer.
Optional Garnishes
– Chopped walnuts
– Powdered sugar
Garnishes make your dish stand out. Chopped walnuts add a nice crunch and flavor. Powdered sugar gives a light, sweet touch. Both are optional but highly recommended.
Ingredient Substitutions
– Whole vs. almond milk
– Alternatives for heavy cream
You can substitute whole milk with almond milk if needed. It still gives a great taste. If you want to skip heavy cream, try coconut cream or a mix of milk with yogurt. Each change will give your dish a unique spin.
Step-by-Step Instructions
Preparation Steps
First, preheat your oven to 350°F (175°C). This temperature helps the dish bake evenly. Next, grease a 9×13-inch baking dish. Use butter or cooking spray to cover the bottom and sides. This step stops the bake from sticking.
Now, let’s mix the custard base. In a large bowl, whisk together 4 large eggs, 2 cups of milk, 1/2 cup of heavy cream, 1/4 cup of brown sugar, 1 teaspoon of vanilla extract, and 1 teaspoon of ground cinnamon. Whisk until it’s smooth and well combined. This mixture adds flavor and moisture to the bread.
Bread Soaking Technique
Soaking the bread is key to a soft French toast bake. Add 1 loaf of cubed challah or brioche bread to the egg mixture. Gently fold the bread into the custard. Let it sit for about 10 minutes. This time allows the bread to absorb the liquid fully. If you skip this step, your bake may turn out dry.
Caramelizing Bananas
Caramelizing bananas adds a sweet and rich flavor. In a skillet, melt 3 tablespoons of butter over medium heat. Add 3 sliced ripe bananas to the pan. Cook for about 3-4 minutes. Stir gently until the bananas are golden and soft. This brings out their natural sweetness and adds a lovely texture.
Baking the Dish
Now it’s time to bake! Layer half of the soaked bread mixture in the greased dish. Top with half of the caramelized bananas. Then, add the rest of the bread mixture and finish with the remaining bananas on top. Bake in the preheated oven for 35-40 minutes. You’ll know it’s done when the top is golden and the custard is set. Let it cool for 5-10 minutes before serving. This wait helps the dish firm up a bit. Enjoy your delicious Caramelized Banana French Toast Bake!
Pro Tips
- Choose the Right Bread: A rich bread like challah or brioche absorbs the custard beautifully, providing a tender and flavorful base for your French toast bake.
- Caramelize with Care: When cooking your bananas, ensure they are over medium heat and stir gently to avoid mashing them. This will help achieve that perfectly caramelized texture.
- Soak Time Matters: Allowing the bread to soak for at least 10 minutes ensures it absorbs the custard mixture fully, resulting in a moist and delicious bake.
- Serving Suggestions: For extra flair, serve your French toast bake with a dollop of whipped cream or a scoop of vanilla ice cream for a decadent breakfast or dessert option.
Tips & Tricks
Perfecting the Texture
To get that perfect custardy bake, you must soak the bread well. Let the bread sit in the egg mixture for about 10 minutes. This gives it time to drink up the flavors. You want the bread cubes to feel soft but not mushy. The right soak will make your French toast bake rich and creamy.
Serving Suggestions
When it’s time to serve, drizzle warm maple syrup over the top. It adds sweetness that pairs well with the bananas. For crunch, sprinkle chopped walnuts on top. You can also dust with powdered sugar for a pretty finish. Serve it warm with a side of fresh fruit. This adds color and freshness to your plate.
Make-Ahead Tips
This dish is great for prepping the night before. Just follow the recipe until the baking step. Cover the dish and store it in the fridge. In the morning, pop it in the oven. It saves time and makes breakfast easier. Plus, the flavors deepen overnight, making it even tastier!
Variations
Flavor Add-Ins
You can change the taste of your Caramelized Banana French Toast Bake by adding different fruits or nuts. Try using berries like strawberries or blueberries for a fresh burst. Apples can also work well when sautéed with cinnamon. You can even add dried fruits, like raisins or cranberries, for extra sweetness. If you like nuts, add chopped pecans or almonds on top. This adds crunch and more flavor to your dish.
Sweetness Adjustments
Not everyone likes the same level of sweetness. You can adjust the sugar in the recipe to fit your taste. If you want a less sweet dish, cut back on the brown sugar by a few tablespoons. You can also use honey or maple syrup instead of sugar. This will add a different flavor. If you want it sweeter, add a bit more sugar or drizzle extra syrup on top when serving.
Dietary Variations
If you need to avoid gluten or dairy, there are easy swaps you can make. For a gluten-free option, use gluten-free bread. There are many brands that work well in this recipe. To make it dairy-free, switch the milk and cream for almond or coconut milk. You can also replace heavy cream with a dairy-free cream alternative. These swaps make the dish more inclusive for everyone while still being tasty.
Storage Info
How to Store Leftovers
Store any leftover Caramelized Banana French Toast Bake in an airtight container. Place it in the fridge if you plan to eat it soon. If you want to keep it longer, freeze it. Cut it into portions for easy serving. Wrap each piece in plastic wrap before placing it in a freezer bag. This helps keep it fresh.
Reheating Instructions
To reheat, you can use the oven or a microwave. For the oven, preheat it to 350°F (175°C). Place the French toast bake in a baking dish and cover it with foil. Heat for about 15-20 minutes. In the microwave, warm individual pieces for about 1-2 minutes. Check to ensure it is hot all the way through.
Shelf Life
In the refrigerator, this dish will last for about 3-4 days. If you freeze it, it can last up to 2-3 months. Make sure to label your containers with the date. This keeps track of how long it has been stored. Enjoy your leftovers while they are still fresh!
FAQs
Can I prepare this dish the night before?
Yes, you can prepare this dish the night before. Simply follow the recipe up to the baking step. After you layer the bread and bananas, cover the dish with plastic wrap. Place it in the fridge overnight. In the morning, take it out and let it sit at room temperature for about 30 minutes before baking. This way, the bread will soak up all the yummy flavors.
What type of bread is best for French toast bake?
For the best flavor, I recommend using challah or brioche bread. These breads are soft and rich. They soak up the custard well. You can also use other types of bread like sourdough or whole wheat. Just make sure the bread is a bit stale. Stale bread holds the custard better and gives a nice texture.
Can I substitute bananas with another fruit?
Absolutely! You can use other fruits if you prefer. Berries, apples, or peaches work great too. Just slice them and cook them like the bananas. Each fruit will give a different taste, adding fun to your dish. If you pick a fruit that cooks down well, you’ll enjoy a lovely caramelized flavor.
This blog post covered all the key ingredients and steps for a delicious French toast bake. You learned how to choose the right bread, mix the custard, and perfect the caramelization of bananas. We also discussed variations, storage tips, and reheating methods.
Remember, this dish is versatile. Customize it to your tastes. Use your favorite fruits or nuts. Experiment with dairy-free options too. Enjoy making this treat at home. Trust me, your breakfast table will shine!


