Caramelized Onion Hummus Tasty and Simple Dip
![To make delicious caramelized onion hummus, you'll need some simple ingredients. Here’s what to gather: - 2 medium onions, thinly sliced - 2 tablespoons olive oil - 1 can (15 oz) chickpeas, drained and rinsed - 2 tablespoons tahini - 2 tablespoons lemon juice - 1 garlic clove, minced - 1/2 teaspoon cumin - Salt and pepper to taste - Water, as needed - Fresh herbs (parsley or thyme) for garnish These ingredients come together to create a rich and flavorful dip. The caramelized onions add sweetness, while the chickpeas give it a creamy texture. Tahini and lemon juice bring a nice balance of nutty and tangy flavors. You can easily find these items at your local grocery store. Remember, using fresh herbs for garnish makes your dish look pretty and tastes great too. For the full recipe, follow the steps carefully to achieve the best results! - Heat olive oil in a skillet over medium heat. - Add the thinly sliced onions and stir. - Cook the onions for about 20-25 minutes. - Stir occasionally until the onions are golden brown. Caramelizing onions takes patience, but the sweet, rich flavor is worth it. You want them to turn soft and brown, not burn. The longer you cook them, the sweeter they get. Once they are done, remove them from heat and let them cool a bit. - In a food processor, combine chickpeas, tahini, and seasonings. - Add lemon juice, minced garlic, and half of the caramelized onions. Blend these ingredients until smooth. Chickpeas give a creamy base, while tahini adds a nutty flavor. The garlic brings a nice kick. Don't forget to save some caramelized onions for later. They will add a tasty finish to your dip! - If the mixture is too thick, add water. - Start with one tablespoon at a time until you reach the right consistency. - Taste the hummus and season with salt and pepper. Blend again to mix the seasonings well. The texture should be creamy and spreadable. If you want to impress, drizzle olive oil on top and sprinkle some smoked paprika. This dips well with pita chips or fresh veggies. For the full recipe, check out the complete guide. To make the best caramelized onions, follow these tips. First, use a heavy skillet. This helps heat spread evenly. Second, slice your onions thin. Thin slices cook better and faster. Cook on medium heat, not high. Stir often to keep them from burning. This process takes about 20-25 minutes. You want them golden, not dark brown. The right timing brings out their sweet flavor. Want to spice up your hummus? Try adding cumin or smoked paprika. These spices add depth. If you like heat, add a pinch of cayenne. You can also switch up the garnishes. Fresh herbs like parsley or thyme brighten the dish. A drizzle of balsamic glaze adds a nice touch too. Experimenting with flavors keeps things exciting. When serving hummus, think about pairings. Pita chips, fresh veggies, or warm pita bread work great. For a fun twist, serve with crunchy crackers. Presentation matters too! Use a wide bowl for the hummus. Create a swirl in the top, then drizzle with olive oil. Lastly, sprinkle some smoked paprika for a pop of color. These small touches make your dish shine. For the full recipe, check the Caramelized Onion Hummus section. {{image_2}} You can make your caramelized onion hummus even better. Try adding roasted peppers for a spicy kick. They give a nice warmth and depth. You can also toss in fresh herbs like basil or cilantro. This adds a fresh taste and brightens the flavor. If you want a twist, use white beans instead of chickpeas. They create a smooth texture and mild taste. For nut butter lovers, swap tahini with almond or cashew butter. This change adds a unique flavor profile and keeps it creamy. You can get creative with how you serve hummus. Use it as a spread on sandwiches for a tasty lunch. It also works great as a dip for parties or game nights. Pair it with fresh veggies or pita chips for a fun snack. For the full recipe, check out the details above! To keep your caramelized onion hummus fresh, use an airtight container. Glass jars work best since they do not absorb odors. You can also use plastic containers with tight lids. Make sure to seal the container well. Place a layer of plastic wrap between the hummus and the lid for extra freshness. Store your hummus in the fridge right after making it. This helps keep it safe and tasty. If you want to enjoy it later, avoid leaving it out at room temperature for more than two hours. How long does it keep in the fridge? Homemade hummus lasts about five to seven days in the fridge. Always check for signs of spoilage, like an off smell or mold. If you see any, throw it away. Freezing hummus for extended storage is also easy. Portion it out in small containers for quick access. Hummus can last up to three months in the freezer. Just remember to thaw it in the fridge overnight before you eat it again. This way, you can enjoy your delicious hummus anytime you want. For the full recipe, check here: [Full Recipe]. Caramelized onion hummus is a creamy dip made with chickpeas and sweet, soft onions. The onions add a rich flavor, while the chickpeas give a smooth and hearty base. This hummus is perfect for dipping or spreading. Its texture is creamy and thick, making it great for pairing with chips or veggies. The sweetness of the caramelized onions balances the nutty taste of tahini and the zest of lemon. Yes, you can use store-bought caramelized onions for this recipe. They save time and still taste great. However, making them at home gives you more control over the flavor. Homemade onions can be cooked to your liking. They also add freshness to the dish. If you choose store-bought, check the label for added ingredients. You want to keep it simple and healthy. Hummus is packed with good nutrients. Chickpeas provide protein and fiber, which help keep you full. Tahini, made from sesame seeds, adds healthy fats and calcium. Garlic can boost your immune system. Lemon juice gives a dose of vitamin C. Overall, hummus is a healthy snack that supports a balanced diet. It’s a great way to enjoy veggies and whole grains while keeping your meals tasty. In this blog post, we explored how to make a delicious caramelized onion hummus. We covered each ingredient, from onions to tahini, and provided step-by-step instructions for caramelizing and blending. I shared tips for perfecting flavor and offered variations to try. Storing your hummus properly keeps it fresh longer. Finally, I answered common questions to enhance your hummus knowledge. Enjoy making this tasty dip! It's easy and brings joy to your meals.](https://dailydishlab.com/wp-content/uploads/2025/06/31a0e749-19bc-456b-b0d4-468054f59b86.webp)
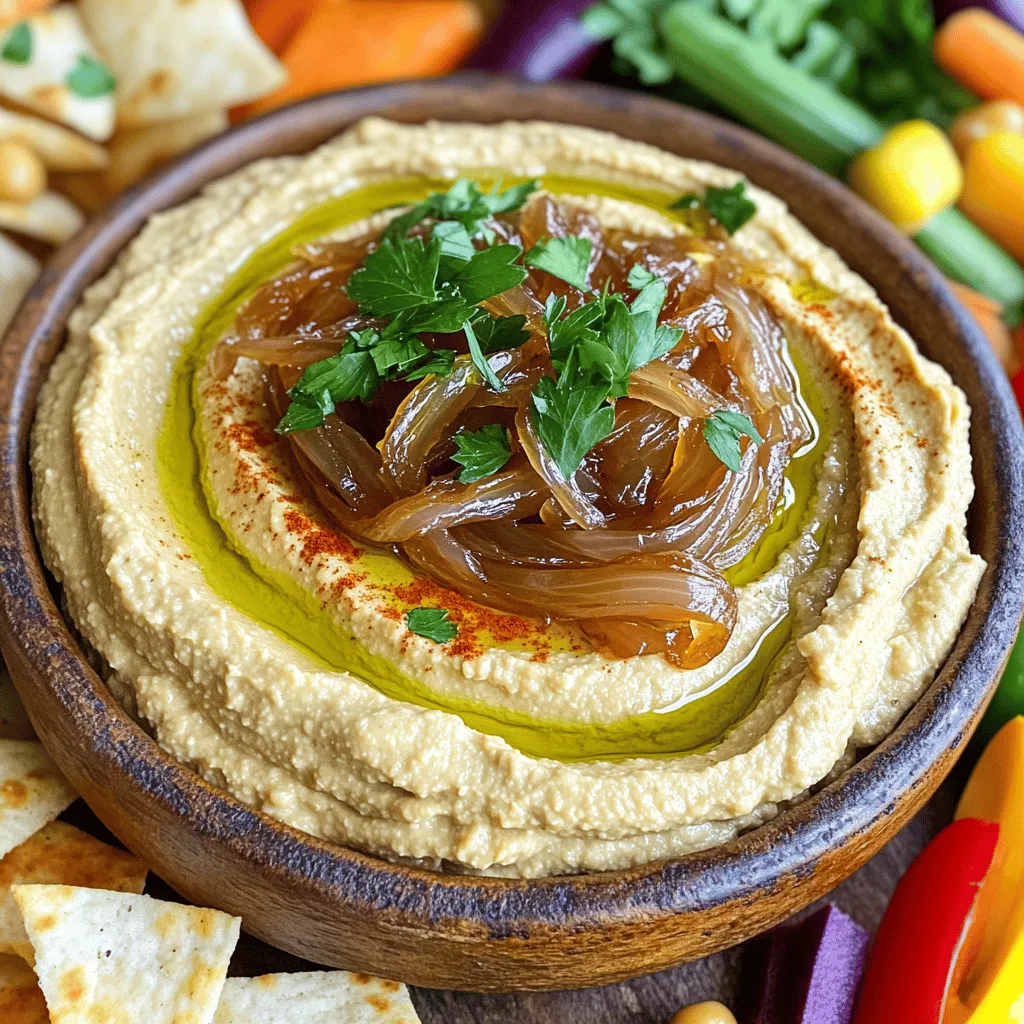
Are you ready to elevate your dip game? This Caramelized Onion Hummus is both tasty and simple to make. With sweet, golden onions blending perfectly into creamy chickpeas, this dip will impress any crowd. Whether you’re hosting a party or just snacking at home, you’ll love the rich flavor. Let’s dive into the ingredients and get started on this delicious treat!
Why I Love This Recipe
- Rich Flavor: The combination of caramelized onions and chickpeas creates a deep, savory flavor that elevates traditional hummus.
- Healthy Ingredients: This hummus is packed with nutritious ingredients like chickpeas and olive oil, making it a wholesome snack or appetizer.
- Versatile Dip: Perfect for parties, picnics, or a healthy snack at home, it pairs well with veggies, pita chips, or even spread on sandwiches.
- Easy to Make: With just a few simple steps, you can whip up this delicious hummus in under 40 minutes!
Ingredients
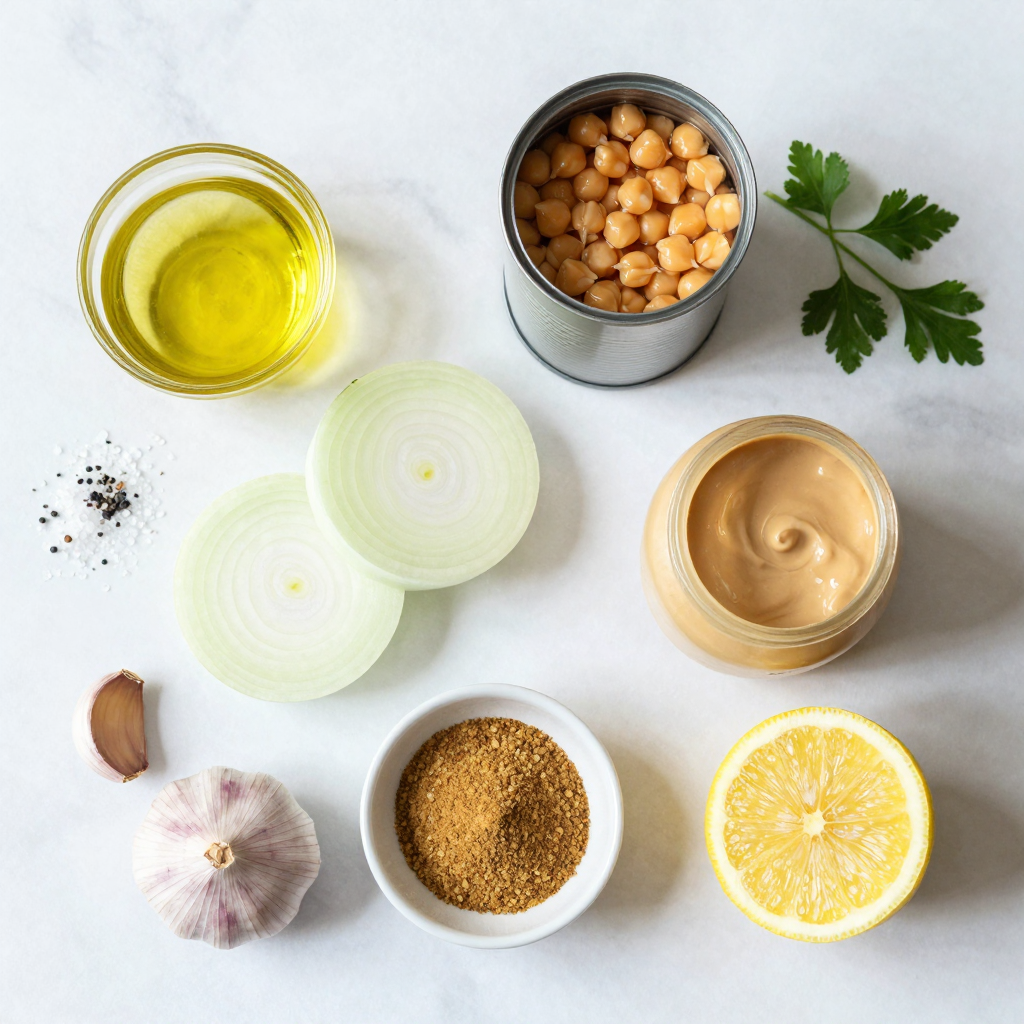
To make delicious caramelized onion hummus, you’ll need some simple ingredients. Here’s what to gather:
- 2 medium onions, thinly sliced
- 2 tablespoons olive oil
- 1 can (15 oz) chickpeas, drained and rinsed
- 2 tablespoons tahini
- 2 tablespoons lemon juice
- 1 garlic clove, minced
- 1/2 teaspoon cumin
- Salt and pepper to taste
- Water, as needed
- Fresh herbs (parsley or thyme) for garnish
These ingredients come together to create a rich and flavorful dip. The caramelized onions add sweetness, while the chickpeas give it a creamy texture. Tahini and lemon juice bring a nice balance of nutty and tangy flavors. You can easily find these items at your local grocery store. Remember, using fresh herbs for garnish makes your dish look pretty and tastes great too.

Step-by-Step Instructions
Caramelizing the Onions
- Heat olive oil in a skillet over medium heat.
- Add the thinly sliced onions and stir.
- Cook the onions for about 20-25 minutes.
- Stir occasionally until the onions are golden brown.
Caramelizing onions takes patience, but the sweet, rich flavor is worth it. You want them to turn soft and brown, not burn. The longer you cook them, the sweeter they get. Once they are done, remove them from heat and let them cool a bit.
Blending the Ingredients
- In a food processor, combine chickpeas, tahini, and seasonings.
- Add lemon juice, minced garlic, and half of the caramelized onions.
Blend these ingredients until smooth. Chickpeas give a creamy base, while tahini adds a nutty flavor. The garlic brings a nice kick. Don’t forget to save some caramelized onions for later. They will add a tasty finish to your dip!
Finalizing the Hummus
- If the mixture is too thick, add water.
- Start with one tablespoon at a time until you reach the right consistency.
- Taste the hummus and season with salt and pepper.
Blend again to mix the seasonings well. The texture should be creamy and spreadable. If you want to impress, drizzle olive oil on top and sprinkle some smoked paprika. This dips well with pita chips or fresh veggies.
Pro Tips
- Caramelization Technique: For the best flavor, cook the onions slowly over medium heat, allowing them to develop a deep, sweet flavor without burning.
- Chickpea Preparation: Use dried chickpeas that have been soaked and cooked for a creamier texture instead of canned chickpeas.
- Flavor Boost: Add a pinch of smoked paprika or cayenne pepper to the hummus for an extra kick of flavor.
- Serving Suggestions: Serve the hummus with a variety of dippers like roasted vegetables, olives, or warm pita bread to enhance the flavor experience.
Tips & Tricks
Perfecting Caramelization
To make the best caramelized onions, follow these tips. First, use a heavy skillet. This helps heat spread evenly. Second, slice your onions thin. Thin slices cook better and faster. Cook on medium heat, not high. Stir often to keep them from burning. This process takes about 20-25 minutes. You want them golden, not dark brown. The right timing brings out their sweet flavor.
Flavor Enhancements
Want to spice up your hummus? Try adding cumin or smoked paprika. These spices add depth. If you like heat, add a pinch of cayenne. You can also switch up the garnishes. Fresh herbs like parsley or thyme brighten the dish. A drizzle of balsamic glaze adds a nice touch too. Experimenting with flavors keeps things exciting.
Serving Suggestions
When serving hummus, think about pairings. Pita chips, fresh veggies, or warm pita bread work great. For a fun twist, serve with crunchy crackers. Presentation matters too! Use a wide bowl for the hummus. Create a swirl in the top, then drizzle with olive oil. Lastly, sprinkle some smoked paprika for a pop of color. These small touches make your dish shine.

Variations
Additional Flavor Profiles
You can make your caramelized onion hummus even better. Try adding roasted peppers for a spicy kick. They give a nice warmth and depth. You can also toss in fresh herbs like basil or cilantro. This adds a fresh taste and brightens the flavor.
Alternative Ingredients
If you want a twist, use white beans instead of chickpeas. They create a smooth texture and mild taste. For nut butter lovers, swap tahini with almond or cashew butter. This change adds a unique flavor profile and keeps it creamy.
Serving Style Adaptations
You can get creative with how you serve hummus. Use it as a spread on sandwiches for a tasty lunch. It also works great as a dip for parties or game nights. Pair it with fresh veggies or pita chips for a fun snack.
Storage Info
How to Store Homemade Hummus
To keep your caramelized onion hummus fresh, use an airtight container. Glass jars work best since they do not absorb odors. You can also use plastic containers with tight lids. Make sure to seal the container well. Place a layer of plastic wrap between the hummus and the lid for extra freshness.
Store your hummus in the fridge right after making it. This helps keep it safe and tasty. If you want to enjoy it later, avoid leaving it out at room temperature for more than two hours.
Shelf Life
How long does it keep in the fridge? Homemade hummus lasts about five to seven days in the fridge. Always check for signs of spoilage, like an off smell or mold. If you see any, throw it away.
Freezing hummus for extended storage is also easy. Portion it out in small containers for quick access. Hummus can last up to three months in the freezer. Just remember to thaw it in the fridge overnight before you eat it again.
This way, you can enjoy your delicious hummus anytime you want.
FAQs
What is caramelized onion hummus?
Caramelized onion hummus is a creamy dip made with chickpeas and sweet, soft onions. The onions add a rich flavor, while the chickpeas give a smooth and hearty base. This hummus is perfect for dipping or spreading. Its texture is creamy and thick, making it great for pairing with chips or veggies. The sweetness of the caramelized onions balances the nutty taste of tahini and the zest of lemon.
Can I use store-bought caramelized onions?
Yes, you can use store-bought caramelized onions for this recipe. They save time and still taste great. However, making them at home gives you more control over the flavor. Homemade onions can be cooked to your liking. They also add freshness to the dish. If you choose store-bought, check the label for added ingredients. You want to keep it simple and healthy.
What are the health benefits of hummus?
Hummus is packed with good nutrients. Chickpeas provide protein and fiber, which help keep you full. Tahini, made from sesame seeds, adds healthy fats and calcium. Garlic can boost your immune system. Lemon juice gives a dose of vitamin C. Overall, hummus is a healthy snack that supports a balanced diet. It’s a great way to enjoy veggies and whole grains while keeping your meals tasty.
In this blog post, we explored how to make a delicious caramelized onion hummus. We covered each ingredient, from onions to tahini, and provided step-by-step instructions for caramelizing and blending. I shared tips for perfecting flavor and offered variations to try. Storing your hummus properly keeps it fresh longer. Finally, I answered common questions to enhance your hummus knowledge. Enjoy making this tasty dip! It’s easy and brings joy to your meals.
![To make delicious caramelized onion hummus, you'll need some simple ingredients. Here’s what to gather: - 2 medium onions, thinly sliced - 2 tablespoons olive oil - 1 can (15 oz) chickpeas, drained and rinsed - 2 tablespoons tahini - 2 tablespoons lemon juice - 1 garlic clove, minced - 1/2 teaspoon cumin - Salt and pepper to taste - Water, as needed - Fresh herbs (parsley or thyme) for garnish These ingredients come together to create a rich and flavorful dip. The caramelized onions add sweetness, while the chickpeas give it a creamy texture. Tahini and lemon juice bring a nice balance of nutty and tangy flavors. You can easily find these items at your local grocery store. Remember, using fresh herbs for garnish makes your dish look pretty and tastes great too. For the full recipe, follow the steps carefully to achieve the best results! - Heat olive oil in a skillet over medium heat. - Add the thinly sliced onions and stir. - Cook the onions for about 20-25 minutes. - Stir occasionally until the onions are golden brown. Caramelizing onions takes patience, but the sweet, rich flavor is worth it. You want them to turn soft and brown, not burn. The longer you cook them, the sweeter they get. Once they are done, remove them from heat and let them cool a bit. - In a food processor, combine chickpeas, tahini, and seasonings. - Add lemon juice, minced garlic, and half of the caramelized onions. Blend these ingredients until smooth. Chickpeas give a creamy base, while tahini adds a nutty flavor. The garlic brings a nice kick. Don't forget to save some caramelized onions for later. They will add a tasty finish to your dip! - If the mixture is too thick, add water. - Start with one tablespoon at a time until you reach the right consistency. - Taste the hummus and season with salt and pepper. Blend again to mix the seasonings well. The texture should be creamy and spreadable. If you want to impress, drizzle olive oil on top and sprinkle some smoked paprika. This dips well with pita chips or fresh veggies. For the full recipe, check out the complete guide. To make the best caramelized onions, follow these tips. First, use a heavy skillet. This helps heat spread evenly. Second, slice your onions thin. Thin slices cook better and faster. Cook on medium heat, not high. Stir often to keep them from burning. This process takes about 20-25 minutes. You want them golden, not dark brown. The right timing brings out their sweet flavor. Want to spice up your hummus? Try adding cumin or smoked paprika. These spices add depth. If you like heat, add a pinch of cayenne. You can also switch up the garnishes. Fresh herbs like parsley or thyme brighten the dish. A drizzle of balsamic glaze adds a nice touch too. Experimenting with flavors keeps things exciting. When serving hummus, think about pairings. Pita chips, fresh veggies, or warm pita bread work great. For a fun twist, serve with crunchy crackers. Presentation matters too! Use a wide bowl for the hummus. Create a swirl in the top, then drizzle with olive oil. Lastly, sprinkle some smoked paprika for a pop of color. These small touches make your dish shine. For the full recipe, check the Caramelized Onion Hummus section. {{image_2}} You can make your caramelized onion hummus even better. Try adding roasted peppers for a spicy kick. They give a nice warmth and depth. You can also toss in fresh herbs like basil or cilantro. This adds a fresh taste and brightens the flavor. If you want a twist, use white beans instead of chickpeas. They create a smooth texture and mild taste. For nut butter lovers, swap tahini with almond or cashew butter. This change adds a unique flavor profile and keeps it creamy. You can get creative with how you serve hummus. Use it as a spread on sandwiches for a tasty lunch. It also works great as a dip for parties or game nights. Pair it with fresh veggies or pita chips for a fun snack. For the full recipe, check out the details above! To keep your caramelized onion hummus fresh, use an airtight container. Glass jars work best since they do not absorb odors. You can also use plastic containers with tight lids. Make sure to seal the container well. Place a layer of plastic wrap between the hummus and the lid for extra freshness. Store your hummus in the fridge right after making it. This helps keep it safe and tasty. If you want to enjoy it later, avoid leaving it out at room temperature for more than two hours. How long does it keep in the fridge? Homemade hummus lasts about five to seven days in the fridge. Always check for signs of spoilage, like an off smell or mold. If you see any, throw it away. Freezing hummus for extended storage is also easy. Portion it out in small containers for quick access. Hummus can last up to three months in the freezer. Just remember to thaw it in the fridge overnight before you eat it again. This way, you can enjoy your delicious hummus anytime you want. For the full recipe, check here: [Full Recipe]. Caramelized onion hummus is a creamy dip made with chickpeas and sweet, soft onions. The onions add a rich flavor, while the chickpeas give a smooth and hearty base. This hummus is perfect for dipping or spreading. Its texture is creamy and thick, making it great for pairing with chips or veggies. The sweetness of the caramelized onions balances the nutty taste of tahini and the zest of lemon. Yes, you can use store-bought caramelized onions for this recipe. They save time and still taste great. However, making them at home gives you more control over the flavor. Homemade onions can be cooked to your liking. They also add freshness to the dish. If you choose store-bought, check the label for added ingredients. You want to keep it simple and healthy. Hummus is packed with good nutrients. Chickpeas provide protein and fiber, which help keep you full. Tahini, made from sesame seeds, adds healthy fats and calcium. Garlic can boost your immune system. Lemon juice gives a dose of vitamin C. Overall, hummus is a healthy snack that supports a balanced diet. It’s a great way to enjoy veggies and whole grains while keeping your meals tasty. In this blog post, we explored how to make a delicious caramelized onion hummus. We covered each ingredient, from onions to tahini, and provided step-by-step instructions for caramelizing and blending. I shared tips for perfecting flavor and offered variations to try. Storing your hummus properly keeps it fresh longer. Finally, I answered common questions to enhance your hummus knowledge. Enjoy making this tasty dip! It's easy and brings joy to your meals.](https://dailydishlab.com/wp-content/uploads/2025/06/31a0e749-19bc-456b-b0d4-468054f59b86-300x300.webp)
Caramelized Onion Hummus
Ingredients
2 medium onions, thinly sliced
2 tablespoons olive oil
1 can (15 oz) chickpeas, drained and rinsed
2 tablespoons tahini
2 tablespoons lemon juice
1 garlic clove, minced
1/2 teaspoon cumin
Salt and pepper to taste
Water, as needed
Fresh herbs (parsley or thyme) for garnish
Instructions
Caramelize the Onions: In a large skillet, heat the olive oil over medium heat. Add the sliced onions and stir to coat. Cook for about 20-25 minutes, stirring occasionally, until the onions are golden brown and caramelized. Remove from heat and let them cool slightly.
Blend the Ingredients: In a food processor, combine the chickpeas, tahini, lemon juice, minced garlic, cumin, and half of the caramelized onions (reserve the rest for garnish). Blend until smooth.
Adjust Consistency: If the mixture is too thick, add water one tablespoon at a time until you reach your desired consistency.
Season: Taste and season the hummus with salt and pepper. Blend again to incorporate.
Serve: Transfer the hummus to a serving bowl. Top with the remaining caramelized onions and garnish with fresh herbs.
Prep Time: 10 mins | Total Time: 35 mins | Servings: 6-8
– Presentation Tips: Serve with a drizzle of olive oil and a sprinkle of smoked paprika for an elegant touch. Pair with pita chips, fresh vegetables, or warm pita bread for dipping.
![To make delicious caramelized onion hummus, you'll need some simple ingredients. Here’s what to gather: - 2 medium onions, thinly sliced - 2 tablespoons olive oil - 1 can (15 oz) chickpeas, drained and rinsed - 2 tablespoons tahini - 2 tablespoons lemon juice - 1 garlic clove, minced - 1/2 teaspoon cumin - Salt and pepper to taste - Water, as needed - Fresh herbs (parsley or thyme) for garnish These ingredients come together to create a rich and flavorful dip. The caramelized onions add sweetness, while the chickpeas give it a creamy texture. Tahini and lemon juice bring a nice balance of nutty and tangy flavors. You can easily find these items at your local grocery store. Remember, using fresh herbs for garnish makes your dish look pretty and tastes great too. For the full recipe, follow the steps carefully to achieve the best results! - Heat olive oil in a skillet over medium heat. - Add the thinly sliced onions and stir. - Cook the onions for about 20-25 minutes. - Stir occasionally until the onions are golden brown. Caramelizing onions takes patience, but the sweet, rich flavor is worth it. You want them to turn soft and brown, not burn. The longer you cook them, the sweeter they get. Once they are done, remove them from heat and let them cool a bit. - In a food processor, combine chickpeas, tahini, and seasonings. - Add lemon juice, minced garlic, and half of the caramelized onions. Blend these ingredients until smooth. Chickpeas give a creamy base, while tahini adds a nutty flavor. The garlic brings a nice kick. Don't forget to save some caramelized onions for later. They will add a tasty finish to your dip! - If the mixture is too thick, add water. - Start with one tablespoon at a time until you reach the right consistency. - Taste the hummus and season with salt and pepper. Blend again to mix the seasonings well. The texture should be creamy and spreadable. If you want to impress, drizzle olive oil on top and sprinkle some smoked paprika. This dips well with pita chips or fresh veggies. For the full recipe, check out the complete guide. To make the best caramelized onions, follow these tips. First, use a heavy skillet. This helps heat spread evenly. Second, slice your onions thin. Thin slices cook better and faster. Cook on medium heat, not high. Stir often to keep them from burning. This process takes about 20-25 minutes. You want them golden, not dark brown. The right timing brings out their sweet flavor. Want to spice up your hummus? Try adding cumin or smoked paprika. These spices add depth. If you like heat, add a pinch of cayenne. You can also switch up the garnishes. Fresh herbs like parsley or thyme brighten the dish. A drizzle of balsamic glaze adds a nice touch too. Experimenting with flavors keeps things exciting. When serving hummus, think about pairings. Pita chips, fresh veggies, or warm pita bread work great. For a fun twist, serve with crunchy crackers. Presentation matters too! Use a wide bowl for the hummus. Create a swirl in the top, then drizzle with olive oil. Lastly, sprinkle some smoked paprika for a pop of color. These small touches make your dish shine. For the full recipe, check the Caramelized Onion Hummus section. {{image_2}} You can make your caramelized onion hummus even better. Try adding roasted peppers for a spicy kick. They give a nice warmth and depth. You can also toss in fresh herbs like basil or cilantro. This adds a fresh taste and brightens the flavor. If you want a twist, use white beans instead of chickpeas. They create a smooth texture and mild taste. For nut butter lovers, swap tahini with almond or cashew butter. This change adds a unique flavor profile and keeps it creamy. You can get creative with how you serve hummus. Use it as a spread on sandwiches for a tasty lunch. It also works great as a dip for parties or game nights. Pair it with fresh veggies or pita chips for a fun snack. For the full recipe, check out the details above! To keep your caramelized onion hummus fresh, use an airtight container. Glass jars work best since they do not absorb odors. You can also use plastic containers with tight lids. Make sure to seal the container well. Place a layer of plastic wrap between the hummus and the lid for extra freshness. Store your hummus in the fridge right after making it. This helps keep it safe and tasty. If you want to enjoy it later, avoid leaving it out at room temperature for more than two hours. How long does it keep in the fridge? Homemade hummus lasts about five to seven days in the fridge. Always check for signs of spoilage, like an off smell or mold. If you see any, throw it away. Freezing hummus for extended storage is also easy. Portion it out in small containers for quick access. Hummus can last up to three months in the freezer. Just remember to thaw it in the fridge overnight before you eat it again. This way, you can enjoy your delicious hummus anytime you want. For the full recipe, check here: [Full Recipe]. Caramelized onion hummus is a creamy dip made with chickpeas and sweet, soft onions. The onions add a rich flavor, while the chickpeas give a smooth and hearty base. This hummus is perfect for dipping or spreading. Its texture is creamy and thick, making it great for pairing with chips or veggies. The sweetness of the caramelized onions balances the nutty taste of tahini and the zest of lemon. Yes, you can use store-bought caramelized onions for this recipe. They save time and still taste great. However, making them at home gives you more control over the flavor. Homemade onions can be cooked to your liking. They also add freshness to the dish. If you choose store-bought, check the label for added ingredients. You want to keep it simple and healthy. Hummus is packed with good nutrients. Chickpeas provide protein and fiber, which help keep you full. Tahini, made from sesame seeds, adds healthy fats and calcium. Garlic can boost your immune system. Lemon juice gives a dose of vitamin C. Overall, hummus is a healthy snack that supports a balanced diet. It’s a great way to enjoy veggies and whole grains while keeping your meals tasty. In this blog post, we explored how to make a delicious caramelized onion hummus. We covered each ingredient, from onions to tahini, and provided step-by-step instructions for caramelizing and blending. I shared tips for perfecting flavor and offered variations to try. Storing your hummus properly keeps it fresh longer. Finally, I answered common questions to enhance your hummus knowledge. Enjoy making this tasty dip! It's easy and brings joy to your meals.](https://dailydishlab.com/wp-content/uploads/2025/06/31a0e749-19bc-456b-b0d4-468054f59b86-300x300.webp)
Caramelized Onion Hummus
Ingredients
- 2 medium onions, thinly sliced
- 2 tablespoons olive oil
- 1 can (15 oz) chickpeas, drained and rinsed
- 2 tablespoons tahini
- 2 tablespoons lemon juice
- 1 clove garlic, minced
- 0.5 teaspoon cumin
- to taste salt and pepper
- as needed water
- for garnish fresh herbs (parsley or thyme)
Instructions
- Caramelize the Onions: In a large skillet, heat the olive oil over medium heat. Add the sliced onions and stir to coat. Cook for about 20-25 minutes, stirring occasionally, until the onions are golden brown and caramelized. Remove from heat and let them cool slightly.
- Blend the Ingredients: In a food processor, combine the chickpeas, tahini, lemon juice, minced garlic, cumin, and half of the caramelized onions (reserve the rest for garnish). Blend until smooth.
- Adjust Consistency: If the mixture is too thick, add water one tablespoon at a time until you reach your desired consistency.
- Season: Taste and season the hummus with salt and pepper. Blend again to incorporate.
- Serve: Transfer the hummus to a serving bowl. Top with the remaining caramelized onions and garnish with fresh herbs.


![To make delicious zucchini corn fritters, gather these simple ingredients: - 2 medium zucchinis, grated - 1 cup sweet corn (fresh, canned, or frozen) - 1/2 cup all-purpose flour - 1/4 cup cornmeal - 2 large eggs - 1/4 cup green onions, finely chopped - 1 teaspoon garlic powder - 1 teaspoon onion powder - 1/2 teaspoon paprika - Salt and pepper to taste - Olive oil for frying - Optional: fresh cilantro or parsley for garnish These ingredients work together to create a tasty and crispy fritter. The zucchini and corn give it a sweet taste, while the spices add flavor. The flour and cornmeal help bind the mixture, ensuring your fritters hold their shape. Using fresh ingredients makes a big difference. I always prefer freshly grated zucchini and sweet corn when available. This helps the fritters taste better. Don't forget to check out the Full Recipe for detailed instructions on how to make these fritters come to life! Grating and Moisture Removal Start by grating the zucchinis with a box grater. Use medium-sized zucchinis for the best texture. After grating, place the zucchini in a clean kitchen towel. Squeeze the towel tightly to remove excess moisture. This is key for crispy fritters. If you skip this step, your fritters may turn out soggy. Combining Ingredients In a large mixing bowl, combine your drained zucchini with sweet corn. You can use fresh, canned, or frozen corn. Add all-purpose flour, cornmeal, and eggs to the bowl. Toss in chopped green onions, garlic powder, onion powder, paprika, salt, and pepper. Mix everything until it is well combined. Your batter should be thick and sticky. Heating the Skillet Heat a non-stick skillet over medium heat. Add enough olive oil to coat the bottom of the pan lightly. This helps the fritters fry evenly and get golden brown. Frying Process Once the oil is hot, scoop about 1/4 cup of the fritter mixture onto the skillet. Flatten each scoop slightly with a spatula. Cook for about 3-4 minutes on each side. Watch for a golden color to know they are done. If they brown too fast, lower the heat a bit. Draining Excess Oil Once the fritters are cooked, transfer them to a plate lined with paper towels. This step helps absorb any excess oil. It makes them less greasy and more enjoyable. Garnishing Options Serve the fritters warm. You can garnish them with fresh cilantro or parsley for a nice pop of color. They pair perfectly with sour cream or a zesty avocado sauce. These simple additions elevate the dish even more. For the full recipe, refer to the [Full Recipe]. Importance of Moisture Removal To get crispy fritters, you must remove excess moisture from the zucchini. Grating the zucchini is just the first step. After grating, use a clean kitchen towel to squeeze out as much water as you can. This simple step makes all the difference. Wet fritters become soggy and won’t crisp up well. Adjusting Cooking Temperature Cooking temperature is key. If the pan is too hot, the fritters burn outside but stay raw inside. If it's too low, they soak up oil and become greasy. I recommend medium heat. This allows the fritters to cook evenly and turn golden brown. Pay attention while frying. Adjust the heat as needed to keep them from burning. Adding Herbs or Spices You can easily boost the flavor of your fritters. Try adding fresh herbs like cilantro or parsley. These add a fresh taste and color. You can also use spices like cumin or chili powder for a kick. Experiment with flavors to find what you enjoy most. Serving Suggestions Serve your fritters warm for the best taste. They go great with a dollop of sour cream or yogurt. For a twist, try a zesty avocado sauce. This adds creaminess and a bright flavor. You can also serve them alongside a fresh salad for a light meal. Recommended Frying Pan A non-stick skillet works best for frying these fritters. It helps prevent sticking and makes flipping easier. If you don’t have non-stick, use a well-seasoned cast iron pan. Both options help achieve that perfect golden crust. Tools for Grating and Mixing For grating zucchini, a box grater is perfect. It gives you nice, even shreds. You will also need a large mixing bowl to combine all the ingredients. A sturdy spatula helps mix everything well, ensuring all the flavors blend. For the best results, keep your tools handy and clean to make cooking smooth. {{image_2}} To make your zucchini corn fritters gluten-free, you can substitute the all-purpose flour. Use a gluten-free flour blend instead. This will keep the fritters light and crispy. You can also use almond flour or chickpea flour for added flavor and texture. Cornmeal is a great choice too, as it adds crunch. If you want to make these fritters vegan, you can replace the eggs with flaxseed meal. Mix one tablespoon of flaxseed meal with three tablespoons of water. Let it sit for about five minutes until it thickens. You can also use unsweetened applesauce as a binder; about 1/4 cup should work well. Adding cheese can elevate your fritters. A sharp cheddar or feta cheese adds great taste. Mix in about 1/2 cup of grated cheese to the batter. You can also incorporate different vegetables like grated carrots or bell peppers for extra flavor and color. Each adds a unique twist to the base recipe. For the full recipe, check out the detailed steps above. After you enjoy your zucchini corn fritters, store any leftovers for later. Here’s how to do it right: - Refrigeration Tips: Place the fritters in an airtight container. They can last up to three days in the fridge. If you want to keep them crispy, place a paper towel in the container. This helps absorb moisture. - Best Practices for Freezing: If you want to freeze them, layer the fritters with parchment paper in a freezer-safe bag. They freeze well for up to three months. When you’re ready to eat, thaw overnight in the fridge before reheating. To enjoy your fritters again, follow these simple steps: - Methods for Best Results: The best way to reheat fritters is on the stove. Heat a non-stick skillet over medium heat. Add a little olive oil and cook for about two minutes on each side. This keeps them nice and crispy. - Avoiding Sogginess: To keep them from getting soggy, avoid using the microwave. The microwave steams them and removes their crunch. Always opt for stovetop reheating for the best texture. Now you can enjoy your delicious zucchini corn fritters any time! To make zucchini corn fritters, start with simple steps. First, grate two medium zucchinis and squeeze out moisture. This step helps the fritters stay crispy. Next, combine the zucchini with one cup of sweet corn, half a cup of flour, and a quarter cup of cornmeal. Add two large eggs, a quarter cup of chopped green onions, garlic powder, onion powder, paprika, salt, and pepper. Mix until well-blended. Heat olive oil in a skillet over medium heat. Scoop about a quarter cup of the mixture for each fritter. Cook for 3-4 minutes on each side. This quick recipe will give you crispy and tasty fritters. You can find the full recipe at the beginning of this article. Yes, you can bake zucchini corn fritters. Preheat your oven to 400°F (200°C). Line a baking sheet with parchment paper. Shape the fritters and place them on the sheet. Brush the tops lightly with olive oil for a golden finish. Bake for about 20-25 minutes or until they are crisp and golden brown. Baking is a healthier option and still gives great results. Zucchini corn fritters pair well with many side dishes. Consider serving them with a dollop of sour cream or Greek yogurt. A zesty avocado sauce adds a nice touch too. You can also serve them with a fresh salad for a balanced meal. Try adding a side of salsa for a fun flavor kick. These options enhance the experience of enjoying your fritters. To keep your fritters from falling apart, moisture removal is key. Squeeze out as much liquid from the grated zucchini as possible. Use enough flour and cornmeal to bind the ingredients. Eggs act as a binder, so don’t skip them. Mixing well will also help combine everything evenly. If the mixture feels too wet, add a bit more flour until it holds together. In this post, I covered how to make delicious Zucchini Corn Fritters. We went over the ingredients, from zucchini to sweet corn, and shared tips for crispy results. You learned how to prepare, cook, and store your fritters. I encourage you to try different variations and flavors. Experiment with herbs or make it gluten-free. No matter how you create them, these fritters will be a tasty addition to your meals. Enjoy your cooking!](https://dailydishlab.com/wp-content/uploads/2025/07/ca44245d-9b60-45de-8deb-be1df19ec037-768x768.webp)

