Cheesy Jalapeño Corn Dip Irresistible Party Treat

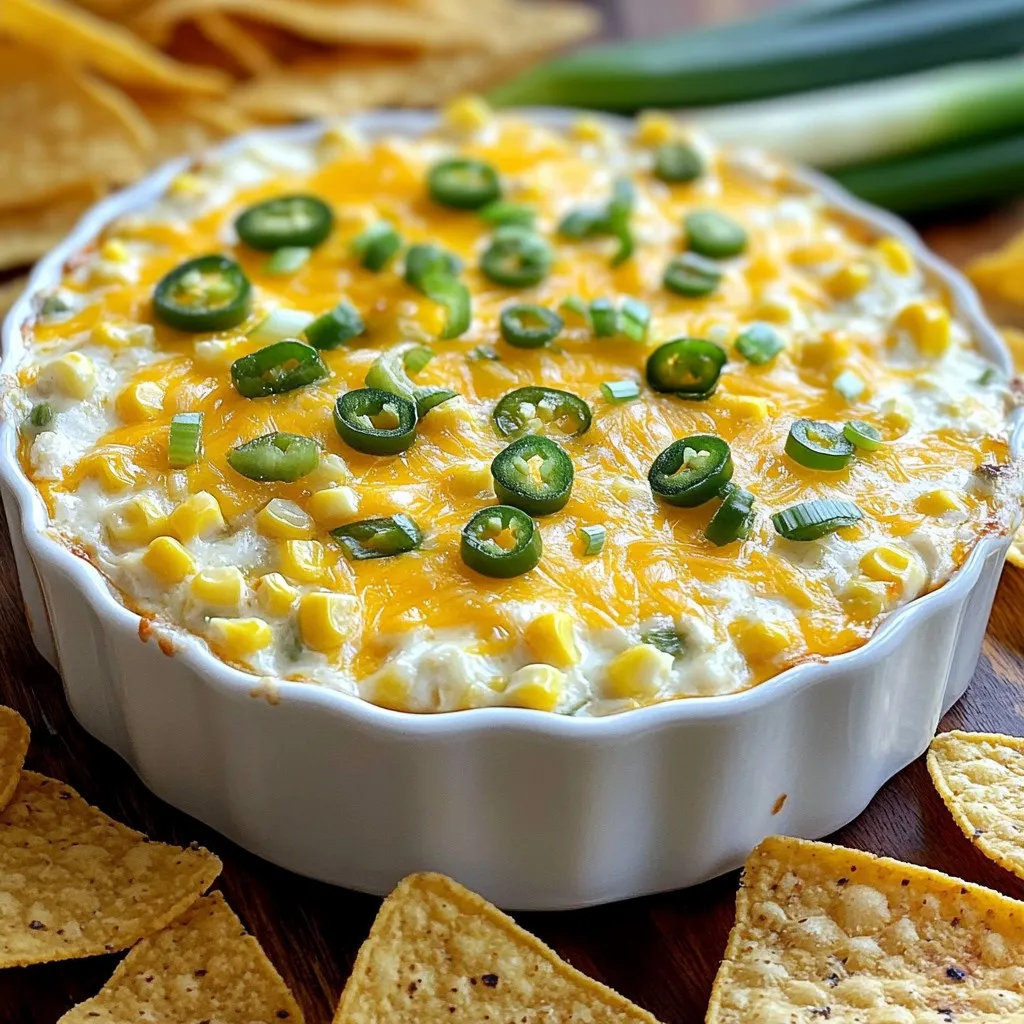
Looking to spice up your next gathering? My Cheesy Jalapeño Corn Dip is the perfect party treat! It’s creamy, cheesy, and has just the right kick of heat. Best of all, it’s easy to make and even easier to share. In this post, I’ll walk you through the ingredients, step-by-step instructions, and tips to ensure your dip impresses everyone. Let’s dive into making this crowd-pleaser!
Why I Love This Recipe
- Easy to Make: This dip comes together quickly, making it perfect for last-minute gatherings or parties.
- Flavor Explosion: The combination of creamy cheese, sweet corn, and spicy jalapeños creates a delightful flavor profile that pleases everyone.
- Versatile Serving Options: Whether you prefer tortilla chips or fresh veggies, this dip pairs well with a variety of dippers.
- Crowd-Pleaser: It’s always a hit at parties, ensuring there are no leftovers!
Ingredients
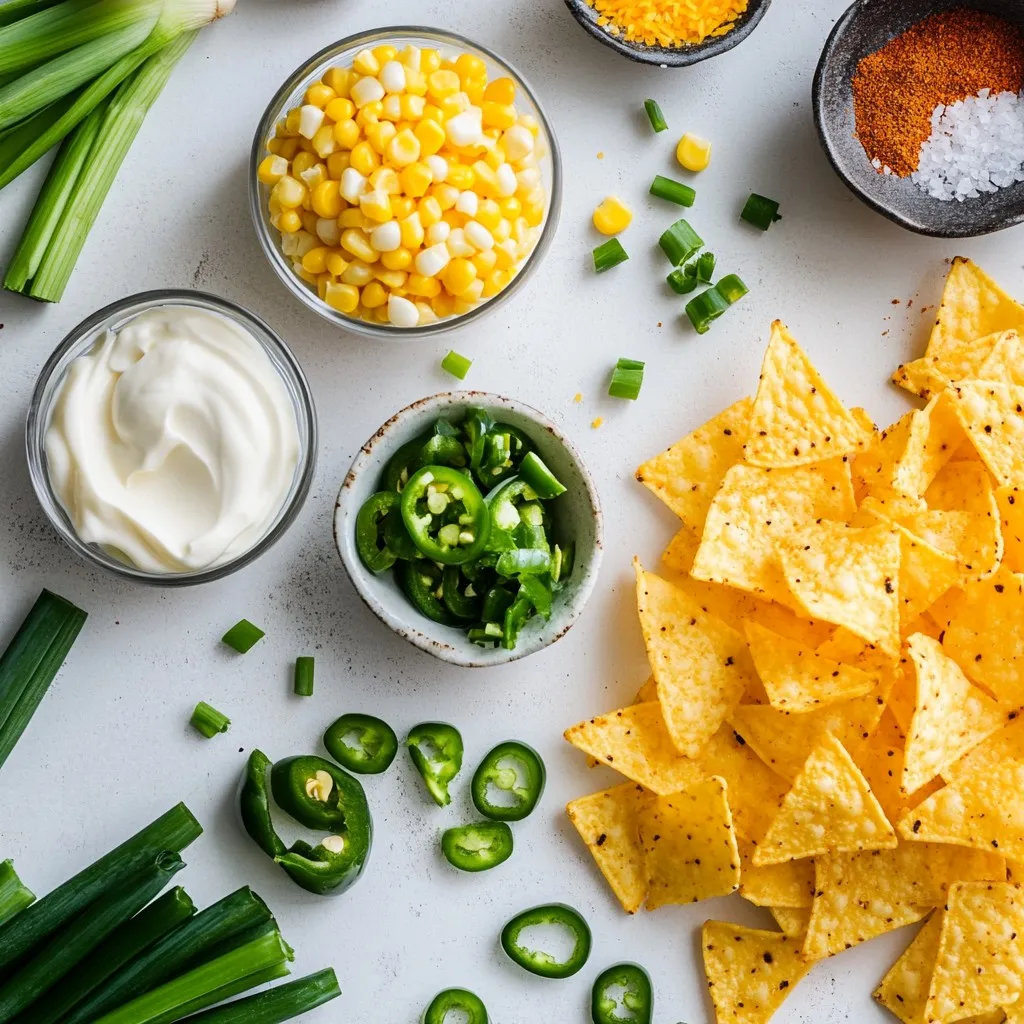
List of Ingredients with Measurements
- 2 cups canned corn, drained
- 1 cup cream cheese, softened
- 1 cup sour cream
- 1 cup shredded cheddar cheese
- 1/2 cup diced jalapeños (fresh or pickled, adjust to taste)
- 1/4 cup green onions, chopped
- 1 teaspoon garlic powder
- 1 teaspoon smoked paprika
- Salt and pepper to taste
- Tortilla chips or veggie sticks for serving
Optional Ingredient Substitutions
You can switch out the cheese. Use pepper jack for a spicy kick. For a lighter dip, use Greek yogurt instead of sour cream. Fresh corn works great too if you prefer it over canned corn. If you do not like jalapeños, try bell peppers for a milder flavor.
Recommended Serving Accompaniments
Tortilla chips are a classic choice for this dip. They add a nice crunch. You can also use veggie sticks like carrots and cucumbers for a fresh twist. Sliced baguette or crackers work well too. Pair it with a cold drink, and you have a perfect snack!

Step-by-Step Instructions
Preparation and Preheating the Oven
First, preheat your oven to 350°F (175°C). This step is key to getting that perfect melt. While the oven warms, gather your ingredients. You will need two cups of canned corn, one cup of softened cream cheese, and one cup of sour cream. Don’t forget the cheddar cheese, jalapeños, green onions, garlic powder, smoked paprika, and seasonings.
Mixing Ingredients Thoroughly
In a large mixing bowl, combine the softened cream cheese and sour cream. Add half of the cheddar cheese. Use a sturdy spatula to mix until smooth. Next, stir in the drained corn. Then, add the diced jalapeños and chopped green onions. Sprinkle in the garlic powder, smoked paprika, salt, and pepper. Mix well until all the ingredients blend together nicely.
Baking the Perfect Cheesy Jalapeño Corn Dip
Now, transfer the mixture to a baking dish. Spread it out evenly and smooth the top. Sprinkle the remaining cheddar cheese on top for that gooey finish. Place your dish in the preheated oven. Bake for 20 to 25 minutes. You want the dip bubbly and the cheese golden. Once done, take it out and let it cool slightly. Serve it warm with tortilla chips or veggie sticks for dipping. Enjoy this tasty treat!
Tips & Tricks
How to Customize Heat Levels
You can adjust the heat in your dip based on your taste. Use fresh jalapeños for a bold kick. For less heat, pickled jalapeños work well. Remove the seeds and ribs for a milder flavor. You can also add more or fewer jalapeños in your mix. If you want a fun twist, try adding diced serrano peppers.
Best Cheese Options for Flavor
Cheddar cheese brings a rich flavor to your dip. You can also experiment with other cheeses. Monterey Jack melts well and adds creaminess. Pepper jack cheese gives you an extra kick. Mixing cheeses can create a unique taste. Try a blend for a gourmet touch. Always use fresh cheese for the best results.
Common Mistakes to Avoid
One common mistake is not draining the corn well. Excess liquid can make your dip watery. Another mistake is overbaking. Keep an eye on it to avoid burning the cheese. Also, don’t forget to let it cool slightly before serving. This allows the dip to set and makes it easier to scoop. Lastly, make sure to season well. Taste as you go to balance the flavors.
Pro Tips
- Tip Title: Adjust the Spice: If you prefer a milder dip, use fewer jalapeños or remove the seeds. For extra heat, add more jalapeños or a dash of hot sauce.
- Tip Title: Make it Ahead: Prepare the dip ahead of time and store it in the refrigerator. Bake it just before serving for a warm, cheesy treat.
- Tip Title: Cheese Variation: Experiment with different cheeses like pepper jack for a spicier flavor or gouda for a smoky twist.
- Tip Title: Garnish for Presentation: Add a sprinkle of fresh cilantro or additional green onions on top before serving for a pop of color and freshness.

Variations
Adding Protein to the Dip
You can make this dip heartier by adding protein. Cooked chicken or shrimp works great. Just shred the chicken or chop the shrimp into small pieces. Mix them into the dip before baking. This twist adds flavor and makes it more filling.
Vegetarian and Vegan Alternatives
For a vegetarian option, simply skip the meat. You can also use dairy-free products for a vegan dip. Swap cream cheese with cashew cream and sour cream with a plant-based version. Use nutritional yeast in place of cheese for a cheesy flavor. This keeps the taste amazing while being vegan-friendly.
Serving Suggestions for Different Occasions
This dip fits many events. For game day, serve it with tortilla chips for a crunchy snack. At parties, add veggie sticks like carrots and celery for a fresh bite. If it’s a family dinner, set it on the table as a fun side. You can even place it in a bread bowl for a unique touch.
Storage Info
How to Store Leftovers Properly
To keep your cheesy jalapeño corn dip fresh, store it in an airtight container. Let it cool down to room temperature first. Then, cover it tightly and place it in the fridge. It will stay fresh for about 3 to 5 days. If you plan to eat it later, you might want to separate the dip into smaller portions. This way, it’s easy to grab what you need.
Reheating Tips for Best Texture
When you’re ready to enjoy your leftovers, reheating is key. Preheat your oven to 350°F (175°C). Place the dip in an oven-safe dish and cover it with foil. This helps keep moisture in. Heat it for about 15 to 20 minutes. You want the dip to be hot and bubbly. If you prefer the microwave, use a microwave-safe bowl. Heat it in short bursts of 30 seconds, stirring in between. This method helps avoid drying it out.
Freezing the Dip for Future Use
If you want to save some dip for later, freezing is a great option. Place the dip in a freezer-safe container. Leave some space at the top since it will expand. Label the container with the date. You can freeze it for up to 2 months. When you’re ready to eat it, thaw it in the fridge overnight. Then, reheat it as mentioned above for the best flavor and texture. Enjoy your cheesy jalapeño corn dip anytime!
FAQs
What Can I Serve with Cheesy Jalapeño Corn Dip?
You can serve Cheesy Jalapeño Corn Dip with a variety of snacks. Tortilla chips are a classic choice. They add a nice crunch and pair well with the creamy dip. You can also use veggie sticks like carrots or celery for a fresh option. Pita chips or crackers work well too. Feel free to get creative!
Can I Make This Dip Ahead of Time?
Yes, you can make this dip ahead of time! Prepare the dip and store it in the fridge. Cover it well to keep it fresh. You can bake it later when you are ready to serve. Just remember to add a few extra minutes to the baking time.
How Long Will Leftovers Last in the Refrigerator?
Leftovers of Cheesy Jalapeño Corn Dip will last about 3 to 5 days in the fridge. Store it in an airtight container for the best results. If it looks or smells off, it’s best to toss it. Always trust your senses!
This blog post covered all you need for the perfect cheesy jalapeño corn dip. We discussed ingredients, step-by-step instructions, and tips for great flavor. Customizing heat levels and using the right cheese will make your dip shine. Storing leftovers and reheating them properly ensures deliciousness later.
Enjoy making this dip for any gathering. With these tips, you can impress your friends and family. Dive into the fun of creating your tasty cheesy di

Cheesy Jalapeño Corn Dip
Ingredients
- 2 cups canned corn, drained
- 1 cup cream cheese, softened
- 1 cup sour cream
- 1 cup shredded cheddar cheese
- 0.5 cup diced jalapeños
- 0.25 cup green onions, chopped
- 1 teaspoon garlic powder
- 1 teaspoon smoked paprika
- to taste salt and pepper
- for serving tortilla chips or veggie sticks
Instructions
- Preheat your oven to 350°F (175°C).
- In a mixing bowl, combine softened cream cheese, sour cream, and half of the cheddar cheese until smooth.
- Stir in the drained corn, diced jalapeños, green onions, garlic powder, smoked paprika, salt, and pepper. Mix well to incorporate all ingredients evenly.
- Transfer the mixture to a baking dish. Smooth the top and sprinkle the remaining cheddar cheese on top.
- Bake in the preheated oven for 20-25 minutes or until the dip is bubbly and the cheese is melted and golden.
- Remove from the oven and let it cool slightly before serving.
- Serve warm with tortilla chips or veggie sticks for dipping.


![- 2 medium zucchinis, cut into fries - 1 cup breadcrumbs (preferably whole wheat or panko for extra crunch) - 1/2 cup grated Parmesan cheese - 1 teaspoon garlic powder - 1 teaspoon paprika - 1/2 teaspoon salt - 1/2 teaspoon black pepper - 2 large eggs, beaten - Cooking spray or olive oil for drizzling When choosing zucchinis, look for medium-sized ones that feel firm. Avoid any that are soft or have blemishes. Fresh zucchinis taste better and give the best results. For breadcrumbs, I suggest using either whole wheat or panko. Whole wheat adds a nutty flavor, while panko gives extra crunch. Both options work well, but I lean toward panko for that delightful crisp. Using fresh ingredients is key. Fresh herbs, spices, and cheese enhance the taste of your baked zucchini fries. They make your snack not just tasty but also healthy. Always choose high-quality ingredients for the best results. For the full recipe, check the detailed instructions above. Enjoy your cooking! Start by preheating your oven to 425°F (220°C). This high heat helps achieve that crispy texture we love. While the oven heats, line a baking sheet with parchment paper. This step makes cleanup easy and prevents sticking. Make sure the parchment paper is flat against the pan. Any wrinkles can cause uneven cooking. Next, let's coat those zucchini fries. First, beat your eggs in a shallow bowl. This will help the breadcrumbs stick. Now, prepare the breadcrumb mixture. In another bowl, mix the breadcrumbs, grated Parmesan, garlic powder, paprika, salt, and pepper. The mix should be evenly combined. For coating, take each zucchini fry and dip it into the eggs. Let the extra drip off for a cleaner look. Then, roll it in the breadcrumb mix. Press gently to ensure the crumbs stick well. This step is key for a crispy bite. Now, it's time to bake. Place the coated zucchini fries on the baking sheet. Make sure they are in a single layer and not touching. This spacing helps them crisp up. Lightly spray or drizzle with olive oil for an extra crispy finish. Bake the fries for 20 to 25 minutes. Flip them halfway through to ensure even cooking. You know they are done when they turn golden brown and crisp. Let them cool for a few minutes before serving. Enjoy your crispy and flavorful baked zucchini fries! For the full recipe, check out the [Full Recipe]. To get your zucchini fries extra crispy, focus on the coating. I recommend using panko breadcrumbs. They add more crunch than regular breadcrumbs. Mix them with grated Parmesan, garlic powder, paprika, salt, and pepper for a tasty coating. Even spacing on the baking sheet is key. Place the zucchini fries in a single layer. Make sure they don’t touch each other. This allows hot air to circulate around each fry, making them crispier. You can customize the spice levels to fit your taste. If you like heat, add cayenne pepper or chili powder. For a milder flavor, stick to garlic and herbs. Fresh herbs can enhance the flavor. Try adding chopped parsley or basil to the breadcrumb mix. This adds a fresh taste that pairs well with zucchini. If you want to try air frying, it’s a great option. Air fryers cook food quickly and make it crispy. Set the temperature to 400°F (200°C) and cook for about 15 minutes, shaking the basket halfway through. Grilling zucchini fries is another fun method. Brush them with olive oil and grill them over medium heat. This gives them a smoky flavor while still keeping them crispy. For the full recipe, check out the detailed steps provided earlier. {{image_2}} You can switch up the cheese for your baked zucchini fries. For a vegan option, use nutritional yeast. It adds a cheesy flavor without dairy. You can also use vegan cheese shreds. They melt well and give a nice texture. If you prefer traditional cheese, try mozzarella or cheddar. Both add a creamy taste. Parmesan is great for a salty kick. Mixing different cheeses can create even more flavor. Want a gluten-free option? Use almond flour or crushed rice cereal instead of breadcrumbs. These options still give that crunchy texture. For more crunch, add nuts or seeds to your coating mix. Chopped almonds or sunflower seeds work well. They boost nutrition and flavor. You can even try crushed cornflakes for a unique twist. Experiment with spices to give your fries a new taste. Try adding cayenne pepper for heat or Italian herbs for a fresh flavor. You can mix garlic powder with onion powder for depth. Incorporating other vegetables can add variety, too. Try mixing in carrot or sweet potato sticks. They can add color and taste. Just keep the size similar so they cook evenly. To keep your zucchini fries fresh, use airtight containers. Glass containers work great. You can also use plastic ones that seal well. Store them in the fridge. They stay good for about 3 days. When reheating, use the oven for the best results. Preheat it to 350°F (175°C). Place the fries on a baking sheet. Heat for about 10 minutes. This keeps them crispy. The microwave works too, but it may make them soft. If you use the microwave, heat for 1-2 minutes on a plate. You can freeze your leftover fries for later. Lay them flat on a baking sheet and freeze until solid. Then, move them to a freezer bag. They stay good for about 2 months. When you're ready to eat them, thaw overnight in the fridge. Reheat in the oven for a crispy finish. Always avoid refreezing once they are thawed. To make baked zucchini fries crispy, you need to focus on a few key steps. First, choose the right breadcrumbs. Whole wheat or panko breadcrumbs add great crunch. Dip the fries in beaten eggs to help the coating stick. Make sure to press the breadcrumbs onto the zucchini well. Common mistakes include overcrowding the baking sheet. Ensure the fries are in a single layer. This allows hot air to circulate and crisp them up. Also, lightly spray the fries with cooking spray or drizzle with olive oil before baking. This step enhances the crispiness. Using frozen zucchini is not ideal for baked zucchini fries. Frozen zucchini contains more water, which affects texture. When you bake it, the fries may turn out soggy instead of crispy. Fresh zucchini gives you the best flavor and crunch. If you only have frozen zucchini, thaw it first. Pat it dry with paper towels to remove excess moisture. This may improve the final result, but fresh is always better for this recipe. Zucchini fries taste great with many dips. Here are some popular options: - Marinara sauce - Ranch dressing - Garlic aioli - Spicy ketchup - Yogurt dip You can also make your own dips to match your taste. Mixing Greek yogurt with herbs makes a refreshing dip, while a spicy aioli adds a kick. Try different combinations to find your favorite! In this post, I shared how to make delicious zucchini fries. We covered selecting the best ingredients, baking techniques, and tips for a perfect crunch. Fresh ingredients matter for great taste. Remember to space your fries evenly for crispiness. Experiment with flavors and cooking methods for variety. Finally, store your leftovers correctly to keep them tasty. Enjoy making these versatile fries, and don’t hesitate to try new combinations!](https://dailydishlab.com/wp-content/uploads/2025/06/7c2e4ba5-05a6-4328-aa36-1f6df44662bb-768x768.webp)


