
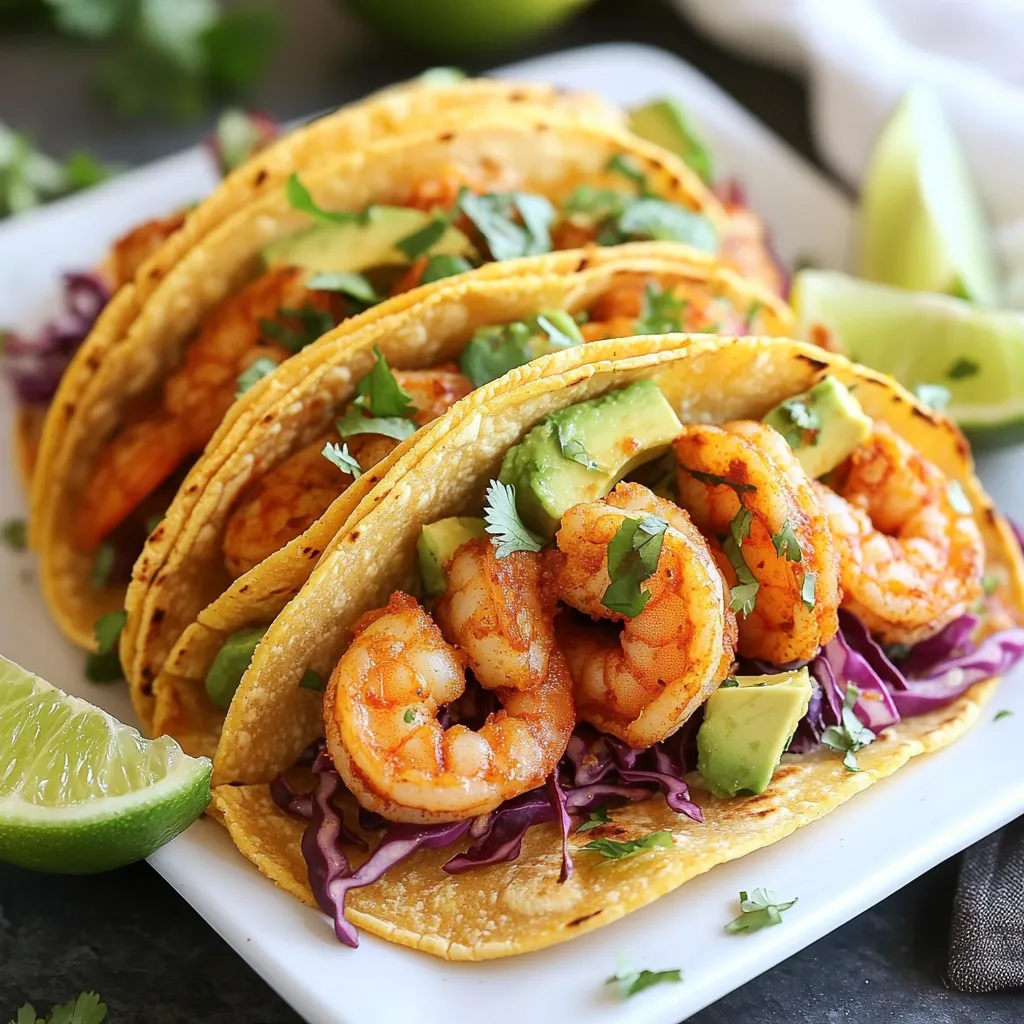
Looking for a quick and tasty dinner? Look no further! Chili Lime Shrimp Tacos are the answer. They are easy to make, packed with flavor, and sure to impress anyone at your table. In this post, I’ll share simple steps, tips, and ingredient swaps to create your perfect taco night. Let’s dive in and cook up something amazing!
Why I Love This Recipe
- Bold Flavors: The combination of chili powder, lime, and spices creates a zesty and vibrant flavor profile that is irresistible.
- Quick and Easy: This recipe comes together in just 40 minutes, making it perfect for a weeknight dinner or a quick lunch.
- Fresh Ingredients: Using fresh shrimp and toppings like avocado and cabbage ensures a nutritious and satisfying meal.
- Customizable Toppings: You can easily swap out or add toppings to suit your taste, whether it’s adding cheese, salsa, or hot sauce.
Ingredients
List of Ingredients
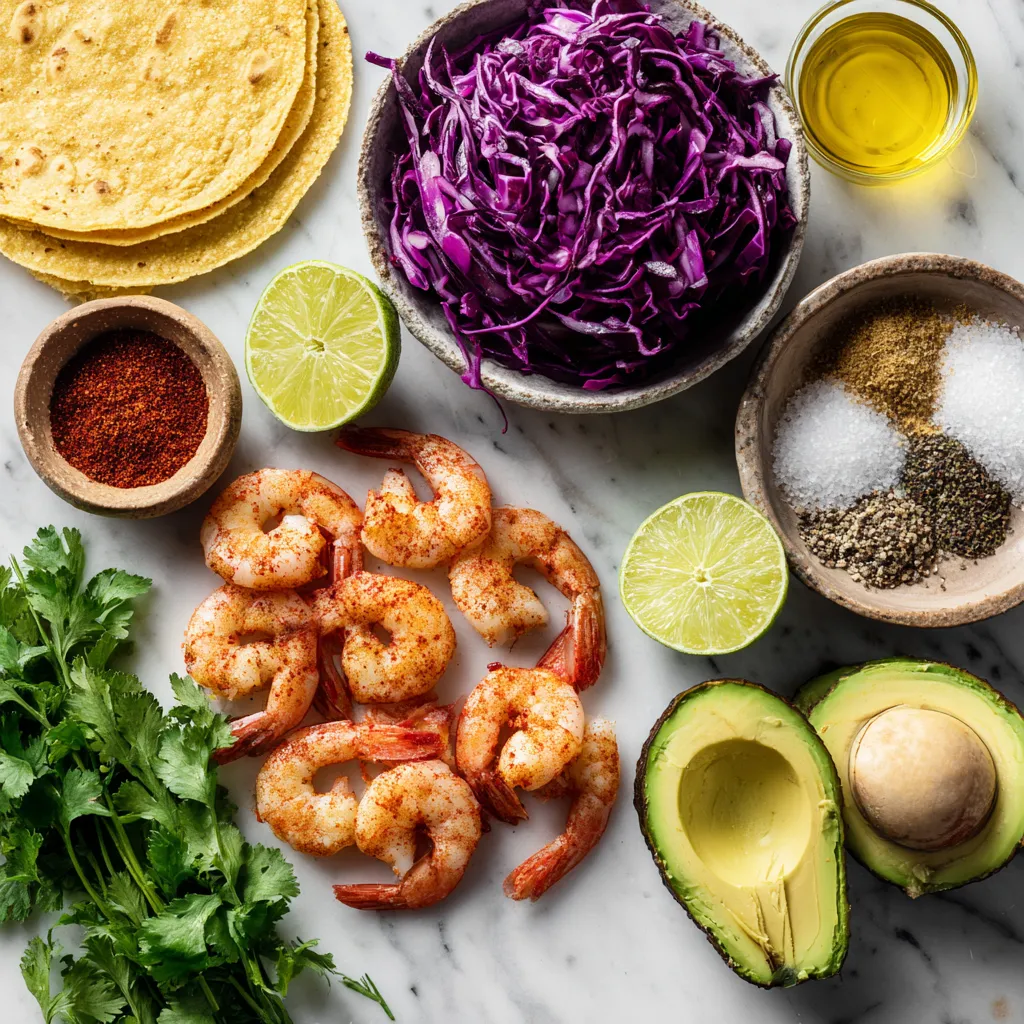
– 1 lb. large shrimp, peeled and deveined
– 2 tablespoons olive oil
– 1 tablespoon chili powder
– 1 teaspoon cumin
– 1 teaspoon garlic powder
– 1 teaspoon paprika
– Juice of 2 limes
– Salt and pepper to taste
– 8 small corn or flour tortillas
– 1 cup red cabbage, shredded
– 1 avocado, sliced
– Fresh cilantro, for garnish
– Lime wedges, for serving
Measurement Tips
When measuring ingredients, use a dry measuring cup for solids. For liquids, a liquid measuring cup works best. Level off the dry ingredients with a straight edge to ensure accuracy. Use a tablespoon for smaller portions, like olive oil or lime juice.
Ingredient Substitutions
If you can’t find large shrimp, try medium shrimp instead. You can use vegetable oil if you need a substitute for olive oil. For spices, smoked paprika can add a different flavor.
If you want a different flavor profile, you can use taco seasoning instead of separate spices. For a creamy element, swap the avocado for a dollop of sour cream or Greek yogurt. If you prefer a crunchier texture, try using shredded carrots instead of red cabbage.
Step-by-Step Instructions
Marinating the Shrimp
To start, grab a bowl. Add the shrimp, olive oil, chili powder, cumin, garlic powder, paprika, lime juice, salt, and pepper. Mix all the ingredients well. This helps the shrimp soak up the flavors. Let the shrimp marinate for 15-20 minutes. This step makes a big difference. The longer it sits, the better the taste!
Cooking the Shrimp
Next, heat a skillet over medium-high heat. When the skillet is hot, add the marinated shrimp. Cook them for 2-3 minutes on each side. You’ll know they are ready when they turn pink and opaque. This is your cue that they are perfectly cooked!
Assembling the Tacos
Now it’s time to assemble your tacos! Warm the tortillas in a separate skillet or microwave until they are soft. Place a few shrimp on each tortilla. Next, add shredded cabbage and avocado slices on top. Don’t forget to garnish with fresh cilantro. Serve with lime wedges for an extra kick of zest. Enjoy your delicious chili lime shrimp tacos!
Tips & Tricks
Best Practices for Marinating
Marinating shrimp is key for great flavor. Use a bowl to mix shrimp with olive oil, lime juice, and spices. Make sure each shrimp gets coated well. Let the shrimp marinate for 15 to 20 minutes. This lets the flavors soak in. If you have more time, go longer for even better taste.
Cooking Techniques for Perfect Shrimp
When cooking shrimp, high heat is best. Heat your skillet on medium-high until hot. Add shrimp to the skillet and cook for 2 to 3 minutes on each side. Look for pink and opaque shrimp. This means they are done. Overcooking can make shrimp tough, so watch closely.
Topping Suggestions
Toppings add crunch and flavor. Shredded red cabbage gives a nice bite. Sliced avocado adds creaminess. Fresh cilantro brightens the dish. Lime wedges are a must for extra zest. You can also try adding diced tomatoes or radishes for more color and taste.
Pro Tips
- Marinate Longer for Depth: For even more flavor, consider marinating the shrimp for up to an hour. This allows the spices to penetrate the shrimp thoroughly.
- Customize Your Heat Level: Adjust the amount of chili powder based on your spice preference. You can also add diced jalapeños for an extra kick!
- Fresh Ingredients Matter: Use freshly squeezed lime juice instead of bottled to enhance the brightness of the flavors in your tacos.
- Serving Suggestions: Serve the tacos with a side of salsa or a creamy sauce, such as chipotle mayo, to elevate the dish further.
Variations
Alternative Protein Options
You can swap shrimp for chicken or tofu. Chicken breast works well, too. Just cut it into small pieces and marinate like the shrimp. Tofu can soak up the great flavors from the marinade. Choose firm tofu, press it, and then cut it into cubes. Both options give you tasty tacos with a different twist.
Taco Style Alternatives
Try using lettuce wraps instead of tortillas for a fresh, low-carb option. You can also use hard taco shells for added crunch. For a unique twist, consider making taco bowls. Serve the shrimp over rice or quinoa, then add your toppings. Each style gives a different feel to your meal.
Flavor Enhancements
Add more zing with fresh lime juice and zest. Mango or pineapple salsa brings a sweet touch. You can also mix in some jalapeños for heat. For a creamier texture, drizzle some sour cream or yogurt over the tacos. These little changes can make your tacos pop with flavor!
Storage Info
How to Store Leftover Tacos
To store leftover tacos, first, separate the shrimp from the tortillas. Place the shrimp in an airtight container. You can keep them in the fridge for up to three days. For the tortillas, wrap them in foil or plastic wrap. This helps keep them soft and fresh. If you have any toppings left, store them in separate containers. This keeps everything fresh and tasty.
Freezing Instructions
If you want to freeze your tacos, it’s best to freeze the shrimp only. After cooking, let the shrimp cool completely. Then, place them in a freezer-safe bag. Try to remove as much air as you can. This helps prevent freezer burn. You can keep the shrimp in the freezer for up to three months. Just remember to label the bag with the date.
Reheating Tips
To reheat the shrimp, you can use a skillet or microwave. If using a skillet, heat it over medium heat. Add the shrimp and cook for a few minutes until warm. If using a microwave, place the shrimp in a bowl with a splash of water. Cover it and heat in short bursts. This keeps the shrimp moist. Warm the tortillas in the microwave for about 15-20 seconds, or until soft. Enjoy your tasty tacos again!
FAQs
What is the best type of shrimp for tacos?
The best type of shrimp for tacos is large shrimp. They are firm and hold up well. I prefer using peeled and deveined shrimp for ease. Look for fresh or frozen shrimp. If using frozen, thaw them before cooking. Fresh shrimp brings a sweet and juicy flavor. It makes the tacos even better.
Can these tacos be made spicy?
Yes, you can easily make these tacos spicy! Use extra chili powder for more heat. You could also add diced jalapeños for a fresh kick. Another option is to drizzle some hot sauce on top. Adjust the spice level to suit your taste. Enjoy the heat with each bite.
How do I make these tacos gluten-free?
To make these tacos gluten-free, use corn tortillas instead of flour. Corn tortillas are safe and tasty. Check the labels to ensure there are no hidden gluten ingredients. You can also use lettuce wraps for a low-carb option. They add a fresh crunch to your meal. Enjoy these tacos with confidence!
We covered the key ingredients and methods to make shrimp tacos. You learned about measuring tips, ingredient swaps, and how to marinate and cook shrimp. We also shared best practices and topping ideas for extra flavor. Remember, these tacos can be customized with different proteins and flavors. Storing leftovers and reheating is simple and effective. With these tips, you can make tasty tacos easily. Enjoy your cooking journey and dine on delicious shrimp tacos soo


