Chocolate Chip Energy Bites Easy and Tasty Snack
![- 1 cup rolled oats - 1/2 cup almond butter (or any nut butter of choice) - 1/4 cup honey or maple syrup These key ingredients form the base of your energy bites. Rolled oats provide fiber and texture. Almond butter gives healthy fats and protein. Honey or maple syrup adds natural sweetness. - 1/4 cup mini chocolate chips - 1/4 cup ground flaxseed - 1/4 cup shredded coconut (unsweetened) Mini chocolate chips add a delightful burst of flavor. Ground flaxseed boosts nutrition with omega-3s. Shredded coconut gives a chewy texture and tropical taste. - 1 tsp vanilla extract - 1/2 tsp cinnamon - A pinch of salt Vanilla extract enhances the overall flavor. Cinnamon adds warmth and depth. A pinch of salt balances the sweetness and brings all the flavors together. For the complete guide on making these bites, check out the [Full Recipe]. To start, gather your ingredients. For the dry mix, you need rolled oats, ground flaxseed, shredded coconut, and cinnamon. In a medium bowl, combine these dry ingredients. Mix them well so they blend nicely. Next, let's make the wet mix. In a separate bowl, add almond butter, honey (or maple syrup), vanilla extract, and a pinch of salt. Stir until it becomes smooth and creamy. This step is key for a good flavor. Now, pour the wet mix into the dry mix. Stir until you combine everything. You want all the dry ingredients to be coated with the wet mix. Finally, gently fold in mini chocolate chips. This adds a sweet delight to every bite. Now it’s time to shape your energy bites. Take about one tablespoon of the mixture. Roll it between your hands to form a ball. Make sure they are about the same size for even bites. Repeat this process until you use all the mixture. Place each ball on a parchment-lined baking sheet. This helps them not stick and makes clean-up easy. Keep them spaced out a bit to avoid sticking together. After shaping, place the baking sheet in the fridge. Let the energy bites chill for at least 30 minutes. This helps them firm up and hold their shape. Once chilled, store the bites in an airtight container. Keep them in the fridge for up to one week. Enjoy these tasty snacks whenever you need a quick energy boost, and don’t forget to check out the Full Recipe for more details! To boost the flavor of your energy bites, add spices like nutmeg or ginger. They give a warm kick. You can also try different extracts, like almond or coconut, for a unique taste. If you like it sweeter, adjust the honey or maple syrup. Just add a little at a time to find your perfect sweetness. For a better texture, focus on the consistency of your mixture. If it's too dry, add a touch more nut butter or honey. For crunchier bites, mix in chopped nuts or seeds. If you prefer them chewier, reduce the baking time slightly. This makes them softer and more enjoyable. Use a medium bowl for mixing your ingredients. A spatula works well for combining everything. To store your energy bites, an airtight container is best. It keeps them fresh longer. You can also use parchment paper to prevent sticking when chilling them in the fridge. For the full recipe, check out the [Full Recipe]. {{image_2}} You can easily make these energy bites fit your diet. For gluten-free options, use certified gluten-free oats. This way, you avoid any gluten while still enjoying a tasty snack. If you want vegan alternatives, swap honey for maple syrup. Both options keep the bites sweet and delicious. You can add fun flavors to your energy bites. Try mixing in dried fruits like raisins or cranberries. These add chewiness and natural sweetness. Nuts such as almonds or walnuts also work well. They add crunch and healthy fats. You can also experiment with different types of chocolate. Use dark, milk, or even white chocolate chips. Each type brings its own unique taste. Get creative with nut butters! While almond butter is great, you can try peanut butter or cashew butter. Each brings a different flavor and texture. You can also incorporate protein powder for a boost. This makes the bites even more filling and nutritious. Adjust the wet ingredients slightly if you add protein powder to keep the right texture. Feel free to explore these variations. They can help you make the perfect chocolate chip energy bites just for you. Check out the Full Recipe for the basic mix, then let your imagination lead the way! To keep your chocolate chip energy bites fresh, store them in an airtight container. Glass or plastic containers work well. Place them in the fridge to maintain their texture and taste. They can last up to one week when stored properly. You can freeze energy bites for longer storage. To freeze, place them in a single layer on a baking sheet. Once frozen, transfer them to a freezer-safe bag. This method prevents them from sticking together. When you want to eat them, take out a few bites and let them thaw in the fridge. This process takes about an hour. In the fridge, these bites last about one week. After that, they may lose flavor and texture. Watch for signs of spoilage, like an off smell or changes in color. If you see or smell anything unusual, it's best to toss them. Enjoy your homemade snacks while they’re fresh! Chocolate chip energy bites can last up to one week in the fridge. Store them in an airtight container for the best freshness. If you freeze them, they can last for about three months. Just thaw them in the fridge when you're ready to enjoy. Yes, you can easily substitute ingredients in this recipe. If you don't like almond butter, feel free to use peanut butter or sunflower seed butter. You can swap honey for maple syrup if you prefer a vegan option. The mini chocolate chips can also be replaced with dried fruits or nuts. Absolutely! These energy bites are a great snack for kids. They are tasty, healthy, and easy to make. You can even involve your kids in the preparation. They will love rolling the bites into balls. Just ensure there are no allergies to the ingredients used. Yes, making these energy bites in advance is a smart idea. You can prepare a batch at the start of the week. This way, you have quick snacks ready for busy days. Just store them in the fridge or freeze some for later use. Chocolate chip energy bites offer many nutritional benefits. They contain rolled oats, which provide fiber for digestion. Almond butter adds healthy fats and protein. Flaxseed is rich in omega-3 fatty acids, promoting heart health. Plus, the little bit of chocolate makes them a treat! These chocolate chip energy bites are simple to make and full of good stuff. You can enjoy them as snacks or quick breakfast bites. Let’s dive into what makes these little treats so special. - Rolled oats: They give a hearty base and provide fiber. - Almond butter (or nut butter alternatives): This adds creaminess and healthy fats. - Honey or maple syrup: Sweeteners that bring flavor and stickiness. - Mini chocolate chips: They add sweetness and a fun texture. - Ground flaxseed: This boosts nutrition and adds omega-3s. - Unsweetened shredded coconut: It gives a nice chewiness. - Vanilla extract: This enhances the flavor and warms the bites. - Cinnamon: It adds spice and depth. - Salt: Just a pinch balances all the flavors. In this recipe, we blend all these ingredients to create something delicious. You can find the [Full Recipe] at the start of this article. It only takes about 10 minutes to mix, and then just chill for 30 minutes. You’ll have about 12 bites ready to enjoy! Feel free to switch it up with your favorite nut butter or add different mix-ins. The options are endless! These chocolate chip energy bites are simple to make and full of flavor. We covered key ingredients like oats and nut butter. I shared tips on making them crunchier or chewier, and variations for different diets. Remember to store them in an airtight container for the best taste. You can enjoy these bites anytime you need a quick snack. Making them yourself lets you control the ingredients and flavors. Healthy snacks can be easy and delicious, so try these energy bites today!](https://dailydishlab.com/wp-content/uploads/2025/07/ee6487bc-f560-4f96-a21c-d76d52703957.webp)
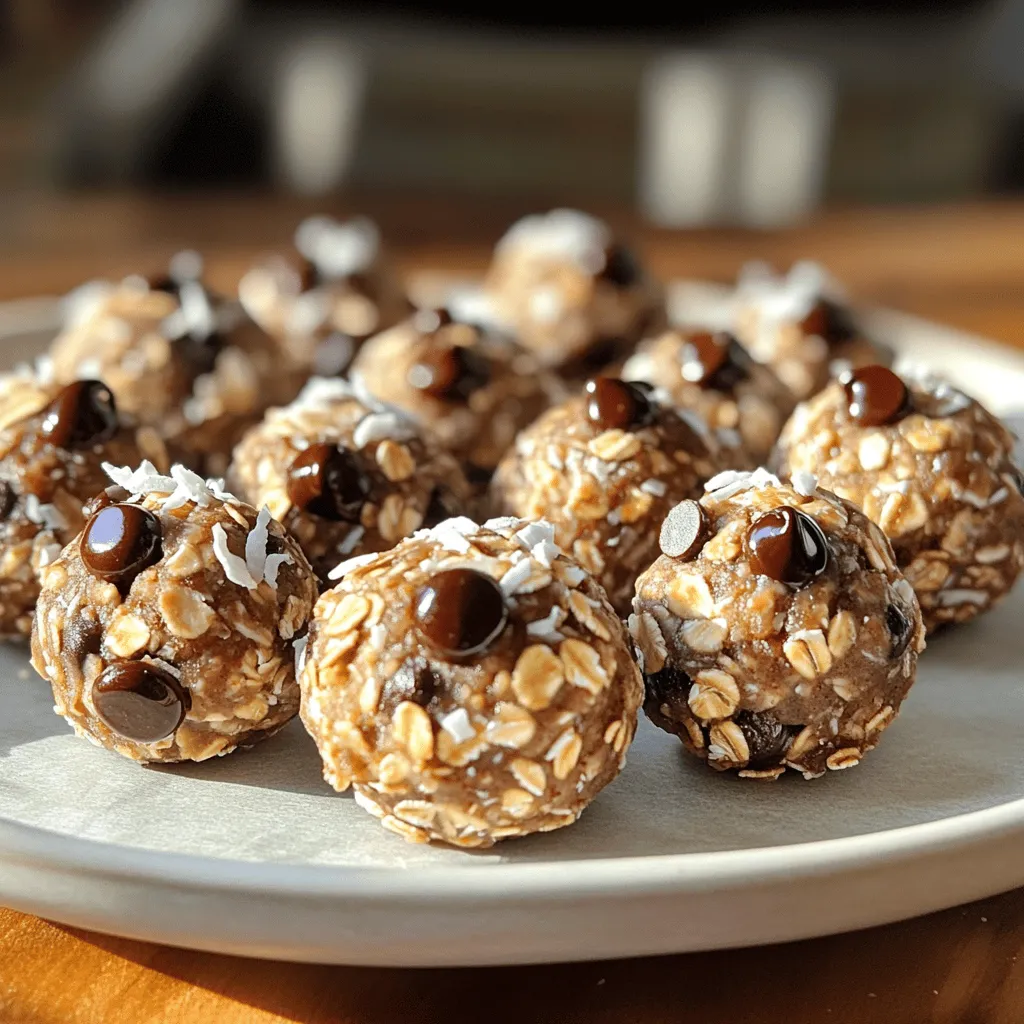
Looking for a quick, tasty snack that packs a punch? You’re in the right place! These Chocolate Chip Energy Bites are easy to make and perfect for any time of day. With just a few simple ingredients like rolled oats, nut butter, and mini chocolate chips, you can whip up a healthy treat in no time. Let’s dive into this delicious recipe that will satisfy your sweet tooth and fuel your day!
Why I Love This Recipe
- Quick and Easy: This recipe takes just 10 minutes of prep time, making it perfect for a quick snack option.
- Nutritious Ingredients: Packed with rolled oats, almond butter, and flaxseed, these bites are a great source of energy and nutrients.
- Customizable: You can easily swap out ingredients like nut butter or sweeteners to suit your taste preferences.
- Portion Control: Each bite is a perfect snack-sized portion, making it easy to enjoy without overindulging.
Ingredients
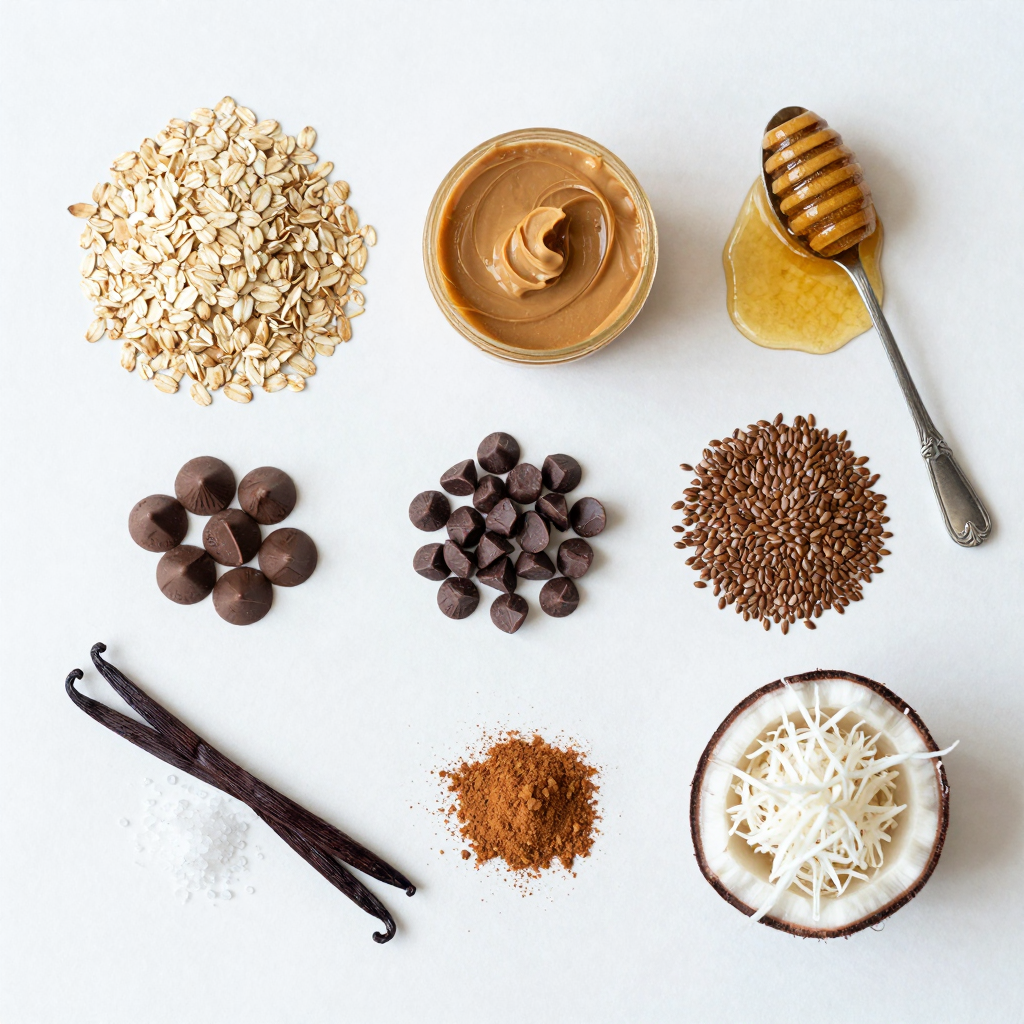
List of Key Ingredients
- 1 cup rolled oats
- 1/2 cup almond butter (or any nut butter of choice)
- 1/4 cup honey or maple syrup
These key ingredients form the base of your energy bites. Rolled oats provide fiber and texture. Almond butter gives healthy fats and protein. Honey or maple syrup adds natural sweetness.
Additional Ingredients
- 1/4 cup mini chocolate chips
- 1/4 cup ground flaxseed
- 1/4 cup shredded coconut (unsweetened)
Mini chocolate chips add a delightful burst of flavor. Ground flaxseed boosts nutrition with omega-3s. Shredded coconut gives a chewy texture and tropical taste.
Seasoning and Extras
- 1 tsp vanilla extract
- 1/2 tsp cinnamon
- A pinch of salt
Vanilla extract enhances the overall flavor. Cinnamon adds warmth and depth. A pinch of salt balances the sweetness and brings all the flavors together.

Step-by-Step Instructions
Preparation Method
To start, gather your ingredients. For the dry mix, you need rolled oats, ground flaxseed, shredded coconut, and cinnamon. In a medium bowl, combine these dry ingredients. Mix them well so they blend nicely.
Next, let’s make the wet mix. In a separate bowl, add almond butter, honey (or maple syrup), vanilla extract, and a pinch of salt. Stir until it becomes smooth and creamy. This step is key for a good flavor.
Now, pour the wet mix into the dry mix. Stir until you combine everything. You want all the dry ingredients to be coated with the wet mix. Finally, gently fold in mini chocolate chips. This adds a sweet delight to every bite.
Forming the Energy Bites
Now it’s time to shape your energy bites. Take about one tablespoon of the mixture. Roll it between your hands to form a ball. Make sure they are about the same size for even bites. Repeat this process until you use all the mixture.
Place each ball on a parchment-lined baking sheet. This helps them not stick and makes clean-up easy. Keep them spaced out a bit to avoid sticking together.
Chilling and Storing
After shaping, place the baking sheet in the fridge. Let the energy bites chill for at least 30 minutes. This helps them firm up and hold their shape.
Once chilled, store the bites in an airtight container. Keep them in the fridge for up to one week.
Pro Tips
- Use Chilled Ingredients: Keeping your nut butter and honey cold can help with mixing and rolling the energy bites.
- Experiment with Mix-Ins: Feel free to add nuts, seeds, or dried fruits to customize your energy bites to your taste.
- Store in the Freezer: For longer shelf life, store energy bites in the freezer. Thaw them as needed for a quick snack.
- Adjust Sweetness: Depending on your preference, you can increase or decrease the amount of honey or maple syrup used.
Tips & Tricks
Enhancing Flavor
To boost the flavor of your energy bites, add spices like nutmeg or ginger. They give a warm kick. You can also try different extracts, like almond or coconut, for a unique taste. If you like it sweeter, adjust the honey or maple syrup. Just add a little at a time to find your perfect sweetness.
Texture Improvement
For a better texture, focus on the consistency of your mixture. If it’s too dry, add a touch more nut butter or honey. For crunchier bites, mix in chopped nuts or seeds. If you prefer them chewier, reduce the baking time slightly. This makes them softer and more enjoyable.
Helpful Tools
Use a medium bowl for mixing your ingredients. A spatula works well for combining everything. To store your energy bites, an airtight container is best. It keeps them fresh longer. You can also use parchment paper to prevent sticking when chilling them in the fridge.

Variations
Dietary Modifications
You can easily make these energy bites fit your diet. For gluten-free options, use certified gluten-free oats. This way, you avoid any gluten while still enjoying a tasty snack. If you want vegan alternatives, swap honey for maple syrup. Both options keep the bites sweet and delicious.
Flavor Enhancements
You can add fun flavors to your energy bites. Try mixing in dried fruits like raisins or cranberries. These add chewiness and natural sweetness. Nuts such as almonds or walnuts also work well. They add crunch and healthy fats. You can also experiment with different types of chocolate. Use dark, milk, or even white chocolate chips. Each type brings its own unique taste.
Creative Combinations
Get creative with nut butters! While almond butter is great, you can try peanut butter or cashew butter. Each brings a different flavor and texture. You can also incorporate protein powder for a boost. This makes the bites even more filling and nutritious. Adjust the wet ingredients slightly if you add protein powder to keep the right texture.
Feel free to explore these variations. They can help you make the perfect chocolate chip energy bites just for you.
Storage Info
Best Storage Practices
To keep your chocolate chip energy bites fresh, store them in an airtight container. Glass or plastic containers work well. Place them in the fridge to maintain their texture and taste. They can last up to one week when stored properly.
Freezing Tips
You can freeze energy bites for longer storage. To freeze, place them in a single layer on a baking sheet. Once frozen, transfer them to a freezer-safe bag. This method prevents them from sticking together. When you want to eat them, take out a few bites and let them thaw in the fridge. This process takes about an hour.
Shelf Life
In the fridge, these bites last about one week. After that, they may lose flavor and texture. Watch for signs of spoilage, like an off smell or changes in color. If you see or smell anything unusual, it’s best to toss them. Enjoy your homemade snacks while they’re fresh!
FAQs
How long do Chocolate Chip Energy Bites last?
Chocolate chip energy bites can last up to one week in the fridge. Store them in an airtight container for the best freshness. If you freeze them, they can last for about three months. Just thaw them in the fridge when you’re ready to enjoy.
Can I substitute ingredients in this recipe?
Yes, you can easily substitute ingredients in this recipe. If you don’t like almond butter, feel free to use peanut butter or sunflower seed butter. You can swap honey for maple syrup if you prefer a vegan option. The mini chocolate chips can also be replaced with dried fruits or nuts.
Are these energy bites suitable for kids?
Absolutely! These energy bites are a great snack for kids. They are tasty, healthy, and easy to make. You can even involve your kids in the preparation. They will love rolling the bites into balls. Just ensure there are no allergies to the ingredients used.
Can I make them in advance for meal prep?
Yes, making these energy bites in advance is a smart idea. You can prepare a batch at the start of the week. This way, you have quick snacks ready for busy days. Just store them in the fridge or freeze some for later use.
What are the nutritional benefits of these bites?
Chocolate chip energy bites offer many nutritional benefits. They contain rolled oats, which provide fiber for digestion. Almond butter adds healthy fats and protein. Flaxseed is rich in omega-3 fatty acids, promoting heart health. Plus, the little bit of chocolate makes them a treat!
Chocolate Chip Energy Bites Easy and Tasty Snack
These chocolate chip energy bites are simple to make and full of good stuff. You can enjoy them as snacks or quick breakfast bites. Let’s dive into what makes these little treats so special.
What Are the Key Ingredients?
- Rolled oats: They give a hearty base and provide fiber.
- Almond butter (or nut butter alternatives): This adds creaminess and healthy fats.
- Honey or maple syrup: Sweeteners that bring flavor and stickiness.
What Else Do You Need?
- Mini chocolate chips: They add sweetness and a fun texture.
- Ground flaxseed: This boosts nutrition and adds omega-3s.
- Unsweetened shredded coconut: It gives a nice chewiness.
How About Seasoning and Extras?
- Vanilla extract: This enhances the flavor and warms the bites.
- Cinnamon: It adds spice and depth.
- Salt: Just a pinch balances all the flavors.
In this recipe, we blend all these ingredients to create something delicious.It only takes about 10 minutes to mix, and then just chill for 30 minutes. You’ll have about 12 bites ready to enjoy!
Feel free to switch it up with your favorite nut butter or add different mix-ins. The options are endless!
These chocolate chip energy bites are simple to make and full of flavor. We covered key ingredients like oats and nut butter. I shared tips on making them crunchier or chewier, and variations for different diets. Remember to store them in an airtight container for the best taste. You can enjoy these bites anytime you need a quick snack. Making them yourself lets you control the ingredients and flavors. Healthy snacks can be easy and delicious, so try these energy bites today!
![- 1 cup rolled oats - 1/2 cup almond butter (or any nut butter of choice) - 1/4 cup honey or maple syrup These key ingredients form the base of your energy bites. Rolled oats provide fiber and texture. Almond butter gives healthy fats and protein. Honey or maple syrup adds natural sweetness. - 1/4 cup mini chocolate chips - 1/4 cup ground flaxseed - 1/4 cup shredded coconut (unsweetened) Mini chocolate chips add a delightful burst of flavor. Ground flaxseed boosts nutrition with omega-3s. Shredded coconut gives a chewy texture and tropical taste. - 1 tsp vanilla extract - 1/2 tsp cinnamon - A pinch of salt Vanilla extract enhances the overall flavor. Cinnamon adds warmth and depth. A pinch of salt balances the sweetness and brings all the flavors together. For the complete guide on making these bites, check out the [Full Recipe]. To start, gather your ingredients. For the dry mix, you need rolled oats, ground flaxseed, shredded coconut, and cinnamon. In a medium bowl, combine these dry ingredients. Mix them well so they blend nicely. Next, let's make the wet mix. In a separate bowl, add almond butter, honey (or maple syrup), vanilla extract, and a pinch of salt. Stir until it becomes smooth and creamy. This step is key for a good flavor. Now, pour the wet mix into the dry mix. Stir until you combine everything. You want all the dry ingredients to be coated with the wet mix. Finally, gently fold in mini chocolate chips. This adds a sweet delight to every bite. Now it’s time to shape your energy bites. Take about one tablespoon of the mixture. Roll it between your hands to form a ball. Make sure they are about the same size for even bites. Repeat this process until you use all the mixture. Place each ball on a parchment-lined baking sheet. This helps them not stick and makes clean-up easy. Keep them spaced out a bit to avoid sticking together. After shaping, place the baking sheet in the fridge. Let the energy bites chill for at least 30 minutes. This helps them firm up and hold their shape. Once chilled, store the bites in an airtight container. Keep them in the fridge for up to one week. Enjoy these tasty snacks whenever you need a quick energy boost, and don’t forget to check out the Full Recipe for more details! To boost the flavor of your energy bites, add spices like nutmeg or ginger. They give a warm kick. You can also try different extracts, like almond or coconut, for a unique taste. If you like it sweeter, adjust the honey or maple syrup. Just add a little at a time to find your perfect sweetness. For a better texture, focus on the consistency of your mixture. If it's too dry, add a touch more nut butter or honey. For crunchier bites, mix in chopped nuts or seeds. If you prefer them chewier, reduce the baking time slightly. This makes them softer and more enjoyable. Use a medium bowl for mixing your ingredients. A spatula works well for combining everything. To store your energy bites, an airtight container is best. It keeps them fresh longer. You can also use parchment paper to prevent sticking when chilling them in the fridge. For the full recipe, check out the [Full Recipe]. {{image_2}} You can easily make these energy bites fit your diet. For gluten-free options, use certified gluten-free oats. This way, you avoid any gluten while still enjoying a tasty snack. If you want vegan alternatives, swap honey for maple syrup. Both options keep the bites sweet and delicious. You can add fun flavors to your energy bites. Try mixing in dried fruits like raisins or cranberries. These add chewiness and natural sweetness. Nuts such as almonds or walnuts also work well. They add crunch and healthy fats. You can also experiment with different types of chocolate. Use dark, milk, or even white chocolate chips. Each type brings its own unique taste. Get creative with nut butters! While almond butter is great, you can try peanut butter or cashew butter. Each brings a different flavor and texture. You can also incorporate protein powder for a boost. This makes the bites even more filling and nutritious. Adjust the wet ingredients slightly if you add protein powder to keep the right texture. Feel free to explore these variations. They can help you make the perfect chocolate chip energy bites just for you. Check out the Full Recipe for the basic mix, then let your imagination lead the way! To keep your chocolate chip energy bites fresh, store them in an airtight container. Glass or plastic containers work well. Place them in the fridge to maintain their texture and taste. They can last up to one week when stored properly. You can freeze energy bites for longer storage. To freeze, place them in a single layer on a baking sheet. Once frozen, transfer them to a freezer-safe bag. This method prevents them from sticking together. When you want to eat them, take out a few bites and let them thaw in the fridge. This process takes about an hour. In the fridge, these bites last about one week. After that, they may lose flavor and texture. Watch for signs of spoilage, like an off smell or changes in color. If you see or smell anything unusual, it's best to toss them. Enjoy your homemade snacks while they’re fresh! Chocolate chip energy bites can last up to one week in the fridge. Store them in an airtight container for the best freshness. If you freeze them, they can last for about three months. Just thaw them in the fridge when you're ready to enjoy. Yes, you can easily substitute ingredients in this recipe. If you don't like almond butter, feel free to use peanut butter or sunflower seed butter. You can swap honey for maple syrup if you prefer a vegan option. The mini chocolate chips can also be replaced with dried fruits or nuts. Absolutely! These energy bites are a great snack for kids. They are tasty, healthy, and easy to make. You can even involve your kids in the preparation. They will love rolling the bites into balls. Just ensure there are no allergies to the ingredients used. Yes, making these energy bites in advance is a smart idea. You can prepare a batch at the start of the week. This way, you have quick snacks ready for busy days. Just store them in the fridge or freeze some for later use. Chocolate chip energy bites offer many nutritional benefits. They contain rolled oats, which provide fiber for digestion. Almond butter adds healthy fats and protein. Flaxseed is rich in omega-3 fatty acids, promoting heart health. Plus, the little bit of chocolate makes them a treat! These chocolate chip energy bites are simple to make and full of good stuff. You can enjoy them as snacks or quick breakfast bites. Let’s dive into what makes these little treats so special. - Rolled oats: They give a hearty base and provide fiber. - Almond butter (or nut butter alternatives): This adds creaminess and healthy fats. - Honey or maple syrup: Sweeteners that bring flavor and stickiness. - Mini chocolate chips: They add sweetness and a fun texture. - Ground flaxseed: This boosts nutrition and adds omega-3s. - Unsweetened shredded coconut: It gives a nice chewiness. - Vanilla extract: This enhances the flavor and warms the bites. - Cinnamon: It adds spice and depth. - Salt: Just a pinch balances all the flavors. In this recipe, we blend all these ingredients to create something delicious. You can find the [Full Recipe] at the start of this article. It only takes about 10 minutes to mix, and then just chill for 30 minutes. You’ll have about 12 bites ready to enjoy! Feel free to switch it up with your favorite nut butter or add different mix-ins. The options are endless! These chocolate chip energy bites are simple to make and full of flavor. We covered key ingredients like oats and nut butter. I shared tips on making them crunchier or chewier, and variations for different diets. Remember to store them in an airtight container for the best taste. You can enjoy these bites anytime you need a quick snack. Making them yourself lets you control the ingredients and flavors. Healthy snacks can be easy and delicious, so try these energy bites today!](https://dailydishlab.com/wp-content/uploads/2025/07/ee6487bc-f560-4f96-a21c-d76d52703957-300x300.webp)
Chocolate Chip Energy Bites
Ingredients
1 cup rolled oats
1/2 cup almond butter (or any nut butter of choice)
1/4 cup honey or maple syrup
1/4 cup mini chocolate chips
1/4 cup ground flaxseed
1/4 cup shredded coconut (unsweetened)
1 tsp vanilla extract
1/2 tsp cinnamon
A pinch of salt
Instructions
In a medium bowl, combine the rolled oats, ground flaxseed, shredded coconut, and cinnamon. Mix well.
In a separate bowl, combine the almond butter, honey (or maple syrup), vanilla extract, and a pinch of salt. Stir until smooth and creamy.
Pour the wet ingredients into the dry ingredients and mix until fully combined.
Gently fold in the mini chocolate chips until evenly distributed throughout the mixture.
Using your hands, scoop out about a tablespoon of the mixture and roll it into a ball. Repeat with the remaining mixture, placing each energy bite on a parchment-lined baking sheet or plate.
Once all the energy bites are formed, refrigerate them for at least 30 minutes to firm up.
After chilling, store the bites in an airtight container in the fridge for up to one week. Enjoy a nutritious snack anytime!
Prep Time: 10 minutes | Total Time: 40 minutes | Servings: About 12 bites
![- 1 cup rolled oats - 1/2 cup almond butter (or any nut butter of choice) - 1/4 cup honey or maple syrup These key ingredients form the base of your energy bites. Rolled oats provide fiber and texture. Almond butter gives healthy fats and protein. Honey or maple syrup adds natural sweetness. - 1/4 cup mini chocolate chips - 1/4 cup ground flaxseed - 1/4 cup shredded coconut (unsweetened) Mini chocolate chips add a delightful burst of flavor. Ground flaxseed boosts nutrition with omega-3s. Shredded coconut gives a chewy texture and tropical taste. - 1 tsp vanilla extract - 1/2 tsp cinnamon - A pinch of salt Vanilla extract enhances the overall flavor. Cinnamon adds warmth and depth. A pinch of salt balances the sweetness and brings all the flavors together. For the complete guide on making these bites, check out the [Full Recipe]. To start, gather your ingredients. For the dry mix, you need rolled oats, ground flaxseed, shredded coconut, and cinnamon. In a medium bowl, combine these dry ingredients. Mix them well so they blend nicely. Next, let's make the wet mix. In a separate bowl, add almond butter, honey (or maple syrup), vanilla extract, and a pinch of salt. Stir until it becomes smooth and creamy. This step is key for a good flavor. Now, pour the wet mix into the dry mix. Stir until you combine everything. You want all the dry ingredients to be coated with the wet mix. Finally, gently fold in mini chocolate chips. This adds a sweet delight to every bite. Now it’s time to shape your energy bites. Take about one tablespoon of the mixture. Roll it between your hands to form a ball. Make sure they are about the same size for even bites. Repeat this process until you use all the mixture. Place each ball on a parchment-lined baking sheet. This helps them not stick and makes clean-up easy. Keep them spaced out a bit to avoid sticking together. After shaping, place the baking sheet in the fridge. Let the energy bites chill for at least 30 minutes. This helps them firm up and hold their shape. Once chilled, store the bites in an airtight container. Keep them in the fridge for up to one week. Enjoy these tasty snacks whenever you need a quick energy boost, and don’t forget to check out the Full Recipe for more details! To boost the flavor of your energy bites, add spices like nutmeg or ginger. They give a warm kick. You can also try different extracts, like almond or coconut, for a unique taste. If you like it sweeter, adjust the honey or maple syrup. Just add a little at a time to find your perfect sweetness. For a better texture, focus on the consistency of your mixture. If it's too dry, add a touch more nut butter or honey. For crunchier bites, mix in chopped nuts or seeds. If you prefer them chewier, reduce the baking time slightly. This makes them softer and more enjoyable. Use a medium bowl for mixing your ingredients. A spatula works well for combining everything. To store your energy bites, an airtight container is best. It keeps them fresh longer. You can also use parchment paper to prevent sticking when chilling them in the fridge. For the full recipe, check out the [Full Recipe]. {{image_2}} You can easily make these energy bites fit your diet. For gluten-free options, use certified gluten-free oats. This way, you avoid any gluten while still enjoying a tasty snack. If you want vegan alternatives, swap honey for maple syrup. Both options keep the bites sweet and delicious. You can add fun flavors to your energy bites. Try mixing in dried fruits like raisins or cranberries. These add chewiness and natural sweetness. Nuts such as almonds or walnuts also work well. They add crunch and healthy fats. You can also experiment with different types of chocolate. Use dark, milk, or even white chocolate chips. Each type brings its own unique taste. Get creative with nut butters! While almond butter is great, you can try peanut butter or cashew butter. Each brings a different flavor and texture. You can also incorporate protein powder for a boost. This makes the bites even more filling and nutritious. Adjust the wet ingredients slightly if you add protein powder to keep the right texture. Feel free to explore these variations. They can help you make the perfect chocolate chip energy bites just for you. Check out the Full Recipe for the basic mix, then let your imagination lead the way! To keep your chocolate chip energy bites fresh, store them in an airtight container. Glass or plastic containers work well. Place them in the fridge to maintain their texture and taste. They can last up to one week when stored properly. You can freeze energy bites for longer storage. To freeze, place them in a single layer on a baking sheet. Once frozen, transfer them to a freezer-safe bag. This method prevents them from sticking together. When you want to eat them, take out a few bites and let them thaw in the fridge. This process takes about an hour. In the fridge, these bites last about one week. After that, they may lose flavor and texture. Watch for signs of spoilage, like an off smell or changes in color. If you see or smell anything unusual, it's best to toss them. Enjoy your homemade snacks while they’re fresh! Chocolate chip energy bites can last up to one week in the fridge. Store them in an airtight container for the best freshness. If you freeze them, they can last for about three months. Just thaw them in the fridge when you're ready to enjoy. Yes, you can easily substitute ingredients in this recipe. If you don't like almond butter, feel free to use peanut butter or sunflower seed butter. You can swap honey for maple syrup if you prefer a vegan option. The mini chocolate chips can also be replaced with dried fruits or nuts. Absolutely! These energy bites are a great snack for kids. They are tasty, healthy, and easy to make. You can even involve your kids in the preparation. They will love rolling the bites into balls. Just ensure there are no allergies to the ingredients used. Yes, making these energy bites in advance is a smart idea. You can prepare a batch at the start of the week. This way, you have quick snacks ready for busy days. Just store them in the fridge or freeze some for later use. Chocolate chip energy bites offer many nutritional benefits. They contain rolled oats, which provide fiber for digestion. Almond butter adds healthy fats and protein. Flaxseed is rich in omega-3 fatty acids, promoting heart health. Plus, the little bit of chocolate makes them a treat! These chocolate chip energy bites are simple to make and full of good stuff. You can enjoy them as snacks or quick breakfast bites. Let’s dive into what makes these little treats so special. - Rolled oats: They give a hearty base and provide fiber. - Almond butter (or nut butter alternatives): This adds creaminess and healthy fats. - Honey or maple syrup: Sweeteners that bring flavor and stickiness. - Mini chocolate chips: They add sweetness and a fun texture. - Ground flaxseed: This boosts nutrition and adds omega-3s. - Unsweetened shredded coconut: It gives a nice chewiness. - Vanilla extract: This enhances the flavor and warms the bites. - Cinnamon: It adds spice and depth. - Salt: Just a pinch balances all the flavors. In this recipe, we blend all these ingredients to create something delicious. You can find the [Full Recipe] at the start of this article. It only takes about 10 minutes to mix, and then just chill for 30 minutes. You’ll have about 12 bites ready to enjoy! Feel free to switch it up with your favorite nut butter or add different mix-ins. The options are endless! These chocolate chip energy bites are simple to make and full of flavor. We covered key ingredients like oats and nut butter. I shared tips on making them crunchier or chewier, and variations for different diets. Remember to store them in an airtight container for the best taste. You can enjoy these bites anytime you need a quick snack. Making them yourself lets you control the ingredients and flavors. Healthy snacks can be easy and delicious, so try these energy bites today!](https://dailydishlab.com/wp-content/uploads/2025/07/ee6487bc-f560-4f96-a21c-d76d52703957-300x300.webp)
Chocolate Chip Energy Bites
Ingredients
- 1 cup rolled oats
- 0.5 cup almond butter (or any nut butter of choice)
- 0.25 cup honey or maple syrup
- 0.25 cup mini chocolate chips
- 0.25 cup ground flaxseed
- 0.25 cup shredded coconut (unsweetened)
- 1 tsp vanilla extract
- 0.5 tsp cinnamon
- a pinch salt
Instructions
- In a medium bowl, combine the rolled oats, ground flaxseed, shredded coconut, and cinnamon. Mix well.
- In a separate bowl, combine the almond butter, honey (or maple syrup), vanilla extract, and a pinch of salt. Stir until smooth and creamy.
- Pour the wet ingredients into the dry ingredients and mix until fully combined.
- Gently fold in the mini chocolate chips until evenly distributed throughout the mixture.
- Using your hands, scoop out about a tablespoon of the mixture and roll it into a ball. Repeat with the remaining mixture, placing each energy bite on a parchment-lined baking sheet or plate.
- Once all the energy bites are formed, refrigerate them for at least 30 minutes to firm up.
- After chilling, store the bites in an airtight container in the fridge for up to one week. Enjoy a nutritious snack anytime!

![To make these brownies, you need specific ingredients. Here’s what you’ll gather: - 1 cup unsalted butter (2 sticks) - 2 cups granulated sugar - 4 large eggs - 1 teaspoon vanilla extract - 1 cup all-purpose flour - 1 cup unsweetened cocoa powder - 1/2 teaspoon salt - 1 cup chopped pecans - 1 cup caramel sauce (store-bought or homemade) - 1/2 cup chocolate chips (semi-sweet or dark) - 1/4 teaspoon sea salt (for topping) Each ingredient plays a key role in creating the rich, fudgy texture and flavor you will love. While the essential ingredients are perfect, you can add more for extra flavor. Consider these options: - A dash of espresso powder can deepen the chocolate taste. - A splash of bourbon or rum brings warmth and complexity. - Use dark chocolate chips for a richer finish. - Add sea salt flakes on top for a contrast in taste. These optional ingredients can take your brownies to the next level. To make the process smooth, you'll need some tools. Here’s what I recommend: - A medium saucepan for melting butter. - A mixing bowl for combining wet ingredients. - A separate bowl for dry ingredients. - A whisk for mixing eggs and vanilla. - A spatula to fold in the nuts and chips. - A 9x13 inch baking pan lined with parchment paper. These tools help you create the perfect caramel pecan turtle brownies. For the full recipe, you can check the complete steps and tips. Enjoy your baking! To create your brownie batter, start with the basics. First, preheat your oven to 350°F (175°C). Next, grease a 9x13 inch baking pan and line the bottom with parchment paper. This step helps with easy removal later. In a medium saucepan, melt 1 cup of unsalted butter over low heat. Once it melts, add 2 cups of granulated sugar and stir until mixed well. Remove the saucepan from heat and let it cool for a few minutes. This cooling step is important to avoid cooking the eggs. Now, whisk in 4 large eggs, one at a time. Add 1 teaspoon of vanilla extract and mix until smooth. In another bowl, sift together 1 cup of all-purpose flour, 1 cup of unsweetened cocoa powder, and 1/2 teaspoon of salt. Gradually add the dry mix to the wet mix. Stir gently until just combined. Overmixing can lead to tough brownies. Fold in 1 cup of chopped pecans and 1/2 cup of chocolate chips, saving a few pecans for the topping. Now it’s time to layer your brownies. Pour half of the brownie batter into the prepared pan and spread it evenly. Drizzle half of the caramel sauce over this layer. Then spoon the rest of the batter on top and spread it gently. Drizzle the remaining caramel sauce over this layer. Sprinkle the reserved pecans on top and add a pinch of sea salt to enhance the flavor. Bake in your preheated oven for 30 to 35 minutes. To check for doneness, insert a toothpick in the center. It should come out with a few moist crumbs, not wet batter. After baking, remove the pan from the oven. Let the brownies cool in the pan for at least 30 minutes. Use the parchment paper to lift them out. Slice them into squares for serving. For a special touch, serve the brownies warm. Drizzle with extra caramel sauce and sprinkle with sea salt. This adds a lovely finishing touch that enhances the flavor. Enjoy your delicious creation! For the complete recipe, check out the [Full Recipe]. One big mistake is overmixing the batter. When you mix too much, it makes brownies tough. Mix until just combined for a softer bite. Another common error is not measuring ingredients well. Use dry measuring cups for flour and cocoa powder. Level the tops with a knife for accuracy. For that perfect chewy texture, use melted butter. This gives your brownies a rich flavor. Don't forget to let the batter rest for a few minutes before baking. It helps the ingredients meld together. Also, bake just until a toothpick shows a few moist crumbs. Too long makes them dry. Serve brownies warm to enjoy their gooey center. Drizzle extra caramel sauce on top for added sweetness. A sprinkle of sea salt can enhance the flavors. Pair with a scoop of vanilla ice cream for a delightful treat. Enjoy your Caramel Pecan Turtle Brownies with friends and family for a memorable dessert. Check out the Full Recipe for more tips! {{image_2}} If you want to change the taste, try other nuts. Almonds, walnuts, or hazelnuts can work well. Each nut gives a unique flavor. Almonds add a sweet crunch. Walnuts bring a rich, earthy taste. Hazelnuts give a hint of chocolate flavor. Just chop them as you would with pecans and mix them in. You can even toast the nuts lightly for extra flavor! Making your own caramel sauce is easy and fun. You need just sugar, butter, and cream. Start by melting sugar in a pan. Watch it closely so it doesn’t burn. Once it melts and turns golden, add butter and let it melt. Then, pour in heavy cream slowly and stir. Let it cool before using it in your brownies. This sauce adds a fresh taste that store-bought cannot match. Want to make these brownies gluten-free? Use gluten-free all-purpose flour instead of regular flour. Check that your caramel sauce is also gluten-free. Many brands are safe, but always read the label. This way, you can enjoy rich, gooey brownies without worry. The taste remains just as delightful, and your friends will never know the difference! Don't forget to check out the Full Recipe for all the details on making these sweet treats! To keep your caramel pecan turtle brownies fresh, store them in an airtight container. Place parchment paper between layers to avoid sticking. They can last up to a week at room temperature. For longer storage, put them in the fridge. This helps maintain their chewy texture and flavor. Freezing brownies is a great way to save some for later. First, allow them to cool completely. Then, cut them into squares. Wrap each piece tightly in plastic wrap. Put them in a freezer-safe bag or container. They can stay frozen for up to three months. When you’re ready to enjoy, just thaw them in the fridge overnight. To enjoy your brownies warm, reheat them in the microwave. Use a low power setting to avoid drying them out. Heat for about 10-15 seconds. You can also warm them in the oven. Set the oven to 350°F (175°C) and place the brownies in for about 5-10 minutes. This brings back that fresh-baked taste. For extra delight, drizzle some caramel sauce on top before serving. Turtle brownies get their name from the classic turtle candy. This candy has caramel, pecans, and chocolate. In our brownies, I mix these same flavors. The caramel adds sweetness, the pecans give a nice crunch, and the chocolate ties it all together. When you bite into these brownies, you taste the rich chocolate and gooey caramel. It's like a treat you can hold in your hand! Yes, you can. If you want to skip the eggs, you can use a few substitutes. Applesauce is a great choice. Use 1/4 cup of unsweetened applesauce for each egg. You can also use a flaxseed meal. Mix one tablespoon of flaxseed meal with three tablespoons of water. Let it sit for a few minutes until it gets thick. Both options work well and keep the brownies moist. These brownies stay fresh for about four to five days when stored properly. Keep them in an airtight container at room temperature. If you want them to last longer, you can freeze them. Just wrap them well in plastic wrap and place them in a freezer bag. They can last up to three months in the freezer. When you're ready to enjoy, just thaw them at room temperature or warm them in the microwave for a few seconds. Remember, for the full recipe, check our earlier section! In this post, we explored how to make delicious caramel pecan turtle brownies. We discussed essential and optional ingredients, the tools you need, and easy step-by-step instructions. I also shared useful tips to avoid common mistakes and achieve the perfect texture. Plus, we looked at variations, storage info, and common questions. Enjoying these brownies can be a fun baking adventure. I hope you try these tips and enjoy every bite!](https://dailydishlab.com/wp-content/uploads/2025/07/cd6252c4-9eb9-4ecc-b5d9-7ffc816e6e24-768x768.webp)


![- 1 ½ cups warm water (110°F to 115°F) - 2 tablespoons granulated sugar - 1 packet (2 ¼ teaspoons) active dry yeast - 4 cups all-purpose flour - 1 teaspoon kosher salt - ½ cup baking soda - 1 large egg (for egg wash) - ½ cup granulated sugar (for coating) - 2 tablespoons ground cinnamon - Coarse sea salt for sprinkling For our cinnamon sugar pretzel twists, we start with warm water. This helps activate the yeast. The sugar feeds the yeast, making it rise. You need active dry yeast to create that fluffy texture. All-purpose flour makes up the bulk of the dough. The kosher salt enhances the flavor. Next, we add baking soda. This gives our pretzels that classic chewy bite. The large egg is crucial for the egg wash. It gives the pretzels a shiny, golden finish. The granulated sugar and ground cinnamon mix together for that sweet topping. Finally, sprinkle coarse sea salt on top for a nice contrast. - Flour Alternatives: You can use whole wheat flour for a nuttier taste. Gluten-free flour works too, but it may change the texture. - Vegan Egg Wash: Use a mixture of almond milk and maple syrup instead of egg. It gives a nice color while keeping it vegan. - Healthier Sugar Options: Try coconut sugar or a sugar substitute for a lower-calorie option. Just remember, it may alter the taste slightly. With these ingredients, you can create a delightful treat that everyone will love! Check out the Full Recipe for more details on how to make these pretzel twists. To start, we need to activate the yeast. In a mixing bowl, combine 1 ½ cups of warm water (110°F to 115°F) and 2 tablespoons of granulated sugar. Sprinkle in 1 packet of active dry yeast. Let it sit for about 5-10 minutes until it looks frothy. This step is crucial. It wakes up the yeast and gets it ready to help our dough rise. Next, we prepare the dough. In a large bowl, mix 4 cups of all-purpose flour and 1 teaspoon of kosher salt. Gradually add the frothy yeast mixture. Stir until a dough forms. Then, knead the dough on a lightly floured surface for about 5-7 minutes. You want it to be smooth and elastic. If the dough is too sticky, add a little more flour. Once it feels right, place it in a greased bowl. Cover it and let it rise for about 1 hour, or until it doubles in size. Now for the fun part—shaping the pretzels! After the dough has risen, punch it down gently. Divide the dough into 8 equal pieces. Roll each piece into a long rope, about 24 inches long. To shape, twist the rope into a pretzel form. Pinch the ends together to secure the shape. Place the shaped pretzels on a prepared baking sheet. Boiling the pretzels is next. This step is key for a chewy texture. In a large pot, bring 10 cups of water and ½ cup of baking soda to a boil. Carefully add each pretzel to the boiling water. Boil each one for 30 seconds. Use a slotted spoon to remove them and place them back on the baking sheet. For baking, preheat your oven to 425°F (220°C). Brush each pretzel with a beaten egg for a shiny finish. In a small bowl, mix ½ cup of granulated sugar with 2 tablespoons of ground cinnamon. Sprinkle this mix generously over each pretzel. Then, add a pinch of coarse sea salt for extra flavor. Bake the pretzels for 12-15 minutes. Keep an eye on them. You want them to turn golden-brown. When they are done, let them cool slightly before serving. Enjoy your warm, delicious cinnamon sugar pretzel twists! For the complete steps, check out the Full Recipe. You can make your pretzels even better by adding a few extras. Try mixing in some vanilla for a sweet touch. A pinch of nutmeg can also add warmth and spice. For the best cinnamon-sugar coating, use fresh cinnamon. Mix the sugar and cinnamon well before sprinkling. Make sure to coat each pretzel evenly. This step really boosts the flavor and makes each bite special. Having the right tools helps make great pretzels. You’ll need a mixing bowl and a large pot for boiling. A sturdy rolling pin helps shape the dough into ropes. Use a baking sheet lined with parchment paper to prevent sticking. A pastry brush is handy for applying the egg wash. These tools will make your pretzel-making experience easier and more fun. Sometimes, things can go wrong. If your pretzels don’t rise, check your yeast. It needs warmth to activate. If the dough feels too sticky, add a bit more flour while kneading. For a dry dough, mix in a little water until it feels smooth. These tips will help you fix any dough problems and get those pretzels just right. For more detailed steps, check out the [Full Recipe]. {{image_2}} Creating different versions of cinnamon sugar pretzel twists can be fun and tasty. Here are some ideas to try. - Cheese-stuffed pretzel twists: For a cheesy treat, roll some cheese into your dough. Use mozzarella or cheddar for a gooey middle. Bake as usual, and enjoy the surprise inside. - Herb-infused pretzel dough: Mix herbs like rosemary or thyme into your dough. This adds a lovely flavor. It pairs well with soups or salads, making it a great snack. - Drizzling with chocolate or icing: After baking, drizzle melted chocolate over the pretzels. You can also use icing for a sweeter touch. This makes them extra special for dessert. - Incorporating nuts or dried fruits: Add chopped nuts like pecans or walnuts for crunch. Dried fruits like raisins or cranberries add sweetness. Mix them into the dough before shaping your pretzels. - Pumpkin spice variation for fall: Add pumpkin spice to your dough for a cozy fall flavor. This makes your pretzels perfect for autumn gatherings. - Peppermint twist for the holidays: Use peppermint extract in your dough for a festive touch. Top with crushed candy canes after baking for a holiday treat. Explore these variations to find your favorite twist on this classic snack! For the full recipe, check out the linked section. To keep your pretzel twists fresh, store them in an airtight container. This helps prevent them from getting stale. You can use a plastic or glass container with a tight lid. Make sure to place them in a cool, dry spot. If you have a lot of leftovers, consider separating layers with parchment paper. This keeps them from sticking together. When you want to enjoy your pretzels again, reheating properly is key. To keep their soft texture, use the oven. Preheat it to 350°F (175°C). Place pretzels on a baking sheet and cover them lightly with foil. Heat for about 10 minutes. If you prefer the microwave, use a damp paper towel. Heat each pretzel for about 15-20 seconds. This helps keep them soft, but they may not be as crispy. Freezing your pretzels is easy and a great way to save them. First, let the pretzels cool completely. Then, wrap each one in plastic wrap. After wrapping, place them in a freezer bag. Remove as much air as possible. They can last up to three months in the freezer. To thaw, take them out and let them sit at room temperature. For reheating, follow the same oven instructions. Enjoy your delicious snack just like fresh with no fuss! Yes, you can use instant yeast. It works faster than active dry yeast. You can use the same amount. Just mix it directly with the flour. No need to proof it in water first. These pretzel twists stay fresh for about 2 to 3 days at room temperature. Store them in an airtight container. To keep them even longer, you can freeze them. They last up to 3 months in the freezer. Serve these pretzels warm for the best taste. They pair well with cream cheese frosting or caramel sauce. You can also enjoy them with a hot cup of cocoa or coffee. Yes, you can make pretzels ahead of time. Prepare them up to the boiling step. After boiling, let them cool, then store in the fridge for up to 24 hours. Bake them fresh before serving. For the full recipe, check out the Cinnamon Sugar Pretzel Twists [Full Recipe]. 🥨 Making cinnamon sugar pretzel twists is fun and rewarding. We covered all the key steps, from ingredients to techniques. Remember to activate your yeast properly and shape each pretzel with care. Adjust flavors to your liking, whether you prefer sweet, savory, or seasonal twists. Store leftovers well to maintain freshness, and use our tips to reheat them later. By following this guide, you'll create tasty pretzel twists that everyone will enjoy. Get ready to impress your friends and family with this delightful treat!](https://dailydishlab.com/wp-content/uploads/2025/07/bb15c195-9d5a-4e67-85de-2a67d5d8104a-768x768.webp)