Chocolate Chip Zucchini Bread Tasty and Moist Treat

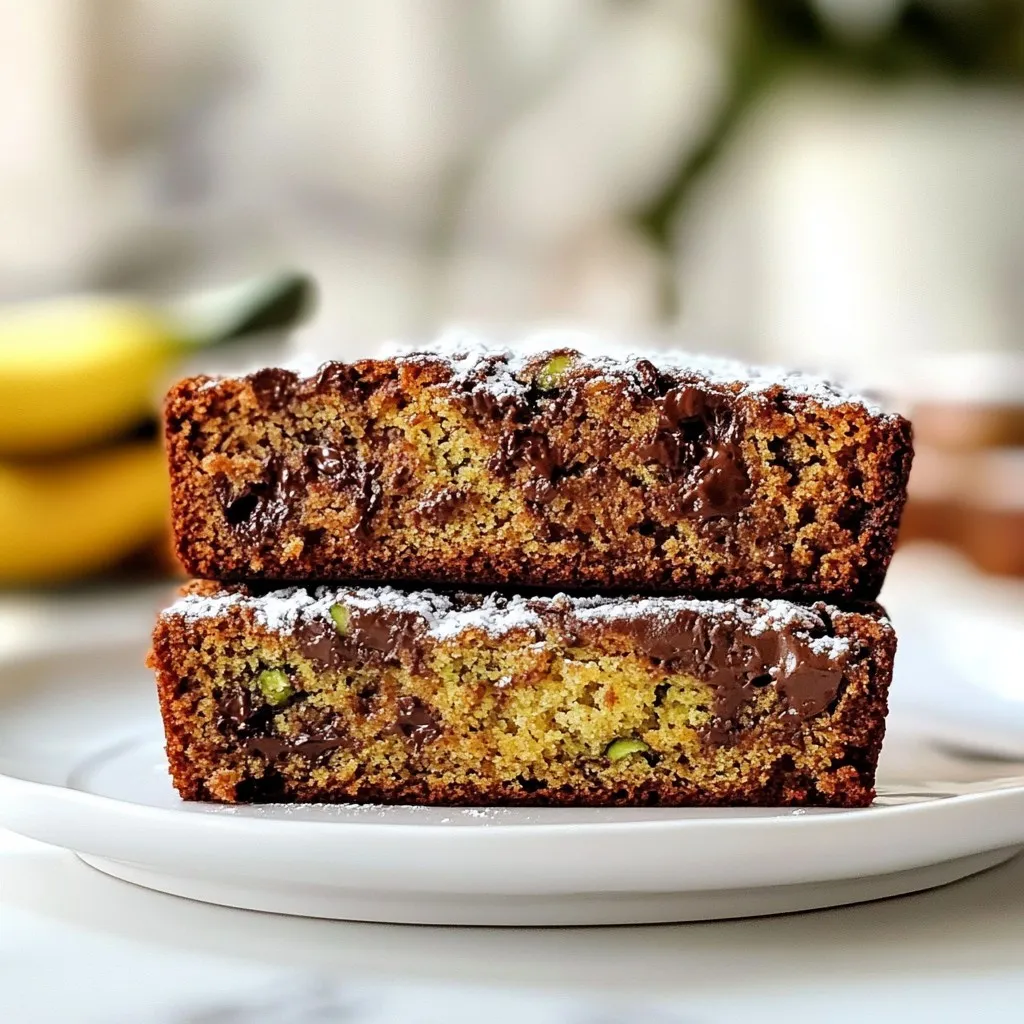
Imagine a warm slice of Chocolate Chip Zucchini Bread fresh from the oven. Sounds tempting, right? This tasty and moist treat is perfect for breakfast, snacks, or dessert. I’m here to guide you through a simple recipe that combines rich chocolate with healthy zucchini. You’ll learn how to make it, store it, and even mix in fun variations. Let’s get started on this delicious journey!
Why I Love This Recipe
- Moist and Delicious: The grated zucchini adds moisture to the bread, making it incredibly soft and tender.
- Perfectly Sweet: The combination of granulated and brown sugar gives just the right amount of sweetness without being overwhelming.
- Chocolatey Goodness: Semi-sweet chocolate chips melt beautifully, creating a rich, indulgent flavor with every bite.
- Healthy Twist: Incorporating zucchini into this classic recipe adds a nutritious element, making it a guilt-free treat!
Ingredients
Zucchini and Dry Ingredients
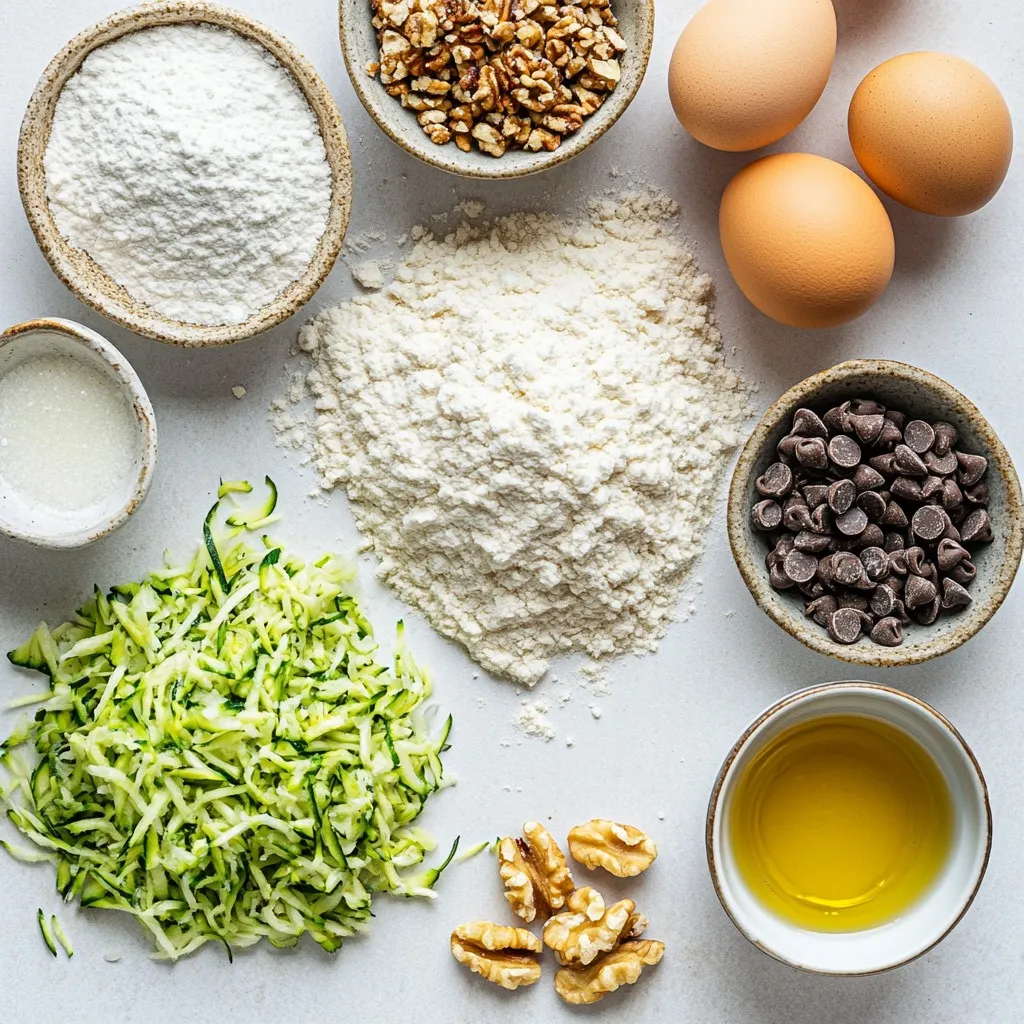
For this tasty bread, you need:
- 2 cups grated zucchini (about 2 medium zucchinis)
- 1 ½ cups all-purpose flour
- 1 teaspoon baking powder
- ½ teaspoon baking soda
- ½ teaspoon salt
- 1 teaspoon ground cinnamon
- ½ teaspoon nutmeg
These dry ingredients create a base for your bread. The grated zucchini adds moisture and nutrition. Make sure to squeeze out excess water from the zucchini. This step keeps your bread from getting soggy.
Sugars and Wet Ingredients
Next, gather these ingredients:
- ½ cup granulated sugar
- ½ cup brown sugar, packed
- ½ cup vegetable oil
- 3 large eggs
- 1 teaspoon vanilla extract
The sugars sweeten the bread and add flavor. The oil keeps the bread moist. When you mix the eggs and vanilla, you create a rich base for the batter.
Optional Add-ins
For extra flavor, consider these options:
- 1 cup semi-sweet chocolate chips
- ½ cup chopped walnuts or pecans (optional)
Chocolate chips make the bread decadent and fun. Nuts add crunch and a nutty taste. You can mix and match these add-ins based on your taste. Enjoy creating your perfect Chocolate Chip Zucchini Bread!

Step-by-Step Instructions
Preparation of the Loaf Pan
Start by preheating your oven to 350°F (175°C). Grab a 9×5 inch loaf pan. Grease it well or line it with parchment paper. This makes it easy to remove the bread later.
Grating Zucchini and Removing Moisture
Next, take two medium zucchinis. Grate them using a box grater until you have about two cups. Place the grated zucchini in a clean dish towel. Squeeze it tightly to remove excess moisture. This step helps keep your bread from being soggy.
Mixing Dry and Wet Ingredients
In a large bowl, whisk together the dry ingredients first. Combine 1 ½ cups of flour, 1 teaspoon baking powder, ½ teaspoon baking soda, ½ teaspoon salt, 1 teaspoon ground cinnamon, and ½ teaspoon nutmeg. Mix these until they are well blended.
In another bowl, mix the sugars and oil. Use ½ cup of granulated sugar and ½ cup of brown sugar. Add ½ cup of vegetable oil and beat them until smooth. Then, stir in three large eggs one at a time. Don’t forget the 1 teaspoon of vanilla extract. Mix well after adding each egg.
Now, gently fold the dry ingredients into the wet mixture. Be careful not to over-mix. This helps your bread stay light and fluffy. Finally, incorporate the grated zucchini, 1 cup of chocolate chips, and optional nuts. Fold them in gently to ensure they are evenly mixed.
Pour the batter into the prepared loaf pan. Smooth the top with a spatula. Now, it’s ready for the oven!
Tips & Tricks
Perfecting Texture and Moisture
To get a moist and tender zucchini bread, start with fresh zucchini. Grate two medium zucchinis. After grating, squeeze out extra moisture using a clean towel. This step is key. Too much moisture will make the bread soggy. For a lighter texture, avoid over-mixing the batter. Fold the wet and dry ingredients gently. This keeps air in, which helps the bread rise.
Baking Techniques and Timing
Preheat your oven to 350°F (175°C). Use a 9×5 inch loaf pan, greased or lined. Bake for 50 to 60 minutes. Check for doneness with a toothpick. Insert it into the center. If it comes out clean, your bread is ready. Let it cool for 10 minutes in the pan. Then, transfer it to a wire rack. This helps it cool evenly.
Serving Suggestions
Slice your zucchini bread and serve it warm or at room temperature. A light dusting of powdered sugar can make it look fancy. For extra flavor, pair it with cream cheese spread. You can also enjoy it with a cup of coffee or tea. This tasty treat works well for breakfast or as a snack.
Pro Tips
- Grate Zucchini Thoroughly: Ensure to grate the zucchini finely and squeeze out excess moisture to prevent the bread from becoming soggy.
- Use Room Temperature Ingredients: For a smoother batter, use eggs and oil at room temperature to help them blend more easily.
- Check for Doneness: Always insert a toothpick into the center of the loaf; if it comes out clean, your bread is ready!
- Store Properly: To keep your zucchini bread fresh, wrap it tightly in plastic wrap and store it in the refrigerator for up to a week.

Variations
Flavor Enhancements (Spices and Extracts)
You can boost the flavor of your chocolate chip zucchini bread with spices. Try adding an extra teaspoon of cinnamon for warmth. A pinch of cloves can add depth. You might also consider nutmeg, which pairs well with chocolate. For a unique twist, use a splash of almond extract. This will bring a lovely aroma to your bread.
Healthier Swaps (Gluten-Free, Sugar-Free)
If you want a gluten-free version, swap all-purpose flour for a gluten-free blend. Make sure it has a binding agent like xanthan gum. For a sugar-free option, use a sugar substitute like erythritol. This keeps the sweetness without the calories. You can also reduce the oil to make it lighter. Use unsweetened applesauce instead to keep moisture.
Different Add-ins (Dried Fruits, Seeds)
Consider adding different ingredients to change up the texture. Dried fruits like cranberries or raisins add sweetness and chewiness. You can sprinkle in seeds like chia or sunflower for a healthy crunch. If you enjoy nuts, walnuts or pecans work well. Just be sure to chop them small enough so they mix evenly. These add-ins can make your bread even more special!
Storage Info
Best Practices for Storing Leftovers
To keep your chocolate chip zucchini bread fresh, wrap it tightly in plastic wrap. You can also store it in an airtight container. This helps to keep the moisture in. Place the bread at room temperature for up to three days. For longer storage, it’s best to freeze it.
Freezing Instructions
To freeze your zucchini bread, first let it cool completely. Then, slice the bread for easy serving later. Wrap each slice in plastic wrap. Place the wrapped slices in a freezer bag. This keeps the bread fresh for up to three months. When you’re ready to enjoy it, just thaw it at room temperature or in the refrigerator.
Reheating Tips
To reheat your zucchini bread, preheat your oven to 350°F (175°C). Place the slices on a baking sheet. Heat for about 10 minutes, or until warm. You can also use a microwave. Heat individual slices for about 15 to 20 seconds. This gives you a warm, tasty treat without losing its moist texture.
FAQs
Can I use frozen zucchini for this recipe?
Yes, you can use frozen zucchini. Just thaw it and squeeze out the water. This keeps your bread moist. Frozen zucchini works well because it retains flavor and nutrition. I recommend using it in recipes where you bake, like this chocolate chip zucchini bread.
How can I make my bread less sweet?
To make your bread less sweet, reduce the sugar. Try cutting the granulated sugar to 1/4 cup. You can also swap out half of the brown sugar for unsweetened applesauce. This adds moisture without the extra sweetness. Taste the batter before baking to find your perfect balance.
What are the signs that the bread is overbaked?
Signs of overbaked bread include a dark, hard crust and dry texture. You should also check if the top is cracked or domed. Always do the toothpick test; if it comes out clean but the bread feels too firm, it may be overbaked. Aim for a moist, tender loaf.
In this blog post, we explored how to make a delicious zucchini bread. We discussed the key ingredients needed, from zucchini to optional add-ins. I shared step-by-step instructions that guide you in preparing, mixing, and baking your loaf. Helpful tips ensured a perfect texture and moisture balance. We also covered variations and storage info to keep your bread fresh. Remember, experimenting with flavors and ingredients can lead to your own tasty creation. Enjoy your baking journe

Chocolate Chip Zucchini Bread
Ingredients
- 2 cups grated zucchini
- 1.5 cups all-purpose flour
- 1 teaspoon baking powder
- 0.5 teaspoon baking soda
- 0.5 teaspoon salt
- 1 teaspoon ground cinnamon
- 0.5 teaspoon nutmeg
- 0.5 cup granulated sugar
- 0.5 cup brown sugar, packed
- 0.5 cup vegetable oil
- 3 large eggs
- 1 teaspoon vanilla extract
- 1 cup semi-sweet chocolate chips
- 0.5 cup chopped walnuts or pecans (optional)
Instructions
- Preheat the oven to 350°F (175°C) and grease a 9x5 inch loaf pan or line it with parchment paper for easy removal.
- Prepare the zucchini: Grate the zucchinis using a box grater. For best results, place the grated zucchini in a clean dish towel or paper towel and squeeze out the excess moisture.
- Mix the dry ingredients: In a large mixing bowl, whisk together the flour, baking powder, baking soda, salt, cinnamon, and nutmeg until evenly combined.
- Combine sugars and oil: In another bowl, beat together the granulated sugar, brown sugar, and vegetable oil until smooth and well blended.
- Add eggs and vanilla: Stir in the eggs one at a time, followed by the vanilla extract, mixing well after each addition.
- Combine wet and dry mixtures: Gradually fold the dry ingredients into the wet mixture until just combined.
- Incorporate zucchini and chocolate chips: Gently fold in the grated zucchini, chocolate chips, and nuts (if using).
- Pour into the prepared pan: Transfer the batter to the prepared loaf pan and smooth out the top with a spatula.
- Bake: Place the loaf in the preheated oven and bake for approximately 50 to 60 minutes, or until a toothpick inserted into the center comes out clean.
- Cool: Once baked, remove the zucchini bread from the oven and let it cool in the pan for about 10 minutes before transferring it to a wire rack to cool completely.


![To make No Bake Pumpkin Spice Cookie Dough Bites, gather the following ingredients. Each one plays a key role in flavor and texture. - 1 cup almond flour - 1/2 cup rolled oats - 1/2 cup pumpkin puree - 1/4 cup maple syrup - 1/4 cup almond butter - 1 tsp vanilla extract - 1 tsp pumpkin spice - 1/2 tsp cinnamon - A pinch of salt - 1/4 cup dark chocolate chips 1. Almond flour: This nut-based flour adds a rich taste and soft texture. 2. Rolled oats: They give the bites a nice chew and help bind the mixture. 3. Pumpkin puree: This provides moisture and a warm, cozy flavor. 4. Maple syrup: It acts as a natural sweetener and adds depth to the taste. 5. Almond butter: This creamy ingredient helps hold everything together. 6. Vanilla extract: A splash of this brightens the flavors in the bites. 7. Pumpkin spice: This blend of spices brings fall warmth to each bite. 8. Cinnamon: It adds a sweet aroma and enhances the pumpkin flavor. 9. Salt: Just a pinch balances the sweetness and lifts the flavors. 10. Dark chocolate chips: These bits of chocolate create delightful bursts of sweetness. These ingredients work together to create a tasty treat. If you want the full experience, check out the Full Recipe for more details. First, gather your ingredients. You will need almond flour, rolled oats, pumpkin puree, maple syrup, almond butter, vanilla extract, pumpkin spice, cinnamon, salt, and dark chocolate chips. 1. In a large mixing bowl, mix the almond flour, rolled oats, pumpkin spice, cinnamon, and salt. Stir well until all the dry ingredients blend together nicely. 2. In another bowl, whisk together the pumpkin puree, maple syrup, almond butter, and vanilla extract. Keep whisking until the mixture is smooth and blended. 3. Pour the wet mixture into the bowl with the dry ingredients. Mix thoroughly. You want to form a dough that holds together well. Now it's time to shape the dough. Use your hands to roll the mixture into small balls. Each ball should be about 1 inch in diameter. Place them on a baking sheet lined with parchment paper. This step makes it easy to chill the bites later. To set the bites, refrigerate them for at least 30 minutes. This chilling time helps them firm up nicely. When you’re ready to serve, enjoy them cold. If you prefer, let them sit out for a few minutes. This makes them easier to eat. You can also serve them as a fun snack or dessert for friends and family. For the full recipe, check out the details above! To get the right texture in your No Bake Pumpkin Spice Cookie Dough Bites, I suggest adjusting the ingredient ratios. For a softer bite, add more pumpkin puree. If you prefer a firmer texture, increase the almond flour. You can also try different sweeteners. Maple syrup adds a nice taste, but agave or honey works too. Just keep the ratios similar for the best results. Want to change it up? You can easily customize the flavor. Try adding nuts or dried fruits. Chopped walnuts or pecans add crunch. Dried cranberries or raisins bring a sweet twist. Just mix them in when you combine the wet and dry ingredients. Prepping ingredients in advance saves time. Measure out the almond flour and oats the night before. You can even mix the dry ingredients early. This way, when you're ready to make the bites, everything is ready to go. It makes the process fast and easy! For the full recipe, check out the details and enjoy making these tasty treats. {{image_2}} You can easily make No Bake Pumpkin Spice Cookie Dough Bites vegan and dairy-free. Use almond butter and maple syrup, just like in the original recipe. Almond flour and rolled oats are already plant-based. You can also swap dark chocolate chips for dairy-free ones. This way, everyone can enjoy them! Want to mix things up? Try adding different spices. Nutmeg is a great choice. It pairs well with pumpkin and gives a warm flavor. You can also add a dash of ginger for some extra warmth. These small changes can make a big difference! How you serve these bites can be fun! You can roll them in crushed nuts or coconut for a crunchy coat. Drizzle some melted dark chocolate on top for a fancy touch. You could also sprinkle a bit of cinnamon for extra flair. These ideas make your bites look as good as they taste. For the complete recipe, check the [Full Recipe]. To keep No Bake Pumpkin Spice Cookie Dough Bites fresh, store them in the fridge. Use an airtight container to prevent them from drying out. Make sure to separate layers with parchment paper. This keeps them from sticking together. They will stay fresh for a longer time when stored properly. If you want to keep these bites longer, freezing is a great option. To freeze, place the cookie dough bites on a baking sheet. Make sure they are not touching each other. Freeze them for about an hour until firm. Then, transfer them to a freezer-safe bag or container. Label the container with the date and flavor. They can last up to three months in the freezer. When stored in the fridge, these bites last about a week. If you freeze them, they can last up to three months. You can enjoy these treats whenever you crave a sweet snack! Just let them thaw in the fridge or at room temperature before eating. For the full recipe, check out the previous sections. Store your cookie dough bites in an airtight container. Keep them in the fridge for up to one week. If you want them to last longer, you can freeze them. Just make sure to separate them with parchment paper. This will help prevent sticking. Yes, you can use other flours. Oat flour or coconut flour are great options. Just know that they may change the texture a bit. If you use coconut flour, reduce the amount to about 1/3 cup. It absorbs more moisture than almond flour. To make sugar-free bites, swap maple syrup for a sugar-free sweetener. Options like stevia or erythritol can work well. Adjust the amount based on your taste. You might need to add a little more pumpkin puree for moisture. For extra flavor, consider adding a dash of vanilla extract. For the full recipe, check out the No Bake Pumpkin Spice Cookie Dough Bites section. These no-bake pumpkin spice cookie dough bites are fun to make and tasty. You learned about the key ingredients, step-by-step instructions, and how to tailor the flavors. We also covered tips for perfect texture and storage. Feel free to mix in your favorite nuts or fruits for a personal touch. Remember, these bites are great for sharing or enjoying on your own. Experiment, have fun, and enjoy every bite of your creation!](https://dailydishlab.com/wp-content/uploads/2025/07/e6c47970-ab6c-4140-bac8-89f339878891-768x768.webp)


![For these muffins, you need simple, wholesome ingredients. Here’s what you will use: - 1 cup rolled oats - 1 cup canned pumpkin puree - 1/4 cup honey or maple syrup - 1/4 cup Greek yogurt - 2 large eggs - 1 teaspoon vanilla extract - 1 teaspoon baking powder - 1/2 teaspoon baking soda - 1 teaspoon ground cinnamon - 1/2 teaspoon ground nutmeg - 1/4 teaspoon salt These ingredients blend to create a moist and tasty treat. The oats add fiber, while pumpkin gives a rich flavor and nutrition. You can enhance your muffins with optional items. Try adding: - 1/2 cup chopped nuts (like walnuts or pecans) - 1/2 cup chocolate chips These extras add crunch and sweetness. You can mix and match based on your taste. If you need to swap ingredients, here are some ideas: - For honey or maple syrup, use agave syrup or coconut sugar. - Replace Greek yogurt with applesauce for a dairy-free option. - If you want a nut-free version, skip the nuts or use seeds instead. These swaps keep the muffins healthy while catering to your needs. You can find the full recipe above for step-by-step guidance. First, gather all your ingredients. You will need rolled oats, pumpkin puree, honey, Greek yogurt, eggs, and spices. Preheat your oven to 350°F (175°C). Line a muffin tin with paper liners or grease it lightly with oil. This step helps to prevent the muffins from sticking. In a large bowl, combine the rolled oats, baking powder, baking soda, salt, and spices. This includes ground cinnamon and nutmeg. Mix these ingredients well. An even mix ensures that each muffin gets the same flavor and rise. In a separate bowl, whisk together the pumpkin puree, honey or maple syrup, Greek yogurt, eggs, and vanilla. Make sure this mixture is smooth and creamy. Once combined, pour this wet mixture into the dry ingredients. Stir gently until just combined. If you want to add nuts or chocolate chips, fold them in now. Now you have a delicious batter ready for baking. Follow the [Full Recipe] to continue. Baking muffins can be fun and easy. To get the best results, start with fresh ingredients. Check the expiration dates on your baking powder and baking soda. Use room temperature eggs and yogurt for a better mix. Always preheat your oven. This helps muffins rise nicely. To get a soft, fluffy muffin, do not overmix your batter. Stir until the dry and wet ingredients just come together. Small lumps are okay! Overmixing makes muffins dense. Bake them until a toothpick comes out clean. This ensures they are cooked but not dry. You can boost flavor by adding spices like ginger or cloves. Try adding nuts or seeds for crunch and taste. For more nutrients, swap out some oats for ground flaxseed or chia seeds. This adds fiber and omega-3s. You can also use unsweetened applesauce instead of some sweetener for a healthier twist. For the complete recipe, check out the Full Recipe. {{image_2}} You can make these muffins gluten-free. Use gluten-free oats instead of regular rolled oats. Make sure to check the label to ensure they are certified gluten-free. For the flour, try almond flour or coconut flour. These flours add a nice texture and flavor. Adjust the amount of liquid in your recipe, as these flours absorb moisture differently. To make these muffins vegan, swap the eggs for flax eggs. Mix one tablespoon of ground flaxseed with three tablespoons of water for each egg. Let it sit for a few minutes until it thickens. Replace Greek yogurt with unsweetened applesauce or a dairy-free yogurt. Use maple syrup instead of honey for sweetness. This keeps the muffins moist while staying plant-based. Feel free to get creative with your muffins. Add-ins can change the flavor and texture. Some great options include: - 1/2 cup chopped nuts (walnuts or pecans) - 1/2 cup chocolate chips - 1/2 cup dried cranberries or raisins - 1/2 teaspoon of ginger or cloves for warmth - 1/4 cup of apple sauce for extra moisture For seasonal twists, try stirring in a bit of orange zest or a splash of maple extract. These small changes can elevate your muffins. You can also top them with pumpkin seeds or a sprinkle of cinnamon for extra flair. Enjoy experimenting with these variations from the Full Recipe! To keep your muffins fresh, store them in an airtight container. This helps avoid drying out. You can place a paper towel in the container. The towel absorbs excess moisture, keeping muffins soft. If you live in a humid area, store them in the fridge to prevent mold. You can freeze muffins for later use. First, let them cool completely. Wrap each muffin in plastic wrap. Then place them in a freezer-safe bag. This keeps them fresh for up to three months. When you're ready to eat, remove a muffin and thaw it overnight in the fridge. You can also warm it in the microwave for 15-20 seconds. Healthy Pumpkin Oat Muffins last for about five days at room temperature. If stored in the fridge, they can last up to a week. For the best taste, eat them within three days. You can find the full recipe above for detailed instructions. Enjoy these tasty treats while they are fresh! You can replace eggs with applesauce or mashed banana. Use 1/4 cup of either for each egg. This keeps the muffins moist and adds natural sweetness. You can also use flaxseed meal. Mix 1 tablespoon of flaxseed with 2.5 tablespoons of water. Let it sit for five minutes until it gels. Both options work well in this recipe. Rolled oats are best for these muffins. They give a nice texture and hold their shape. You can also use quick oats, but they will make the muffins softer. Avoid steel-cut oats, as they need more cooking time. Using rolled oats ensures a good balance of flavor and texture in every bite. Yes, you can use fresh pumpkin. Just cook it until soft, then blend until smooth. This adds a fresh flavor to your muffins. Make sure to measure the same amount as the canned pumpkin. Fresh pumpkin can be more watery, so drain any excess moisture if needed. Pumpkin is rich in vitamins A and C, which support your immune system. It also has fiber that helps digestion. Oats are a great source of whole grains. They lower cholesterol and keep you full longer. Together, they make a nutritious snack. Enjoy these muffins guilt-free! You can find the Full Recipe above for a tasty way to enjoy these benefits. Healthy pumpkin oat muffins are simple and tasty. We covered key ingredients and how to make them. You learned tips for perfect texture and added flavors. Variations cater to gluten-free and vegan diets. I also shared storage tips for freshness and longevity. In the end, these muffins offer a healthy option for any meal. Enjoy making them your own with different ingredients and flavors. Your baking journey can be both fun and healthy!](https://dailydishlab.com/wp-content/uploads/2025/07/c0729778-358d-4726-8681-cbd04cabebc9-768x768.webp)

