
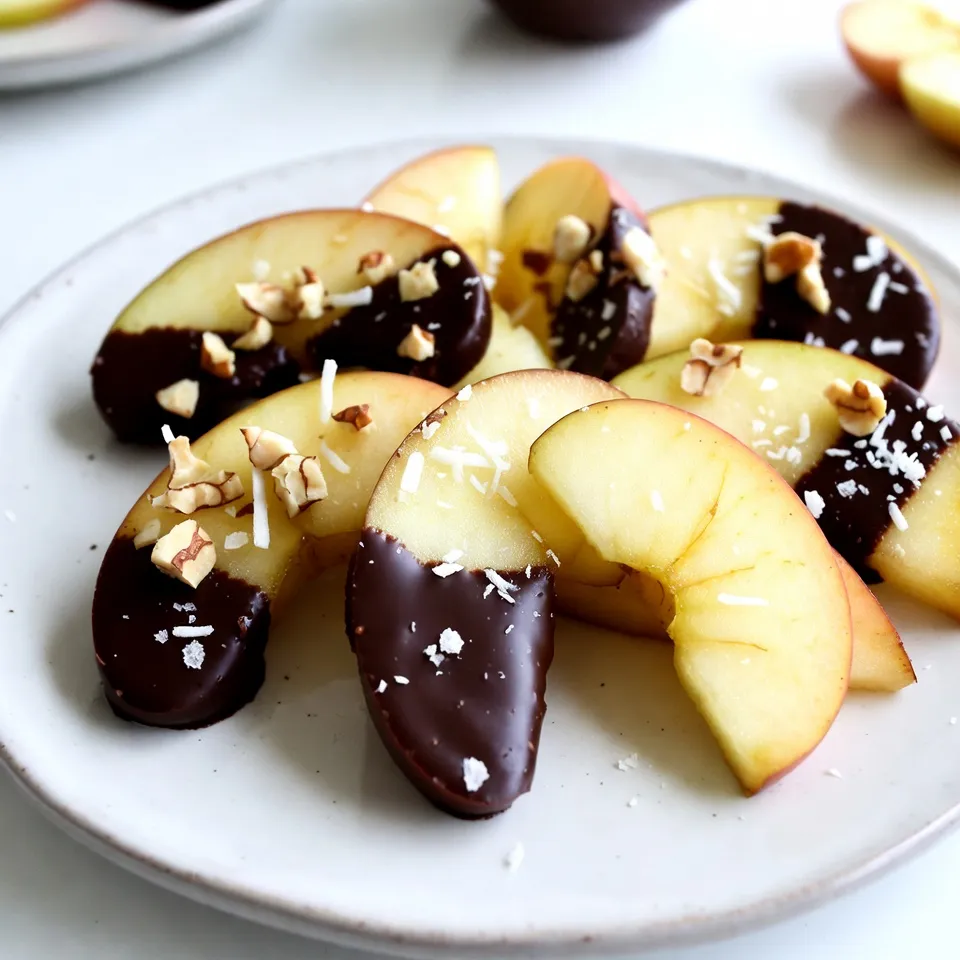
Are you ready to indulge in a sweet treat that’s both simple and satisfying? Chocolate-covered apple slices are the perfect blend of crisp and creamy, making them a fun snack or dessert. In this guide, I’ll share all you need to know—from selecting the right apples to customizing your toppings. Let’s create these delicious bites that everyone will love! Get your ingredients ready and let’s dive in!
Why I Love This Recipe
- Delicious Balance: The combination of sweet, crisp apples and rich chocolate creates a delightful contrast that appeals to all taste buds.
- Customizable Toppings: You can easily personalize these apple slices with your favorite nuts and toppings, making them unique every time.
- Healthy Indulgence: These treats are a healthier alternative to traditional desserts, offering nutrients from the apples while satisfying your sweet tooth.
- Fun to Make: This recipe is simple and fun, perfect for kids and adults alike to enjoy making together!
Ingredients
Main Ingredients
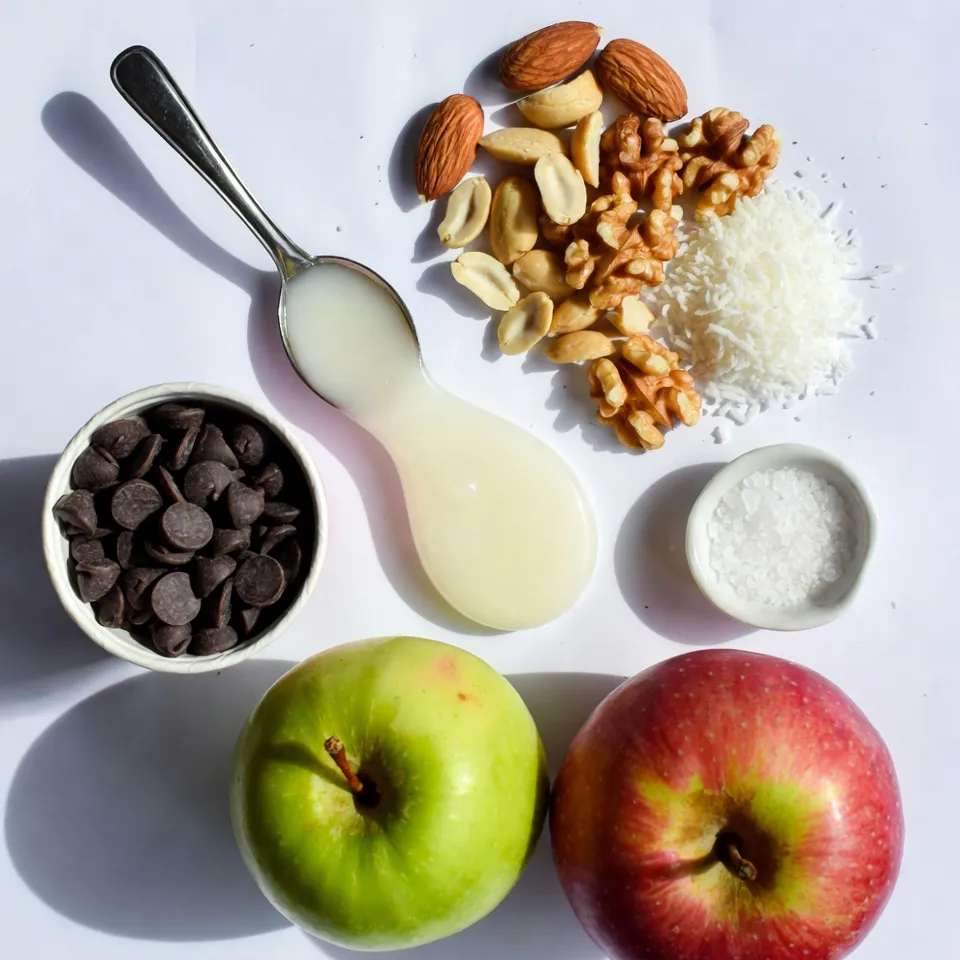
– 2 large apples (your choice of variety)
– 1 cup dark chocolate chips (or vegan chocolate chips)
– 1 tablespoon coconut oil
You can use any type of large apple. I love using Fuji or Granny Smith. They add a nice balance of sweet and tart. For the chocolate, dark chocolate chips are perfect. If you’re vegan, choose vegan chocolate chips. The coconut oil helps the chocolate melt smoothly.
Toppings and Garnishes
– 1/2 cup chopped nuts (almonds, peanuts, or walnuts)
– 1/4 cup shredded coconut (unsweetened)
– Sea salt for garnish
You can get creative with toppings. I prefer chopped almonds or walnuts. They add crunch and flavor. Unsweetened shredded coconut also works well. A sprinkle of sea salt brings out the chocolate’s richness.
Equipment Needed
– Microwave-safe bowl
– Baking sheet
– Parchment paper
Having the right tools makes cooking easy. A microwave-safe bowl helps melt the chocolate without burning. A baking sheet lined with parchment paper keeps the apple slices from sticking.
Step-by-Step Instructions
Preparing the Apples
– Start by washing the apples thoroughly. Dirt can hide on their skin.
– Pat them dry with a clean towel. A dry surface helps the chocolate stick better.
– Slice each apple into wedges about 1/4-inch thick. This size is easy to eat.
– Remove any seeds you see. Nobody wants to bite into a seed!
Melting the Chocolate
– In a microwave-safe bowl, combine the dark chocolate chips and coconut oil. The oil helps the chocolate melt smoothly.
– Heat the bowl in the microwave. Use 30-second intervals. Stir the mixture each time until it is fully melted. It should be glossy and smooth.
Dipping and Garnishing
– Line a baking sheet with parchment paper. This makes clean-up easy.
– Dip each apple slice into the melted chocolate. Coat it evenly on both sides. Let any extra chocolate drip off.
– Place the chocolate-covered slices on the baking sheet.
– While the chocolate is still soft, sprinkle your chosen toppings on top. You can use chopped nuts or shredded coconut.
– Once you finish, put the baking sheet in the fridge for about 30 minutes. This helps the chocolate set and harden.
– After the chocolate hardens, gently peel the apple slices off the parchment paper. Enjoy your tasty treat!
Tips & Tricks
Ensuring a Smooth Chocolate Coating
To melt chocolate well, use a microwave-safe bowl. Combine dark chocolate chips and coconut oil. Heat in 30-second bursts. Stir after each time to keep it smooth. This method prevents burning.
If your chocolate starts to harden, don’t worry. Keep it warm by placing the bowl in a pot of hot water. This way, it stays melted while you dip your apple slices.
Presentation Ideas
Make your dessert look special! Place chocolate-covered apple slices on a nice platter. You can arrange them in a circle or a neat row. Drizzle any leftover melted chocolate in a zigzag over the slices. It adds charm and flair.
Consider using colorful plates or bowls as your base. Adding some fresh mint leaves can bring a pop of color too.
Customization Tips
Choose your favorite apples for different tastes. Sweet apples, like Fuji or Honeycrisp, pair well with dark chocolate. Tart apples, like Granny Smith, bring a fun contrast.
Change up your toppings! In addition to nuts, try crushed pretzels or sprinkles. You can even add spices, like cinnamon, for a warm touch. Mixing flavors keeps it exciting!
Pro Tips
- Choose the Right Apples: Select apples that are firm and crisp, such as Granny Smith or Honeycrisp, to ensure a satisfying crunch when you bite into the chocolate-covered slices.
- Use Quality Chocolate: Opt for high-quality dark chocolate for the best flavor. If you’re vegan, make sure to choose chocolate chips that are specifically labeled as vegan.
- Experiment with Toppings: Get creative with toppings! Try adding dried fruits, seeds, or even sprinkles to add different flavors and textures to your apple slices.
- Serve Fresh: For the best taste and texture, serve the chocolate-covered apple slices soon after they have set. They can also be stored in an airtight container for a couple of days.
Variations
Flavor Enhancements
You can boost the taste of your chocolate-covered apple slices by adding spices. Cinnamon and nutmeg work wonderfully. A dash of cinnamon gives warmth, while nutmeg adds a hint of nuttiness. You can also infuse the chocolate with extracts. Vanilla makes it richer, while peppermint adds a refreshing twist. Experiment with these flavors to find your favorite combination.
Different Coatings
While dark chocolate is a classic choice, don’t shy away from other coatings. White chocolate or milk chocolate can bring a new flavor profile. These options can be sweeter and creamier. You can also change up the toppings. Instead of nuts, try seeds like pumpkin or sunflower seeds. These add crunch and unique flavors.
Health-Conscious Versions
If you’re looking for a healthier treat, consider low-sugar chocolate options. Many brands offer great choices that do not skimp on flavor. Another fun idea is to use nut butters instead of chocolate. Almond or peanut butter gives a rich taste while adding healthy fats. This twist makes for a filling snack that still satisfies your sweet tooth.
Storage Info
Best Practices for Storing
To keep your chocolate-covered apple slices fresh, store them in a cool, dry place. Use airtight containers to prevent air from getting in. This keeps the chocolate smooth and the apples crisp. If it’s warm, the fridge is best. Place parchment paper between layers to stop them from sticking.
Shelf Life
Chocolate-covered apple slices last about 5 days in the fridge. After that, they may lose their crunch. Look for signs of spoilage. If the chocolate looks dull or the apples get mushy, it’s time to toss them. Freshness is key for the best taste.
Freezing Options
You can freeze chocolate-covered apple slices. First, place them in a single layer on a baking sheet. Freeze them for about an hour until solid. Then put the slices in a freezer-safe bag or container. When you want to eat them, thaw in the fridge for a few hours. Enjoy them cold or at room temperature!
FAQs
Can I use other fruits instead of apples?
Yes, you can use many fruits! Try bananas, strawberries, or pears. Each fruit gives a unique taste. For bananas, cut them into thick slices. Strawberries are perfect whole, while pears need slicing. You can dip any of these in chocolate, too. Just like with apples, keep the fruits fresh and ripe for the best flavor.
What type of chocolate works best for dipping?
Dark chocolate chips are great for this recipe. They melt well and taste rich. Brands like Ghirardelli or Nestlé work nicely. If you prefer milk chocolate, you can use that too. Vegan chocolate chips are a good choice for a dairy-free treat. Look for brands like Enjoy Life or Hu. They melt smoothly and taste amazing.
How do I make these vegan-friendly?
To make vegan chocolate-covered apple slices, choose vegan chocolate chips. Replace any non-vegan ingredients with plant-based options. Use coconut oil, as it is vegan. You can also skip the nuts if you want. Enjoy your chocolate-covered slices without dairy!
This blog covered how to make tasty chocolate-covered apples. You learned about choosing the right apples, melting chocolate, and adding fun toppings. We explored tips for a smooth finish and creative ways to serve. There are also tasty variations and storage tips. As you try this recipe, remember you can customize it to fit your taste. Keep experimenting with flavors and toppings to make it your own. Enjoy making these sweet treats that are sure to impres


