Chocolate Covered Cheesecake Bites Easy and Delicious

To make these cheesecake bites, you need: - 8 oz cream cheese, softened - 1/2 cup powdered sugar - 1 tsp vanilla extract - 1 cup graham cracker crumbs - 8 oz dark chocolate, chopped - Sea salt for garnish These ingredients create a creamy and sweet base. The cream cheese gives it richness. Powdered sugar adds sweetness, while vanilla brings in flavor. Graham cracker crumbs provide a nice crunch. Dark chocolate coats the bites for a decadent finish. You can enhance your bites with: - 1/4 cup mini chocolate chips - 1 tablespoon coconut oil Mini chocolate chips add extra sweetness and texture. Coconut oil helps chocolate melt smoothly. Both ingredients make the bites even more delicious. Feel free to mix and match to your taste! Gather these tools to make the process easier: - Mixing bowl - Electric mixer or whisk - Small cookie scoop or your hands - Parchment paper - Baking sheet - Microwave-safe bowl These tools help you mix, shape, and coat the bites easily. Parchment paper prevents sticking, and a baking sheet holds everything while it freezes. {{ingredient_image_1}} Start with a mixing bowl. Add 8 oz of softened cream cheese. Then, pour in 1/2 cup of powdered sugar. Next, add 1 tsp of vanilla extract. Beat this mixture until it is smooth and creamy. This step is key for a great texture. Gently fold in 1 cup of graham cracker crumbs. If you want a chocolate touch, add 1/4 cup of mini chocolate chips. Mix until everything is fully blended. Now, it's time to shape the bites. Use your hands or a small cookie scoop. Form the mixture into small balls, about 1 inch wide. This size is perfect for popping in your mouth. Place these balls on a baking sheet lined with parchment paper. Make sure they have space between them. Freeze the bites for at least 30 minutes. This helps them hold their shape when you dip them in chocolate. While your cheesecake bites chill, prepare the chocolate coating. Take 8 oz of chopped dark chocolate and place it in a microwave-safe bowl. If you want a smoother melt, add 1 tablespoon of coconut oil. Microwave in 30-second intervals. Stir in between until the chocolate is fully melted and smooth. Once your cheesecake bites are firm, dip each one into the melted chocolate. Let any excess chocolate drip off. Return them to the baking sheet. Just before the chocolate hardens, sprinkle a pinch of sea salt on top. This adds a nice flavor boost. Finally, put the baking sheet back in the freezer for 10-15 minutes. This will set the chocolate completely. To get a smooth chocolate coating, use high-quality chocolate. I recommend dark chocolate for rich flavor. Chop it into small pieces to melt evenly. Add coconut oil to the chocolate. This helps it melt smoother. Heat the chocolate in short bursts. Microwave it in 30-second intervals. Stir it often to prevent burning. Once melted, the chocolate should be glossy. Dip each cheesecake bite quickly for the best results. For uniform cheesecake bites, use a small cookie scoop. This keeps each bite the same size. Roll the mixture in your hands gently. Aim for about 1 inch in diameter. Place them on parchment paper to avoid sticking. Make sure they are evenly spaced. Chilling them in the freezer helps firm them up. This makes dipping easier and cleaner. To stop the chocolate from cracking, make sure it cools slightly before dipping. If it is too hot, it might crack when it sets. Ensure the cheesecake bites are very cold. This helps the chocolate set quickly. After dipping, return them to the freezer to set fully. Sprinkle sea salt while the chocolate is still wet. This adds flavor and looks great. Pro Tips Room Temperature Cream Cheese: Make sure your cream cheese is at room temperature for easier mixing and a smoother texture. Chill for Better Dipping: Ensure the cheesecake bites are thoroughly chilled before dipping in chocolate for a clean and even coating. Use Quality Chocolate: Opt for high-quality dark chocolate for the best flavor and a silky texture when melted. Experiment with Toppings: Get creative with toppings by adding crushed nuts, sprinkles, or even drizzling white chocolate for a decorative touch. {{image_2}} You can change the chocolate coating to fit your taste. Instead of dark chocolate, try white chocolate for a sweeter bite. Melt the white chocolate the same way as dark. You can also use milk chocolate for a creamier flavor. Each coating adds a new look and taste to your cheesecake bites. You can make these bites more fun with different flavors. Try mixing in fruit puree, like strawberry or raspberry, into the cream cheese. This will give your bites a fruity twist. You can also add zest from lemon or orange for a fresh taste. This way, every bite can surprise you with a new flavor. You can easily adapt this recipe for different diets. For a gluten-free option, use gluten-free graham crackers. This keeps the crust crunchy without gluten. If you want a vegan version, swap cream cheese for a vegan cream cheese. Use coconut milk or almond milk for the chocolate coating. This way, everyone can enjoy the deliciousness of cheesecake bites. After making these bites, you want to keep them fresh. Store your chocolate-covered cheesecake bites in an airtight container. This helps prevent them from drying out or absorbing other odors. Place a piece of parchment paper between layers if you stack them. This keeps the chocolate from sticking. If you want to enjoy these bites later, freezing works well. First, place the bites on a baking sheet in a single layer. Freeze them for about an hour until firm. Then, transfer them to a freezer-safe bag or container. Make sure to remove as much air as possible. These bites can last up to three months in the freezer. When you're ready to eat, let them thaw in the fridge overnight. Serve the bites chilled for the best taste. You can drizzle extra melted chocolate over them for a nice touch. Adding a sprinkle of sea salt right before serving enhances the flavor. For a pop of color, consider garnishing with fresh mint leaves. This makes your dessert look even more inviting. Yes, you can! Cream cheese gives a rich taste. But you can also try mascarpone or ricotta. Each cheese adds a unique flavor. Just remember, the texture may change a bit. If you want lighter bites, use whipped cream cheese. It works well, too! These bites stay fresh for up to one week in the fridge. Store them in an airtight container. If you freeze them, they can last for up to three months. Just let them thaw in the fridge before enjoying. They taste great both ways! Absolutely! Making these bites a day or two ahead is a smart idea. It saves time on the party day. Just follow the recipe and store them properly. When you’re ready, serve them chilled. Your guests will love them! You learned how to make tasty Chocolate Covered Cheesecake Bites. We talked about the main and optional ingredients and tools you need. I provided clear steps for mixing, shaping, and coating the bites. Tips helped you get a smooth finish and avoid cracks. We also explored fun variations and how to store your bites safely. Enjoy making these bites for yourself or your friends. They will be a hit at any event!

WANT TO SAVE THIS RECIPE?

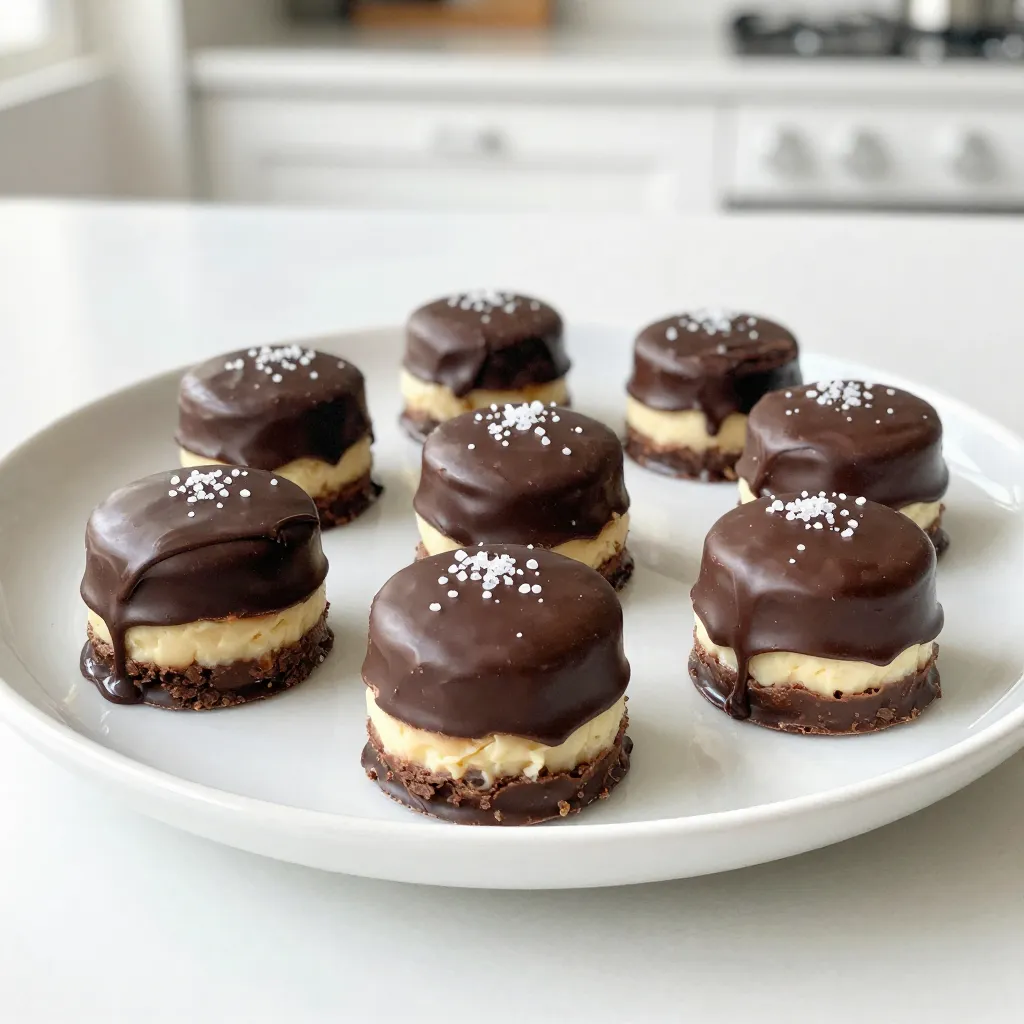
Want a sweet treat that’s easy to make and hard to resist? These Chocolate Covered Cheesecake Bites are your answer! With a creamy cheesecake base and a rich chocolate coating, they’re perfect for any occasion. In this guide, I’ll walk you through the simple steps to create these delightful bites. Plus, I’ll share tips, tricks, and variations to suit your taste. Let’s get started on these delicious bites!

Why I Love This Recipe

  1. Irresistible Flavor: The combination of creamy cheesecake and rich chocolate creates a delightful treat that satisfies any sweet tooth.
  2. Easy to Make: This recipe requires minimal ingredients and straightforward steps, making it accessible for bakers of all skill levels.
  3. Perfect for Any Occasion: These bites are ideal for parties, gatherings, or simply as a sweet indulgence at home.
  4. Customizable Treat: You can easily add your favorite mix-ins, like nuts or different chocolate types, to make these cheesecake bites uniquely yours.

Ingredients

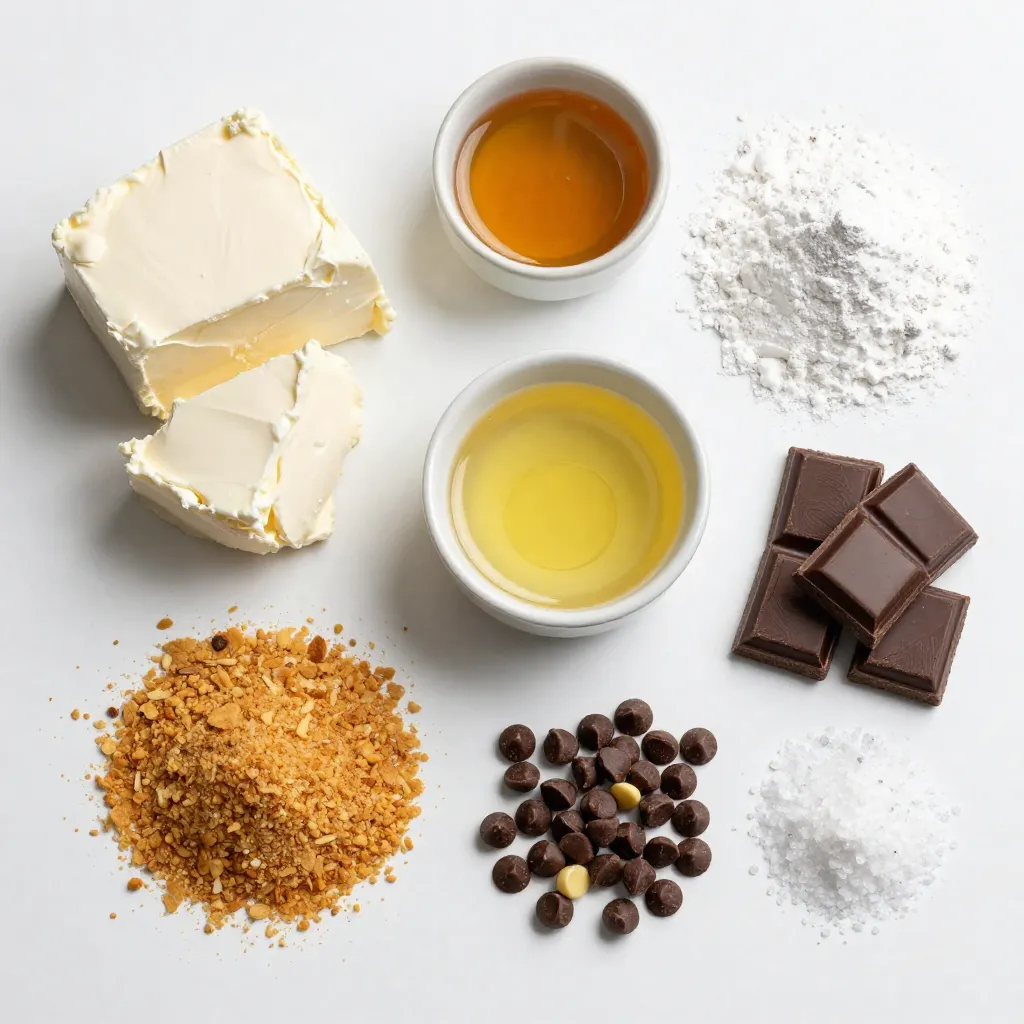
Main ingredients for Chocolate Covered Cheesecake Bites

To make these cheesecake bites, you need:

  • 8 oz cream cheese, softened
  • 1/2 cup powdered sugar
  • 1 tsp vanilla extract
  • 1 cup graham cracker crumbs
  • 8 oz dark chocolate, chopped
  • Sea salt for garnish

These ingredients create a creamy and sweet base. The cream cheese gives it richness. Powdered sugar adds sweetness, while vanilla brings in flavor. Graham cracker crumbs provide a nice crunch. Dark chocolate coats the bites for a decadent finish.

Optional ingredients for added flavor

You can enhance your bites with:

  • 1/4 cup mini chocolate chips
  • 1 tablespoon coconut oil

Mini chocolate chips add extra sweetness and texture. Coconut oil helps chocolate melt smoothly. Both ingredients make the bites even more delicious. Feel free to mix and match to your taste!

Recommended tools needed for preparation

Gather these tools to make the process easier:

  • Mixing bowl
  • Electric mixer or whisk
  • Small cookie scoop or your hands
  • Parchment paper
  • Baking sheet
  • Microwave-safe bowl

These tools help you mix, shape, and coat the bites easily. Parchment paper prevents sticking, and a baking sheet holds everything while it freezes.

Step-by-Step Instructions

Mixing the cream cheese base

Start with a mixing bowl. Add 8 oz of softened cream cheese. Then, pour in 1/2 cup of powdered sugar. Next, add 1 tsp of vanilla extract. Beat this mixture until it is smooth and creamy. This step is key for a great texture. Gently fold in 1 cup of graham cracker crumbs. If you want a chocolate touch, add 1/4 cup of mini chocolate chips. Mix until everything is fully blended.

Forming the cheesecake bites

Now, it’s time to shape the bites. Use your hands or a small cookie scoop. Form the mixture into small balls, about 1 inch wide. This size is perfect for popping in your mouth. Place these balls on a baking sheet lined with parchment paper. Make sure they have space between them. Freeze the bites for at least 30 minutes. This helps them hold their shape when you dip them in chocolate.

Melting the chocolate coating

While your cheesecake bites chill, prepare the chocolate coating. Take 8 oz of chopped dark chocolate and place it in a microwave-safe bowl. If you want a smoother melt, add 1 tablespoon of coconut oil. Microwave in 30-second intervals. Stir in between until the chocolate is fully melted and smooth. Once your cheesecake bites are firm, dip each one into the melted chocolate. Let any excess chocolate drip off. Return them to the baking sheet. Just before the chocolate hardens, sprinkle a pinch of sea salt on top. This adds a nice flavor boost. Finally, put the baking sheet back in the freezer for 10-15 minutes. This will set the chocolate completely.

Tips & Tricks

How to achieve a smooth chocolate coating

To get a smooth chocolate coating, use high-quality chocolate. I recommend dark chocolate for rich flavor. Chop it into small pieces to melt evenly. Add coconut oil to the chocolate. This helps it melt smoother. Heat the chocolate in short bursts. Microwave it in 30-second intervals. Stir it often to prevent burning. Once melted, the chocolate should be glossy. Dip each cheesecake bite quickly for the best results.

Best practices for forming uniform bites

For uniform cheesecake bites, use a small cookie scoop. This keeps each bite the same size. Roll the mixture in your hands gently. Aim for about 1 inch in diameter. Place them on parchment paper to avoid sticking. Make sure they are evenly spaced. Chilling them in the freezer helps firm them up. This makes dipping easier and cleaner.

Preventing chocolate from cracking

To stop the chocolate from cracking, make sure it cools slightly before dipping. If it is too hot, it might crack when it sets. Ensure the cheesecake bites are very cold. This helps the chocolate set quickly. After dipping, return them to the freezer to set fully. Sprinkle sea salt while the chocolate is still wet. This adds flavor and looks great.

Pro Tips

  1. Room Temperature Cream Cheese: Make sure your cream cheese is at room temperature for easier mixing and a smoother texture.
  2. Chill for Better Dipping: Ensure the cheesecake bites are thoroughly chilled before dipping in chocolate for a clean and even coating.
  3. Use Quality Chocolate: Opt for high-quality dark chocolate for the best flavor and a silky texture when melted.
  4. Experiment with Toppings: Get creative with toppings by adding crushed nuts, sprinkles, or even drizzling white chocolate for a decorative touch.

Variations

Alternative coatings (e.g., white chocolate, milk chocolate)

You can change the chocolate coating to fit your taste. Instead of dark chocolate, try white chocolate for a sweeter bite. Melt the white chocolate the same way as dark. You can also use milk chocolate for a creamier flavor. Each coating adds a new look and taste to your cheesecake bites.

Different fillings (e.g., fruit-flavored cheesecake)

You can make these bites more fun with different flavors. Try mixing in fruit puree, like strawberry or raspberry, into the cream cheese. This will give your bites a fruity twist. You can also add zest from lemon or orange for a fresh taste. This way, every bite can surprise you with a new flavor.

Dietary alternatives (gluten-free, vegan options)

You can easily adapt this recipe for different diets. For a gluten-free option, use gluten-free graham crackers. This keeps the crust crunchy without gluten. If you want a vegan version, swap cream cheese for a vegan cream cheese. Use coconut milk or almond milk for the chocolate coating. This way, everyone can enjoy the deliciousness of cheesecake bites.

Storage Info

How to store Chocolate Covered Cheesecake Bites

After making these bites, you want to keep them fresh. Store your chocolate-covered cheesecake bites in an airtight container. This helps prevent them from drying out or absorbing other odors. Place a piece of parchment paper between layers if you stack them. This keeps the chocolate from sticking.

Tips for freezing for longer shelf life

If you want to enjoy these bites later, freezing works well. First, place the bites on a baking sheet in a single layer. Freeze them for about an hour until firm. Then, transfer them to a freezer-safe bag or container. Make sure to remove as much air as possible. These bites can last up to three months in the freezer. When you’re ready to eat, let them thaw in the fridge overnight.

Best serving suggestions after storage

Serve the bites chilled for the best taste. You can drizzle extra melted chocolate over them for a nice touch. Adding a sprinkle of sea salt right before serving enhances the flavor. For a pop of color, consider garnishing with fresh mint leaves. This makes your dessert look even more inviting.

FAQs

Can I use different types of cheese for the filling?

Yes, you can! Cream cheese gives a rich taste. But you can also try mascarpone or ricotta. Each cheese adds a unique flavor. Just remember, the texture may change a bit. If you want lighter bites, use whipped cream cheese. It works well, too!

How long do Chocolate Covered Cheesecake Bites last?

These bites stay fresh for up to one week in the fridge. Store them in an airtight container. If you freeze them, they can last for up to three months. Just let them thaw in the fridge before enjoying. They taste great both ways!

Can I make these bites in advance for a party?

Absolutely! Making these bites a day or two ahead is a smart idea. It saves time on the party day. Just follow the recipe and store them properly. When you’re ready, serve them chilled. Your guests will love them!

You learned how to make tasty Chocolate Covered Cheesecake Bites. We talked about the main and optional ingredients and tools you need. I provided clear steps for mixing, shaping, and coating the bites. Tips helped you get a smooth finish and avoid cracks. We also explored fun variations and how to store your bites safely.

Enjoy making these bites for yourself or your friends. They will be a hit at any even

To make these cheesecake bites, you need: - 8 oz cream cheese, softened - 1/2 cup powdered sugar - 1 tsp vanilla extract - 1 cup graham cracker crumbs - 8 oz dark chocolate, chopped - Sea salt for garnish These ingredients create a creamy and sweet base. The cream cheese gives it richness. Powdered sugar adds sweetness, while vanilla brings in flavor. Graham cracker crumbs provide a nice crunch. Dark chocolate coats the bites for a decadent finish. You can enhance your bites with: - 1/4 cup mini chocolate chips - 1 tablespoon coconut oil Mini chocolate chips add extra sweetness and texture. Coconut oil helps chocolate melt smoothly. Both ingredients make the bites even more delicious. Feel free to mix and match to your taste! Gather these tools to make the process easier: - Mixing bowl - Electric mixer or whisk - Small cookie scoop or your hands - Parchment paper - Baking sheet - Microwave-safe bowl These tools help you mix, shape, and coat the bites easily. Parchment paper prevents sticking, and a baking sheet holds everything while it freezes. {{ingredient_image_1}} Start with a mixing bowl. Add 8 oz of softened cream cheese. Then, pour in 1/2 cup of powdered sugar. Next, add 1 tsp of vanilla extract. Beat this mixture until it is smooth and creamy. This step is key for a great texture. Gently fold in 1 cup of graham cracker crumbs. If you want a chocolate touch, add 1/4 cup of mini chocolate chips. Mix until everything is fully blended. Now, it's time to shape the bites. Use your hands or a small cookie scoop. Form the mixture into small balls, about 1 inch wide. This size is perfect for popping in your mouth. Place these balls on a baking sheet lined with parchment paper. Make sure they have space between them. Freeze the bites for at least 30 minutes. This helps them hold their shape when you dip them in chocolate. While your cheesecake bites chill, prepare the chocolate coating. Take 8 oz of chopped dark chocolate and place it in a microwave-safe bowl. If you want a smoother melt, add 1 tablespoon of coconut oil. Microwave in 30-second intervals. Stir in between until the chocolate is fully melted and smooth. Once your cheesecake bites are firm, dip each one into the melted chocolate. Let any excess chocolate drip off. Return them to the baking sheet. Just before the chocolate hardens, sprinkle a pinch of sea salt on top. This adds a nice flavor boost. Finally, put the baking sheet back in the freezer for 10-15 minutes. This will set the chocolate completely. To get a smooth chocolate coating, use high-quality chocolate. I recommend dark chocolate for rich flavor. Chop it into small pieces to melt evenly. Add coconut oil to the chocolate. This helps it melt smoother. Heat the chocolate in short bursts. Microwave it in 30-second intervals. Stir it often to prevent burning. Once melted, the chocolate should be glossy. Dip each cheesecake bite quickly for the best results. For uniform cheesecake bites, use a small cookie scoop. This keeps each bite the same size. Roll the mixture in your hands gently. Aim for about 1 inch in diameter. Place them on parchment paper to avoid sticking. Make sure they are evenly spaced. Chilling them in the freezer helps firm them up. This makes dipping easier and cleaner. To stop the chocolate from cracking, make sure it cools slightly before dipping. If it is too hot, it might crack when it sets. Ensure the cheesecake bites are very cold. This helps the chocolate set quickly. After dipping, return them to the freezer to set fully. Sprinkle sea salt while the chocolate is still wet. This adds flavor and looks great. Pro Tips Room Temperature Cream Cheese: Make sure your cream cheese is at room temperature for easier mixing and a smoother texture. Chill for Better Dipping: Ensure the cheesecake bites are thoroughly chilled before dipping in chocolate for a clean and even coating. Use Quality Chocolate: Opt for high-quality dark chocolate for the best flavor and a silky texture when melted. Experiment with Toppings: Get creative with toppings by adding crushed nuts, sprinkles, or even drizzling white chocolate for a decorative touch. {{image_2}} You can change the chocolate coating to fit your taste. Instead of dark chocolate, try white chocolate for a sweeter bite. Melt the white chocolate the same way as dark. You can also use milk chocolate for a creamier flavor. Each coating adds a new look and taste to your cheesecake bites. You can make these bites more fun with different flavors. Try mixing in fruit puree, like strawberry or raspberry, into the cream cheese. This will give your bites a fruity twist. You can also add zest from lemon or orange for a fresh taste. This way, every bite can surprise you with a new flavor. You can easily adapt this recipe for different diets. For a gluten-free option, use gluten-free graham crackers. This keeps the crust crunchy without gluten. If you want a vegan version, swap cream cheese for a vegan cream cheese. Use coconut milk or almond milk for the chocolate coating. This way, everyone can enjoy the deliciousness of cheesecake bites. After making these bites, you want to keep them fresh. Store your chocolate-covered cheesecake bites in an airtight container. This helps prevent them from drying out or absorbing other odors. Place a piece of parchment paper between layers if you stack them. This keeps the chocolate from sticking. If you want to enjoy these bites later, freezing works well. First, place the bites on a baking sheet in a single layer. Freeze them for about an hour until firm. Then, transfer them to a freezer-safe bag or container. Make sure to remove as much air as possible. These bites can last up to three months in the freezer. When you're ready to eat, let them thaw in the fridge overnight. Serve the bites chilled for the best taste. You can drizzle extra melted chocolate over them for a nice touch. Adding a sprinkle of sea salt right before serving enhances the flavor. For a pop of color, consider garnishing with fresh mint leaves. This makes your dessert look even more inviting. Yes, you can! Cream cheese gives a rich taste. But you can also try mascarpone or ricotta. Each cheese adds a unique flavor. Just remember, the texture may change a bit. If you want lighter bites, use whipped cream cheese. It works well, too! These bites stay fresh for up to one week in the fridge. Store them in an airtight container. If you freeze them, they can last for up to three months. Just let them thaw in the fridge before enjoying. They taste great both ways! Absolutely! Making these bites a day or two ahead is a smart idea. It saves time on the party day. Just follow the recipe and store them properly. When you’re ready, serve them chilled. Your guests will love them! You learned how to make tasty Chocolate Covered Cheesecake Bites. We talked about the main and optional ingredients and tools you need. I provided clear steps for mixing, shaping, and coating the bites. Tips helped you get a smooth finish and avoid cracks. We also explored fun variations and how to store your bites safely. Enjoy making these bites for yourself or your friends. They will be a hit at any event!

Decadent Chocolate Covered Cheesecake Bites

Delicious bite-sized cheesecake balls covered in rich dark chocolate.
Prep Time 15 minutes
Total Time 1 hour 15 minutes
Course Dessert
Cuisine American
Servings 20
Calories 150 kcal

Ingredients


  • 8 oz cream cheese, softened
  • 1/2 cup powdered sugar
  • 1 tsp vanilla extract
  • 1 cup graham cracker crumbs
  • 1/4 cup mini chocolate chips (optional)
  • 8 oz dark chocolate, chopped
  • 1 tbsp coconut oil (optional, for smooth melting)
  • to taste sea salt for garnish

Instructions


  • In a mixing bowl, beat the softened cream cheese, powdered sugar, and vanilla extract until smooth and creamy.
  • Gently fold in the graham cracker crumbs and mini chocolate chips (if using) until fully combined.
  • Using your hands or a small cookie scoop, form the cream cheese mixture into small bite-sized balls, about 1 inch in diameter.
  • Place the formed balls on a parchment-lined baking sheet and freeze for at least 30 minutes, until firm.
  • While the cheesecake bites are chilling, prepare the chocolate coating. In a microwave-safe bowl, combine the chopped dark chocolate and coconut oil, then microwave in 30-second intervals, stirring in between until fully melted and smooth.
  • Once the cheesecake bites are firm, dip each one into the melted chocolate, allowing any excess to drip off. Return them to the baking sheet.
  • Before the chocolate hardens, sprinkle a small pinch of sea salt on top of each chocolate-covered bite for an added flavor boost.
  • Place the baking sheet back in the freezer for about 10-15 minutes for the chocolate to set completely.
  • After setting, serve immediately, or store in an airtight container in the refrigerator for up to 1 week.

Notes

Arrange the cheesecake bites on a decorative platter and drizzle extra melted chocolate over the top for an elegant finish. You can also garnish with small sprigs of mint for color.
Keyword cheesecake, chocolate, dessert bites
To make these cheesecake bites, you need: - 8 oz cream cheese, softened - 1/2 cup powdered sugar - 1 tsp vanilla extract - 1 cup graham cracker crumbs - 8 oz dark chocolate, chopped - Sea salt for garnish These ingredients create a creamy and sweet base. The cream cheese gives it richness. Powdered sugar adds sweetness, while vanilla brings in flavor. Graham cracker crumbs provide a nice crunch. Dark chocolate coats the bites for a decadent finish. You can enhance your bites with: - 1/4 cup mini chocolate chips - 1 tablespoon coconut oil Mini chocolate chips add extra sweetness and texture. Coconut oil helps chocolate melt smoothly. Both ingredients make the bites even more delicious. Feel free to mix and match to your taste! Gather these tools to make the process easier: - Mixing bowl - Electric mixer or whisk - Small cookie scoop or your hands - Parchment paper - Baking sheet - Microwave-safe bowl These tools help you mix, shape, and coat the bites easily. Parchment paper prevents sticking, and a baking sheet holds everything while it freezes. {{ingredient_image_1}} Start with a mixing bowl. Add 8 oz of softened cream cheese. Then, pour in 1/2 cup of powdered sugar. Next, add 1 tsp of vanilla extract. Beat this mixture until it is smooth and creamy. This step is key for a great texture. Gently fold in 1 cup of graham cracker crumbs. If you want a chocolate touch, add 1/4 cup of mini chocolate chips. Mix until everything is fully blended. Now, it's time to shape the bites. Use your hands or a small cookie scoop. Form the mixture into small balls, about 1 inch wide. This size is perfect for popping in your mouth. Place these balls on a baking sheet lined with parchment paper. Make sure they have space between them. Freeze the bites for at least 30 minutes. This helps them hold their shape when you dip them in chocolate. While your cheesecake bites chill, prepare the chocolate coating. Take 8 oz of chopped dark chocolate and place it in a microwave-safe bowl. If you want a smoother melt, add 1 tablespoon of coconut oil. Microwave in 30-second intervals. Stir in between until the chocolate is fully melted and smooth. Once your cheesecake bites are firm, dip each one into the melted chocolate. Let any excess chocolate drip off. Return them to the baking sheet. Just before the chocolate hardens, sprinkle a pinch of sea salt on top. This adds a nice flavor boost. Finally, put the baking sheet back in the freezer for 10-15 minutes. This will set the chocolate completely. To get a smooth chocolate coating, use high-quality chocolate. I recommend dark chocolate for rich flavor. Chop it into small pieces to melt evenly. Add coconut oil to the chocolate. This helps it melt smoother. Heat the chocolate in short bursts. Microwave it in 30-second intervals. Stir it often to prevent burning. Once melted, the chocolate should be glossy. Dip each cheesecake bite quickly for the best results. For uniform cheesecake bites, use a small cookie scoop. This keeps each bite the same size. Roll the mixture in your hands gently. Aim for about 1 inch in diameter. Place them on parchment paper to avoid sticking. Make sure they are evenly spaced. Chilling them in the freezer helps firm them up. This makes dipping easier and cleaner. To stop the chocolate from cracking, make sure it cools slightly before dipping. If it is too hot, it might crack when it sets. Ensure the cheesecake bites are very cold. This helps the chocolate set quickly. After dipping, return them to the freezer to set fully. Sprinkle sea salt while the chocolate is still wet. This adds flavor and looks great. Pro Tips Room Temperature Cream Cheese: Make sure your cream cheese is at room temperature for easier mixing and a smoother texture. Chill for Better Dipping: Ensure the cheesecake bites are thoroughly chilled before dipping in chocolate for a clean and even coating. Use Quality Chocolate: Opt for high-quality dark chocolate for the best flavor and a silky texture when melted. Experiment with Toppings: Get creative with toppings by adding crushed nuts, sprinkles, or even drizzling white chocolate for a decorative touch. {{image_2}} You can change the chocolate coating to fit your taste. Instead of dark chocolate, try white chocolate for a sweeter bite. Melt the white chocolate the same way as dark. You can also use milk chocolate for a creamier flavor. Each coating adds a new look and taste to your cheesecake bites. You can make these bites more fun with different flavors. Try mixing in fruit puree, like strawberry or raspberry, into the cream cheese. This will give your bites a fruity twist. You can also add zest from lemon or orange for a fresh taste. This way, every bite can surprise you with a new flavor. You can easily adapt this recipe for different diets. For a gluten-free option, use gluten-free graham crackers. This keeps the crust crunchy without gluten. If you want a vegan version, swap cream cheese for a vegan cream cheese. Use coconut milk or almond milk for the chocolate coating. This way, everyone can enjoy the deliciousness of cheesecake bites. After making these bites, you want to keep them fresh. Store your chocolate-covered cheesecake bites in an airtight container. This helps prevent them from drying out or absorbing other odors. Place a piece of parchment paper between layers if you stack them. This keeps the chocolate from sticking. If you want to enjoy these bites later, freezing works well. First, place the bites on a baking sheet in a single layer. Freeze them for about an hour until firm. Then, transfer them to a freezer-safe bag or container. Make sure to remove as much air as possible. These bites can last up to three months in the freezer. When you're ready to eat, let them thaw in the fridge overnight. Serve the bites chilled for the best taste. You can drizzle extra melted chocolate over them for a nice touch. Adding a sprinkle of sea salt right before serving enhances the flavor. For a pop of color, consider garnishing with fresh mint leaves. This makes your dessert look even more inviting. Yes, you can! Cream cheese gives a rich taste. But you can also try mascarpone or ricotta. Each cheese adds a unique flavor. Just remember, the texture may change a bit. If you want lighter bites, use whipped cream cheese. It works well, too! These bites stay fresh for up to one week in the fridge. Store them in an airtight container. If you freeze them, they can last for up to three months. Just let them thaw in the fridge before enjoying. They taste great both ways! Absolutely! Making these bites a day or two ahead is a smart idea. It saves time on the party day. Just follow the recipe and store them properly. When you’re ready, serve them chilled. Your guests will love them! You learned how to make tasty Chocolate Covered Cheesecake Bites. We talked about the main and optional ingredients and tools you need. I provided clear steps for mixing, shaping, and coating the bites. Tips helped you get a smooth finish and avoid cracks. We also explored fun variations and how to store your bites safely. Enjoy making these bites for yourself or your friends. They will be a hit at any event!

Decadent Chocolate Covered Cheesecake Bites

Delicious bite-sized cheesecake treats covered in rich chocolate.
Prep Time 30 minutes
Cook Time 10 minutes
Total Time 40 minutes
Course Dessert
Cuisine American
Servings 12 servings
Calories 150 kcal

Ingredients
  

  • 8 oz cream cheese
  • 1 cup powdered sugar
  • 1 tsp vanilla extract
  • 1 cup chocolate chips
  • 2 tbsp butter
  • 1 cup graham cracker crumbs

Instructions
 

  • In a mixing bowl, combine cream cheese, powdered sugar, and vanilla extract until smooth.
  • Form the mixture into small balls and place them on a baking sheet.
  • Freeze the balls for about 15 minutes until firm.
  • Melt chocolate chips and butter together in a microwave or double boiler.
  • Dip each cheesecake ball into the melted chocolate, ensuring they are fully coated.
  • Return the chocolate-covered bites to the baking sheet and refrigerate until the chocolate is set.

Notes

Chill the bites for a firmer texture before serving.
Keyword bite-sized, cheesecake, chocolate, dessert

WANT TO SAVE THIS RECIPE?

Related Posts