
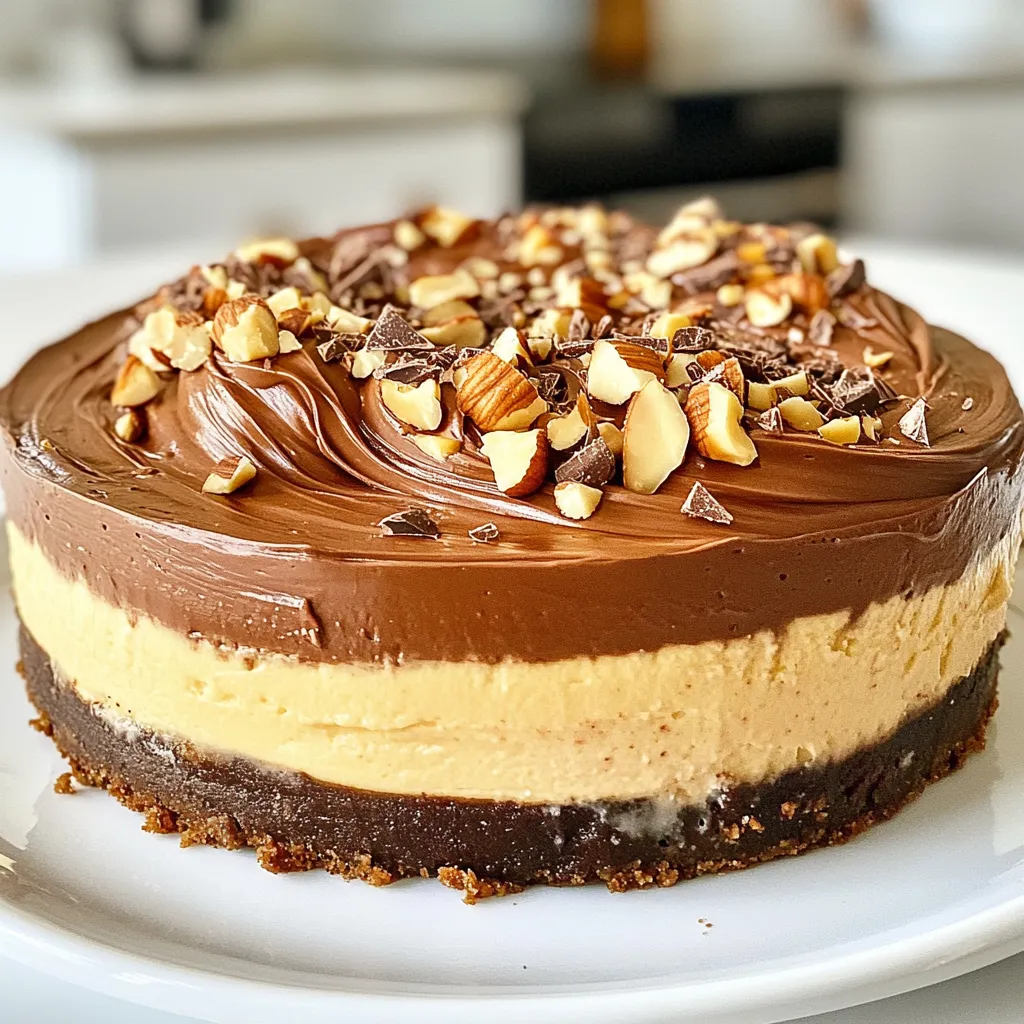
If you’re searching for a dessert that’s both rich and creamy, look no further. My Chocolate Hazelnut Cheesecake is a delightful treat that impresses every time. With a smooth filling and a crust that’s perfectly crispy, each slice melts in your mouth. From selecting high-quality ingredients to avoiding common pitfalls, this guide is packed with tips to help you create this indulgent dessert at home. Let’s dive into the delicious details!
Why I Love This Recipe
- Decadent Flavor: This cheesecake combines rich chocolate and nutty hazelnut flavors for an indulgent treat that’s hard to resist.
- Easy Preparation: With simple steps and common ingredients, this recipe is accessible to both novice and experienced bakers.
- Impressive Presentation: Garnished with toasted hazelnuts and chocolate shavings, it looks as good as it tastes, perfect for gatherings.
- Chill Time for Perfection: Allowing the cheesecake to chill overnight ensures a creamy texture and enhances the flavors beautifully.
Ingredients
List of Ingredients
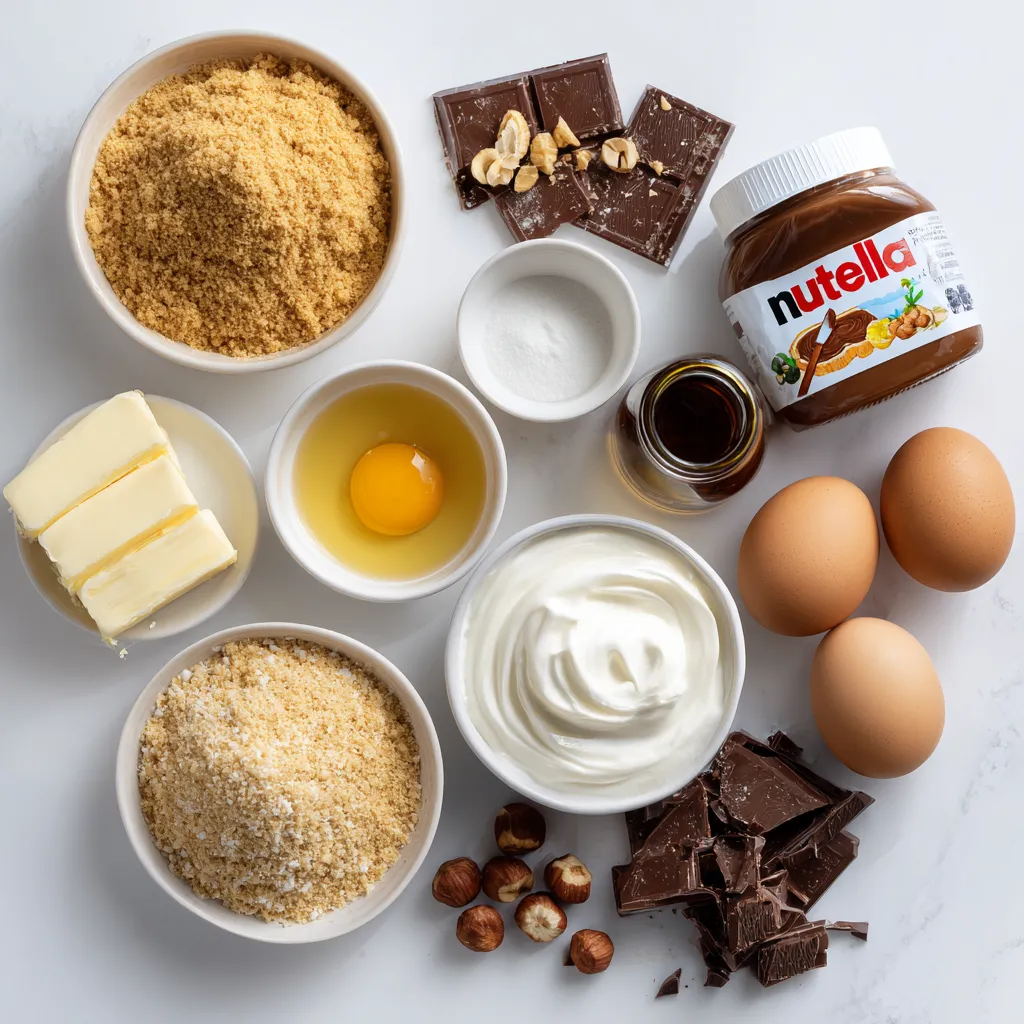
– 1 ½ cups graham cracker crumbs: This forms the crust and gives a sweet crunch.
– ½ cup unsalted butter, melted: It binds the crumbs and adds richness.
– 2 cups cream cheese, softened: This is the base of your cheesecake. Softened cream cheese blends well.
– 1 cup sugar: This sweetens the filling, balancing the rich flavors.
– 1 teaspoon vanilla extract: It adds warmth and depth to the overall taste.
– 1 cup Nutella: This chocolate hazelnut spread gives a decadent flavor.
– 3 large eggs: They help set the cheesecake and give it a creamy texture.
– 1 cup heavy cream: This adds a rich, smooth finish to the filling.
– ½ cup toasted hazelnuts, chopped: These are for garnish. They add crunch and flavor.
– Shaved chocolate: Use this for decoration. It enhances the visual appeal.
Notes on Ingredient Substitutions
– Graham cracker crumbs can be replaced with chocolate cookie crumbs for a richer base.
– Nutella can be swapped for any chocolate hazelnut spread if needed.
– Heavy cream could be replaced with coconut cream for a dairy-free option.
Tips for Selecting High-Quality Ingredients
– Choose fresh cream cheese for a smooth filling. Check the expiration date.
– Pick high-quality Nutella or chocolate spread for the best flavor. Look for a brand with real hazelnuts.
– Use unsalted butter to control the salt level in your cheesecake. It lets other flavors shine.
Step-by-Step Instructions
Preparing the Crust
To start, preheat your oven to 350°F (175°C). In a mixing bowl, combine 1 ½ cups of graham cracker crumbs with ½ cup of melted unsalted butter. Mix well until every crumb is coated.
Next, take this mixture and press it firmly into the bottom of a 9-inch springform pan. This forms your crust. Bake it for 8-10 minutes. This short baking time helps create a crispy texture. Once done, set it aside to cool.
Tips for a crispy crust:
– Use fresh graham cracker crumbs for the best flavor.
– Press the mixture down evenly to avoid weak spots.
Making the Filling
In a large mixing bowl, grab 2 cups of softened cream cheese. Beat it with an electric mixer until it turns smooth and creamy. Slowly add in 1 cup of sugar, mixing until everything blends nicely.
Now, it’s time to add flavor! Pour in 1 teaspoon of vanilla extract and 1 cup of Nutella. Blend well until combined. Don’t forget to scrape down the sides of the bowl if needed.
Next, add 3 large eggs one at a time. Mix on low speed until just combined after each egg. This step is key. Overmixing can make your cheesecake dense.
Finally, gently fold in 1 cup of heavy cream. Mix until everything looks well combined.
Baking and Cooling
Pour the filling over your cooled crust in the springform pan. Bake in the preheated oven for 55-60 minutes. The edges should be set, but the center should still jiggle slightly.
Once baked, turn off the oven and slightly crack the door. Let the cheesecake cool in the oven for about 1 hour. This cooling helps prevent cracks.
After cooling, refrigerate the cheesecake for at least 4 hours, or better yet, overnight. Chilling helps the cheesecake firm up and enhances the flavors.
Tips & Tricks
Perfecting the Cheesecake Texture
To get that smooth filling, start with room temperature cream cheese. Cold cream cheese can create lumps. Beat it well until it’s creamy before adding other ingredients.
To avoid cracks in your cheesecake, don’t overmix the batter. Mix just enough to combine. Also, bake at a lower temperature, around 325°F, to keep the heat gentle.
Use a springform pan for easy removal and a clean edge. A hand mixer is great for blending, but a stand mixer can give you more control.
Serving Suggestions
When it’s time to serve, place the cheesecake on a nice plate. You can add a drizzle of chocolate sauce or a dollop of whipped cream. Top it with fresh berries for a burst of color and flavor.
Pair this cheesecake with coffee or a glass of dessert wine. Both enhance the rich flavors. You could also try some light fruit tea for a refreshing touch.
Common Mistakes to Avoid
One big mistake is baking too long. Watch your cheesecake closely. It should jiggle slightly in the center when done.
If your cheesecake is overbaked, you can cover it with whipped cream to add moisture. For underbaked cheesecake, return it to the oven for a few more minutes.
Always let your ingredients sit at room temperature before mixing. This helps them blend better and gives a smoother texture.
Pro Tips
- Chill for Best Texture: Allow the cheesecake to chill overnight for a firmer texture and enhanced flavor.
- Use Room Temperature Ingredients: Ensure your cream cheese and eggs are at room temperature for a smoother filling.
- Prevent Cracking: To avoid cracks, bake the cheesecake in a water bath by placing the springform pan in a larger pan filled with hot water.
- Garnish Just Before Serving: Add hazelnuts and chocolate shavings right before serving to maintain their crunchiness.
Variations
Flavor Variations
You can easily switch up the taste of your cheesecake. For a nutty twist, try adding peanut butter. It blends well with the chocolate hazelnut flavor. If you enjoy coffee, a bit of espresso powder can enhance the richness too.
For crusts, think outside the box. An Oreo crust adds a chocolatey kick. If you want a lighter option, use almond flour mixed with butter. Both choices offer a fun twist.
Topping your cheesecake can also change the game. A silky chocolate ganache adds a luxurious finishing touch. Simply melt chocolate with cream, pour it over, and let it set.
Dietary Variations
If you need a gluten-free option, swap the graham crackers for gluten-free cookies. You can also use almond flour in the crust. Both choices work well and taste great.
For dairy-free needs, choose vegan cream cheese. Coconut cream is a fantastic substitute for heavy cream, too. These swaps keep your cheesecake creamy without dairy.
If you want to cut down on sugar, use a sugar substitute. Stevia or monk fruit sweetener works well in the filling. Just adjust the amount to match your taste.
Storage Info
Best Storage Practices
To keep your chocolate hazelnut cheesecake fresh, store it in the fridge. Here’s how:
– Wrap it well: Use plastic wrap or aluminum foil to cover the cheesecake. This helps keep it moist and prevents odors.
– Use a container: Place the cheesecake in an airtight container. This adds extra protection against drying out.
– Label the date: Write the date on the container to track freshness.
If you have leftover cheesecake, you can freeze it too. Here are some tips:
– Slice before freezing: Cut the cheesecake into pieces. This makes it easier to thaw just what you need.
– Use parchment paper: Place parchment paper between slices to prevent sticking.
– Wrap and seal: Wrap each slice in plastic wrap, then place in a freezer bag. Make sure to push out the air before sealing.
Shelf Life
In the fridge, your cheesecake lasts about 5 to 7 days. Always check for signs of spoilage. Here’s what to look for:
– Smell: If it smells sour or off, it’s time to toss it.
– Texture: If the surface is slimy or dry, it may have gone bad.
– Color: Any discoloration or mold means it’s not safe to eat.
If you freeze your cheesecake, it can last up to 3 months. When ready to enjoy, thaw the cheesecake in the fridge overnight. Avoid thawing at room temperature, as this can affect the texture.
FAQs
Can I use another type of chocolate spread instead of Nutella?
Yes, you can use other chocolate spreads. Brands like Justin’s or Hershey’s work well. If you choose a spread with less sugar, you might need to adjust the sugar in the recipe. Always taste the filling before baking. This way, you can ensure the flavor is just right.
How long should I cool the cheesecake?
After baking, let the cheesecake cool in the oven for one hour. This helps it set slowly. Then, move it to the fridge. Chilling for at least four hours is best, but overnight is even better. This makes the texture smooth and creamy.
Can cheesecake be made ahead of time?
Yes, cheesecake is great for making ahead. You can bake it one to two days before serving. Store it in the fridge, covered with plastic wrap. This allows the flavors to develop. Just remember to garnish it right before serving for the best look.
We’ve covered a lot about making a great cheesecake. You learned about the right ingredients, how to prepare the crust, and the proper steps for the filling. Remember the tips for a smooth texture and the ways to avoid common mistakes. Don’t forget the flavor variations and proper storage methods.
In the end, making cheesecake is fun and rewarding. Enjoy creating your perfect desser


