Chocolate Hazelnut Protein Shake Tasty and Smooth Drink

If you’re looking for a delicious way to boost your protein intake, you’ve found it! This Chocolate Hazelnut Protein Shake is creamy, smooth, and packed with flavor. With just a few simple ingredients, you can whip up this tasty drink in no time. Whether you want a healthy breakfast or a post-workout treat, this shake hits the spot. Let’s dive into how to make this delightful drink and enjoy its many benefits!
Why I Love This Recipe
- Rich Chocolate Flavor: This shake satisfies my chocolate cravings while providing a nutritious boost.
- Protein-Packed: With the addition of protein powder, this shake is perfect for post-workout recovery.
- Quick and Easy: It takes just 5 minutes to make, making it a convenient option for busy mornings.
- Customizable: You can easily adjust sweetness and creaminess to suit your taste preferences.
Ingredients
Detailed Ingredient List
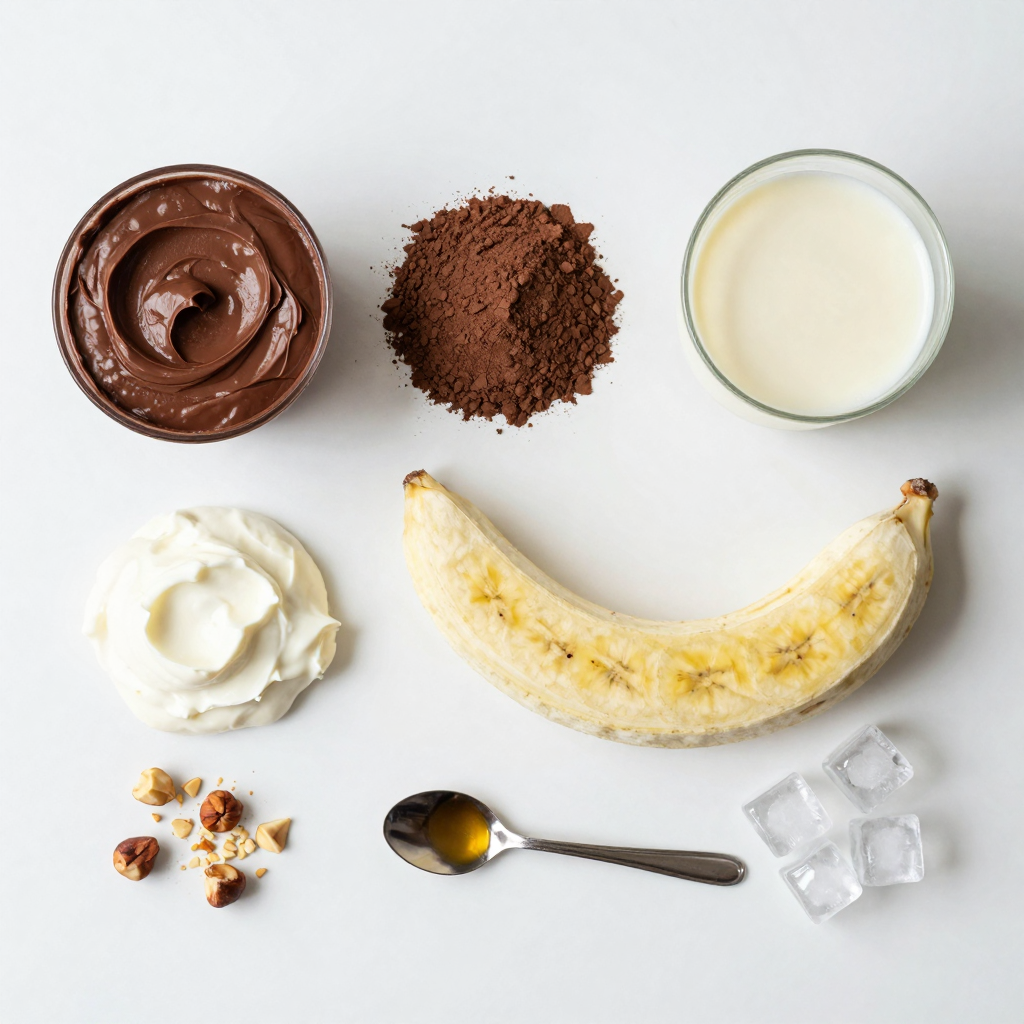
- 1 tablespoon chocolate hazelnut spread
- 1 scoop chocolate protein powder
- 1 cup unsweetened almond milk
- 1 frozen banana
- 2 tablespoons Greek yogurt (optional)
- 1 teaspoon vanilla extract
- 1 tablespoon chopped hazelnuts (for garnish)
- Ice cubes (optional)
Each ingredient brings a unique flavor and texture to the shake. The chocolate hazelnut spread adds richness and sweetness. I love using Nutella, but any good brand works well.
The chocolate protein powder boosts the shake’s protein content. It can help you feel full longer. Unsweetened almond milk keeps it light and creamy, but you can use any milk you like.
A frozen banana brings natural sweetness and creaminess. If you want an extra creamy shake, Greek yogurt is a great choice. It adds protein too.
Vanilla extract enhances the chocolate flavor, making it more delicious. I like to sprinkle chopped hazelnuts on top for a crunchy finish.
If you want a thicker shake, add ice cubes to the mix. They cool it down and make it super refreshing. Each ingredient plays a key role in making this shake both tasty and nutritious.

Step-by-Step Instructions
Preparing the Ingredients
First, measure out all your ingredients. This makes blending easier. You will need:
- 1 tablespoon chocolate hazelnut spread
- 1 scoop chocolate protein powder
- 1 cup unsweetened almond milk
- 1 frozen banana
- 2 tablespoons Greek yogurt (optional)
- 1 teaspoon vanilla extract
- Ice cubes (optional)
- 1 tablespoon chopped hazelnuts (for garnish)
When selecting your frozen banana, choose one that is ripe. Ripe bananas have a sweet taste. Peel and slice the banana before freezing for easier blending.
Blending Process
Next, add the ingredients to the blender. Start with the liquid first. This helps the blades move freely. The order is important:
1. Unsweetened almond milk
2. Chocolate hazelnut spread
3. Chocolate protein powder
4. Frozen banana
5. Greek yogurt (if using)
6. Vanilla extract
7. Ice cubes (if desired)
Blend on high for about 30 seconds. Stop and check the texture. You want it smooth and creamy. If it looks too thick, add a little more almond milk.
Serving the Shake
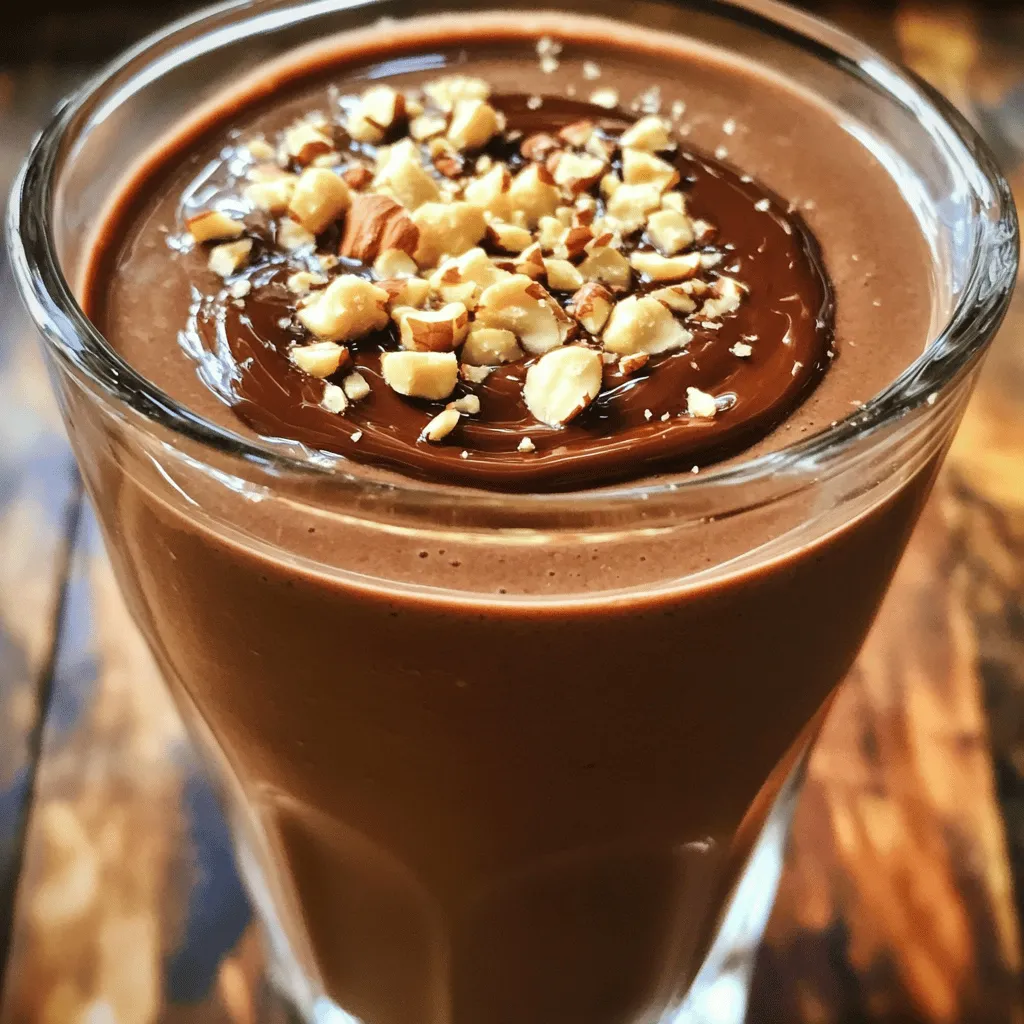
Once blended, pour the shake into a glass. You can use a tall glass for a nice presentation. For garnish, sprinkle the chopped hazelnuts on top. This adds a nice crunch and makes your shake look fancy. Enjoy your tasty and smooth drink!
Pro Tips
- Use Frozen Bananas: Frozen bananas not only add creaminess but also chill the shake without the need for extra ice.
- Try Different Milk: Experiment with different types of milk, such as oat or coconut milk, to find your favorite flavor combination.
- Boost the Protein: Add an extra scoop of protein powder or some flaxseeds for an additional protein boost and nutrition.
- Garnish Creatively: In addition to hazelnuts, consider using cocoa nibs or shredded coconut for a unique and flavorful garnish.
Tips & Tricks
Achieving the Perfect Consistency
To get the right thickness for your shake, you can add ice cubes. More ice makes it thicker. Blend in the ice until you get your desired texture. For smoothness, use a high-speed blender. This helps mix everything well and gives a creamy finish.
Sweetness Adjustments
If you find your shake needs more sweetness, consider adding honey. You can also add another spoonful of hazelnut spread. If you want to try something different, use maple syrup or agave nectar. These options work well without overpowering the chocolate flavor.
Enhancing Flavor
Want to change the flavor? You can add a scoop of peanut butter for a nutty twist. A dash of cinnamon also adds warmth. If you love fruit, try adding berries or a scoop of instant coffee. These pair nicely with chocolate and hazelnut.

Variations
Different Protein Powder Options
You can choose different protein powders for your shake. Plant-based protein works well for those who prefer vegan options. It blends nicely and adds a good taste. Whey protein is another choice and gives a creamy texture. Both types are rich in protein, so you can pick what suits you best.
Flavored protein powders can add a twist to your shake. You might find chocolate, vanilla, or even hazelnut flavors. Using these can make your shake even more fun and tasty.
Dairy-Free and Vegan Options
If you want a dairy-free shake, skip the Greek yogurt. You can use a plant-based yogurt instead. Coconut yogurt is a great choice. It adds creaminess and a light coconut flavor.
For milk, stick with unsweetened almond milk or any plant-based milk. Options like oat milk or soy milk also work well. They give the shake a nice taste without dairy.
Nut-Free Options
If you have nut allergies, there are safe substitutes for hazelnuts. You can use sunflower seeds or pumpkin seeds. They add a nutty taste without the nuts.
To keep the flavor profile similar, try using a dash of hazelnut extract. It gives you that beloved hazelnut taste without any nuts. You can still enjoy a delicious shake without worrying about allergies.
Storage Info
Best Practices for Storing
To store leftovers, put your shake in an airtight container. Place it in the fridge. This helps keep it fresh for later. You can also freeze it for long-term storage. Use ice cube trays or freezer-safe bags for freezing. Just remember to leave some space for expansion.
Shelf Life
Refrigerated shakes last about 1 to 2 days. After that, they may lose flavor. Look for changes in color or smell as signs of spoilage. If it smells off or looks strange, it’s best to toss it.
Rejuvenating Leftovers
To refresh stored shakes, pour them back into a blender. Blend again until smooth. If the shake seems thick, add a splash of milk. This helps bring back its creamy texture. For the best taste, enjoy it within a couple of days after storing.
FAQs
Can I use regular milk instead of almond milk?
Yes, you can use regular milk. It will change the flavor a bit. Almond milk gives a nice nutty taste. If you prefer cow’s milk, go for it. Your shake will still be tasty and smooth.
How can I make this protein shake vegan?
To make this shake vegan, swap the Greek yogurt for a plant-based yogurt. You can also use plant-based protein powder. Choose almond or oat milk for a creamy base. These changes keep all the rich flavor while making it vegan.
What are the health benefits of this protein shake?
This protein shake is great for muscle repair and energy. It has protein, healthy fats, and fiber. The banana adds potassium, which helps your muscles. Hazelnuts are full of good fats and nutrients. This shake can support your workout goals and keep you full.
Can I add greens like spinach to this shake?
Yes, you can add spinach! It blends well and won’t change the taste much. Spinach adds vitamins and minerals without many calories. Just toss in a handful when you blend. It’s a simple way to boost nutrition.
How many calories are in a chocolate hazelnut protein shake?
This shake has about 400 calories. The exact number depends on your milk and yogurt choice. If you want a lighter shake, skip the yogurt or use less hazelnut spread. Adjusting these ingredients can help fit your diet plans.
This blog post covered everything you need to know about making a chocolate hazelnut protein shake. We explored each ingredient, detailed the steps for blending, and discussed tips for consistency and flavor. You can easily adjust the recipe to fit your needs, whether you prefer vegan options or different protein sources.
Enjoy experimenting with variations and storage tips! This shake is not just tasty; it’s also a great way to boost your nutrition. Keep these pointers in mind, and you’ll create a delicious shake every time.

Chocolate Hazelnut Protein Shake
Ingredients
1 tablespoon chocolate hazelnut spread (like Nutella)
1 scoop chocolate protein powder
1 cup unsweetened almond milk (or any milk of choice)
1 banana, frozen
2 tablespoons Greek yogurt (optional for creaminess)
1 tablespoon chopped hazelnuts (for garnish and added crunch)
1 teaspoon vanilla extract
Ice cubes (optional for a thicker texture)
Instructions
In a blender, combine the chocolate hazelnut spread, chocolate protein powder, unsweetened almond milk, frozen banana, and Greek yogurt (if using).
Add the vanilla extract and as many ice cubes as you like for thickness.
Blend on high until smooth and creamy, ensuring all ingredients are well combined.
Taste the shake and adjust sweetness if desired by adding a little honey or another spoonful of hazelnut spread.
Pour the shake into a glass and sprinkle with chopped hazelnuts on top for garnish.
Prep Time: 5 minutes | Total Time: 5 minutes | Servings: 1

Chocolate Hazelnut Protein Shake
Ingredients
- 1 tablespoon chocolate hazelnut spread (like Nutella)
- 1 scoop chocolate protein powder
- 1 cup unsweetened almond milk (or any milk of choice)
- 1 banana frozen
- 2 tablespoons Greek yogurt (optional for creaminess)
- 1 tablespoon chopped hazelnuts (for garnish and added crunch)
- 1 teaspoon vanilla extract
- to taste ice cubes (optional for a thicker texture)
Instructions
- In a blender, combine the chocolate hazelnut spread, chocolate protein powder, unsweetened almond milk, frozen banana, and Greek yogurt (if using).
- Add the vanilla extract and as many ice cubes as you like for thickness.
- Blend on high until smooth and creamy, ensuring all ingredients are well combined.
- Taste the shake and adjust sweetness if desired by adding a little honey or another spoonful of hazelnut spread.
- Pour the shake into a glass and sprinkle with chopped hazelnuts on top for garnish.


![To make this tasty drink, you need: - 1 cup fresh blackberries - 1 cup water (for blackberry syrup) - 1 cup granulated sugar - 1 tablespoon dried lavender flowers - 1 cup fresh lemon juice (about 4-6 lemons) - 3-4 cups cold water (for dilution) - Ice cubes for serving The fresh blackberries bring a sweet burst of flavor. Their deep color makes the drink pretty too. The sugar helps balance the tartness of the lemons. Dried lavender flowers add a lovely floral note, making this drink feel special. You can make your drink even prettier with these garnishes: - Fresh blackberries - Lemon slices - Lavender sprigs Adding fresh blackberries and lemon slices on top makes the drink pop. Lavender sprigs can add a nice touch of elegance. You can mix and match these options to fit your style. If you want to learn how to make this refreshing drink, check out the Full Recipe. To start, you will need to make the blackberry syrup. Take a saucepan and combine 1 cup of fresh blackberries, 1 cup of water, and 1 cup of granulated sugar. This mixture is the heart of your drink. Bring it to a gentle simmer over medium heat. Stir it now and then. This helps the blackberries break down and release their juices. This should take about 5 to 7 minutes. Next, it’s time to add the lavender flavor. Stir in 1 tablespoon of dried lavender flowers into your syrup mixture. Reduce the heat and let it simmer for another 2 to 3 minutes. Then, remove the saucepan from the heat. Let the mixture steep for about 10 minutes. This step allows the lavender to infuse its wonderful aroma and taste into the syrup. Now, you are ready to mix your lemonade. In a large pitcher, combine the blackberry syrup with 1 cup of fresh lemon juice. You can use about 4 to 6 lemons to get this much juice. Then, add 3 to 4 cups of cold water to the pitcher. Stir well and taste your mixture. Adjust the sweetness or tartness to your liking. You can add more sugar if it’s too tart or more lemon juice if it’s too sweet. This process lets you create a refreshing drink that highlights the best of summer. For the full recipe, you can refer to the earlier section. Enjoy your cooling drink on a hot day! To make your blackberry lavender lemonade shine, focus on the right balance. Use equal parts sugar and lemon juice for a perfect blend. For example, if you use one cup of lemon juice, add one cup of sugar. This gives a nice sweet-tart flavor. You can adjust the sugar based on your taste, but this ratio works well for most. When straining the syrup, use a fine mesh strainer. This step is key to a smooth drink. Press down gently on the solids. This helps you get every drop of flavor. Discard the leftover solids, and you’ll have a beautiful syrup. Finding fresh blackberries and lavender is easy if you know where to look. Visit your local farmers market for the best options. Farmers often sell ripe blackberries in season. You can also check grocery stores. Look for berries that are firm and dark. For lavender, specialty shops or online stores often carry it. Make sure to choose culinary-grade lavender for the best flavor. You can also grow it yourself if you like gardening! When it comes to organic versus non-organic options, organic is often better. Organic berries have less pesticide. They taste fresher, too. However, if you can’t find organic, non-organic is still a good option and will work well in your drink. If you want to whip up this delightful drink, refer to the Full Recipe for all the details. {{image_2}} You can switch up the berries in this drink. Raspberries or blueberries work great. They each give a unique taste and color. You might even mix different berries for more fun! Try using honey or agave syrup instead of sugar. These natural sweeteners add depth to the flavor. They also make the drink a bit healthier. Adding herbs can give your drink a fresh twist. Mint adds a cool taste, while basil gives a warm flavor. Just a few leaves can change everything. If you want a stronger lavender taste, use more dried flowers. For a milder taste, reduce the amount. This lets you control the flavor profile to suit your mood or crowd. For the Full Recipe, check out the details above. To keep your blackberry lavender lemonade fresh, store it in the fridge. Use a large glass or plastic pitcher. Make sure the lid is on tight to avoid spills and keep out other smells. If you don’t have a pitcher, you can use a clean jar with a lid. Just remember to keep it covered. Your lemonade will stay fresh for about three to five days in the fridge. After that, it may lose its taste and color. If you have leftover lemonade, get creative! You can blend it into smoothies, use it to make popsicles, or even splash it into sparkling water for a tasty twist. Enjoy the refreshing flavor in many ways! To change the sweetness, you can add more or less sugar. If it’s too sweet, add more lemon juice. If it’s not sweet enough, mix in more sugar. Start with a small amount and taste it. This way, you can find the perfect balance for your drink. You can also try using honey or agave syrup as alternatives. Yes, you can use frozen blackberries. They are easy to find and often cheaper. They also save time since you don’t need to wash or pick them. However, frozen blackberries might be less firm and a bit mushy once thawed. If you choose frozen, use them straight from the freezer to make blackberry syrup. This will help keep the flavors fresh. Lavender offers calming effects and can help with sleep. It also has antioxidants that protect your cells. Blackberries are full of vitamins C and K. They are low in calories and high in fiber. This helps with digestion and supports a healthy heart. Drinking Blackberry Lavender Lemonade can refresh you while providing these health benefits. Enjoying this drink not only tastes good but also supports your wellness. For the full recipe, check out the [Full Recipe]. Blackberry lavender lemonade combines fresh berries, sweet sugar, and bright lemon juice. We learned how to make blackberry syrup, infuse lavender, and assemble the drink. I shared tips on ingredient sourcing, sweetening, and storing. You can even play with variations! This refreshing drink is fun to make and enjoy. Try your own twists and share this delightful recipe with friends. Happy sipping!](https://dailydishlab.com/wp-content/uploads/2025/07/3ca7755b-589d-4967-9590-f9a8bff39cf7-768x768.webp)
![For the Lemon Ginger Turmeric Smoothie, gather these simple ingredients: - 1 banana, frozen - 1 cup almond milk (or any milk of choice) - 1 tablespoon fresh ginger, grated - 1 teaspoon ground turmeric - 1 tablespoon honey (or maple syrup for a vegan option) - Juice of 1 lemon - 1/2 teaspoon cinnamon - A pinch of black pepper (to enhance turmeric absorption) - Ice cubes (optional, for a colder smoothie) - Banana adds creaminess and provides potassium. This helps with muscle function and heart health. - Almond milk is low in calories and dairy-free. It offers a nutty flavor and healthy fats. - Fresh ginger boosts digestion and fights inflammation. It also adds a zesty kick. - Ground turmeric contains curcumin, which has anti-inflammatory effects. This spice may help improve brain health. - Honey gives natural sweetness and has antioxidants. It can soothe sore throats and boost energy. - Lemon juice is high in vitamin C. It supports your immune system and adds a refreshing taste. - Cinnamon can regulate blood sugar and may help lower cholesterol levels. It adds warmth to the flavor. - Black pepper enhances the absorption of turmeric. It also adds a little heat to the mix. - Ice cubes make the smoothie cold and refreshing, especially in warm weather. You can swap ingredients to fit your needs: - Use any frozen fruit in place of banana for different flavors. - Substitute coconut milk or soy milk for almond milk if you prefer. - Replace fresh ginger with ground ginger in a pinch, but use less. - Use agave syrup instead of honey for a vegan sweetener. - If you don’t have ground turmeric, fresh turmeric can work as well. - For a spice boost, consider adding nutmeg instead of cinnamon. Feel free to mix and match to create your perfect smoothie! You can find the Full Recipe for detailed steps and tips. Start by gathering your ingredients. You will need: - 1 banana, frozen - 1 cup almond milk (or any milk of choice) - 1 tablespoon fresh ginger, grated - 1 teaspoon ground turmeric - 1 tablespoon honey (or maple syrup for a vegan option) - Juice of 1 lemon - 1/2 teaspoon cinnamon - A pinch of black pepper - Ice cubes (optional) Peel and grate the fresh ginger. This step makes the ginger easier to blend. Next, freeze your banana overnight. This will give your smoothie a creamy texture. Now it’s time to blend. In a blender, add: - The frozen banana - Almond milk - Grated ginger - Ground turmeric - Honey - Lemon juice - Cinnamon - Black pepper Blend on high speed for about 1-2 minutes. You want the mixture to be smooth and creamy. If you like it colder, add some ice cubes. Blend again until well mixed. Taste your smoothie. If you want it sweeter, add more honey or maple syrup. Blend briefly again if you do. Pour your smoothie into a tall glass. For a nice touch, garnish with a slice of lemon on the rim. You can also sprinkle a bit of turmeric on top. This makes the drink look great and adds a little extra flavor. Enjoy your Lemon Ginger Turmeric Smoothie right away for the best taste. For the full recipe, check the previous section. To get the smoothest texture, always use a frozen banana. This gives the smoothie a creamy base. Make sure to blend on high speed for about one to two minutes. If you find the texture too thick, add more almond milk. This helps to create a silky consistency. Taste your smoothie before serving. If you want more sweetness, add a bit of honey or maple syrup. Start with a small amount, like a half tablespoon. Blend again to mix well. You can always add more, but you can’t take it out! A high-speed blender works best for this smoothie. It makes sure all the ingredients blend evenly. If you don’t have one, a regular blender will work, but you may need to blend longer. Use a measuring cup for accurate ingredient amounts. A good knife makes peeling and grating ginger easier. For the full recipe, check out the section above. {{image_2}} You can make this smoothie even better by adding seasonal fruits. Fresh fruits can change the flavor and add more nutrition. In spring, try fresh strawberries or peaches. In summer, add ripe mango or watermelon. Autumn brings apples and pears, while winter is perfect for oranges or pomegranates. Each fruit offers unique vitamins that boost your health. This smoothie is easy to make dairy-free and vegan. Use almond milk or coconut milk instead of regular milk. For sweetness, use maple syrup instead of honey. This keeps the drink plant-based and still delicious. You can also add a scoop of your favorite plant-based protein powder for extra fuel. Want to make your smoothie even healthier? Consider adding a handful of spinach or kale. This gives you more fiber and vitamins without changing the taste much. You can also throw in some chia seeds or flaxseeds for healthy fats and omega-3s. These small changes can pack a big punch in nutrition. For the full recipe, check out the section above. If you have leftover smoothie, store it in an airtight container. Place it in the fridge. It can last for up to two days. When you want to enjoy it again, give it a good shake or stir. This will help mix it back up. The smoothie may separate a bit, but that’s normal. You can freeze parts of the smoothie for later use. Freeze the banana and ginger separately. This way, you can blend them fresh when you want a smoothie. To freeze, slice the banana and place it in a bag. Grate the ginger and store it in a small container. You can use these frozen pieces anytime for a quick, healthy drink. Smoothies are best enjoyed cold, but if you need to reheat, do so gently. Pour it into a pot and warm it on low heat. Stir often to keep the texture smooth. You can also add a little almond milk to refresh it if it thickens. For a quick pick-me-up, blend in some ice cubes to chill it right before serving. For the full recipe and more tips, check out the [Full Recipe]. Yes, you can use frozen ginger. It still has great flavor. However, fresh ginger adds a brighter taste. If you use frozen, just grate it first. This will help it blend better. Turmeric is known for its many health benefits. It may help reduce inflammation in the body. This spice also supports brain health and boosts immunity. Turmeric contains curcumin, which is a powerful antioxidant. Adding black pepper helps your body absorb turmeric better. If your smoothie is too thick, add more liquid. You can use almond milk or water. Blend it again until you reach your desired thickness. Another option is to use less frozen banana. Adjust it to fit your taste! Check out the Full Recipe for more tips. This blog post covered key smoothie ingredients and their health benefits. We explored how to prepare, blend, and serve your smoothies for the best taste. Tips helped you achieve great texture and adjust sweetness perfectly. You learned about delicious variations and smart storage methods. In summary, making smoothies can be fun and healthy. Experiment with flavors and find what you love. Enjoy your smoothie journey and boost your health!](https://dailydishlab.com/wp-content/uploads/2025/06/39b90a8c-8945-4064-ab1e-a02d16f24ba0-768x768.webp)

