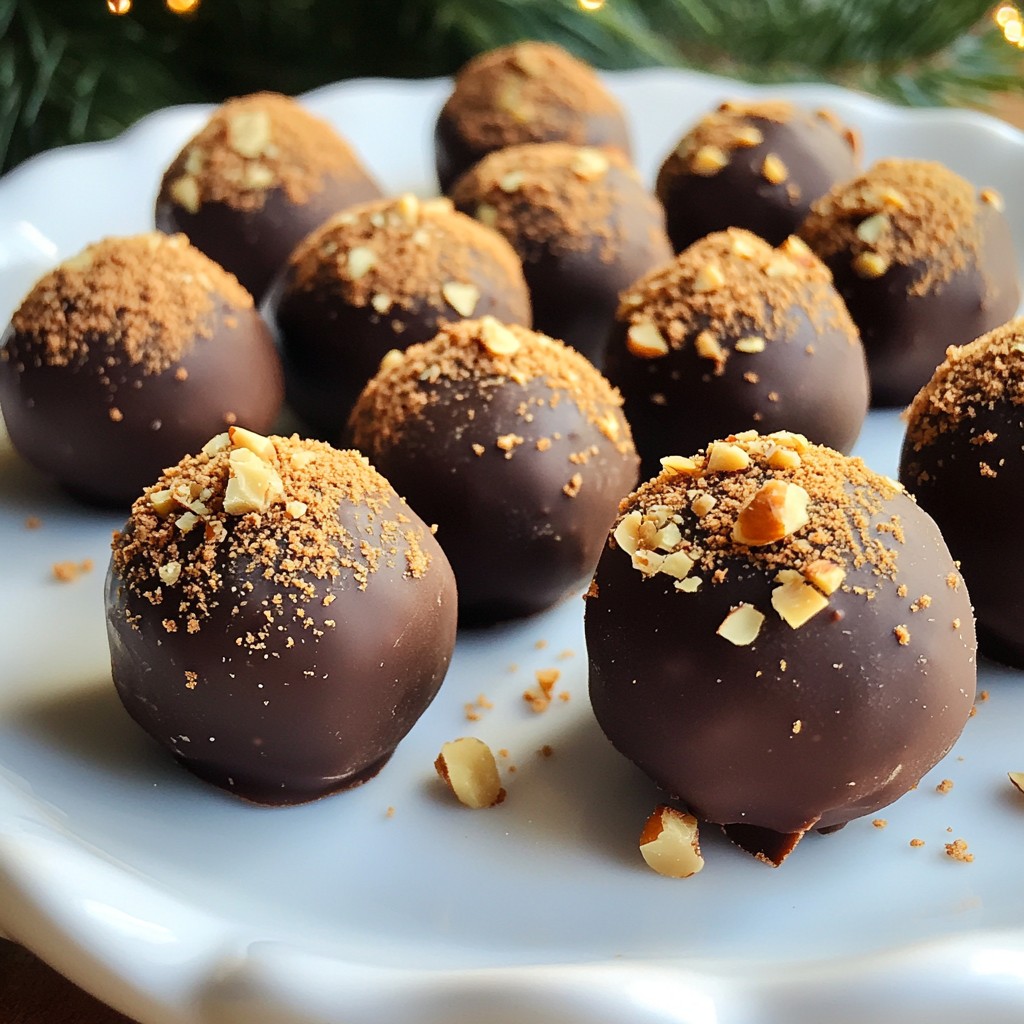
Are you ready to indulge in a sweet delight? My Chocolate Hazelnut Truffles recipe offers a heavenly blend of rich dark chocolate and nutty hazelnuts. You'll enjoy every step as we transform simple ingredients into luxurious treats. Perfect for gifting or a personal treat, these truffles are quick to make and even easier to enjoy. Let’s dive into this irresistible recipe that will leave your taste buds craving more!
Why I Love This Recipe
- Indulgent Flavor: These truffles are a perfect blend of rich dark chocolate and nutty hazelnuts, creating a decadent treat that melts in your mouth.
- Simple Ingredients: With just a few high-quality ingredients, you can create a luxurious dessert that impresses without a lot of fuss.
- Customizable: Feel free to experiment with different coatings or add-ins like crushed spices or flavored extracts to make them your own!
- Perfect for Gifting: These truffles make an elegant gift for any occasion, especially when beautifully packaged and presented.
Ingredients
List of Ingredients
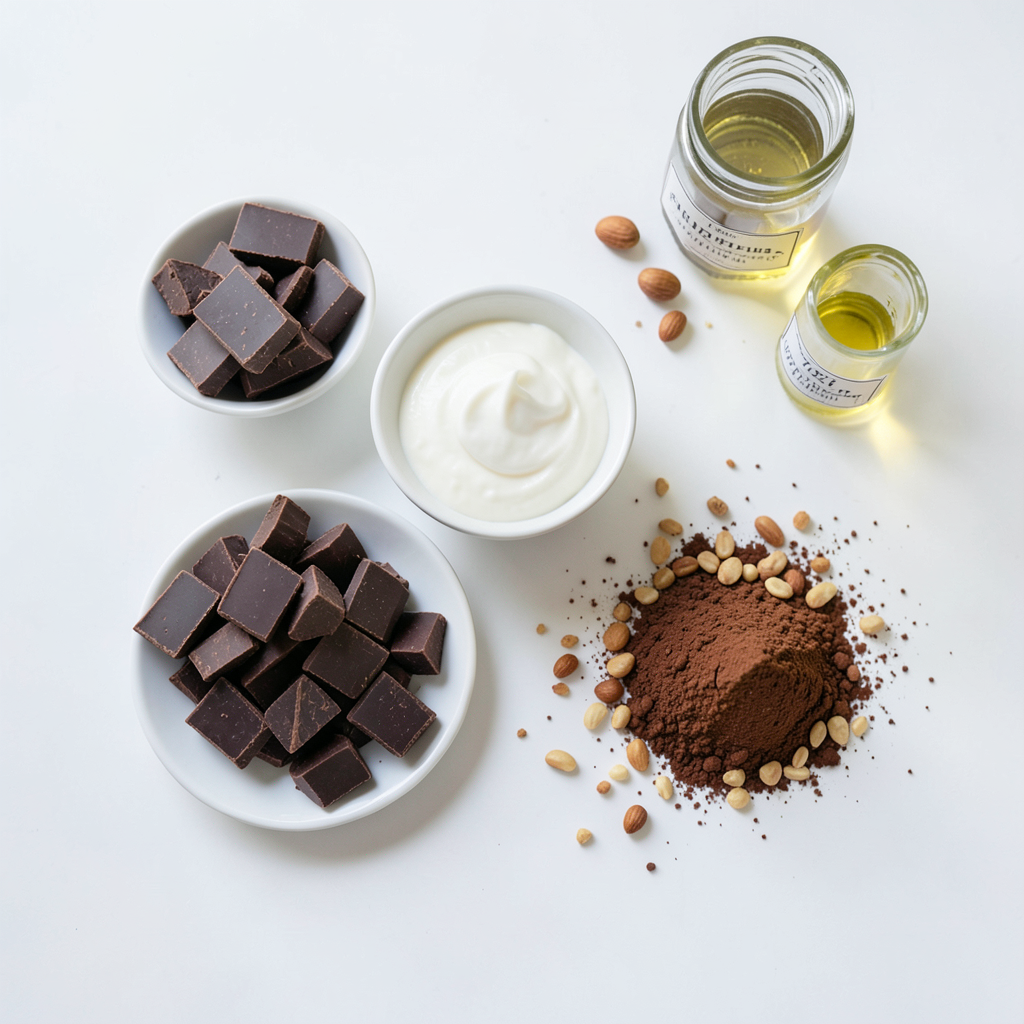
- 200g dark chocolate (70% cocoa), chopped
- 100ml heavy cream
- 50g hazelnuts, finely ground
- 20g unsweetened cocoa powder
- 2 tablespoons coconut oil
- 1 teaspoon vanilla extract
- Pinch of salt
Ingredient Substitutions
- Alternatives for chocolate: You can use milk chocolate or semi-sweet chocolate if you prefer a sweeter taste.
- Non-dairy options for cream: Use coconut cream or almond milk for a tasty dairy-free option.
- Other nut options: If hazelnuts are not available, try almonds or walnuts for a different flavor.
These ingredients create rich and creamy chocolate hazelnut truffles. Each one offers a delightful burst of flavor. With simple swaps, you can adjust the recipe to fit your taste or dietary needs. Enjoy exploring these options while making your truffles!
Step-by-Step Instructions
Preparation Overview
1. Start by heating the cream. Pour 100ml of heavy cream into a small saucepan. Place it on medium heat. Watch closely as it heats. You want it to simmer, not boil. This step helps blend flavors well.
2. Next, melt the chocolate. Chop 200g of dark chocolate into small pieces. When the cream simmers, remove it from the heat. Add the chocolate to the hot cream. Let it sit for 2 minutes. This resting time helps the chocolate melt smoothly.
Combining Ingredients
1. Now it’s time to mix in coconut oil and vanilla. Stir the chocolate and cream until smooth. Add 2 tablespoons of coconut oil and 1 teaspoon of vanilla extract. Mix well until everything is combined.
2. Then, add the ground hazelnuts. Incorporate 50g of finely ground hazelnuts into the mixture. This adds a nutty flavor and great texture. Mix until everything is well blended.
Shaping and Coating
1. It’s time to shape the truffles. Transfer the mixture into a bowl. Let it cool to room temperature first. Cover it with plastic wrap and refrigerate for 2 hours. Once firm, scoop out small pieces. Roll each piece into a smooth ball.
2. Finally, coat the truffles in cocoa powder. Take 20g of unsweetened cocoa powder and place it in a shallow dish. Roll each truffle in the cocoa powder. Make sure they are fully coated. Place them on a parchment-lined tray. Refrigerate for another 30 minutes to set.
Tips & Tricks
Perfecting Your Truffles
To make your truffles smooth, focus on blending. Start by heating the cream until it simmers. Remove it from heat, then add the chopped dark chocolate. Wait two minutes before stirring. This helps the chocolate melt evenly. Mix gently until it is smooth.
Temperature matters too. After mixing in the other ingredients, let the mixture cool. Cover it and chill for two hours. This step ensures the truffles firm up well for rolling.
Common Mistakes to Avoid
One big mistake is overheating the cream. If it boils, it can burn. Watch it closely as it heats. Another mistake is not cooling the mixture enough. If you skip this, the truffles will be too soft to shape.
Give it time to chill. A well-cooled mixture makes rolling easy.
Presentation Ideas
Make your truffles shine with simple presentations. Use a decorative box or a pretty plate. You can sprinkle crushed hazelnuts on top for flair.
If you plan to gift them, wrap them in clear bags tied with ribbons. This adds a personal touch and makes them extra special.
Pro Tips
- Choose Quality Chocolate: Use high-quality dark chocolate for the best flavor and texture in your truffles.
- Chill for Perfect Texture: Allow the mixture to chill properly before rolling to ensure it holds its shape when forming the truffles.
- Experiment with Coatings: Try rolling your truffles in different coatings like crushed nuts, shredded coconut, or even melted chocolate for variety.
- Store Properly: Keep your truffles in an airtight container in the refrigerator to maintain freshness and prevent them from drying out.
Variations
Flavor Enhancements
You can boost the flavor of your truffles in fun ways. Adding different extracts can change the taste. Try orange or almond extract to give a fresh twist. Infusing your truffles with liqueurs like hazelnut or coffee adds depth. Just a tablespoon can make a big difference.
Dietary Variations
If you want a vegan version, swap the heavy cream for coconut cream. Use dairy-free chocolate to keep it plant-based. For sugar-free options, consider using sugar substitutes. Stevia or erythritol works well. This way, everyone can enjoy these tasty treats.
Textural Variations
Add crunchy bits for fun texture. Chopped nuts like almonds or pecans can give a nice bite. You can roll your truffles in different coatings too. Try sprinkles or shredded coconut for a colorful finish. These variations make your truffles unique and exciting.
Storage Info
How to Store Truffles
You can store your chocolate hazelnut truffles in two ways: refrigeration or room temperature. If you live in a warm place, refrigeration is best. Truffles can melt at room temp, making a mess. Place them in an airtight container to keep them safe from odors.
For room temperature, make sure your kitchen is cool. Use a container with a lid to shield from dust or insects.
Shelf Life
These truffles can stay fresh for about one week in the fridge. If stored at room temperature, they last about three days. Look for signs of spoilage, such as a change in smell or texture. If they become dry or crumbly, it's time to toss them.
Freezing Instructions
You can freeze your truffles if you want to keep them longer. Place the truffles in a single layer on a tray. Freeze them for about one hour. Once firm, transfer them to a freezer-safe bag. Remove as much air as possible before sealing.
To thaw, take them out and let them sit in the fridge for a few hours. This way, they will keep their smooth texture. Never thaw them at room temperature, as they may become too soft.
FAQs
How long do homemade chocolate truffles last?
Homemade chocolate truffles can last about one to two weeks in the fridge. To keep them fresh, store them in an airtight container. Place a piece of parchment paper between layers to avoid sticking. If you want to keep them for longer, you can freeze them. They will stay good for about three months in the freezer.
Can I use milk chocolate instead of dark chocolate?
Yes, you can use milk chocolate. However, the truffles will taste sweeter and have a creamier texture. Dark chocolate gives a richer flavor, while milk chocolate can make them taste lighter. If you choose milk chocolate, consider reducing the amount of sugar in your recipe to balance the sweetness.
What should I do if my truffle mixture is too soft?
If your truffle mixture is too soft, chill it in the fridge for 30 minutes. This will help it firm up. If it’s still too soft, add a bit more finely ground hazelnuts or cocoa powder. This will help absorb some moisture and make it easier to roll into balls. Avoid adding too much at once; mix a little in and check the consistency.
You now have all the tools to make delicious chocolate truffles. From choosing the right ingredients to tips for perfecting your truffles, each step matters. Remember, you can swap ingredients based on your taste or dietary needs. Pay attention to common mistakes to avoid, and explore different flavors and textures. Store your truffles properly to enjoy them longer. With this guide, you can impress friends and family while satisfying your sweet tooth. Enjoy your tasty creation!