
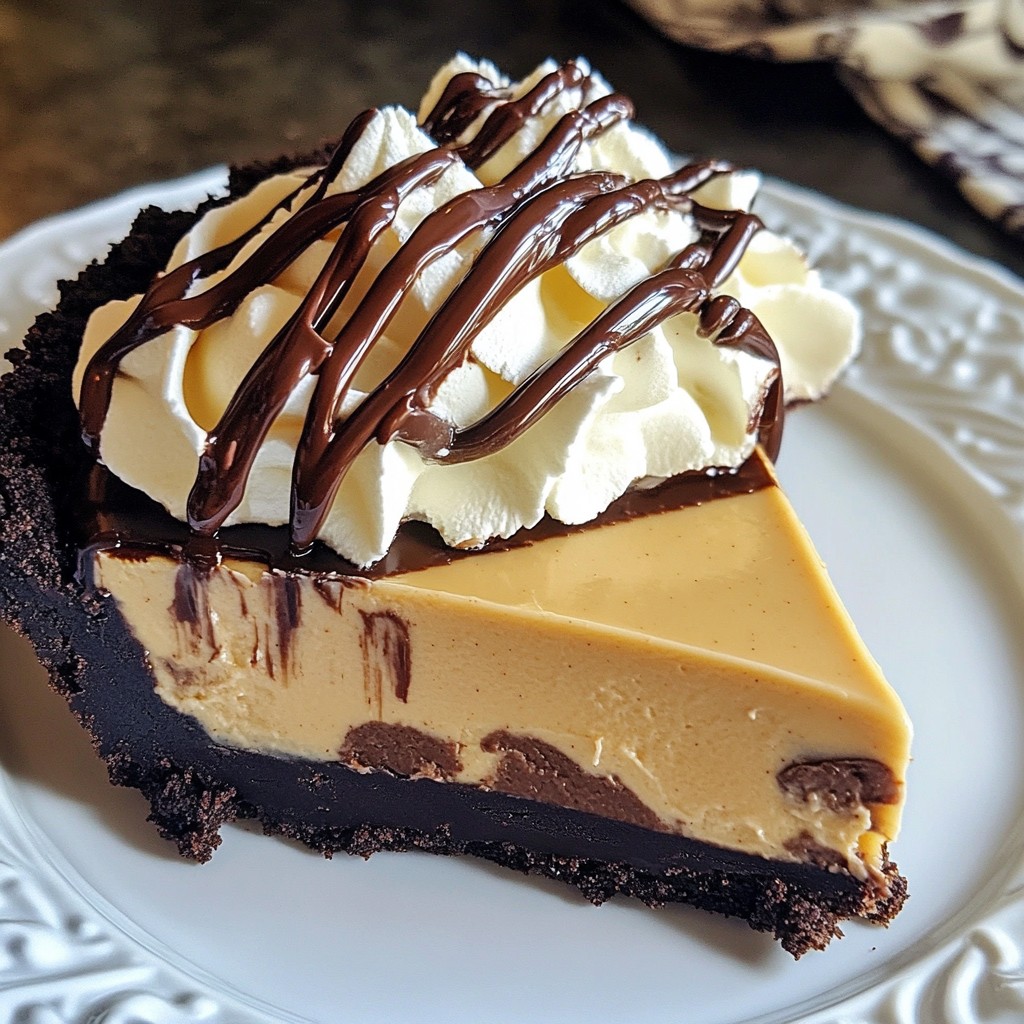
Are you ready to treat yourself to a sweet delight? This Chocolate Peanut Butter Icebox Pie is the perfect blend of two classic flavors. It’s easy to make and will wow your family or guests. You'll need just a few simple ingredients and a bit of time in the fridge. Stick around as I share step-by-step instructions and tips for creating this cool dessert. Let’s dive into this delicious recipe!
Why I Love This Recipe
- Decadent Flavor: This pie combines the rich taste of chocolate and the creamy goodness of peanut butter, creating an indulgent dessert that satisfies sweet cravings.
- No-Bake Convenience: With no baking required, this recipe is perfect for hot days or when you want a quick and easy dessert without turning on the oven.
- Make-Ahead Option: Preparing this pie in advance allows the flavors to meld beautifully, making it an excellent choice for parties or gatherings.
- Customizable Toppings: You can easily add your favorite toppings like whipped cream, crushed nuts, or even caramel drizzle to enhance the presentation and taste.
Ingredients
Required Ingredients
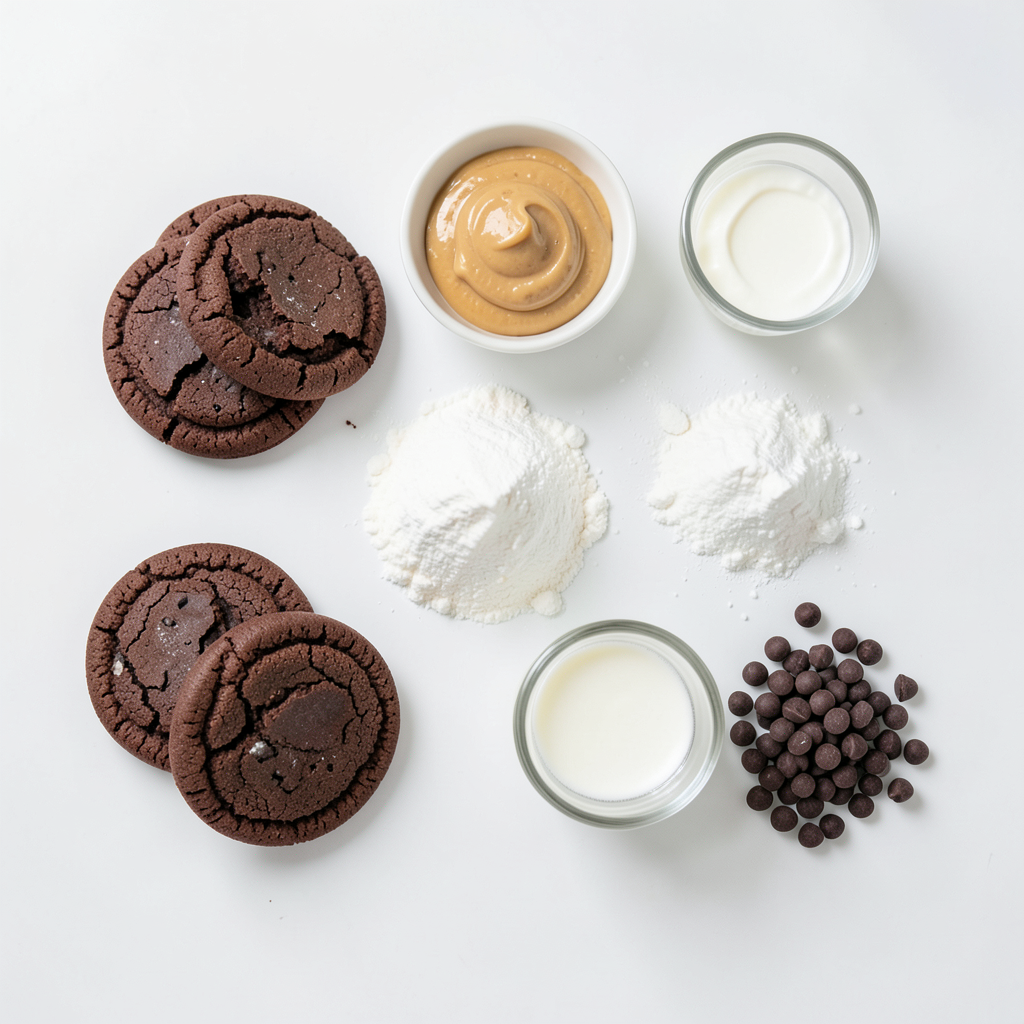
- 1 ½ cups chocolate sandwich cookies
- ½ cup unsalted butter
- 1 cup creamy peanut butter
- 1 cup powdered sugar
- 1 cup heavy cream
- 1 teaspoon vanilla extract
- ½ cup semi-sweet chocolate chips
- Optional: Whipped cream for garnish
To make this Chocolate Peanut Butter Icebox Pie, you need simple ingredients that pack a lot of flavor. First, gather 1 ½ cups of chocolate sandwich cookies. They form the crust. Next, you will need ½ cup of unsalted butter, which you will melt to mix with the cookies. For the filling, get 1 cup of creamy peanut butter and 1 cup of powdered sugar. These create a rich and sweet layer.
You will also need 1 cup of heavy cream. This will help make the filling light and fluffy. Don’t forget 1 teaspoon of vanilla extract to enhance the flavor. Finally, grab ½ cup of semi-sweet chocolate chips. These will top the pie and add a nice touch of chocolate. If you like, you can also have whipped cream on hand for a garnish.
These ingredients work together to create a dessert that is both easy and delicious. They bring a balance of sweet and salty flavors. Each bite is a treat for your taste buds. You can customize the toppings and make it your own!
Step-by-Step Instructions
Preparing the Crust
- First, combine 1 ½ cups of crushed chocolate sandwich cookies and ½ cup of melted butter in a bowl.
- Mix until it looks like wet sand.
- Next, press this mixture into the bottom and up the sides of a 9-inch pie dish.
- After that, refrigerate the crust for at least 30 minutes to set.
Making the Peanut Butter Filling
- In another bowl, mix 1 cup of creamy peanut butter with 1 cup of powdered sugar.
- Use an electric mixer to beat until the mixture is smooth.
- In a separate bowl, whip 1 cup of heavy cream with 1 teaspoon of vanilla extract until stiff peaks form.
Assembly and Setting
- Gently fold the whipped cream into the peanut butter mixture until fully combined.
- Pour this filling into the chilled crust. Spread it evenly with a spatula.
- Melt ½ cup of semi-sweet chocolate chips in a microwave-safe bowl in 30-second bursts, stirring in between.
- Drizzle the melted chocolate over the top of the pie.
- Cover with plastic wrap and refrigerate for at least 4 hours or overnight to set.
- Optionally, garnish with whipped cream before serving.
Tips & Tricks
Achieving the Perfect Crust
- Choosing the right cookies: Use chocolate sandwich cookies like Oreos. Their flavor and texture work well. They give a rich taste and a crunch.
- Ensuring proper mixing: Mix the crushed cookies and melted butter until it looks like wet sand. This mix holds together well when pressed into the pie dish.
Making the Filling Creamy
- Best practices for whipping cream: Start with cold heavy cream. Use a clean bowl and beat until stiff peaks form. This makes your filling light and airy.
- Tips for folding mixture: When you add whipped cream to the peanut butter mix, do it gently. Use a spatula and fold in. This keeps the filling fluffy and smooth.
Serving Suggestions
- Ideal accompaniments: Serve with fresh fruit like strawberries or bananas. Their sweetness pairs well with the rich pie.
- Garnishing ideas: Add a dollop of whipped cream on top. A sprinkle of chocolate chips can also enhance the look and flavor.
Pro Tips
- Chill Your Tools: For better whipping, chill your mixing bowl and beaters in the freezer for about 15 minutes before whipping the cream. This helps the cream whip up faster and achieve stiff peaks more easily.
- Cookie Crust Perfection: Make sure to really pack the crushed cookies into the pie dish. A well-compressed crust will hold together better and provide a satisfying crunch when you slice into the pie.
- Layering Chocolate: For a more decorative look, allow the melted chocolate to cool slightly before drizzling it over the pie. This prevents it from sinking into the filling and creates a beautiful contrast on top.
- Overnight Refrigeration: While 4 hours is the minimum chill time, letting the pie set overnight allows the flavors to meld beautifully, enhancing the overall taste and texture.
Variations
Customization Options
You can make this pie your own with fun twists. Adding different toppings can change the whole vibe. Here are some ideas:
- Crushed nuts for crunch
- Mini chocolate chips for extra sweetness
- Sliced bananas for a fresh taste
- Shredded coconut for a tropical flair
You can also switch up the nut butter. Try almond butter or cashew butter for new flavors. Each nut butter gives a unique taste and texture.
Gluten-Free Alternatives
If you need a gluten-free option, you can easily adapt this recipe. Use gluten-free chocolate cookies for the crust. Many brands offer great tasting cookies that work well.
Also, check your peanut butter and other ingredients. Make sure they are gluten-free. Simple swaps can help you enjoy this pie without worry.
Storage Info
Refrigeration Tips
To store leftovers, cover the pie tightly with plastic wrap. This keeps it fresh. You can also use an airtight container. The pie stays good in the fridge for up to five days. Keeping it chilled helps maintain its smooth texture and rich taste. The creamy filling holds up well, but it’s best served cold.
Freezing the Pie
If you want to freeze the pie, slice it first. Wrap each slice in plastic wrap or foil. Then, put the slices in a freezer-safe bag. This method helps save space and makes it easy to grab a piece. The pie can stay in the freezer for about two months.
To thaw, take a slice out and place it in the fridge for a few hours. You can also let it sit at room temperature for about 30 minutes before serving. This way, the pie stays creamy and delicious!
FAQs
How long does Chocolate Peanut Butter Icebox Pie last?
Chocolate Peanut Butter Icebox Pie can last for about 5 days in the fridge. Make sure to cover it well with plastic wrap. This keeps it fresh and tasty. If you are like me, you might finish it before then!
Can I use crunchy peanut butter instead of creamy?
Yes, you can use crunchy peanut butter! It gives the pie a fun texture. Just remember, the taste will be a bit different. I love the extra crunch, but it’s all up to your preference!
How do I make mini icebox pies?
Making mini icebox pies is easy! Just use a muffin tin or small jars. Press the cookie crust into each cup and fill with the peanut butter mixture. Chill them the same way. They are perfect for parties or as a fun treat!
Is it necessary to refrigerate before serving?
Yes, refrigerating is necessary. It helps the pie set properly. The filling becomes firm and creamy. I recommend chilling for at least 4 hours, or even better, overnight!
Can I make this pie ahead of time?
Absolutely! This pie is great for making ahead. You can prepare it up to two days before serving. Just store it in the fridge. This way, you can enjoy it without any last-minute fuss!
This blog post covered how to make a tasty Chocolate Peanut Butter Icebox Pie. You learned about the key ingredients, like cookies and peanut butter, and simple steps to prepare the crust and filling. I shared tips for perfecting your pie and ideas for tasty variations. Remember to store your pie correctly to keep it fresh. This dessert is easy to make and fun to customize, so get creative! Enjoy your delicious treat with friends or family.


