
Are you ready to elevate your baking game? These Cinnamon Apple Muffins are the perfect blend of sweet and spice. With a soft, fluffy texture, they’ll be a hit at breakfast or as an afternoon snack. In this post, I’ll guide you through the easy steps to create these delicious treats using simple ingredients. Get your apron on, and let’s turn your kitchen into a warm, inviting bakery!
Why I Love This Recipe
- Delicious Flavor: The combination of cinnamon and fresh apples creates a warm and inviting flavor that is perfect for any occasion.
- Easy to Make: This recipe is straightforward and requires simple ingredients, making it accessible for bakers of all skill levels.
- Perfect for Sharing: These muffins are ideal for breakfast or as a snack, making them great for sharing with friends and family.
- Customizable: You can easily add your favorite mix-ins like nuts or dried fruits to personalize these muffins to your taste.
Ingredients
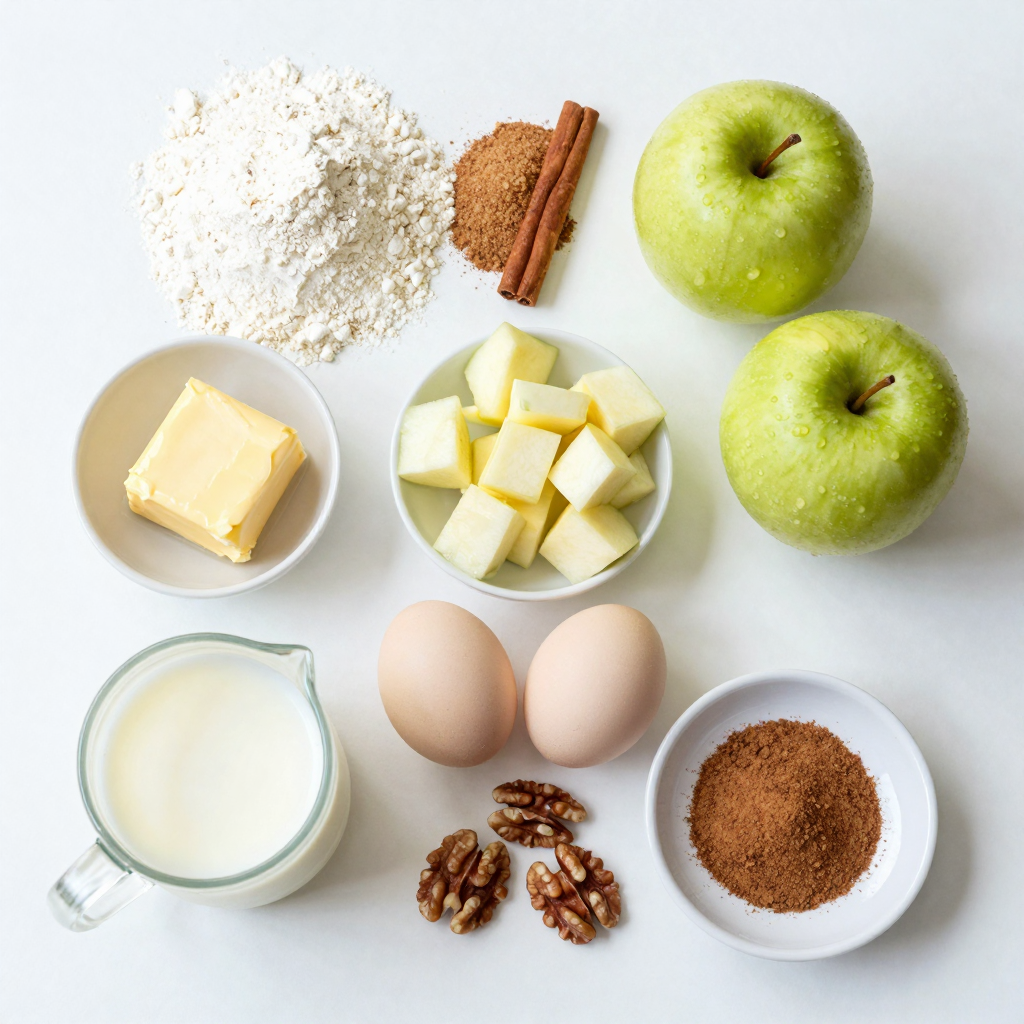
To make these delightful cinnamon apple muffins, you need the following ingredients:
– 2 cups all-purpose flour
– 1 teaspoon baking soda
– 1 teaspoon baking powder
– 1 teaspoon ground cinnamon
– 1/2 teaspoon salt
– 1/2 cup unsalted butter, softened
– 1 cup packed brown sugar
– 2 large eggs
– 1 teaspoon vanilla extract
– 1 cup buttermilk
– 2 apples, peeled, cored, and diced (preferably Granny Smith for tartness)
– 1/2 cup chopped walnuts (optional)
– Extra cinnamon sugar for topping (1 tablespoon sugar mixed with 1/2 teaspoon cinnamon)
The right mix of these ingredients creates a warm, inviting flavor. I love how the sweet apples and warm cinnamon blend. The buttermilk adds moisture, making the muffins soft and fluffy. You can also add walnuts for a nice crunch, but they are optional. This simple list allows you to bake a batch that brings joy to any kitchen.
Step-by-Step Instructions
Preheat and Prepare
– Preheat your oven to 350°F (175°C).
– Line a muffin tin with paper liners or grease it well.
Mix Dry Ingredients
– In a medium bowl, whisk together the flour, baking soda, baking powder, ground cinnamon, and salt.
Cream Butter and Sugar
– In a large mixing bowl, cream softened butter and brown sugar until light and fluffy.
Combine Wet Ingredients
– Add eggs one at a time, mixing well after each. Stir in the vanilla extract.
Combine Wet and Dry Ingredients
– Gradually mix in the dry ingredients and buttermilk. Alternate adding each, starting and ending with dry ingredients.
Fold in Apples and Bake
– Fold diced apples and walnuts into the batter.
– Spoon the batter into the muffin tin, filling each cup about three-quarters full.
– Sprinkle the tops with cinnamon sugar for added crunch and sweetness.
– Bake for 18-22 minutes, or until a toothpick comes out clean.
This simple method leads to tasty cinnamon apple muffins.Enjoy the warm, fluffy bites of joy!
Pro Tips
- Use Fresh Apples: For the best flavor and texture, choose fresh, firm apples like Granny Smith, which add a nice tartness to the muffins.
- Don’t Overmix: When combining the wet and dry ingredients, mix just until combined to keep your muffins light and fluffy.
- Cool Before Serving: Allow the muffins to cool for a few minutes in the pan before transferring them to a wire rack to prevent them from becoming soggy.
- Customize Toppings: Feel free to experiment with different toppings such as oats, streusel, or adding a drizzle of icing for a sweet finish.
Tips & Tricks
Baking Tips
– Make sure all your ingredients are at room temperature. This helps them mix better.
– Use a toothpick to check for doneness. Insert it in the center; it should come out clean.
Serve Suggestions
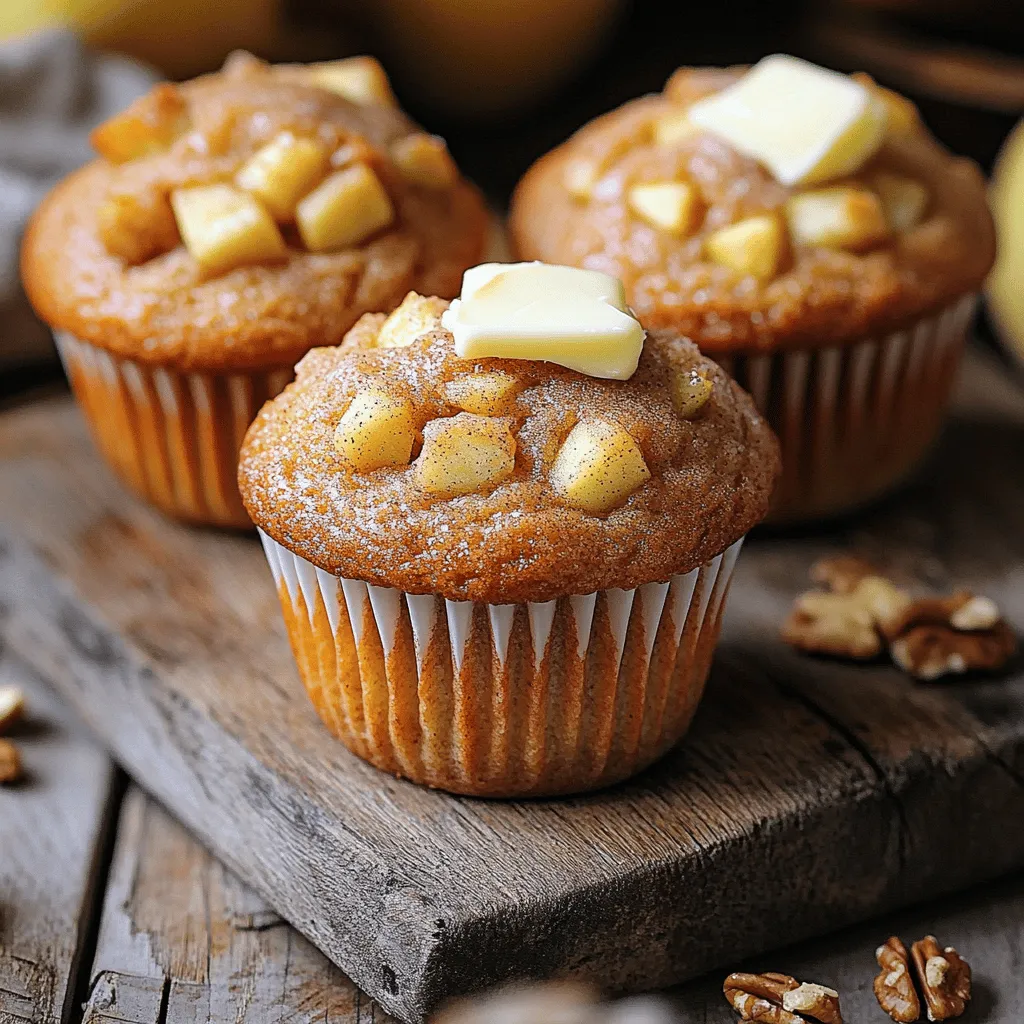
– Serve your muffins warm with a pat of butter. This adds richness and flavor.
– You can also dust them with powdered sugar for a sweet touch.
– For a cozy display, place them on a rustic wooden board. It looks inviting!
Creating the Perfect Muffin
– To achieve a moist muffin, do not overmix the batter. Mix just until combined.
– Avoid dense muffins by measuring flour correctly. Too much flour can weigh them down.
– Use a light hand when folding in the apples. This keeps the air in the batter.
These tips will help you bake delicious cinnamon apple muffins every time!
Variations
Fruit Variations
You can switch things up by using different fruits. Instead of apples, try pears or berries. Both options bring a fresh taste to your muffins. If you love dried fruits, add cranberries to the mix. They add a nice chew and burst of flavor.
Dietary Adjustments
If you want gluten-free muffins, use almond or oat flour instead of regular flour. Both options work well and keep the muffins soft. For those who prefer vegan options, replace eggs with flax eggs and use plant-based milk. These changes make the recipe accessible for everyone.
Flavor Enhancements
To add more depth, mix in spices like nutmeg or ginger. They pair well with cinnamon and give your muffins a warm flavor. You can also swirl in caramel or chocolate chips for a sweet surprise. These little changes can take your muffins to a whole new level.
Storage Info
Short-term Storage
To keep your muffins fresh, store them at room temperature. Place them in an airtight container. This helps retain moisture. If you don’t have a container, wrap them tightly in plastic wrap. They will stay soft for about three days. Be sure to keep them away from direct sunlight and heat.
Long-term Storage
For longer storage, freeze your muffins. Allow them to cool completely first. Place them in a freezer-safe bag or container. Remove as much air as possible to prevent freezer burn. They can last up to three months in the freezer.
When you want to enjoy one, reheat it for the best texture. You can microwave it for about 20-30 seconds. If you prefer the oven, bake at 350°F (175°C) for about 10 minutes. This keeps the muffins soft and fluffy.
FAQs
How can I make my muffins rise higher?
To make your muffins rise higher, focus on the batter’s consistency. Use the right amount of flour. If your batter is too thick, add a touch more liquid. Air pockets help muffins rise, so mix gently but well. Also, make sure your oven is preheated to 350°F (175°C). An oven that is too cool can lead to flat muffins.
Can I use a different type of apple?
Yes, you can use different apples. Granny Smith apples are tart and work well. Honeycrisp apples add a nice sweetness and crunch. Fuji apples are also great for a sweeter taste. Try to pick apples that are firm and fresh for the best results.
How long do muffins last?
Muffins usually last about 2-3 days at room temperature. Store them in an airtight container. If you want them to last longer, freeze them. In the freezer, they can last up to three months. Just make sure to wrap them well to prevent freezer burn.
Can I replace buttermilk?
You can replace buttermilk with milk and vinegar. Just mix 1 cup of milk with 1 tablespoon of vinegar. Let it sit for a few minutes to thicken. Another option is to use yogurt or sour cream. These will also give your muffins a nice texture.
In this blog post, we covered how to make delicious apple muffins step by step, from gathering ingredients to baking tips. We also explored fun variations and smart storage methods. Remember, the right techniques make all the difference in your baking. Whether you stick to the classic recipe or try new flavors, these muffins will delight everyone. Enjoy the process, share them with friends, and savor each bite. Happy baking!


