Cinnamon Roll Scones Bakery Style Easy and Delicious

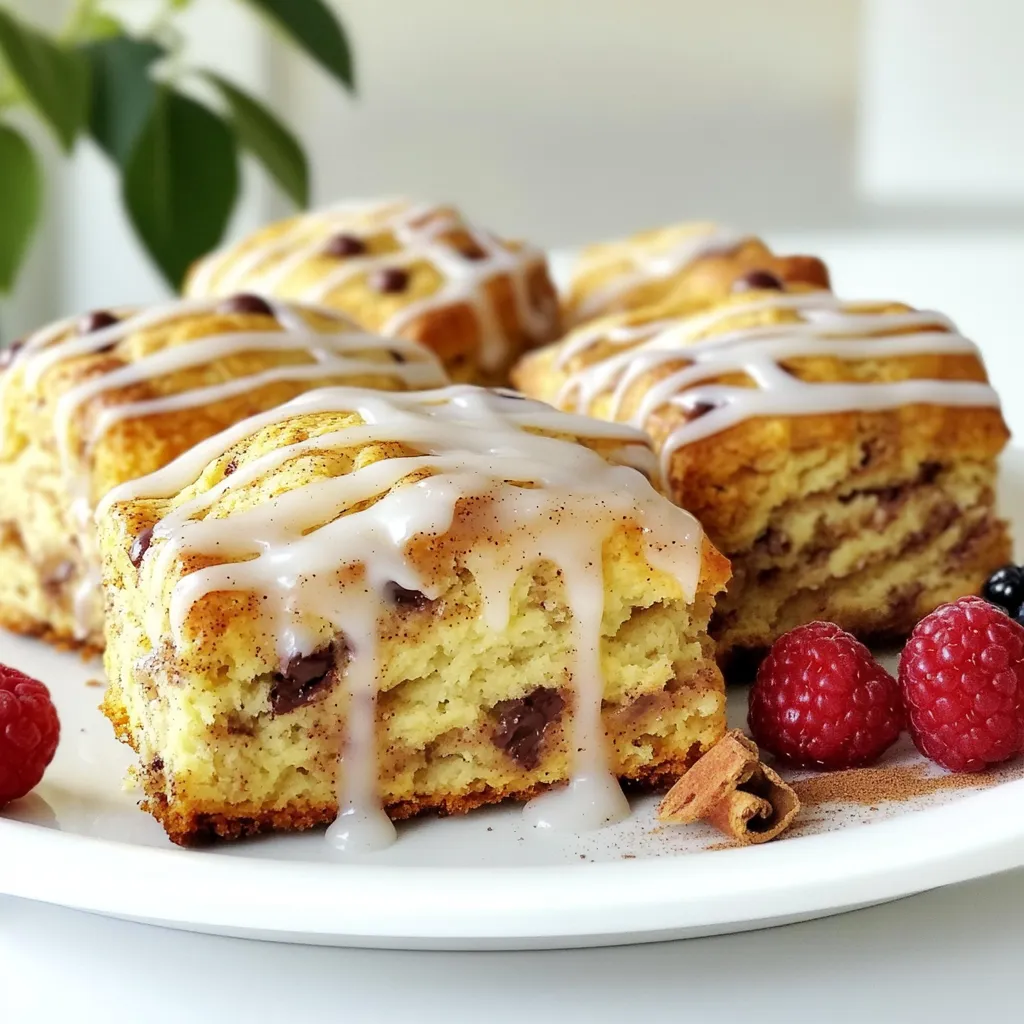
Craving a delightful treat that combines the best of cinnamon rolls and scones? You’re in for a treat! In this post, I’ll guide you through making bakery-style Cinnamon Roll Scones that are easy and delicious. From the warm, cinnamon filling to the sweet icing drizzle, these scones will make any breakfast or snack time special. Get ready to impress with a recipe that everyone will love!
Why I Love This Recipe
- Delicious Flavor Combination: The mix of cinnamon and sugar gives these scones a comforting, sweet flavor that reminds me of fresh cinnamon rolls.
- Easy to Make: This recipe comes together quickly, making it perfect for a weekend brunch or a last-minute treat.
- Versatile Add-Ins: With the option to include chocolate chips, you can customize these scones to suit your taste or mood.
- Beautiful Presentation: The scones look stunning when drizzled with icing and can be garnished with fresh berries for an elegant touch.
Ingredients
Main Ingredients for Scones
- 2 cups all-purpose flour
- 1/3 cup granulated sugar
- 1 tablespoon baking powder
- 1/2 teaspoon salt
- 1/2 teaspoon ground cinnamon
- 1/4 cup cold unsalted butter, cubed
- 3/4 cup buttermilk (or milk + 1 tablespoon vinegar)
- 1/2 cup mini chocolate chips (optional)
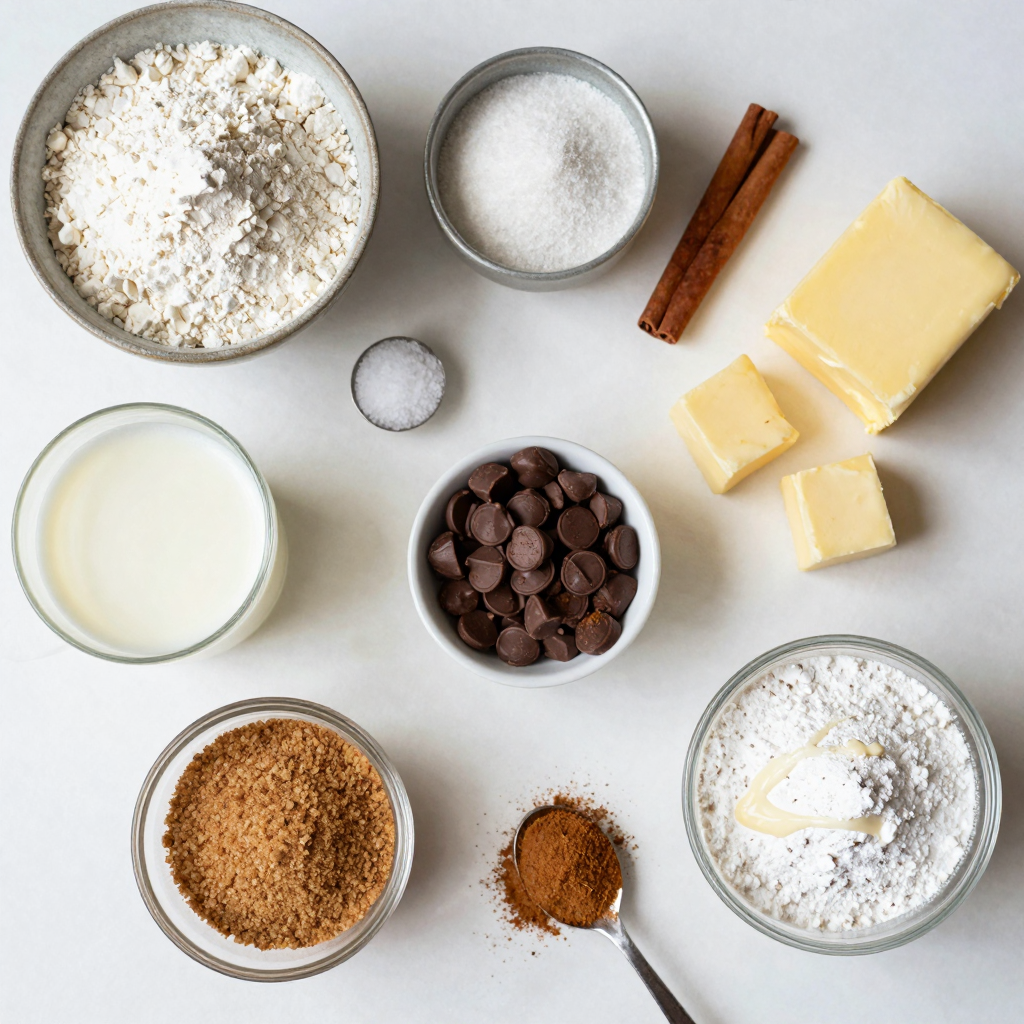
The main ingredients for the scones create a soft and flaky texture. Flour forms the base, while sugar adds sweetness. Baking powder helps the scones rise. Salt enhances flavor, and cinnamon gives warmth. Cold butter is key; it ensures a tender crumb. Buttermilk adds moisture and a slight tang. If you fancy, mini chocolate chips can add a nice touch.
Ingredients for Cinnamon Filling
- 1/4 cup brown sugar
- 1 tablespoon ground cinnamon
The cinnamon filling brings a rich flavor. Brown sugar adds a hint of caramel, while cinnamon provides warmth. Together, they create a delightful swirl within the scones.
Ingredients for Icing
- 1/2 cup powdered sugar
- 1-2 tablespoons milk
The icing is simple yet sweet. Powdered sugar forms the base for a smooth glaze. Adding milk creates the right consistency to drizzle. You can adjust the thickness by adding more milk if needed.
These ingredients combine to make cinnamon roll scones that are easy and delicious. Enjoy them warm from the oven, drizzled with icing for a sweet finish.

Step-by-Step Instructions
Preparing the Scone Dough
1. Preheat your oven to 400°F (200°C). Line a baking sheet with parchment paper.
2. In a large bowl, whisk together the following dry ingredients:
- 2 cups all-purpose flour
- 1/3 cup granulated sugar
- 1 tablespoon baking powder
- 1/2 teaspoon salt
- 1/2 teaspoon ground cinnamon
3. Add 1/4 cup of cold unsalted butter, cubed. Use your fingers or a pastry cutter to blend. Keep mixing until the mixture looks like coarse crumbs.
Combining Wet Ingredients
1. Pour in 3/4 cup of buttermilk. Stir gently until just combined.
2. If you want chocolate chips, fold in 1/2 cup of mini chocolate chips at this point.
Incorporating the Cinnamon Filling
1. In a small bowl, mix 1/4 cup of brown sugar with 1 tablespoon of ground cinnamon to create the filling.
2. Turn the dough onto a floured surface. Gently knead until the dough comes together. Pat it down into a rectangle, about 1-inch thick.
3. Sprinkle the cinnamon-brown sugar mixture evenly over the dough. Fold the dough in half. Flatten it into a rectangle, making sure to keep the filling inside.
4. Cut the dough into triangles or use a round cutter. Place the scones on the prepared baking sheet with space between them.
Now you are ready to bake!
Pro Tips
- Keep Ingredients Cold: Make sure your butter and buttermilk are cold to achieve a flaky texture in your scones.
- Don’t Overwork the Dough: Knead the dough just until it comes together to maintain tenderness in the scones.
- Proper Baking Space: Ensure there’s enough space between the scones on the baking sheet to allow for even rising and browning.
- Adjust Icing Consistency: If your icing is too thick, add a little more milk until you reach your desired drizzling consistency.
Tips & Tricks
Achieving Perfect Texture
- Use cold butter for a flaky scone. Cold butter helps create layers. It gives the scones their nice rise.
- Avoid overmixing the dough. Mix until just combined. This keeps the scones tender and soft.
Baking Tips
- Ensure the oven is preheated fully. A hot oven helps the scones bake evenly.
- Bake until golden brown for best flavor. This gives the scones a rich, warm taste.
Icing Consistency
- Adjust icing with milk for desired thickness. Add more milk for a thinner icing.
- Drizzle icing for an appealing finish. This makes the scones look beautiful and adds sweetness.

Variations
Flavor Variations
You can make your cinnamon roll scones even more exciting. One way is to add nuts. Walnuts or pecans give a nice crunch. Just chop them up and mix them into the dough. You can also try using different spices. Nutmeg or ginger adds a warm twist to the flavor. Experiment with what you like best!
Dietary Modifications
Want to make these scones fit your diet? You can use gluten-free flour instead of all-purpose flour. This way, everyone can enjoy them. If you need a vegan option, swap the butter for coconut oil or vegan butter. For milk, almond or oat milk works great. These swaps still keep the scones soft and tasty!
Serving Suggestions
How you serve your scones can make them even better. Try pairing them with fruit preserves or clotted cream for a rich touch. It adds sweetness and creaminess. Also, enjoy your scones with a warm cup of coffee or tea. This classic combo will surely delight your taste buds!
Storage Info
Storing Leftover Scones
To keep your scones fresh, store them at room temperature. Place them in an airtight container. This will help them stay soft for up to two days. If you want to keep them longer, freezing is a great option. Wrap each scone tightly in plastic wrap. Then, place them in a freezer bag. They can last up to three months in the freezer. Just remember to label the bag!
Reheating Instructions
When you want to enjoy your scones again, reheating is key. The best method is to use an oven. Preheat your oven to 350°F (175°C). Place the scones on a baking sheet and heat for about 10 minutes. This will help them regain their freshness. If you are short on time, you can use the microwave. Heat each scone for about 15-20 seconds. However, be careful not to overheat, as this can make them dry.
Icing Storage
If you have leftover icing, store it in a sealed container. Keep it in the fridge for up to one week. To reuse the icing, let it come to room temperature. You can also add a splash of milk to thin it out if needed. This icing is not just for scones! Use it on other baked goods like muffins or cookies. It’s a quick way to add sweetness to any treat!
FAQs
How can I make scones more fluffy?
To make scones fluffy, here are some tips to follow:
- Use cold butter when mixing. It helps create a flaky texture.
- Avoid overmixing the dough. Mix just until it comes together.
- Add a bit more baking powder for extra lift.
- Let the dough rest before cutting. This adds air pockets.
These steps help create that light, airy feel we all love in scones.
Can I make cinnamon roll scones without chocolate chips?
Yes, you can make great cinnamon roll scones without chocolate chips. Here are some ideas:
- Simply leave out the chocolate chips. The scones will still taste amazing.
- Add nuts like pecans or walnuts for a nice crunch.
- Try adding dried fruit like raisins or cranberries for extra flavor.
- Experiment with spices like nutmeg or cardamom for a twist.
These variations allow you to enjoy delicious scones with or without chocolate.
What is the best way to serve these scones?
Serving cinnamon roll scones can be fun! Here are some ideas:
- Serve warm with a drizzle of icing on top.
- Pair with fresh fruit or berries for a pop of color.
- Offer them with a side of clotted cream or fruit preserves.
- Enjoy with a hot cup of coffee or tea for a cozy treat.
These serving ideas will make your scones even more delightful!
You now have all you need to make delicious scones at home. We covered the key ingredients, from flour to chocolate chips, and shared step-by-step instructions for making dough. Remember to use cold butter for a flaky texture and avoid overmixing. We explored variations that add unique flavors and how to store and reheat your scones for freshness. Enjoy baking these tasty treats with family or friends. Your kitchen will smell amazing, and the results will impress everyone. Happy baking!

Cinnamon Roll Scones Bakery Style
Ingredients
2 cups all-purpose flour
1/3 cup granulated sugar
1 tablespoon baking powder
1/2 teaspoon salt
1/2 teaspoon ground cinnamon
1/4 cup cold unsalted butter, cubed
3/4 cup buttermilk (or milk + 1 tablespoon vinegar)
1/2 cup mini chocolate chips (optional)
1/4 cup brown sugar
1 tablespoon ground cinnamon (for the filling)
1/2 cup powdered sugar (for icing)
1-2 tablespoons milk (for icing)
Instructions
Preheat the Oven: Preheat your oven to 400°F (200°C) and line a baking sheet with parchment paper.
Mix Dry Ingredients: In a large bowl, whisk together the flour, granulated sugar, baking powder, salt, and ground cinnamon.
Cut in Butter: Add the cubed cold butter to the dry mixture. Use a pastry cutter or your fingertips to blend until the mixture resembles coarse crumbs.
Add Buttermilk: Pour in the buttermilk and stir until just combined. If you’re adding chocolate chips, fold them in at this stage.
Prepare the Cinnamon Filling: In a small bowl, mix the brown sugar and the tablespoon of ground cinnamon to create your filling.
Shape the Dough: Turn the dough out onto a floured surface and gently knead it just until it comes together. Pat it into a rectangle about 1-inch thick.
Add Filling: Sprinkle the cinnamon-brown sugar mixture evenly over the dough. Fold the dough in half, then flatten it again into a rectangle, ensuring the filling is incorporated.
Cut into Scones: Cut the dough into triangles or use a round cutter to create scone shapes. Place them on the prepared baking sheet, leaving space between each one.
Bake: Bake the scones in the preheated oven for 15-20 minutes or until they are golden brown on top and cooked through.
Make Icing: While the scones bake, whisk together the powdered sugar and milk until smooth to make the icing. Adjust the consistency by adding more milk if needed.
Drizzle Icing: Once the scones have cooled slightly, drizzle the icing over the top of each scone.
Prep Time: 20 min | Total Time: 40 min | Servings: 10 scones
– Presentation Tips: Serve the scones on a beautiful platter, garnished with a sprinkle of cinnamon and fresh berries for a pop of color.

Cinnamon Roll Scones Bakery Style
Ingredients
- 2 cups all-purpose flour
- 1.33 cups granulated sugar
- 1 tablespoon baking powder
- 0.5 teaspoon salt
- 0.5 teaspoon ground cinnamon
- 0.25 cups cold unsalted butter, cubed
- 0.75 cups buttermilk (or milk + 1 tablespoon vinegar)
- 0.5 cups mini chocolate chips (optional)
- 0.25 cups brown sugar
- 1 tablespoon ground cinnamon (for the filling)
- 0.5 cups powdered sugar (for icing)
- 1 tablespoon milk (for icing)
Instructions
- Preheat your oven to 400°F (200°C) and line a baking sheet with parchment paper.
- In a large bowl, whisk together the flour, granulated sugar, baking powder, salt, and ground cinnamon.
- Add the cubed cold butter to the dry mixture. Use a pastry cutter or your fingertips to blend until the mixture resembles coarse crumbs.
- Pour in the buttermilk and stir until just combined. If you’re adding chocolate chips, fold them in at this stage.
- In a small bowl, mix the brown sugar and the tablespoon of ground cinnamon to create your filling.
- Turn the dough out onto a floured surface and gently knead it just until it comes together. Pat it into a rectangle about 1-inch thick.
- Sprinkle the cinnamon-brown sugar mixture evenly over the dough. Fold the dough in half, then flatten it again into a rectangle, ensuring the filling is incorporated.
- Cut the dough into triangles or use a round cutter to create scone shapes. Place them on the prepared baking sheet, leaving space between each one.
- Bake the scones in the preheated oven for 15-20 minutes or until they are golden brown on top and cooked through.
- While the scones bake, whisk together the powdered sugar and milk until smooth to make the icing. Adjust the consistency by adding more milk if needed.
- Once the scones have cooled slightly, drizzle the icing over the top of each scone.


![To make these classic blueberry muffins, you need a few key ingredients: - 2 cups all-purpose flour - 1 cup granulated sugar - 1 tablespoon baking powder - 1/2 teaspoon salt - 1/2 cup unsalted butter, melted and cooled - 1 cup milk (whole or almond) - 2 large eggs - 1 teaspoon vanilla extract - 1 1/2 cups fresh blueberries These ingredients work together to create a soft, fluffy, and delicious muffin. The flour gives structure, while the sugar adds sweetness. Baking powder helps them rise, leading to a light texture. Butter adds richness, and milk keeps them moist. Blueberries are the star of this dish, bursting with flavor. You can also enhance your muffins with these optional ingredients: - Zest of 1 lemon (for added flavor) - 1 tablespoon coarse sugar (for topping, optional) - Variations for milk substitutes (whole or almond) Adding lemon zest brings a bright, fresh taste. Coarse sugar on top gives a nice crunch. If you're avoiding dairy, almond milk works well. These extras can elevate your muffins, making them even more special. For the complete recipe, check out the [Full Recipe]. 1. Preheat your oven to 375°F (190°C). This step makes sure your muffins bake evenly. Line a 12-cup muffin pan with paper liners or grease it with non-stick spray. 2. In a large mixing bowl, combine the dry ingredients. Add 2 cups of all-purpose flour, 1 cup of granulated sugar, 1 tablespoon of baking powder, and 1/2 teaspoon of salt. Whisk them together until they are well mixed. 3. In another bowl, combine the wet ingredients. Whisk together 1/2 cup of melted butter, 1 cup of milk, 2 large eggs, and 1 teaspoon of vanilla extract. Make sure everything is smooth and fully mixed. 1. Now, it's time to mix the wet and dry ingredients. Pour the wet mixture into the dry mixture. Use a spatula to gently mix them together. Do not overmix; a few lumps are okay. 2. Carefully fold in the blueberries and lemon zest. Add 1 1/2 cups of fresh blueberries. If you use frozen blueberries, keep them frozen to avoid color bleeding. 3. Next, fill the muffin cups. Scoop the batter into each cup, filling them about 3/4 full. If you like a crunchy top, sprinkle 1 tablespoon of coarse sugar on top. 4. Bake your muffins for 18-22 minutes. They are ready when the tops turn golden and a toothpick comes out clean from the center. For the complete recipe, check out the Full Recipe section. To make perfect blueberry muffins, the texture matters a lot. First, avoid overmixing the batter. When you mix the wet and dry ingredients, stop as soon as you see no dry flour. Lumps are okay. Overmixing makes the muffins tough, which we don’t want! Next, cooling the muffins properly is key. After baking, let them sit in the pan for just five minutes. This keeps them moist. Then, transfer them to a wire rack. Cooling them fully helps maintain a soft texture and stops sogginess. You can make your muffins even better with a few simple additions. Consider adding chopped nuts, like walnuts or pecans, for a crunchy bite. A pinch of cinnamon or nutmeg can add warmth and depth to the flavor. You can also play with the sweetness. If you prefer a less sweet muffin, reduce the sugar by a quarter cup. For a sweeter treat, add a bit more sugar or top the muffins with a sprinkle of coarse sugar before baking. This gives a nice, sweet crunch on top. For the complete recipe, check out the [Full Recipe]. {{image_2}} You can easily switch up your classic blueberry muffins with new flavors. One fun option is lemon-blueberry muffins. Just add the zest of one lemon to your batter. This brings a bright and fresh taste to each bite. The lemon pairs well with the sweet blueberries, creating a lovely balance. Another delightful option is almond-flavored muffins with blueberries. You can achieve this by adding almond extract instead of vanilla. This gives a nutty twist that makes your muffins stand out. You can also sprinkle sliced almonds on top before baking for extra crunch. If you follow a gluten-free diet, you can still enjoy these muffins. Just replace the all-purpose flour with a gluten-free blend. Many blends work well and keep the muffins soft. You can use the same amount, making it easy to convert the recipe. For those who want vegan muffins, I have good news! You can swap the eggs for flax eggs. To make a flax egg, mix one tablespoon of ground flaxseed with three tablespoons of water. Let it sit for a few minutes to thicken. Also, use almond or soy milk instead of regular milk. This keeps your muffins moist and delicious. Try these variations to create your perfect blueberry muffin. New flavors and dietary choices make baking fun! For the full recipe, check out the Berrylicious Blueberry Muffins 🫐🧁 section above. To keep your muffins fresh, store them in an airtight container. This helps prevent them from drying out. You can keep the muffins at room temperature for up to three days. If your kitchen is warm and humid, it’s best to keep them in the fridge. However, this can change the texture. Muffins may become dense and less fluffy when chilled. To freeze muffins, first, let them cool completely. Wrap each muffin tightly in plastic wrap. Then place the wrapped muffins in a freezer-safe bag or container. This helps keep out air and prevents freezer burn. You can freeze muffins for up to three months. When you want to enjoy a muffin, take it out of the freezer. Unwrap it and reheat it in a microwave for 20 to 30 seconds. For a crisp top, you can warm it in the oven at 350°F (175°C) for about 10 minutes. This method keeps your muffins tasting fresh and delicious. Can I use frozen blueberries instead of fresh? Yes, you can use frozen blueberries! They work well in muffins. Just add them straight from the freezer. This helps keep your muffins from turning blue. How do I know when my muffins are done baking? Check your muffins at 18 minutes. Insert a toothpick into the center. If it comes out clean, your muffins are done. The tops should look golden brown too. What can I do if my muffins are too dry? If your muffins are dry, try adding more milk next time. You can also reduce baking time slightly. This keeps them moist and fluffy. How to make blueberry muffins in a mini version? To make mini muffins, use a mini muffin pan. Fill each cup about halfway. Bake at the same temperature for 10-12 minutes. Keep an eye on them as they bake. Can I substitute any ingredients for a healthier muffin? Yes, you can! Try using whole wheat flour instead of all-purpose flour. You can also use less sugar or substitute it with honey. These changes can make a healthier muffin. In this post, we covered everything about making classic blueberry muffins. You learned the key ingredients, step-by-step instructions, baking tips, and cool variations. Baking perfect muffins means mixing well but not too much. Fresh blueberries make a big difference. You can try new flavors and adaptations, like gluten-free options. Remember to store muffins properly and enjoy them warm. With these tips, you can bake tasty muffins that everyone loves. Now get in the kitchen and start baking!](https://dailydishlab.com/wp-content/uploads/2025/07/a334ec52-bf2f-4d59-8425-d9a15cac52c1-768x768.webp)
