Cinnamon Sugar Donut Muffins Simple and Delicious Treat

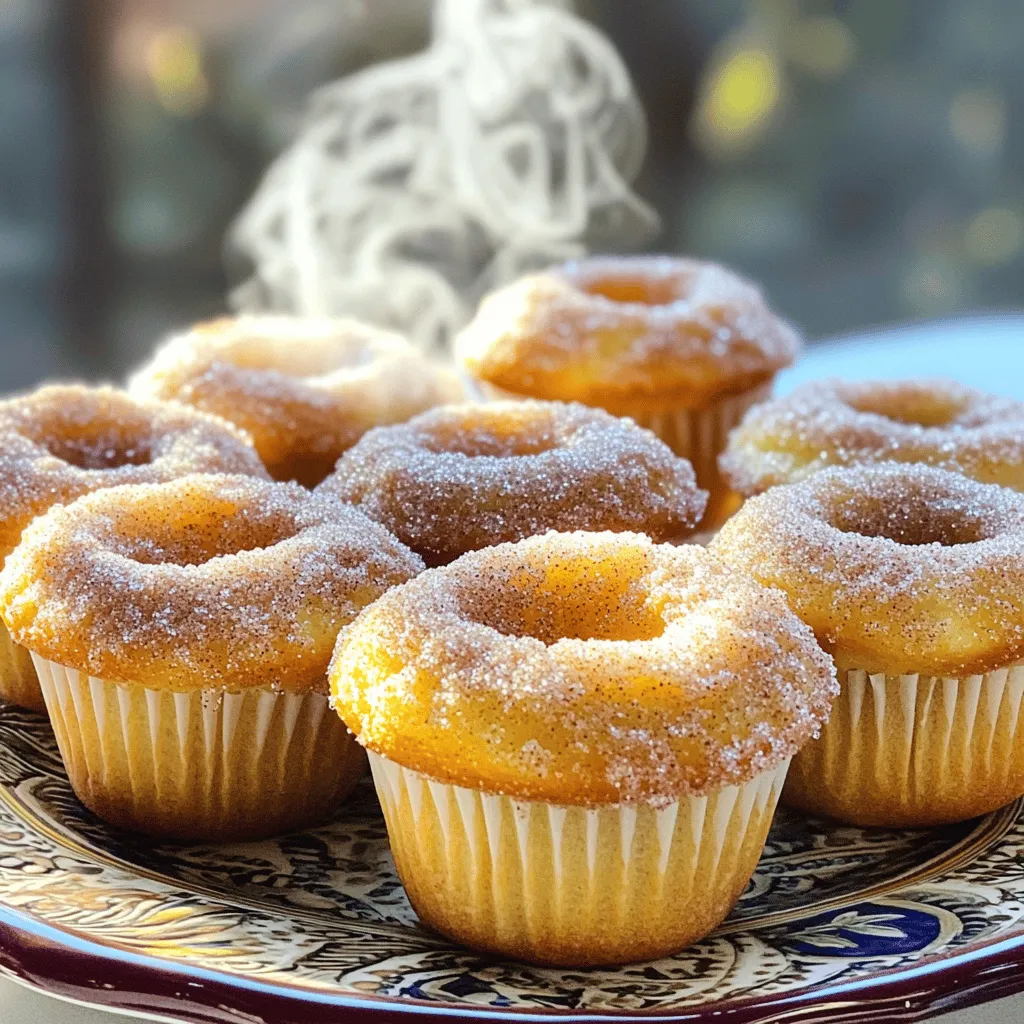
Get ready to indulge in a warm and tasty treat! These Cinnamon Sugar Donut Muffins are simple to make and so, so delicious. I’ll guide you step-by-step to create these fluffy delights right at home, from gathering ingredients to perfecting your baking skills. Whether you’re a seasoned baker or trying muffins for the first time, you’ll love this easy recipe. Let’s dive into the world of sweet and spice!
Why I Love This Recipe
- Irresistible Flavor: The combination of warm cinnamon and sweet sugar creates a comforting flavor that is hard to resist.
- Easy to Make: This recipe comes together quickly, making it perfect for a last-minute treat or breakfast.
- Perfectly Soft Texture: The muffins are soft and fluffy, delivering that classic donut feel without the frying hassle.
- Great for Sharing: With 12 muffins, it’s an ideal recipe for gatherings, ensuring everyone gets a delicious bite!
Ingredients
Complete List of Ingredients
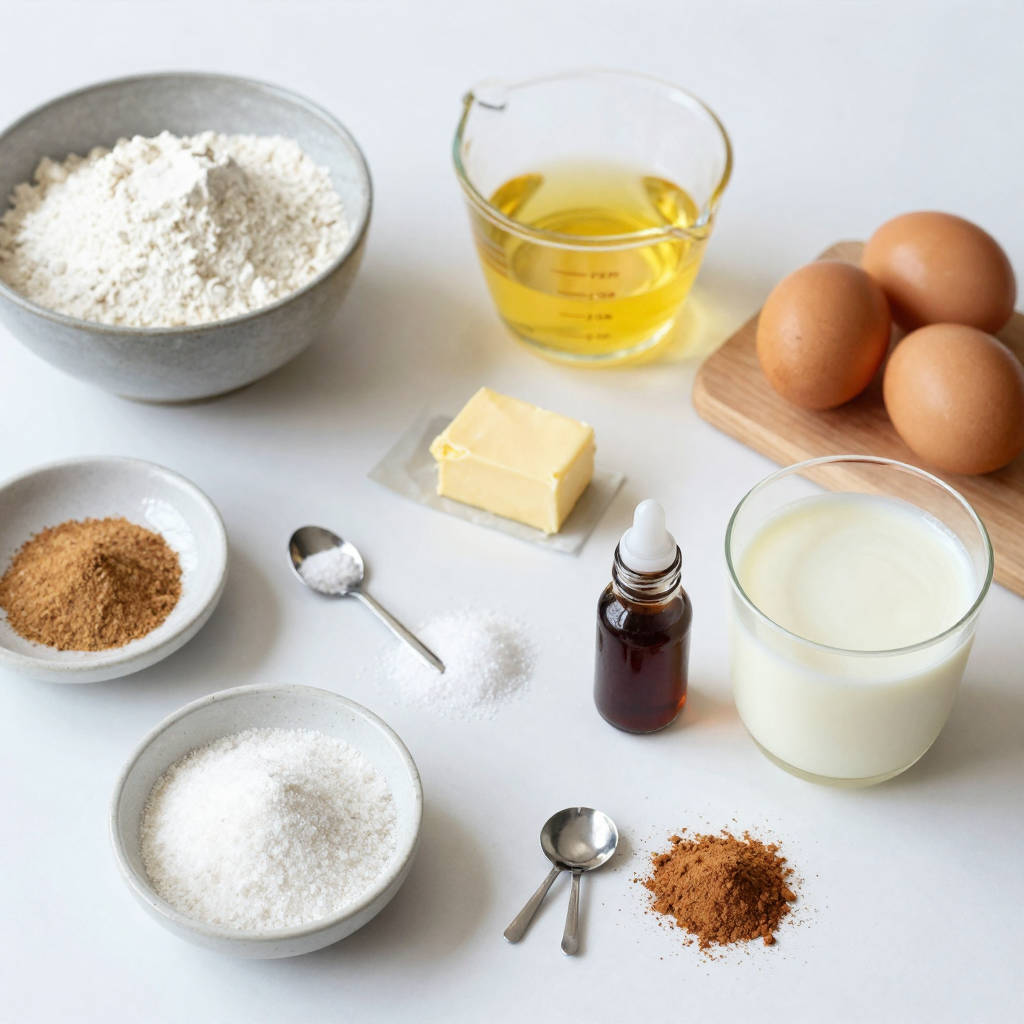
To make your cinnamon sugar donut muffins, gather these ingredients:
- 1 ½ cups all-purpose flour
- 1 teaspoon baking powder
- ½ teaspoon baking soda
- ½ teaspoon salt
- ¾ cup granulated sugar
- 1 teaspoon ground cinnamon (plus extra for topping)
- ½ cup unsalted butter, melted
- 2 large eggs
- ¾ cup buttermilk (or ¾ cup milk + 1 tablespoon lemon juice)
- 1 teaspoon vanilla extract
- ½ cup granulated sugar (for coating)
- 2 teaspoons ground cinnamon (for coating)
Ingredient Substitutions
You can swap some ingredients to fit your needs. Here are a few ideas:
- All-purpose flour: Use whole wheat flour for more fiber.
- Buttermilk: Mix regular milk with lemon juice for a quick substitute.
- Unsalted butter: Coconut oil works well if you want a dairy-free option.
- Granulated sugar: You can use brown sugar for a deeper flavor.
Benefits of Key Ingredients
Each ingredient adds something special to your muffins:
- Flour: Provides structure and texture.
- Baking powder and baking soda: Help muffins rise to a fluffy texture.
- Cinnamon: Adds warmth and sweetness, plus it has health benefits like anti-inflammatory properties.
- Butter: Gives richness and moisture for a tender crumb.
- Buttermilk: Keeps muffins soft and adds a slight tang.
- Eggs: Bind all ingredients and add protein for a satisfying bite.
With these ingredients, you’ll create a delicious treat that everyone will love.

Step-by-Step Instructions
Preparation Steps
To start, gather all your ingredients. This makes the process smooth and fun! First, preheat your oven to 350°F (175°C). While it warms up, grease a muffin tin with non-stick spray or use muffin liners. In a large bowl, whisk together the dry ingredients: 1 ½ cups of all-purpose flour, 1 teaspoon of baking powder, ½ teaspoon of baking soda, ½ teaspoon of salt, ¾ cup of granulated sugar, and 1 teaspoon of ground cinnamon. Mix well to combine everything.
In another bowl, mix the wet ingredients. Combine ½ cup of melted unsalted butter, 2 large eggs, ¾ cup of buttermilk (or milk with lemon juice), and 1 teaspoon of vanilla extract. Whisk until it’s smooth. Now, pour the wet ingredients into the dry ones. Stir gently until just combined. A few lumps are totally fine!
Baking Process
Now, spoon the batter into your prepared muffin tin. Fill each muffin cup about ¾ full. This allows space for the muffins to rise. Bake in the preheated oven for 15-18 minutes. To check if they’re done, insert a toothpick into the center of a muffin. If it comes out clean, your muffins are ready!
While the muffins bake, prepare the cinnamon sugar. In a shallow bowl, mix together ½ cup of granulated sugar with 2 teaspoons of ground cinnamon. This will be the tasty coating!
Tips for Checking Doneness
To ensure your muffins are perfectly baked, use a toothpick. Insert it into the center of a muffin. If it comes out clean, they are done. If there’s batter on the toothpick, bake a few more minutes. Also, look for a golden color on top. This is a great sign! Once baked, let the muffins cool in the pan for 5 minutes before removing them. Then, dip the tops into the warm cinnamon sugar for a sweet finish! Enjoy this simple and delicious treat with your family!
Pro Tips
- Use Fresh Ingredients: Always use fresh eggs and buttermilk for the best flavor and texture in your muffins.
- Don’t Overmix: When combining the wet and dry ingredients, mix just until combined to keep the muffins light and fluffy.
- Experiment with Flavors: Add a pinch of nutmeg or vanilla extract variations to customize the flavor profile of your muffins.
- Storage Tips: Store leftover muffins in an airtight container at room temperature for up to 3 days, or freeze for longer storage.
Tips & Tricks
Achieving Perfect Muffins
To make the best cinnamon sugar donut muffins, pay attention to your mixing. Mix the dry and wet ingredients separately. When you combine them, stir just until you see no dry flour. Lumps are okay! Overmixing can lead to tough muffins. Use a light touch and be gentle. This keeps the muffins soft and fluffy.
Common Mistakes to Avoid
One common mistake is overbaking. Keep a close eye on your muffins. Insert a toothpick around 15 minutes in. If it comes out clean, they are done! Another mistake is skipping the cinnamon sugar coating. This adds sweetness and flavor. Don’t forget to coat the muffins while they are still warm. It helps the sugar stick better.
Enhancing Flavor Profile
You can boost the flavor with simple changes. Try adding nutmeg for warmth or lemon zest for brightness. Both pair well with cinnamon. If you love chocolate, mix in some chocolate chips. This adds a rich taste that pairs nicely with the cinnamon. For a more complex flavor, consider brown sugar instead of white sugar. It adds a hint of caramel.

Variations
Gluten-Free Cinnamon Sugar Donut Muffins
You can easily make gluten-free cinnamon sugar donut muffins. Use a gluten-free flour blend instead of all-purpose flour. Many blends work well and give great results. Follow the same steps in the recipe. The muffins will still be soft and sweet. This option lets everyone enjoy this treat!
Chocolate Chip Cinnamon Muffins
If you love chocolate, add chocolate chips to your muffins. Mix in about ½ cup of chocolate chips into the batter before baking. The rich chocolate pairs well with the cinnamon. This variation adds a sweet surprise in each bite. You can use milk or dark chocolate chips, depending on your taste.
Seasonal Flavor Variants
You can change up the flavors to match the seasons. In fall, try adding pumpkin spice for a cozy vibe. In winter, add a hint of peppermint extract for a fresh twist. During summer, fresh berries like blueberries or raspberries can add a fruity burst. Each season brings a new taste adventure to your muffins!
Storage Info
How to Store Muffins
To keep your cinnamon sugar donut muffins fresh, store them in an airtight container. Place parchment paper between layers to prevent sticking. They stay good at room temperature for about three days. If you want them to last longer, refrigerate them for up to a week.
Reheating Tips
When you want to enjoy a warm muffin, the oven works best. Set it to 350°F (175°C). Place the muffins on a baking sheet and heat for 5-10 minutes. This method keeps the muffins soft and warm. You can also use a microwave. Heat each muffin for about 15-20 seconds. Just be careful not to overheat them!
Freezing Instructions
To freeze your muffins, let them cool completely first. Wrap each muffin tightly in plastic wrap, then place them in a freezer bag. They can stay frozen for up to three months. When you are ready to eat, thaw them overnight in the fridge. You can reheat them afterward for that fresh-baked taste.
FAQs
What are Cinnamon Sugar Donut Muffins?
Cinnamon sugar donut muffins are soft, fluffy treats. They blend muffin and donut flavors. Each bite is sweet, buttery, and has a hint of cinnamon. They are coated in a mix of cinnamon and sugar right after baking. This gives them a delightful crunch on the outside. You can enjoy them with coffee or milk. They are perfect for breakfast or a snack.
Can I make these muffins ahead of time?
Yes, you can make these muffins ahead of time. Bake them and let them cool completely. Store them in an airtight container. They will stay fresh for about three days. To enjoy them warm, simply reheat in the microwave for 10-15 seconds. You can also freeze them for longer storage. Just make sure to wrap them well before freezing.
What is the best way to store uncoated muffins?
Store uncoated muffins in an airtight container. Keep them at room temperature for up to three days. If you want them to last longer, you can freeze them. Just wrap each muffin in plastic wrap, then place them in a freezer bag. When you’re ready to eat, let them thaw at room temperature or reheat them in the oven. Enjoy your muffins fresh!
In this blog post, we explored everything about cinnamon sugar donut muffins. We covered key ingredients, easy steps to make them, and tips for perfect results. Understanding ingredient options and potential mistakes will help you bake with confidence. Remember to experiment with flavors and to store your muffins properly for freshness. With these insights, you’ll enjoy delicious muffins anytime. Happy baking!

Cinnamon Sugar Donut Muffins
Ingredients
1 ½ cups all-purpose flour
1 teaspoon baking powder
½ teaspoon baking soda
½ teaspoon salt
¾ cup granulated sugar
1 teaspoon ground cinnamon (plus extra for topping)
½ cup unsalted butter, melted
2 large eggs
¾ cup buttermilk (or ¾ cup milk + 1 tablespoon lemon juice)
1 teaspoon vanilla extract
½ cup granulated sugar (for coating)
2 teaspoons ground cinnamon (for coating)
Instructions
Preheat the oven to 350°F (175°C) and grease a muffin tin with non-stick spray or line with muffin liners.
In a large bowl, whisk together the flour, baking powder, baking soda, salt, ¾ cup granulated sugar, and 1 teaspoon of ground cinnamon until well combined.
In a separate bowl, combine the melted butter, eggs, buttermilk, and vanilla extract. Whisk until smooth.
Pour the wet ingredients into the dry ingredients and stir gently until just combined. Be careful not to overmix; a few lumps are fine!
Spoon the batter evenly into the prepared muffin tin, filling each cup about ¾ full.
Bake in the preheated oven for 15-18 minutes, or until a toothpick inserted into the center comes out clean.
While the muffins bake, prepare the cinnamon sugar coating by mixing ½ cup sugar with 2 teaspoons of ground cinnamon in a shallow bowl.
Once the muffins are done, remove them from the oven and let them cool in the pan for 5 minutes.
Remove the muffins from the tin and dip the tops into the cinnamon sugar mixture while they are still warm, coating them thoroughly.
Allow the muffins to cool slightly before serving, or enjoy them warm for that fresh-baked taste!
Prep Time: 15 minutes | Total Time: 40 minutes | Servings: 12 muffins
– Presentation Tips: Arrange the muffins on a decorative plate or tiered stand, and sprinkle some extra cinnamon sugar on top for a beautiful finish. Serve with coffee or milk for a delightful treat!

Cinnamon Sugar Donut Muffins
Ingredients
- 1.5 cups all-purpose flour
- 1 teaspoon baking powder
- 0.5 teaspoon baking soda
- 0.5 teaspoon salt
- 0.75 cup granulated sugar
- 1 teaspoon ground cinnamon (plus extra for topping)
- 0.5 cup unsalted butter, melted
- 2 large eggs
- 0.75 cup buttermilk (or ¾ cup milk + 1 tablespoon lemon juice)
- 1 teaspoon vanilla extract
- 0.5 cup granulated sugar (for coating)
- 2 teaspoons ground cinnamon (for coating)
Instructions
- Preheat the oven to 350°F (175°C) and grease a muffin tin with non-stick spray or line with muffin liners.
- In a large bowl, whisk together the flour, baking powder, baking soda, salt, ¾ cup granulated sugar, and 1 teaspoon of ground cinnamon until well combined.
- In a separate bowl, combine the melted butter, eggs, buttermilk, and vanilla extract. Whisk until smooth.
- Pour the wet ingredients into the dry ingredients and stir gently until just combined. Be careful not to overmix; a few lumps are fine!
- Spoon the batter evenly into the prepared muffin tin, filling each cup about ¾ full.
- Bake in the preheated oven for 15-18 minutes, or until a toothpick inserted into the center comes out clean.
- While the muffins bake, prepare the cinnamon sugar coating by mixing ½ cup sugar with 2 teaspoons of ground cinnamon in a shallow bowl.
- Once the muffins are done, remove them from the oven and let them cool in the pan for 5 minutes.
- Remove the muffins from the tin and dip the tops into the cinnamon sugar mixture while they are still warm, coating them thoroughly.
- Allow the muffins to cool slightly before serving, or enjoy them warm for that fresh-baked taste!
- Presentation Tips: Arrange the muffins on a decorative plate or tiered stand, and sprinkle some extra cinnamon sugar on top for a beautiful finish. Serve with coffee or milk for a delightful treat!


![To make Peach Cream Cheese Danish, you need these key items: - 1 package (8 oz) cream cheese, softened - 1/4 cup granulated sugar - 1 teaspoon vanilla extract - 1 package (1 lb) refrigerated crescent roll dough - 2 ripe peaches, sliced thin - 1 tablespoon lemon juice - 1 teaspoon ground cinnamon - 1 egg, beaten (for egg wash) - Powdered sugar for drizzling These ingredients create a creamy filling and a flaky crust. The peaches add a sweet touch. You can add a few extra ingredients for more taste: - 1 tablespoon honey for sweetness - 1/2 teaspoon almond extract for a nutty note - Chopped nuts for crunch These extras can take your danish to the next level. Try them out for a twist! Gather these tools for easy cooking: - Mixing bowls - Whisk or electric mixer - Baking sheet - Parchment paper - Knife and cutting board Having the right tools makes the process smooth. You will feel like a pro in no time! For the complete recipe, check out the Full Recipe link. To start, gather your cream cheese, sugar, and vanilla extract. Beat the softened cream cheese in a bowl. Add the granulated sugar and vanilla extract next. Mix until you have a smooth and creamy filling. This step is simple but key. You want a rich flavor that pairs well with the peaches. Set this bowl aside as you move on. Now, let’s work with the crescent roll dough. Open the package and unroll it on a floured surface. Pinch the seams to form a rectangle. This helps keep the dough intact. Cut the dough into squares about 4 inches by 4 inches. Make a small indentation in the center of each square. This is where your filling will go. Next, take your sliced peaches. Toss them with lemon juice and ground cinnamon. This mix adds a bright taste. Place a tablespoon of the cream cheese filling in the center of each dough square. Top it with a few peach slices. You can fold the corners over the filling to create a pocket. This keeps the delicious filling inside. Before baking, brush the tops with a beaten egg. This gives the danishes a lovely golden color. Preheat your oven to 375°F (190°C). Line a baking sheet with parchment paper to prevent sticking. Bake the danishes for 15-18 minutes. Look for a golden brown color and puffed dough. Let them cool for a few minutes. Drizzle with powdered sugar for that sweet touch. Enjoy your Peach Cream Cheese Danish as a delightful treat! For the complete recipe, check the [Full Recipe]. To make your Peach Cream Cheese Danish shine, use ripe peaches. They add sweetness and flavor. You can also sprinkle a bit of extra sugar on the peaches before baking. It helps them caramelize and enhances their taste. For a rich creaminess, ensure your cream cheese is at room temperature. This makes it easy to blend with sugar and vanilla. Don’t rush this step. A smooth filling gives the best texture. If your danishes don't puff up, check your oven temperature. An oven that is too cool can lead to flat pastries. Also, ensure you seal the edges well. If they open during baking, the filling will spill out. If the dough is too sticky, add a bit of flour when rolling it out. This will help prevent sticking and make it easier to shape. These danishes are perfect warm. You can serve them with a scoop of vanilla ice cream or a dollop of whipped cream. For a fun twist, try pairing them with a cup of coffee or tea. They also make a great breakfast treat or a delightful dessert. You can find the full recipe to perfect your own Peach Cream Cheese Danish. Enjoy! {{image_2}} You can change up the fruit in your Danish. Try using apples, berries, or pears. Each fruit gives a new taste. Apples add crunch, while berries bring a sweet-tart flavor. For pears, use ripe ones for the best texture. You can mix fruits too! Combine peaches with blueberries for a fun twist. This way, you can create your favorite flavor each time. If you need gluten-free options, look for gluten-free crescent roll dough. Many brands have tasty choices that work well. For a vegan version, swap cream cheese for plant-based cream cheese. Use a vegan egg wash or skip it for a golden look. You can also replace sugar with maple syrup or agave for sweetening. These changes let everyone enjoy the Danish! Want to make your Danish even better? Add spices like nutmeg or ginger for warmth. You can mix in a splash of almond extract for a nutty taste. Try adding a dollop of jam on top of the cream cheese too. You can experiment with different flavors! The possibilities are endless, and you can find your perfect combo. Check the Full Recipe to see how to make your new favorite treat! To keep your Peach Cream Cheese Danish fresh, place it in an airtight container. This will help preserve its flavor and texture. You can store it in the fridge for up to three days. Just make sure it is completely cool before sealing it. If you prefer to keep it longer, freezing is a great option. When you want to enjoy your leftover Danish, reheating is simple. Preheat your oven to 350°F (175°C). Place the Danish on a baking sheet for about 10-15 minutes. This will warm it up nicely and keep the pastry crisp. You can also use a microwave if you're in a hurry, but the oven gives better results. If you want to freeze the Danish, wrap each piece tightly in plastic wrap. Then, place them in a freezer-safe bag. They can last up to three months in the freezer. When you're ready to eat, just thaw them in the fridge overnight. Reheat in the oven for the best taste. For the full recipe, check the earlier sections. Yes, you can use canned peaches. They save time and are easy to find. Just make sure to drain them well. Canned peaches can be softer than fresh ones. This may change the texture slightly. If you want a firmer bite, fresh peaches are best. You will know the danishes are done when they turn golden brown. The dough should be puffy and cooked through. You can also check the bottom. It should feel firm and have a slight crunch. If they look undercooked, give them a few more minutes. Yes, you can prepare the dough ahead of time. Just keep it covered in the fridge. Make sure to use it within a day or two. If you want to freeze it, roll it out and wrap it tightly. When ready, thaw it in the fridge overnight before using. For the complete recipe, check out the Full Recipe link. Enjoy your baking! You now know how to make a delicious Peach Cream Cheese Danish. We covered key ingredients, step-by-step instructions, and handy tips. You can adjust flavors and even swap out fruits. Remember, storing leftovers properly keeps them fresh. Don't shy away from experimenting with options like vegan swaps. Making this treat is fun and easy! Enjoy baking and sharing your tasty danish creations!](https://dailydishlab.com/wp-content/uploads/2025/07/e83a1769-6d69-4dce-85bf-b37ffbe7d076-768x768.webp)
![- 1 cup canned pumpkin puree - 1/2 cup granulated sugar - 1/2 cup brown sugar - 2 large eggs - 1 cup all-purpose flour To create the Snickerdoodle Pumpkin Cobbler, you need some key ingredients. Canned pumpkin puree gives the dish its warm, earthy flavor. Both granulated and brown sugars add sweetness and depth. Two large eggs help bind everything together, while all-purpose flour forms the base. - 1/2 cup chopped walnuts or pecans - 2 tablespoons cinnamon-sugar mixture (for topping) You can add chopped walnuts or pecans for a nutty crunch. A sprinkle of cinnamon-sugar on top gives it a sweet finish. This step is all about personal touch and taste. - 1 teaspoon ground cinnamon - 1/2 teaspoon ground nutmeg - 1/4 teaspoon ground ginger - 1 teaspoon baking powder - 1/2 teaspoon baking soda - 1/4 teaspoon salt Spices are crucial for flavor. Ground cinnamon adds warmth. Nutmeg and ginger offer a hint of spice. Baking powder and baking soda help the cobbler rise. A pinch of salt balances the sweetness. For the full recipe, you can check the [Full Recipe]. First, preheat your oven to 350°F (175°C). Next, grease a 9x9-inch baking dish with non-stick spray or butter. This step is crucial to prevent sticking. In a large mixing bowl, combine the pumpkin puree, granulated sugar, brown sugar, and vanilla extract. Whisk them together until the mixture is smooth. This blend adds sweetness and a lovely flavor to your cobbler. In another bowl, mix the dry ingredients. Combine the cinnamon, nutmeg, ginger, baking powder, baking soda, salt, and flour. Stir them well to ensure even distribution of the spices. Gradually add the dry mix to the wet ingredients. Alternate with the milk as you mix. Be gentle here; over-mixing can make the cobbler tough. Once just combined, stir in the melted butter. If you like, add chopped walnuts or pecans for extra crunch. Pour the batter into your prepared baking dish. Spread it evenly for a consistent bake. Before placing it in the oven, sprinkle the top with the cinnamon-sugar mixture. This adds a sweet crust that contrasts nicely with the soft filling. Bake in the preheated oven for 30-35 minutes. Check for doneness by inserting a toothpick in the center. If it comes out clean, your cobbler is ready. Let it cool slightly before serving. Enjoy it warm for the best taste, especially with a scoop of ice cream. For the complete recipe, refer to the Full Recipe above. - Not measuring ingredients accurately: Always use dry measuring cups for flour and sugar. This helps keep the balance right. A kitchen scale is your best friend for precision. - Over-mixing the batter: Mix until just combined. Over-mixing makes the cobbler tough. You want it soft and fluffy, not dense. - Resting the batter before baking: Let your batter sit for a few minutes. This helps the flavors blend well. It can also improve the texture. - Adjusting spices to personal taste: Feel free to change up the spices! If you love nutmeg, add a bit more. If you want it spicier, increase the ginger. Make it yours! - Pairing with ice cream or whipped cream: Serve warm with a scoop of vanilla ice cream. The cold ice cream contrasts nicely with the warm cobbler. Whipped cream is a great choice too! - Presentation ideas for gatherings: Cut into squares and serve in bowls. Sprinkle some cinnamon on top for a pop of color. Add a dollop of whipped cream for a lovely finish. This makes your dessert look fancy! For the full recipe, check out the Snickerdoodle Pumpkin Cobbler section above. {{image_2}} You can change the nuts in this dish or skip them. If you like walnuts, use them. Pecans work great too. If you want a nut-free option, just leave them out. For sugar, swap granulated sugar for coconut sugar or honey. These options add a different flavor and sweetness. Coconut sugar gives a rich taste, while honey adds a nice touch. Want to jazz up your cobbler? Try adding chocolate chips or butterscotch chips. These sweet bites melt and blend with the pumpkin. You can also explore spices like allspice or cloves. These spices add warmth and depth to the cobbler. Don't be afraid to mix and match your favorites to create new flavors. For gluten-free friends, use gluten-free flour. Many brands work well and keep the taste great. If you need to avoid eggs, try flaxseed or applesauce as a substitute. Each option helps to keep the cobbler moist and tasty. You can enjoy the same warm dessert while meeting your dietary needs. For the full recipe, check the link above. After enjoying your Snickerdoodle Pumpkin Cobbler, let it cool down. Then, cover it with plastic wrap or keep it in an airtight container. Store it in the fridge for up to three days. The cobbler stays tasty and fresh when stored properly. To enjoy your cobbler warm, you can reheat it. The best way is to use an oven. Preheat the oven to 350°F (175°C) and place the cobbler in for about 10-15 minutes. This keeps the texture nice and soft. If you use a microwave, heat it in short bursts of 20 seconds. Check to avoid drying it out. If you want to save some for later, freezing works well. Cut the cobbler into squares first. Wrap each piece in plastic wrap, then place them in a freezer bag. This way, you can take only what you need. For the best taste, eat it within three months. When ready to enjoy, thaw it in the fridge overnight before reheating. - Prep time: 15 mins - Total time: 50 mins - Servings: 9 Yes, you can prepare this cobbler ahead of time. Mix the batter and pour it into the greased dish. Cover it tightly with plastic wrap and store it in the fridge for up to a day. When you're ready, bake it straight from the fridge. Just add a few extra minutes to the baking time. You can serve it with a scoop of vanilla ice cream or a dollop of whipped cream. A drizzle of caramel sauce adds a nice touch, too. Fresh whipped cream garnished with a sprinkle of cinnamon works great as well. Look for a golden-brown color on top. A toothpick inserted in the center should come out clean. If it comes out with wet batter, give it a few more minutes. The edges should be slightly puffed and firm to touch. Yes, fresh pumpkin can be used instead of canned pumpkin puree. To do this, cook the pumpkin until soft, then mash it. Make sure to drain any excess water. This will give your cobbler a fresh taste and a nice texture. In this blog post, you discovered how to make a delicious Snickerdoodle Pumpkin Cobbler. We talked about essential ingredients, like canned pumpkin and sugars, and shared optional ones to enhance flavor. I provided step-by-step instructions for preparation, baking, and common mistakes to watch out for. Remember to store leftovers properly to keep them fresh. This dessert is easy to make, fun to personalize, and perfect for gatherings. Enjoy baking this delightful treat that brings warmth and sweetness to any occasion!](https://dailydishlab.com/wp-content/uploads/2025/07/2d25911d-0f51-4f98-ae6a-a9dc8136342e-768x768.webp)


