Classic Deviled Eggs with Sweet Relish Delight

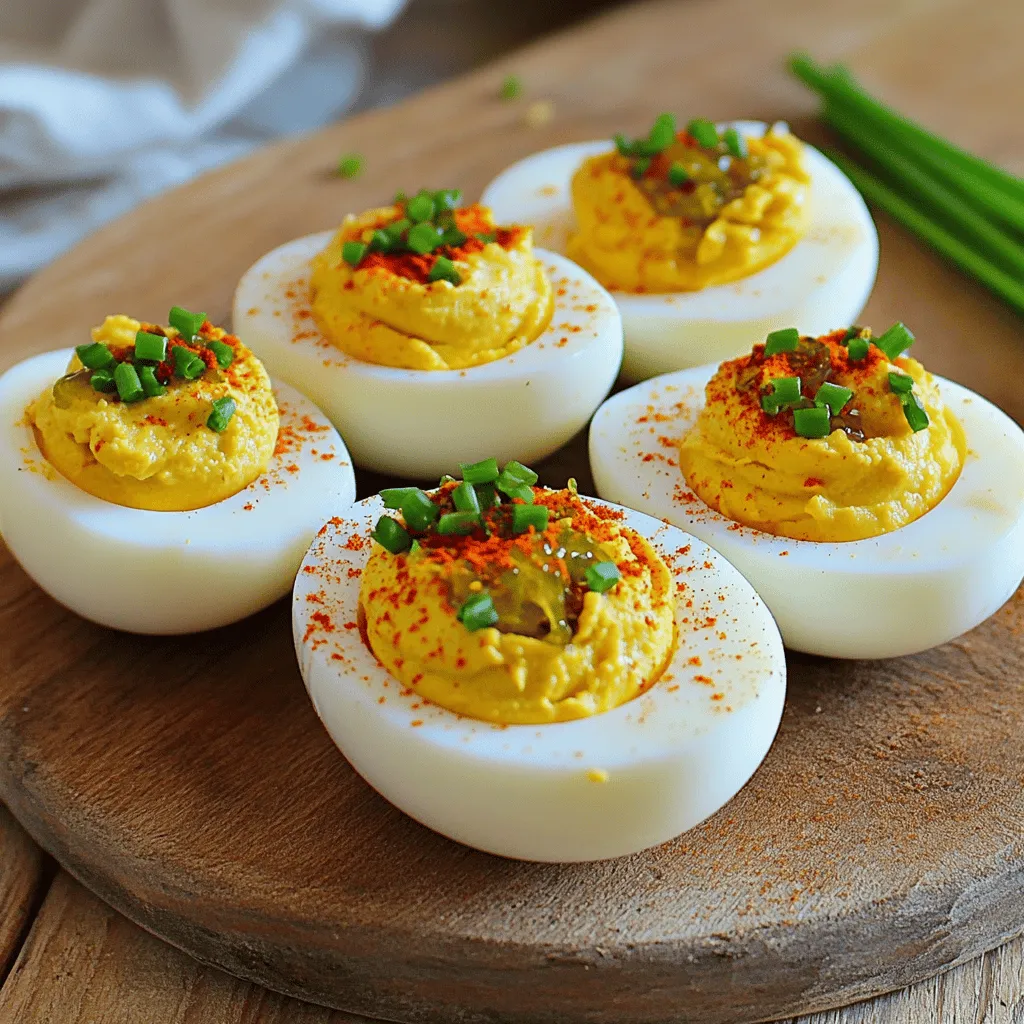
If you’re craving a classic snack with a tangy twist, you’ve come to the right place. My Classic Deviled Eggs with Sweet Relish Delight will take your taste buds on an exciting journey. These creamy, flavorful bites are perfect for parties or just a treat at home. I’ll guide you through selecting the best ingredients, step-by-step instructions, and tips to elevate your deviled egg game. Let’s get started on this simple yet delicious recipe!
Why I Love This Recipe
- Simple to Make: With just a few ingredients and straightforward steps, these deviled eggs come together quickly, making them perfect for any occasion.
- Classic Flavor: The combination of mayonnaise, Dijon mustard, and sweet pickle relish creates a timeless taste that appeals to everyone.
- Customizable: You can easily adjust the ingredients to suit your taste, adding spices or different types of pickles for a unique twist.
- Great for Sharing: These delightful bites are ideal for parties, picnics, or potlucks, allowing guests to enjoy a tasty treat without fuss.
Ingredients
Detailed List of Ingredients
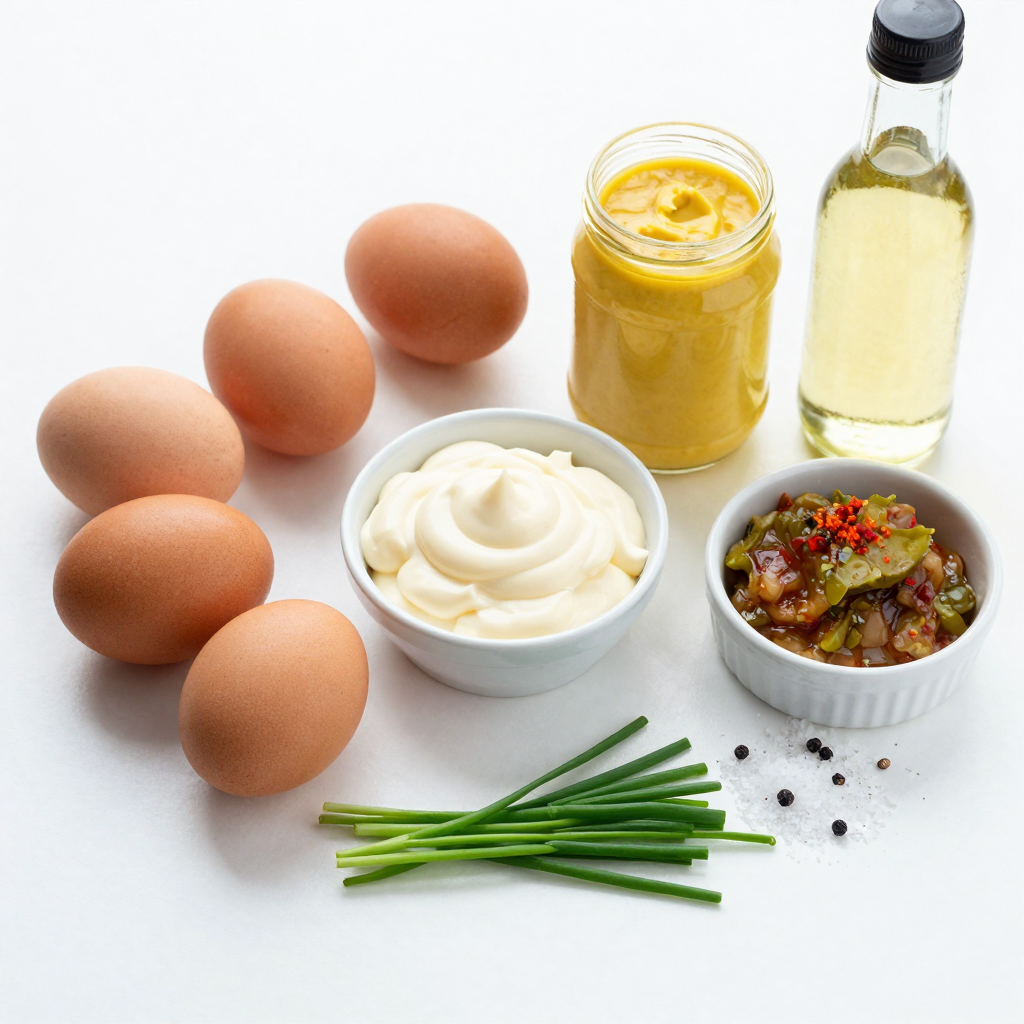
To make the perfect deviled eggs, gather these simple items:
- 6 large eggs
- 3 tablespoons mayonnaise
- 1 tablespoon Dijon mustard
- 1 tablespoon sweet pickle relish
- 1 teaspoon apple cider vinegar
- Salt and black pepper, to taste
- Paprika, for garnish
- Fresh chives or parsley, chopped for garnish
Equipment Needed
You will need a few tools to help you make these deviled eggs:
- A saucepan for boiling the eggs
- A mixing bowl for the yolks
- A fork to mash the yolks
- A piping bag or spoon for filling the eggs
- A bowl of ice water for cooling
Tips for Selecting the Best Ingredients
Choosing the right ingredients makes all the difference. Here are my tips:
- Use fresh, large eggs for the best texture.
- Choose a mayonnaise that you enjoy; it adds creaminess.
- Select a high-quality Dijon mustard for a nice kick.
- Pick sweet relish that is not too overpowering.
- Fresh herbs add brightness, so don’t skip them.
- Always season with salt and pepper to bring out flavors.

Step-by-Step Instructions
How to Hard-Boil the Eggs
To start, you need to hard-boil the eggs. Place six large eggs in a saucepan. Cover them with cold water, about an inch above the eggs. Turn the heat to medium-high and bring the water to a boil. Once it reaches a boil, cover the pot and take it off the heat. Let the eggs sit in the hot water for 12 minutes. This method gives you a creamy yolk without a gray ring.
Preparing the Filling
After the eggs cool, it’s time to prepare the filling. Transfer the eggs to a bowl of ice water. Let them sit for at least 10 minutes to cool. Once cool, gently tap each egg on a hard surface to crack the shell. Peel the eggs and slice them in half lengthwise. Carefully scoop out the yolks into a mixing bowl. Mash the yolks with a fork until smooth. Then add three tablespoons of mayonnaise, one tablespoon of Dijon mustard, one tablespoon of sweet pickle relish, and one teaspoon of apple cider vinegar. Season with salt and black pepper to taste. Mix until the filling is creamy.
Tips for Filling and Garnishing
Now, you’re ready to fill the egg whites. You can use a spoon or a piping bag. If you want a fancy look, use a star tip on the piping bag. This will add a nice touch. Once filled, sprinkle paprika over each egg for color. For a fresh twist, add chopped chives or parsley on top. This makes your deviled eggs not just tasty, but also beautiful!
Pro Tips
- Perfect Hard-Boiling: To ensure your eggs are perfectly hard-boiled, start them in cold water and bring them to a gentle boil. This helps avoid cracks and promotes even cooking.
- Easy Peeling: Adding a teaspoon of baking soda to the boiling water can help make peeling the eggs easier by increasing the pH level of the water, which loosens the egg’s membrane.
- Customize Your Flavor: Feel free to experiment with different types of mustards or add spices like cayenne pepper or garlic powder to the yolk mixture for a unique twist.
- Presentation Matters: For an elegant presentation, use a piping bag with a star tip to fill the egg whites. This not only looks great but also makes for a more enjoyable eating experience.
Tips & Tricks
Common Mistakes to Avoid
When making deviled eggs, avoid overcooking the eggs. This can cause a green ring around the yolk. Instead, follow the boiling process closely. Another mistake is not cooling the eggs in ice water. This helps peel them easily. Lastly, don’t skip seasoning. Salt and pepper enhance the flavor of the filling.
Enhancing Flavor Profiles
To boost flavor, consider adding a dash of hot sauce or smoked paprika. You can also mix in a teaspoon of lemon juice for a zesty touch. Try different mustards. Honey mustard can add a sweet twist. For a gourmet touch, add capers or diced pickles. These ingredients can elevate your deviled eggs and surprise your guests.
Presentation Tips for Serving
Presentation matters for deviled eggs. Use a piping bag for a clean, swirled look. This gives your eggs a professional touch. Arrange them on a platter with fresh herbs. Chives or parsley not only add color but also flavor. Sprinkle paprika on top for a vibrant finish. Consider using decorative egg trays to impress your guests.

Variations
Spicy Deviled Eggs
To make spicy deviled eggs, add a kick. Mix in some hot sauce, like sriracha. You can also use spicy mustard instead of Dijon. This will add heat and flavor. You can try jalapeños or diced pickled peppers for extra spice. Adjust the heat to your taste.
Avocado Deviled Eggs
For a creamy twist, use avocado. Mash ripe avocado with the egg yolks. Replace some or all mayonnaise with the avocado. This gives a fresh flavor and a beautiful green color. Add lime juice for a zesty touch. Garnish with cilantro for a nice finish.
Adding Different Relishes
Relish can change the taste of deviled eggs. Try adding a spicy relish for a new flavor. You can use dill relish for a tangy twist. A fruit relish, like mango or peach, offers sweetness. Experiment with different types to find your favorite mix.
Storage Info
How to Store Leftover Deviled Eggs
To store leftover deviled eggs, place them in a covered container. Use wax paper or plastic wrap to keep them fresh. You can also separate the egg whites from the yolk filling. This helps prevent sogginess. Store them in the fridge and eat them within three days for the best taste.
Freezing Options for Deviled Egg Filling
I do not recommend freezing filled deviled eggs. The texture changes when thawed. You can freeze the yolk filling. Put it in an airtight container. Be sure to label the container with the date. When you are ready to use it, thaw it in the fridge overnight. Mix it well before using.
Best Practices for Keeping Deviled Eggs Fresh
To keep your deviled eggs fresh, always store them in the fridge. Avoid leaving them out for more than two hours. If you plan a party, prepare the filling a few hours ahead. Fill the eggs just before serving. This keeps them looking and tasting great.
FAQs
How long do Deviled Eggs last in the refrigerator?
Deviled eggs can last about three to four days in the fridge. Store them in an airtight container to keep them fresh. If you see any signs of spoilage, it’s best to toss them.
Can I make Deviled Eggs ahead of time?
Yes, you can make deviled eggs ahead of time. Prepare the eggs, fill them, and store them covered in the fridge. They taste great even a day in advance. Just add the garnish right before serving for the best look.
What can I use instead of mayonnaise?
If you want to skip mayonnaise, use Greek yogurt or sour cream. These options give a creamy texture and a tangy flavor. You can also try avocado for a healthier twist, adding richness and flavor.
This post covered how to make perfect deviled eggs. We discussed key ingredients, tools, and step-by-step methods. I shared tips to enhance flavors and avoid mistakes. Variations like spicy or avocado deviled eggs add fun twists. Lastly, proper storage keeps them fresh for longer.
Remember, practice makes perfect. Enjoy making and sharing these tasty bites!

Classic Deviled Eggs with Sweet Relish
Ingredients
6 large eggs
3 tablespoons mayonnaise
1 tablespoon Dijon mustard
1 tablespoon sweet pickle relish
1 teaspoon apple cider vinegar
Salt and black pepper, to taste
Paprika, for garnish
Fresh chives or parsley, chopped for garnish
Instructions
Hard-Boil the Eggs: Place the eggs in a saucepan and cover them with cold water. Bring to a boil over medium-high heat. Once boiling, cover the pot and remove it from heat. Let the eggs sit in hot water for 12 minutes.
Cool the Eggs: Transfer the eggs to a bowl of ice water to halt the cooking process. Let them cool for at least 10 minutes before peeling.
Prepare the Filling: Gently tap the peeled eggs on a hard surface and remove the shells. Slice the eggs in half lengthwise and carefully remove the yolks, placing them in a mixing bowl.
Mix Ingredients: Mash the yolks with a fork until smooth. Add mayonnaise, Dijon mustard, sweet pickle relish, apple cider vinegar, salt, and pepper. Mix until creamy and well combined.
Fill the Egg Whites: Spoon or pipe the yolk mixture back into the hollow egg whites. For a pretty presentation, use a piping bag fitted with a star tip for an elegant touch.
Garnish: Sprinkle a dash of paprika on top of each deviled egg and add some chopped chives or parsley for a fresh pop of color.
Prep Time: 15 minutes | Total Time: 30 minutes | Servings: 12 halves

Classic Deviled Eggs with Sweet Relish
Ingredients
- 6 large eggs
- 3 tablespoons mayonnaise
- 1 tablespoon Dijon mustard
- 1 tablespoon sweet pickle relish
- 1 teaspoon apple cider vinegar
- to taste Salt and black pepper
- for garnish Paprika
- for garnish Fresh chives or parsley, chopped
Instructions
- Hard-Boil the Eggs: Place the eggs in a saucepan and cover them with cold water. Bring to a boil over medium-high heat. Once boiling, cover the pot and remove it from heat. Let the eggs sit in hot water for 12 minutes.
- Cool the Eggs: Transfer the eggs to a bowl of ice water to halt the cooking process. Let them cool for at least 10 minutes before peeling.
- Prepare the Filling: Gently tap the peeled eggs on a hard surface and remove the shells. Slice the eggs in half lengthwise and carefully remove the yolks, placing them in a mixing bowl.
- Mix Ingredients: Mash the yolks with a fork until smooth. Add mayonnaise, Dijon mustard, sweet pickle relish, apple cider vinegar, salt, and pepper. Mix until creamy and well combined.
- Fill the Egg Whites: Spoon or pipe the yolk mixture back into the hollow egg whites. For a pretty presentation, use a piping bag fitted with a star tip for an elegant touch.
- Garnish: Sprinkle a dash of paprika on top of each deviled egg and add some chopped chives or parsley for a fresh pop of color.


![To make delicious zucchini corn fritters, gather these simple ingredients: - 2 medium zucchinis, grated - 1 cup sweet corn (fresh, canned, or frozen) - 1/2 cup all-purpose flour - 1/4 cup cornmeal - 2 large eggs - 1/4 cup green onions, finely chopped - 1 teaspoon garlic powder - 1 teaspoon onion powder - 1/2 teaspoon paprika - Salt and pepper to taste - Olive oil for frying - Optional: fresh cilantro or parsley for garnish These ingredients work together to create a tasty and crispy fritter. The zucchini and corn give it a sweet taste, while the spices add flavor. The flour and cornmeal help bind the mixture, ensuring your fritters hold their shape. Using fresh ingredients makes a big difference. I always prefer freshly grated zucchini and sweet corn when available. This helps the fritters taste better. Don't forget to check out the Full Recipe for detailed instructions on how to make these fritters come to life! Grating and Moisture Removal Start by grating the zucchinis with a box grater. Use medium-sized zucchinis for the best texture. After grating, place the zucchini in a clean kitchen towel. Squeeze the towel tightly to remove excess moisture. This is key for crispy fritters. If you skip this step, your fritters may turn out soggy. Combining Ingredients In a large mixing bowl, combine your drained zucchini with sweet corn. You can use fresh, canned, or frozen corn. Add all-purpose flour, cornmeal, and eggs to the bowl. Toss in chopped green onions, garlic powder, onion powder, paprika, salt, and pepper. Mix everything until it is well combined. Your batter should be thick and sticky. Heating the Skillet Heat a non-stick skillet over medium heat. Add enough olive oil to coat the bottom of the pan lightly. This helps the fritters fry evenly and get golden brown. Frying Process Once the oil is hot, scoop about 1/4 cup of the fritter mixture onto the skillet. Flatten each scoop slightly with a spatula. Cook for about 3-4 minutes on each side. Watch for a golden color to know they are done. If they brown too fast, lower the heat a bit. Draining Excess Oil Once the fritters are cooked, transfer them to a plate lined with paper towels. This step helps absorb any excess oil. It makes them less greasy and more enjoyable. Garnishing Options Serve the fritters warm. You can garnish them with fresh cilantro or parsley for a nice pop of color. They pair perfectly with sour cream or a zesty avocado sauce. These simple additions elevate the dish even more. For the full recipe, refer to the [Full Recipe]. Importance of Moisture Removal To get crispy fritters, you must remove excess moisture from the zucchini. Grating the zucchini is just the first step. After grating, use a clean kitchen towel to squeeze out as much water as you can. This simple step makes all the difference. Wet fritters become soggy and won’t crisp up well. Adjusting Cooking Temperature Cooking temperature is key. If the pan is too hot, the fritters burn outside but stay raw inside. If it's too low, they soak up oil and become greasy. I recommend medium heat. This allows the fritters to cook evenly and turn golden brown. Pay attention while frying. Adjust the heat as needed to keep them from burning. Adding Herbs or Spices You can easily boost the flavor of your fritters. Try adding fresh herbs like cilantro or parsley. These add a fresh taste and color. You can also use spices like cumin or chili powder for a kick. Experiment with flavors to find what you enjoy most. Serving Suggestions Serve your fritters warm for the best taste. They go great with a dollop of sour cream or yogurt. For a twist, try a zesty avocado sauce. This adds creaminess and a bright flavor. You can also serve them alongside a fresh salad for a light meal. Recommended Frying Pan A non-stick skillet works best for frying these fritters. It helps prevent sticking and makes flipping easier. If you don’t have non-stick, use a well-seasoned cast iron pan. Both options help achieve that perfect golden crust. Tools for Grating and Mixing For grating zucchini, a box grater is perfect. It gives you nice, even shreds. You will also need a large mixing bowl to combine all the ingredients. A sturdy spatula helps mix everything well, ensuring all the flavors blend. For the best results, keep your tools handy and clean to make cooking smooth. {{image_2}} To make your zucchini corn fritters gluten-free, you can substitute the all-purpose flour. Use a gluten-free flour blend instead. This will keep the fritters light and crispy. You can also use almond flour or chickpea flour for added flavor and texture. Cornmeal is a great choice too, as it adds crunch. If you want to make these fritters vegan, you can replace the eggs with flaxseed meal. Mix one tablespoon of flaxseed meal with three tablespoons of water. Let it sit for about five minutes until it thickens. You can also use unsweetened applesauce as a binder; about 1/4 cup should work well. Adding cheese can elevate your fritters. A sharp cheddar or feta cheese adds great taste. Mix in about 1/2 cup of grated cheese to the batter. You can also incorporate different vegetables like grated carrots or bell peppers for extra flavor and color. Each adds a unique twist to the base recipe. For the full recipe, check out the detailed steps above. After you enjoy your zucchini corn fritters, store any leftovers for later. Here’s how to do it right: - Refrigeration Tips: Place the fritters in an airtight container. They can last up to three days in the fridge. If you want to keep them crispy, place a paper towel in the container. This helps absorb moisture. - Best Practices for Freezing: If you want to freeze them, layer the fritters with parchment paper in a freezer-safe bag. They freeze well for up to three months. When you’re ready to eat, thaw overnight in the fridge before reheating. To enjoy your fritters again, follow these simple steps: - Methods for Best Results: The best way to reheat fritters is on the stove. Heat a non-stick skillet over medium heat. Add a little olive oil and cook for about two minutes on each side. This keeps them nice and crispy. - Avoiding Sogginess: To keep them from getting soggy, avoid using the microwave. The microwave steams them and removes their crunch. Always opt for stovetop reheating for the best texture. Now you can enjoy your delicious zucchini corn fritters any time! To make zucchini corn fritters, start with simple steps. First, grate two medium zucchinis and squeeze out moisture. This step helps the fritters stay crispy. Next, combine the zucchini with one cup of sweet corn, half a cup of flour, and a quarter cup of cornmeal. Add two large eggs, a quarter cup of chopped green onions, garlic powder, onion powder, paprika, salt, and pepper. Mix until well-blended. Heat olive oil in a skillet over medium heat. Scoop about a quarter cup of the mixture for each fritter. Cook for 3-4 minutes on each side. This quick recipe will give you crispy and tasty fritters. You can find the full recipe at the beginning of this article. Yes, you can bake zucchini corn fritters. Preheat your oven to 400°F (200°C). Line a baking sheet with parchment paper. Shape the fritters and place them on the sheet. Brush the tops lightly with olive oil for a golden finish. Bake for about 20-25 minutes or until they are crisp and golden brown. Baking is a healthier option and still gives great results. Zucchini corn fritters pair well with many side dishes. Consider serving them with a dollop of sour cream or Greek yogurt. A zesty avocado sauce adds a nice touch too. You can also serve them with a fresh salad for a balanced meal. Try adding a side of salsa for a fun flavor kick. These options enhance the experience of enjoying your fritters. To keep your fritters from falling apart, moisture removal is key. Squeeze out as much liquid from the grated zucchini as possible. Use enough flour and cornmeal to bind the ingredients. Eggs act as a binder, so don’t skip them. Mixing well will also help combine everything evenly. If the mixture feels too wet, add a bit more flour until it holds together. In this post, I covered how to make delicious Zucchini Corn Fritters. We went over the ingredients, from zucchini to sweet corn, and shared tips for crispy results. You learned how to prepare, cook, and store your fritters. I encourage you to try different variations and flavors. Experiment with herbs or make it gluten-free. No matter how you create them, these fritters will be a tasty addition to your meals. Enjoy your cooking!](https://dailydishlab.com/wp-content/uploads/2025/07/ca44245d-9b60-45de-8deb-be1df19ec037-768x768.webp)

