Creamy Garlic Mushroom Orzo Flavorful Dinner Delight

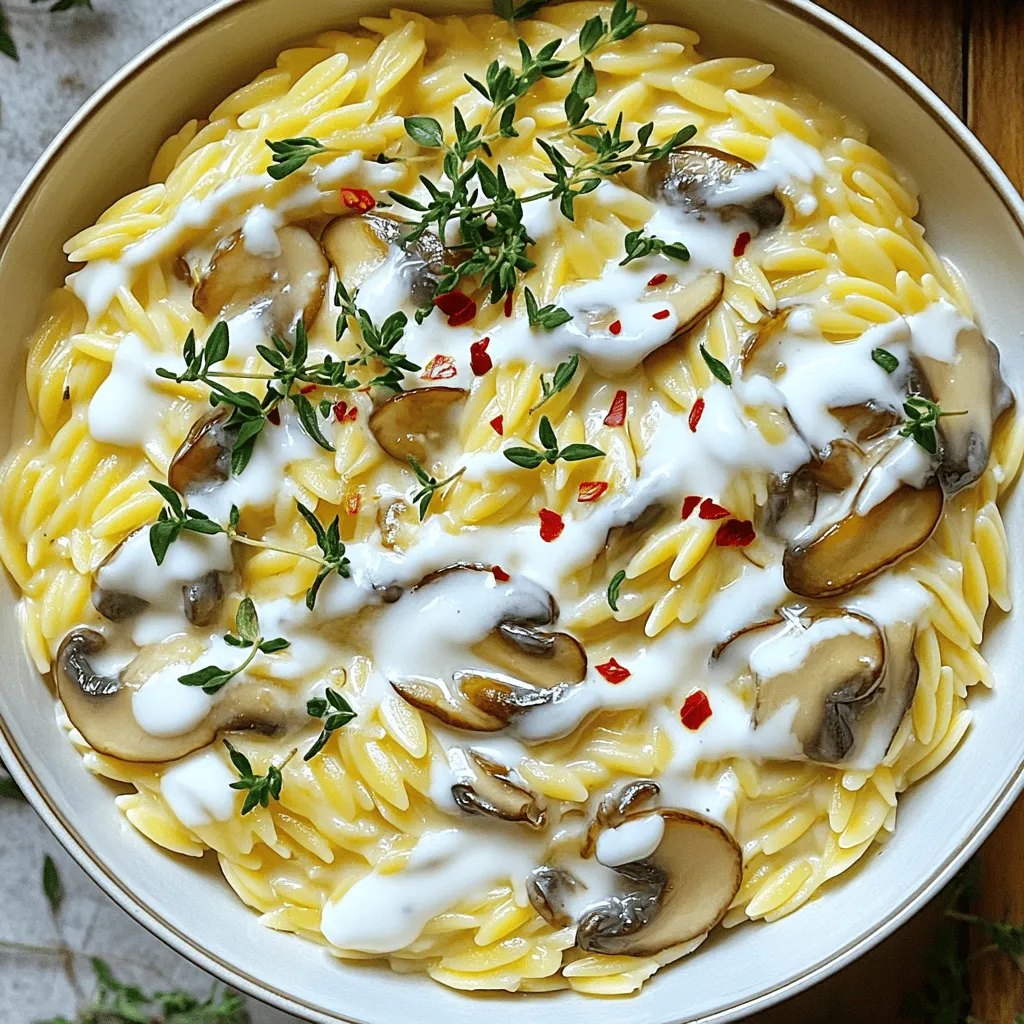
Looking for a tasty dinner idea? This Creamy Garlic Mushroom Orzo is a must-try! It combines rich flavors and smooth textures, creating a dish you’ll love. In this post, I’ll guide you through the easy steps to make it yourself. You’ll also find tips on ingredient swaps, serving suggestions, and fun variations. Let’s dive in and make dinner a delightful experience!
Why I Love This Recipe
- Rich and Creamy Flavor: This dish combines the earthy taste of mushrooms with the luxurious creaminess of the sauce, creating a comforting and indulgent experience.
- Quick and Easy: Ready in just 25 minutes, this recipe is perfect for busy weeknights when you want something delicious without spending hours in the kitchen.
- Versatile Ingredients: You can easily customize this recipe with different types of mushrooms or add veggies, making it adaptable to your preferences or what you have on hand.
- Beautiful Presentation: With its creamy texture and fresh herbs, this dish looks as good as it tastes, making it a great choice for entertaining or special occasions.
Ingredients
List of Ingredients
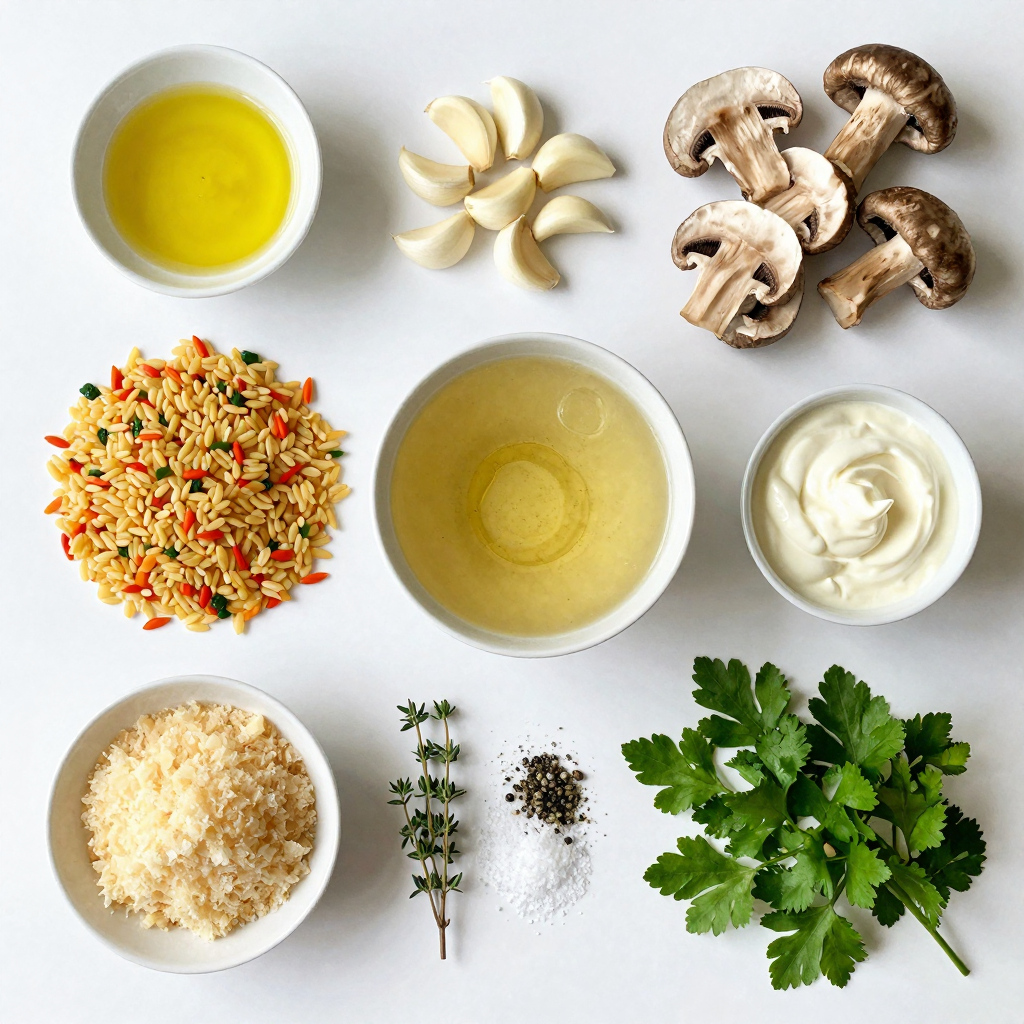
To make creamy garlic mushroom orzo, gather these ingredients:
- 1 cup orzo pasta
- 2 tablespoons olive oil
- 3 cloves garlic, minced
- 8 ounces mushrooms, sliced (use a mix of cremini and shiitake for unique flavor)
- 1 cup vegetable broth
- 1 cup heavy cream (or coconut cream for a dairy-free option)
- 1/2 cup grated Parmesan cheese (or nutritional yeast for a vegan option)
- 1 tablespoon fresh thyme leaves
- Salt and pepper to taste
- Fresh parsley, chopped (for garnish)
Ingredient Substitutions
You can switch some ingredients to fit your taste or diet.
- For orzo, use any small pasta like ditalini or couscous.
- Olive oil can be replaced with butter for a richer flavor.
- Any mushrooms work well, like button mushrooms or portobello.
- If you want a lighter option, use half-and-half instead of heavy cream.
- You can swap Parmesan cheese with nutritional yeast for a vegan dish.
- Fresh thyme can be replaced with dried thyme, but use less.
Nutritional Information
This dish serves four. Each serving has roughly:
- Calories: 400
- Protein: 12 grams
- Carbohydrates: 45 grams
- Fat: 20 grams
- Fiber: 2 grams
These numbers can change based on the substitutions you choose.

Step-by-Step Instructions
Cooking the Orzo
Start by boiling salted water in a large pot. Add 1 cup of orzo pasta. Cook it until it’s al dente, which means it should be firm yet tender. This takes about 8 to 10 minutes. Once cooked, drain the orzo in a colander and set it aside. This step is important for the final dish.
Preparing the Mushroom Sauce
In the same pot, heat 2 tablespoons of olive oil over medium heat. Add 3 cloves of minced garlic. Sauté for about 1 minute. You want the garlic to be fragrant, not burned. Next, add 8 ounces of sliced mushrooms. A mix of cremini and shiitake mushrooms works best. Cook these for about 5 to 7 minutes. They should become soft and brown. This process builds a great flavor base for your sauce.
Combining Ingredients for Creaminess
Pour in 1 cup of vegetable broth. Let it simmer for about 2 minutes. This reduces the broth slightly, enhancing the flavor. Now, stir in 1 cup of heavy cream. Bring this mixture to a gentle simmer. Fold in the drained orzo along with 1/2 cup of grated Parmesan cheese. Mix everything well. Add in 1 tablespoon of fresh thyme leaves. Season with salt and pepper to taste. Cook for an additional 2 to 3 minutes, stirring occasionally. This lets the flavors meld together, creating a creamy texture. Finally, remove from heat and garnish with chopped fresh parsley. This adds a nice touch before serving.
Pro Tips
- Use a Variety of Mushrooms: Combining different types of mushrooms like cremini and shiitake adds depth and complexity to the flavor of your dish.
- Reserve Pasta Water: If your orzo becomes too thick, adding a splash of the reserved pasta water can help achieve a creamy consistency.
- Experiment with Herbs: Feel free to mix in other fresh herbs like basil or oregano for a unique twist that complements the dish.
- Garnish Creatively: Consider topping your orzo with toasted pine nuts or a squeeze of lemon juice for added texture and brightness.
Tips & Tricks
Perfecting the Creaminess
To get that rich, creamy texture, use heavy cream. This adds depth and richness. If you prefer a lighter option, try coconut cream. It gives a nice flavor without dairy. Stir the cream in gently. This helps keep it smooth and luscious.
Flavor Enhancements
Boost the taste with fresh herbs. Thyme adds a lovely aroma. You can also use rosemary or basil for a twist. Want a little kick? Add red chili flakes when serving. For a cheesy flavor without dairy, use nutritional yeast. It blends well and tastes great!
Presentation Suggestions
Serve the orzo in shallow bowls for a beautiful look. Drizzle extra cream sauce on top for a touch of elegance. Sprinkle extra thyme and parsley for color and freshness. For a spicy twist, add a few red chili flakes on top. This makes your dish pop!

Variations
Vegan and Dairy-Free Alternatives
You can easily make this dish vegan. Swap the heavy cream for coconut cream. It gives a rich flavor and texture. Replace Parmesan cheese with nutritional yeast for a cheesy taste without dairy. This keeps the dish creamy and delicious.
Adding Protein Options
Want to make it heartier? Add some protein. Grilled chicken or shrimp complements the orzo well. For a plant-based option, try chickpeas or lentils. These choices boost protein and add great flavor. Just mix them in when you combine the orzo and sauce.
Seasonal Vegetable Additions
Fresh veggies can change the dish’s vibe. In spring, use asparagus or peas for a bright taste. In the fall, add roasted butternut squash or spinach. These veggies not only taste great but also make your meal colorful and nutritious. Feel free to experiment with your favorites!
Storage Info
How to Store Leftovers
Let your creamy garlic mushroom orzo cool before storing. Use an airtight container to keep it fresh. Place the leftovers in the fridge. They will stay good for about 3 days.
Reheating Instructions
To reheat, add the orzo to a pot over low heat. Stir in a splash of broth or cream for moisture. Heat until warm, stirring often. You can also microwave it in a bowl. Cover it with a damp paper towel to keep it moist. Heat in 30-second bursts, stirring in between.
Freezing Recommendations
You can freeze creamy garlic mushroom orzo for up to 3 months. Use a freezer-safe container, leaving space for expansion. Thaw it in the fridge overnight before reheating. Remember, the texture may change slightly after freezing, but it will still taste delicious.
FAQs
Can I use different pasta instead of orzo?
Yes, you can use other pasta types. Small shapes like ditalini or acini di pepe work well. Just be sure to adjust the cooking time as needed. Each pasta type offers a different texture, which can change the dish’s feel.
How can I make this dish gluten-free?
To make creamy garlic mushroom orzo gluten-free, swap orzo with gluten-free pasta. Look for options made from rice or quinoa. Ensure all other ingredients, like the broth and cream, are also gluten-free. This way, you can enjoy the same great taste without gluten.
What can I serve with creamy garlic mushroom orzo?
Creamy garlic mushroom orzo pairs well with many sides. Try serving it with a fresh salad or steamed vegetables. Grilled chicken or fish adds protein, making the meal more filling. You can also serve warm bread for a cozy touch.
This blog post covered everything you need to make creamy garlic mushroom orzo. We looked at ingredients, cooking steps, and clever tips. I shared variations for diets and storage hacks. Remember, you can switch ingredients and make this dish your own. Your taste and creativity shine through in the kitchen. Enjoy your cooking, and don’t hesitate to explore new flavors!

Creamy Garlic Mushroom Orzo
Ingredients
1 cup orzo pasta
2 tablespoons olive oil
3 cloves garlic, minced
8 ounces mushrooms, sliced (use a mix of cremini and shiitake for unique flavor)
1 cup vegetable broth
1 cup heavy cream (or coconut cream for a dairy-free option)
1/2 cup grated Parmesan cheese (or nutritional yeast for a vegan option)
1 tablespoon fresh thyme leaves
Salt and pepper to taste
Fresh parsley, chopped (for garnish)
Instructions
In a large pot, bring salted water to a boil. Add the orzo and cook according to package instructions until al dente. Drain and set aside.
In the same pot, heat the olive oil over medium heat. Add the minced garlic and sauté for about 1 minute until fragrant, being careful not to burn it.
Add the sliced mushrooms to the pot and cook for 5-7 minutes until they are soft and browned.
Pour in the vegetable broth, and allow it to simmer for about 2 minutes to reduce slightly.
Stir in the heavy cream, bringing the mixture to a gentle simmer. Fold in the cooked orzo and Parmesan cheese, mixing well to combine.
Add the fresh thyme and season with salt and pepper to taste. Let the orzo cook for an additional 2-3 minutes, stirring occasionally, until creamy and heated through.
Remove from heat and garnish with fresh parsley before serving.
Prep Time, Total Time, Servings: 10 minutes | 25 minutes | Serves 4
– Presentation Tips: Serve the orzo in shallow bowls, drizzling extra cream sauce on top and sprinkling with additional thyme and parsley for a pop of color. Add a sprinkle of red chili flakes for a hint of spice!

Creamy Garlic Mushroom Orzo
Ingredients
- 1 cup orzo pasta
- 2 tablespoons olive oil
- 3 cloves garlic, minced
- 8 ounces mushrooms, sliced
- 1 cup vegetable broth
- 1 cup heavy cream
- 1 2 grated Parmesan cheese
- 1 tablespoon fresh thyme leaves
- Salt and pepper to taste
- Fresh parsley, chopped for garnish
Instructions
- In a large pot, bring salted water to a boil. Add the orzo and cook according to package instructions until al dente. Drain and set aside.
- In the same pot, heat the olive oil over medium heat. Add the minced garlic and sauté for about 1 minute until fragrant, being careful not to burn it.
- Add the sliced mushrooms to the pot and cook for 5-7 minutes until they are soft and browned.
- Pour in the vegetable broth, and allow it to simmer for about 2 minutes to reduce slightly.
- Stir in the heavy cream, bringing the mixture to a gentle simmer. Fold in the cooked orzo and Parmesan cheese, mixing well to combine.
- Add the fresh thyme and season with salt and pepper to taste. Let the orzo cook for an additional 2-3 minutes, stirring occasionally, until creamy and heated through.
- Remove from heat and garnish with fresh parsley before serving.


![Here’s what you need for Easy Sheet Pan Salmon Fajitas. Gather these ingredients for a fun and tasty meal: - 1 lb salmon fillet, cut into bite-sized pieces - 2 bell peppers (any color), sliced - 1 medium onion, sliced - 3 tablespoons olive oil - 2 teaspoons chili powder - 1 teaspoon ground cumin - 1 teaspoon garlic powder - 1/2 teaspoon smoked paprika - Salt and pepper to taste - 8 small flour or corn tortillas - Fresh cilantro, for garnish - Lime wedges, for serving These ingredients work together to create a dish that is both simple and full of flavor. The salmon brings a rich taste, while the vegetables add crunch and color. Each spice adds a unique depth, making every bite exciting. You can find the full recipe to guide you through the cooking process. Enjoy crafting this delightful meal! - Preheat your oven to 400°F (200°C). - Line a baking sheet with parchment paper. - In a large bowl, combine sliced bell peppers and onion with 3 tablespoons of olive oil, chili powder, ground cumin, garlic powder, smoked paprika, salt, and pepper. - Toss well to coat the veggies evenly. - Spread the seasoned vegetables on one side of the sheet pan. - Coat salmon pieces with olive oil and place them on the other side of the pan. - Bake everything for 15-20 minutes. Check for doneness to ensure the salmon is cooked through. - Warm the tortillas in a dry skillet or microwave until soft. - Once done, assemble salmon and veggies in the warm tortillas. - Add fresh cilantro and a squeeze of lime juice for extra flavor. You can find the complete instructions in the Full Recipe. Enjoy your cooking! I love to play with flavors. For a zestier kick, add more chili powder. If you prefer a milder taste, reduce it. You can also mix in some lime zest for a fresh twist. For a smoky flavor, increase the smoked paprika. Experiment with spices to find what you love. Cooking time depends on the salmon's thickness. Thicker pieces need a bit more time, while thinner ones cook faster. Check your salmon at 15 minutes. If it flakes easily with a fork, it's done! Different ovens heat unevenly, so keep an eye on your dish. If your oven runs hot, reduce the time slightly. These salmon fajitas shine with simple sides. A fresh avocado salad pairs well. You can also serve with black beans or corn on the side. For dips, try a creamy avocado sauce or salsa. A cold drink, like lemonade or iced tea, complements the meal perfectly. Enjoy your colorful, tasty dish! {{image_2}} You can switch salmon for chicken or tofu. Chicken works well because it absorbs flavors nicely. Cut chicken into small pieces like the salmon. Cook it for about 20-25 minutes. Tofu is a great choice for a plant-based option. Press it to remove extra water, then cut it into cubes. Bake it for 15-20 minutes too. Both options are tasty and keep the dish simple. Feel free to add more veggies for fun and flavor. Zucchini, corn, or mushrooms are great choices. Slice zucchini into thin rounds and add it to the mix. Corn can bring a sweet crunch. You can chop mushrooms and toss them in for extra depth. Mixing different vegetables keeps every bite exciting. Don’t be shy to use what you like! Want it spicier? Add more chili powder or fresh jalapeños. You can sprinkle red pepper flakes for an extra kick. If you prefer it milder, use less chili powder. You can also add more lime juice to balance the heat. Adjusting spice levels makes this dish fun for everyone. Your taste buds will thank you! For the complete recipe, check out the [Full Recipe]. To store your leftover salmon fajitas, first let them cool. This step helps keep the food fresh. Use an airtight container for best results. You can separate the salmon, veggies, and tortillas or store them together. If you store them together, the tortillas may get soggy. I recommend using glass containers or heavy-duty plastic bags. When you reheat salmon fajitas, you want to keep them moist. The best method is to use the oven. Preheat your oven to 350°F (175°C). Place the salmon and veggies on a baking sheet. Cover them with foil to trap moisture. Heat for about 10-15 minutes. You can also use a skillet over medium heat. Just add a splash of water to help steam them. If you prefer the microwave, use a microwave-safe dish. Cover it with a damp paper towel. Heat in short bursts, checking often. Freezing salmon fajitas is simple. Pack the leftovers in airtight containers or freezer bags. Remove as much air as possible. They can last up to three months in the freezer. When ready to eat, thaw them in the fridge overnight. Reheat them as mentioned above. This keeps the flavor and texture nice. You’ll have a quick meal ready to go! For the full recipe, visit the section above. Yes, you can prep ahead. Chop the veggies and salmon in advance. Store them in the fridge. You can mix the spices and keep them in a small jar. This way, you save time when cooking. Just remember to bake everything fresh for the best taste. Salmon fajitas pair well with many sides. Here are some tasty options: - Rice or quinoa for a filling base - Black beans for extra protein - A fresh salad with lime dressing - Guacamole for a creamy touch - Chips for a crunchy contrast You can easily lighten up this dish. Try these tips: - Use less oil when roasting the veggies - Add more vegetables like zucchini or corn - Choose whole wheat tortillas for more fiber - Skip the cheese or use a low-fat option - Serve with a side of steamed veggies To reheat salmon fajitas, use a skillet. Warm it over medium heat. Add the salmon and veggies, and cover with a lid. This keeps them moist. You can also use the microwave. Heat in short bursts to avoid drying them out. Just remember, fresh is always best! This recipe highlights the joy of making salmon fajitas. You learned about the key ingredients, step-by-step instructions, and helpful tips. I shared ideas for variations and storage. Remember, you can customize flavors and spices to suit your taste. Whether you enjoy it with chicken, tofu, or extra veggies, it’s all about creating a meal you love. Use these pointers to enjoy cooking and eating. Your salmon fajitas can be a hit at every meal. Cooking should be fun and tasty!](https://dailydishlab.com/wp-content/uploads/2025/07/cbf1539a-7436-4928-932a-7fda2b4117aa-768x768.webp)


![To make this tasty dish, you need some key items. Here is what you will need: - 2 cups cooked pasta (penne or rotini works best) - 1 lb chicken breast, diced - 8 oz mushrooms, sliced - 2 cups broccoli florets (fresh or frozen) - 3 cups Alfredo sauce (store-bought or homemade) - 1 cup shredded mozzarella cheese - ½ cup grated Parmesan cheese - 2 tablespoons olive oil - 2 cloves garlic, minced - Salt and pepper to taste - 1 teaspoon Italian seasoning These ingredients create a rich and creamy flavor that everyone will love. The right seasonings make your casserole pop. Salt and pepper add basic flavor. Italian seasoning gives it a nice herbal touch. I often use fresh garlic to add depth. The garlic will make your kitchen smell amazing as it cooks. Don’t skip these steps; they make a big difference! Garnishes can make your dish look more inviting. I like to use fresh parsley for a burst of color. You can also add extra cheese on top if you want a cheesier finish. These little touches make your casserole feel special and more appealing. Use what you enjoy most! If you want the full details, check the Full Recipe. Start by gathering your ingredients. You need cooked pasta, chicken, mushrooms, broccoli, and sauce. Also, have mozzarella and Parmesan cheese ready. Dice the chicken and slice the mushrooms. This helps the cooking go fast. Mince the garlic too. Don’t forget to measure out the olive oil and seasonings. In a large skillet, heat olive oil over medium heat. Once hot, add the diced chicken. Season it with salt, pepper, and Italian seasoning. Cook for 5-7 minutes until the chicken turns white. It should not be pink inside. Next, add minced garlic and sliced mushrooms. Sauté these for 3-4 minutes. The mushrooms will become soft and tasty. Finally, stir in the broccoli florets. Cook for an extra 2 minutes until they turn bright green. In a big bowl, mix the cooked pasta with the chicken and vegetables. Pour in the Alfredo sauce and stir well. Make sure everything is coated evenly. Transfer this mixture to a greased baking dish. Spread it out evenly. Now, top it with mozzarella and Parmesan cheese. Bake it in a preheated oven at 375°F for 25-30 minutes. Look for bubbly, golden cheese on top. When it’s ready, let it cool for 5 minutes before serving. You can find the Full Recipe for more details and serving tips. To cook chicken well, use a skillet over medium heat. First, add olive oil and let it warm. Then, add diced chicken to the hot oil. Season with salt, pepper, and Italian seasoning. Cook for 5-7 minutes until the chicken turns white and is no longer pink. This step ensures juicy chicken for your casserole. The key to creamy Alfredo sauce is gentle heating. If you use store-bought sauce, warm it on low heat. If you make it from scratch, stir constantly to avoid lumps. You want it smooth and silky. Mix the sauce well with pasta before adding other ingredients. This helps coat everything evenly and keeps it creamy. Ovens can vary, so check your casserole while it bakes. I suggest baking for 25-30 minutes. If the top isn’t golden, leave it for a few more minutes. To avoid overcooking, always look for bubbling cheese. When the cheese is melted and golden, it’s ready to serve. Adjust your time based on your oven’s heat. {{image_2}} You can switch out the chicken for other meats. Try diced turkey or cooked ham. Shrimp works well too. Each option adds a different taste to the dish. You can also use ground beef for a heartier flavor. Just make sure it's fully cooked. If you want a meatless meal, skip the chicken. Replace it with tofu or tempeh. Both will soak up the sauce and add protein. You can also use chickpeas for a fun twist. This way, you keep it filling and tasty. Boost the health of your casserole by adding more vegetables. Spinach, bell peppers, or zucchini are great choices. You can mix in frozen peas or corn too. Just remember to keep the cooking time in mind. You want all the veggies to be tender but not mushy. They add color and flavor to your dish! To keep your Chicken and Mushroom Alfredo Casserole fresh, store it in an airtight container. Place it in the fridge right after it cools down. It will stay good for up to three days. Make sure to label the container with the date. This helps you track how long it has been stored. When you’re ready to enjoy your leftovers, preheat your oven to 350°F (175°C). Place the casserole in an oven-safe dish. Cover it with foil to keep it moist. Heat for about 20 minutes or until it's warm all the way through. You can also use the microwave. Just heat in short bursts and stir in between until hot. If you want to save the casserole for later, freezing is a great option. Allow the dish to cool completely before freezing. Use a freezer-safe container or wrap it tightly in plastic wrap and foil. It can last for up to three months in the freezer. To reheat, thaw it overnight in the fridge and then bake as mentioned above. Enjoy your creamy, cheesy meal anytime! Yes, you can make this dish ahead of time. Prepare the casserole, but do not bake it. Cover it tightly with plastic wrap or foil. Store it in the fridge for up to two days. When you are ready to eat, bake it straight from the fridge. Just add a few extra minutes to the cooking time. This keeps the flavors fresh and tasty. If you need a substitute, try cream cheese mixed with milk. This gives a creamy texture. You can also use a white sauce made from butter, flour, and milk. For a lighter option, consider using Greek yogurt mixed with a bit of cheese. These options will still keep your casserole rich and delicious. Yes, frozen chicken and vegetables work well in this recipe. If using frozen chicken, thaw it first. Cut it into small pieces before cooking. For frozen vegetables, you can add them straight to the skillet. Just cook them a little longer to ensure they heat through. This makes the prep easy and quick, while still tasting great. You can find the full recipe for Chicken and Mushroom Alfredo Casserole [Full Recipe]. This blog covered everything you need for Chicken and Mushroom Alfredo Casserole. We discussed the ingredients, from required items to tasty garnishes. I shared easy steps for preparing, cooking, and assembling the dish. Plus, I gave tips for perfect chicken and sauce. We explored variations, storage, and answered common questions. Creating this dish can be simple and fun. You can enjoy different flavors and textures. Don't hesitate to try your own spin on it. Enjoy your cooking adventure!](https://dailydishlab.com/wp-content/uploads/2025/06/668e601b-10d5-4ca8-81a3-3ea93e17acf1-768x768.webp)