Creamy Garlic Parmesan Noodles Quick and Easy Recipe

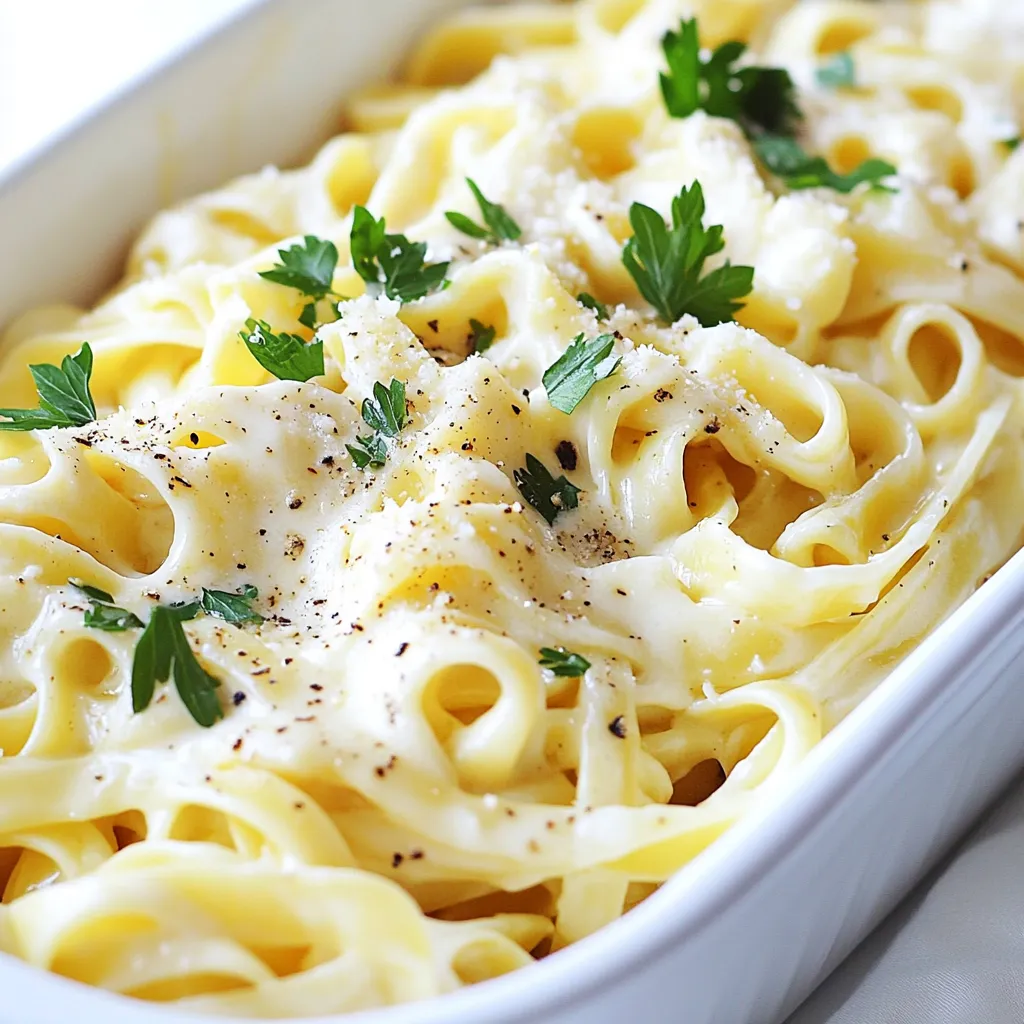
Craving a quick and tasty meal? Let me share my Creamy Garlic Parmesan Noodles recipe! This dish combines tender fettuccine with rich garlic and cheesy goodness. It’s easy to make, using just a few simple ingredients. Perfect for busy nights or when you want a comforting treat, this recipe will impress everyone at your table. Grab your ingredients, and let’s get started on this creamy delight!
Why I Love This Recipe
- Creamy Indulgence: This dish is a delightful combination of creamy sauce and tender pasta, making it a comforting meal for any occasion.
- Quick and Easy: With a prep time of just 10 minutes, this recipe is perfect for weeknight dinners when you’re short on time.
- Flavor Packed: The combination of garlic and Parmesan creates a rich flavor profile that elevates simple fettuccine to a gourmet experience.
- Customizable: You can easily add your favorite proteins or veggies to this dish, allowing for endless variations to suit your taste.
Ingredients
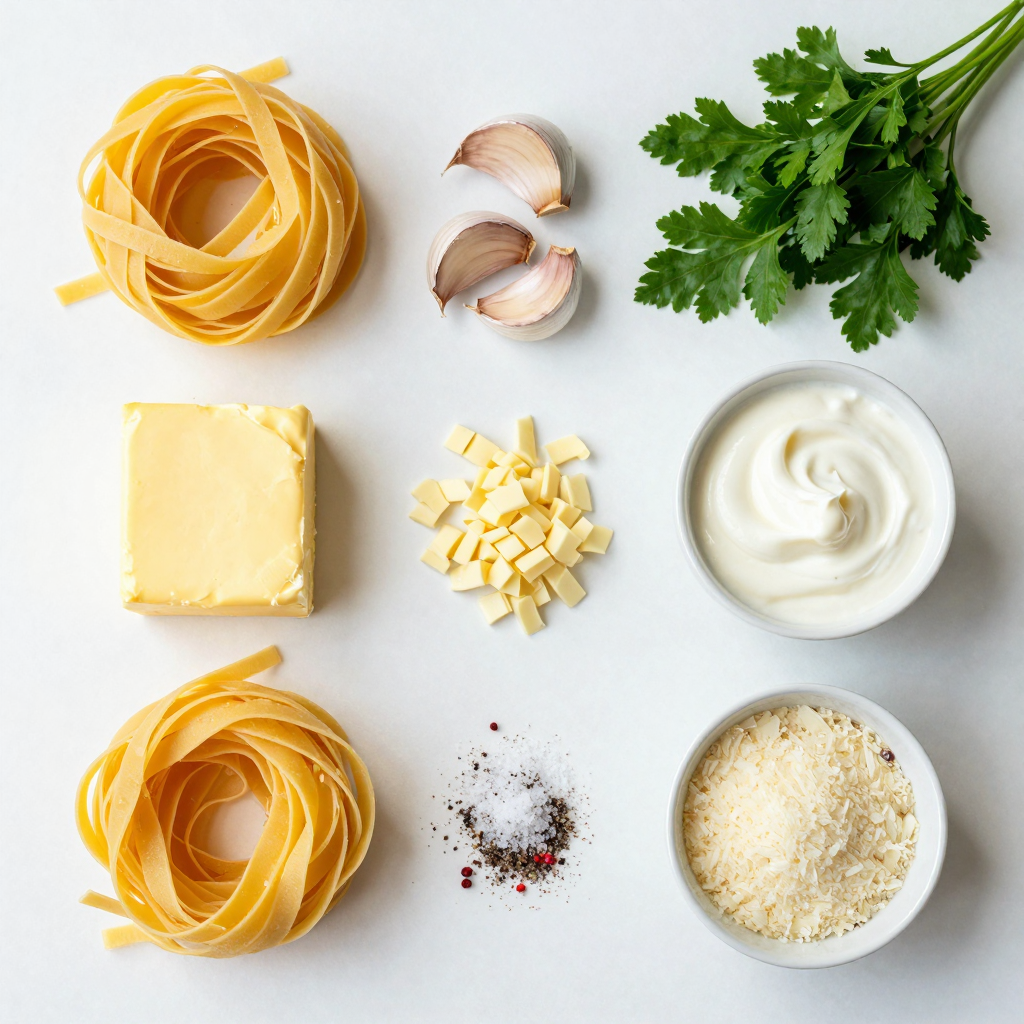
List of Required Ingredients
- 8 oz fettuccine pasta
- 4 tablespoons unsalted butter
- 3 cloves garlic, minced
- 1 cup heavy cream
- 1 cup freshly grated Parmesan cheese
- 1/2 teaspoon salt (adjust to taste)
- 1/4 teaspoon black pepper
- 1/4 teaspoon red pepper flakes (optional)
- 1 tablespoon fresh parsley, chopped (for garnish)
To make creamy garlic Parmesan noodles, start with these simple ingredients. Fettuccine pasta serves as the base. The noodles soak up that rich sauce well. Use unsalted butter for a creamy, rich flavor. Minced garlic adds a nice kick to the dish. Heavy cream creates the smooth sauce you crave. Grated Parmesan cheese is the star of this recipe. It gives that cheesy goodness we all love.
Season your dish with salt, black pepper, and red pepper flakes for a hint of heat. Fresh parsley brightens the dish and adds color. With just these ingredients, you can create a meal that feels fancy but is quick and easy to make.

Step-by-Step Instructions
Cooking the Pasta
To start, bring a large pot of salted water to a boil. Once boiling, add 8 oz of fettuccine pasta. Cook it until it is al dente, which usually takes about 8-10 minutes. After the pasta is done, drain it in a colander. Don’t forget to save about 1/2 cup of the pasta water. This water helps to adjust the sauce later.
Making the Creamy Sauce
Next, grab a large skillet and melt 4 tablespoons of unsalted butter over medium heat. Once the butter melts, add 3 cloves of minced garlic. Sauté the garlic for 1-2 minutes until it smells amazing. Be careful not to let it brown. Then, pour in 1 cup of heavy cream. Stir the cream continuously for about 3-4 minutes so it thickens a bit. Now, reduce the heat to low. Gradually whisk in 1 cup of freshly grated Parmesan cheese. Keep whisking until it melts and the sauce is nice and creamy.
Combining Ingredients
Now it’s time to bring it all together. Season the sauce with 1/2 teaspoon of salt, 1/4 teaspoon of black pepper, and 1/4 teaspoon of red pepper flakes if you like some heat. Stir everything well. Add the drained fettuccine to the skillet. Toss the pasta in the sauce to coat it well. If the sauce is too thick, use the reserved pasta water to reach your desired creaminess. Taste it and adjust the seasoning if needed. Finally, let the dish sit for a minute before you serve it. Garnish with 1 tablespoon of fresh parsley for a pop of color.
Pro Tips
- Use Fresh Ingredients: Always opt for fresh garlic and high-quality Parmesan cheese for the best flavor in your creamy sauce.
- Adjust Creaminess: If the sauce is too thick, gradually add reserved pasta water until you reach your desired consistency.
- Garnish for Flavor: Fresh parsley not only adds color but also a burst of freshness to balance the richness of the dish.
- Make it Your Own: Feel free to add cooked chicken, shrimp, or vegetables for a heartier meal that suits your taste.
Tips & Tricks
Perfecting the Sauce
To make the best sauce, you need low heat. High heat can burn the garlic or make the sauce too thin. Cook the garlic just until fragrant. This should take only 1-2 minutes. Next, add the heavy cream. Stir this for 3-4 minutes until it thickens a bit. Gradually whisk in the Parmesan cheese. This step is key for a rich, creamy sauce. If the sauce seems too thick, add a little reserved pasta water. This will help reach the right creaminess.
Taste Adjustments
Adjusting salt and spice levels is easy. Start with the salt. Taste the sauce after you add it. If it needs more, sprinkle in a bit more salt. For spice, add red pepper flakes. If you want it spicier, add more to taste. To enhance flavors, try fresh herbs. Basil or thyme can add great depth. Just chop them finely and stir them in.
Presentation Suggestions
Plating your noodles can make a big difference. Serve them in shallow bowls for a nice look. Top with extra Parmesan and a sprinkle of black pepper. This adds visual appeal and flavor. For a complete meal, serve garlic bread on the side. The bread pairs perfectly with the creamy sauce.

Variations
Ingredient Substitutions
You can easily swap heavy cream for other options. Here are a few ideas:
- Half-and-half: This gives a lighter creaminess.
- Greek yogurt: Use plain yogurt for a tangy twist.
- Coconut milk: Great for a dairy-free option with a hint of sweetness.
When it comes to cheese, Parmesan is a classic. However, you can mix it up:
- Pecorino Romano: This adds a sharper flavor.
- Asiago: Offers a nutty taste that pairs well.
- Mozzarella: For a creamier melt and stretch.
Flavor Additions
To make your noodles more exciting, try adding spices. Here are some that pair well:
- Oregano: Adds a warm, earthy note.
- Basil: Fresh or dried, it gives a nice aroma.
- Thyme: A hint of this herb can enhance depth.
You can also incorporate vegetables or proteins into your dish. Consider these options:
- Spinach: Fresh or wilted, it adds color and nutrients.
- Mushrooms: Sautéed mushrooms bring a savory flavor.
- Grilled chicken or shrimp: Great for a protein boost.
Dietary Adjustments
If you need to make it gluten-free, use gluten-free pasta. Many brands offer great options that cook up nicely.
For dairy-free choices, try these:
- Nut milk: Almond or cashew milk works well with added thickeners.
- Vegan cheese: Look for varieties that melt well and mimic Parmesan.
These variations ensure everyone can enjoy creamy garlic Parmesan noodles!
Storage Info
Keeping Leftovers
To keep your leftover creamy garlic Parmesan noodles fresh, store them in an airtight container. This helps prevent them from drying out. Before sealing the container, let the noodles cool to room temperature. Once cooled, refrigerate them right away.
Leftovers last about 3 to 4 days in the fridge. After that, the noodles may lose their flavor and texture. Be sure to check them before you eat. If they smell off or look strange, it’s best to throw them away.
Reheating Instructions
To reheat your creamy garlic Parmesan noodles, avoid using high heat. High heat can make the sauce separate. Instead, use a skillet on low to medium heat. Add a splash of milk or reserved pasta water to keep the creaminess. Stir often until warmed through.
You can also use the microwave for reheating. Place the noodles in a microwave-safe bowl. Add a small amount of water or milk. Cover it with a microwave-safe lid or plate. Heat in short bursts, stirring in between, until warm. This method helps keep the sauce smooth and creamy.
FAQs
Can I use other pasta types?
Yes, you can use other pasta types. Spaghetti, penne, or rigatoni work well. Just cook the pasta until al dente like you would fettuccine. Adjust cooking time based on the pasta shape you choose.
What can I serve with Creamy Garlic Parmesan Noodles?
You can serve this dish with garlic bread or a fresh salad. A side of grilled chicken or shrimp adds protein. Steamed vegetables also pair nicely, adding color and nutrition to your meal.
How do I make it spicier?
To add spice, include more red pepper flakes. You can also use a pinch of cayenne pepper. If you like, add sliced jalapeños for a fresh kick. Just remember to taste as you go!
Can I prepare this dish in advance?
Yes, you can prepare the sauce ahead of time. Store it in the fridge for up to two days. Cook the pasta fresh when you’re ready to serve. This keeps the noodles from getting mushy.
Is this recipe suitable for meal prep?
Absolutely! This recipe is great for meal prep. Just divide the noodles and sauce into containers. It keeps well in the fridge for about three days. Reheat it gently on the stove for best results.
You now have a simple guide to make creamy garlic Parmesan noodles. Remember, use fresh ingredients for the best flavor. Follow the cooking steps closely to get that perfect sauce. Don’t be afraid to adjust flavors with spices or herbs. With a few tips, you can serve a dish that impresses everyone. Enjoy your cooking and let your creativity shine in the kitchen!

Creamy Garlic Parmesan Noodles
Ingredients
8 oz fettuccine pasta
4 tablespoons unsalted butter
3 cloves garlic, minced
1 cup heavy cream
1 cup freshly grated Parmesan cheese
1/2 teaspoon salt (adjust to taste)
1/4 teaspoon black pepper
1/4 teaspoon red pepper flakes (optional)
1 tablespoon fresh parsley, chopped (for garnish)
Instructions
Cook the fettuccine pasta in a large pot of salted boiling water according to the package instructions, or until al dente. Drain and set aside, reserving about 1/2 cup of pasta water.
In a large skillet over medium heat, melt the butter. Add the minced garlic and sauté for about 1-2 minutes until fragrant, but not browned.
Pour in the heavy cream and stir continuously for about 3-4 minutes, allowing it to thicken slightly.
Reduce the heat to low and gradually whisk in the grated Parmesan cheese until fully melted and the sauce is creamy.
Season the sauce with salt, black pepper, and red pepper flakes if using. Stir well to combine.
Add the cooked fettuccine to the skillet with the cheese sauce. Toss to combine, adding reserved pasta water as needed to reach desired creaminess.
Taste and adjust seasoning if necessary.
Remove from heat and let it sit for a minute before serving. Garnish with fresh parsley.
Prep Time: 10 minutes | Total Time: 25 minutes | Servings: 4
– Presentation Tips: Serve the noodles in shallow bowls, topped with an extra sprinkle of Parmesan and a few cracked black pepper flakes for added visual appeal. Add a slice of garlic bread on the side for an extra touch.

Creamy Garlic Parmesan Noodles
Ingredients
- 8 oz fettuccine pasta
- 4 tablespoons unsalted butter
- 3 cloves garlic, minced
- 1 cup heavy cream
- 1 cup freshly grated Parmesan cheese
- 0.5 teaspoon salt
- 0.25 teaspoon black pepper
- 0.25 teaspoon red pepper flakes
- 1 tablespoon fresh parsley, chopped
Instructions
- Cook the fettuccine pasta in a large pot of salted boiling water according to the package instructions, or until al dente. Drain and set aside, reserving about 1/2 cup of pasta water.
- In a large skillet over medium heat, melt the butter. Add the minced garlic and sauté for about 1-2 minutes until fragrant, but not browned.
- Pour in the heavy cream and stir continuously for about 3-4 minutes, allowing it to thicken slightly.
- Reduce the heat to low and gradually whisk in the grated Parmesan cheese until fully melted and the sauce is creamy.
- Season the sauce with salt, black pepper, and red pepper flakes if using. Stir well to combine.
- Add the cooked fettuccine to the skillet with the cheese sauce. Toss to combine, adding reserved pasta water as needed to reach desired creaminess.
- Taste and adjust seasoning if necessary.
- Remove from heat and let it sit for a minute before serving. Garnish with fresh parsley.
- Presentation Tips: Serve the noodles in shallow bowls, topped with an extra sprinkle of Parmesan and a few cracked black pepper flakes for added visual appeal. Add a slice of garlic bread on the side for an extra touch.


. In this post, we explored how to make spicy garlic shrimp tacos. We covered key ingredients like shrimp, garlic, and spices. I shared step-by-step instructions for marinating, cooking, and assembling the tacos. We also discussed tips for perfect shrimp and different tortilla options. You can customize these tacos to your taste or use other proteins too. Don’t forget to check out the full recipe for quick reference. Enjoy creating and sharing this tasty meal with friends and family!](https://dailydishlab.com/wp-content/uploads/2025/06/f3f63153-6df6-4664-b699-490f731c66b6-768x768.webp)

![To make Lemon Dill Grilled Salmon, you need a few simple yet fresh ingredients. Here’s the list: - Fresh Salmon Fillets - Fresh Dill - Lemon - Garlic - Olive Oil - Honey - Seasoning: Salt and Pepper - Lemon Slices for Garnish Each ingredient plays a key role in creating the bright and delicious taste of this dish. Fresh salmon fillets give you a rich flavor and perfect texture. The fresh dill adds a fragrant herb note that pairs well with the fish. Lemon provides the zesty brightness that cuts through the richness of the salmon. Garlic gives depth, while olive oil adds a smooth finish. Honey balances the flavors with just a hint of sweetness. Finally, salt and pepper enhance everything, and lemon slices make for a lovely garnish. You can find the full recipe with detailed steps to prepare this dish easily. Enjoy the process of cooking and savor the delightful taste! - In a mixing bowl, combine the chopped dill, lemon zest, lemon juice, minced garlic, olive oil, honey, salt, and pepper. - Whisk the ingredients together until well blended to create a marinade. This step is key. The mix of flavors will soak into the salmon. - Place the salmon fillets in a resealable plastic bag or shallow dish. Pour the marinade over the top. - Seal the bag or cover the dish. This ensures the salmon gets coated well. Marinate in the refrigerator for 30 minutes to 1 hour for maximum flavor. The longer you marinate, the more taste you get. - Preheat your grill to medium-high heat. This helps cook the salmon evenly. - Remove the salmon from the marinade and let any excess drip off. Discard the marinade for safety. - Grease the grill grates with a little olive oil. This helps prevent sticking. - Place the salmon fillets skin-side down on the grill. Grill for 4-6 minutes without moving them. This allows the skin to become crispy. - Carefully flip the salmon fillets using a wide spatula. Grill for an additional 4-6 minutes. The fish should be opaque and flake easily with a fork. Adjust the time based on the thickness of your fillets. - Remove the salmon from the grill and let it rest for a couple of minutes. Resting helps keep it juicy. - Serve the grilled salmon garnished with fresh lemon slices and a sprinkle of additional dill if desired. Enjoy the fresh taste! For the complete recipe, check out the Full Recipe link. To enhance flavor with the marinade, use fresh ingredients. Fresh dill, garlic, and lemon add zest to the salmon. Combine these ingredients in a bowl and whisk until well mixed. This step makes every bite burst with flavor. Marinating is key, too. Let the salmon sit in the marinade for at least 30 minutes. This time allows the flavors to soak in deeply. For best results, aim for one hour. To prevent sticking on the grill, grease the grates with olive oil. This simple tip helps the salmon slide off easily. Place the salmon skin-side down on the grill first. Grill for 4-6 minutes without moving it. This helps the skin get crispy. To check for doneness, look for opaque flesh that flakes easily. If your salmon is thick, it may need a bit more time. Always use a wide spatula when flipping. This supports the fillet and keeps it intact. For a complete meal, pair your salmon with fresh vegetables or a light salad. Steamed asparagus or roasted broccoli complement the dish well. You can also serve it with rice or quinoa for a filling side. Don’t forget to garnish with lemon slices. They add a bright touch and extra flavor. Enjoy your delicious meal! For the full recipe, check out the detailed steps above. {{image_2}} Alternative Herbs and Spices You can switch up the herbs in this dish. Try fresh parsley or basil instead of dill. These herbs add unique tastes and aromas. Adding a pinch of red pepper flakes gives a bit of heat. This twist can make your salmon extra special. Different Citrus Options Lemon is great, but don’t stop there. Use lime or orange juice for a different kick. Each citrus option brings its own flavor. You can mix citrus juices for a fun blend. This variation makes the dish exciting and fresh. Oven-Baked Lemon Dill Salmon Baking salmon is simple and tasty. Preheat your oven to 375°F. Place the marinated salmon on a baking sheet. Bake for 15 to 20 minutes. Check for flakiness to know when it's done. This method keeps the salmon moist and flavorful. Pan-Seared Lemon Dill Salmon Pan-searing gives a crispy outer layer. Heat oil in a pan over medium heat. Add the salmon skin-side down and cook for 4-5 minutes. Flip and cook for another 4-5 minutes. This method enhances the flavor and adds a nice texture. Low-Carb and Keto Options This recipe is already low in carbs. You can keep it keto-friendly by using healthy fats. Olive oil works great here. You can also serve it with low-carb veggies like zucchini or asparagus. Gluten-Free Modifications This dish is naturally gluten-free. Just make sure all your ingredients are gluten-free. Check the labels on the olive oil and honey. This way, you can enjoy this dish without any worries. For the full recipe, check the earlier section and get started on this delicious meal! After grilling your lemon dill salmon, you may have some leftovers. To keep your salmon fresh, follow these best practices for refrigeration: - Cool it down first. Let the salmon reach room temperature before storing. - Use an airtight container. This helps prevent odors and keeps the salmon moist. - Refrigerate within two hours. This keeps bacteria from growing. If you want to enjoy your salmon later, freezing is a great option. Here's how to freeze salmon safely: - Wrap each fillet tightly. Use plastic wrap or aluminum foil to prevent freezer burn. - Place in a freezer bag. Squeeze out as much air as possible before sealing. - Label and date it. This helps you keep track of how long it’s been in the freezer. When it's time to enjoy your leftover salmon, reheating correctly is key to keeping the flavor and texture. Here are some recommended methods: - Oven method: Preheat your oven to 275°F (135°C). Place the salmon on a baking sheet and cover it with foil. Heat for about 15 minutes. - Stovetop method: Heat a non-stick skillet over medium-low heat. Add a splash of water or broth. Place the salmon in the skillet, cover, and heat for 5-7 minutes. To maintain the flavor and texture, avoid using a microwave. Microwaving can dry out the salmon and make it tough. Enjoy your delicious lemon dill grilled salmon again with these easy tips. And don't forget to check out the Full Recipe for more details! Marinating salmon for 30 minutes to 1 hour works best. This time allows the flavors to soak in without overpowering the fish. If you marinate for too long, the texture may change. Always keep it in the fridge while marinating to keep it fresh. Yes, you can use dried dill instead of fresh. Use about one-third of the amount since dried herbs are stronger. Fresh dill gives a brighter flavor, but dried dill still works well in a pinch. Grill your salmon at medium-high heat, around 375°F to 400°F. This heat helps create a nice sear while keeping the inside tender. If your grill runs hotter, reduce the heat slightly. - What if my salmon fillets are thick or thin? For thick fillets, increase the grilling time by a few minutes. For thin fillets, decrease the time. Always check for doneness by seeing if the fish flakes easily with a fork. Salmon is rich in omega-3 fatty acids, which are good for your heart. It also has high-quality protein that helps build muscle. Salmon is packed with vitamins like B12, D, and selenium. Eating salmon can boost brain health and improve mood. For the full recipe, please refer to [Full Recipe]. This blog post gives you the keys to grill perfect salmon. We covered essential ingredients, marinating tips, and grilling techniques. With the right marinade and careful cooking, you'll impress at every meal. Plus, explore tasty variations to keep it fresh and exciting. Store leftovers smartly and reheat without losing flavor. By following these steps, you can enjoy delicious salmon that is healthy and easy to make. Embrace these tips to make every salmon dish a hit!](https://dailydishlab.com/wp-content/uploads/2025/06/c925202d-eb72-4cda-aa67-938206b6f665-768x768.webp)

