Creamy Roasted Garlic Hummus Flavorful Easy Dip

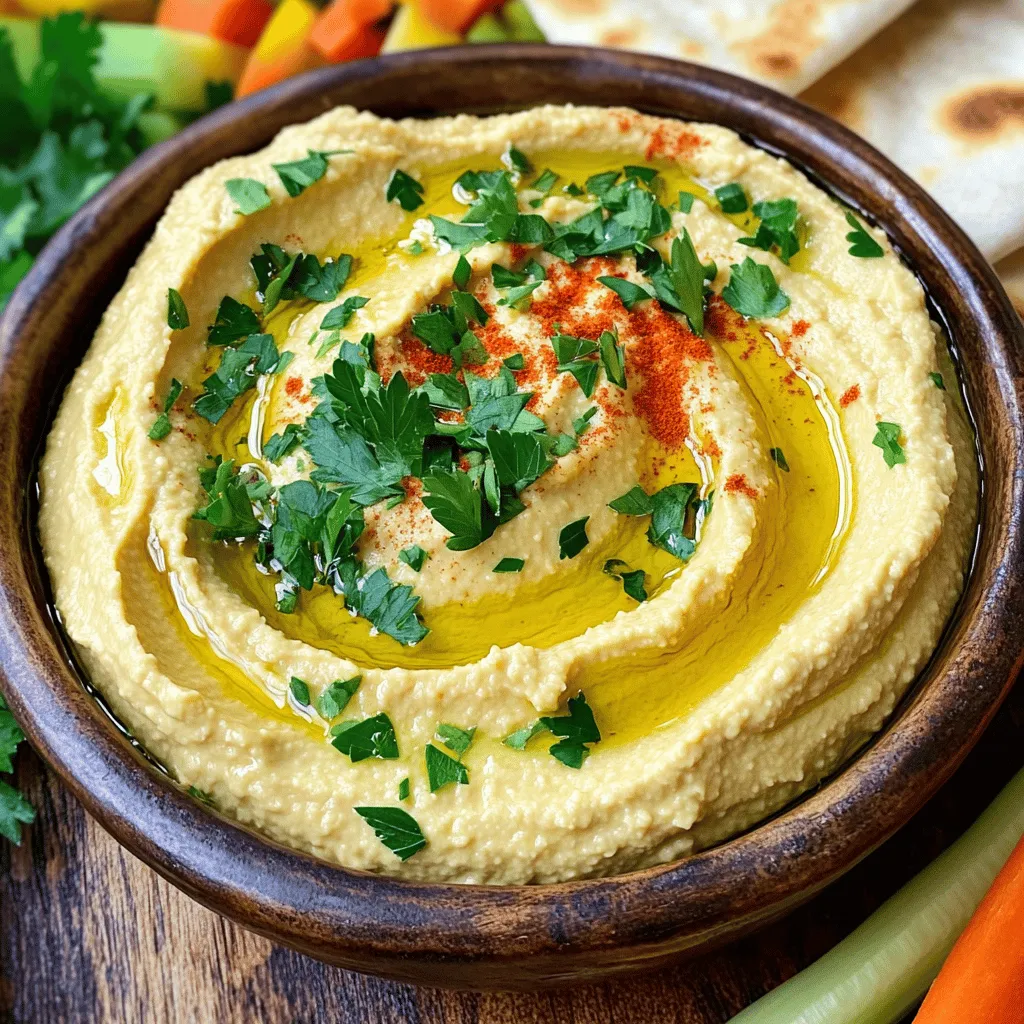
Looking for a dip that’s rich, creamy, and packed with flavor? Look no further! This Creamy Roasted Garlic Hummus is your new go-to. It’s simple to make, uses just a few fresh ingredients, and will wow your guests. In this post, I’ll guide you through the steps to create this tasty dip, share some fun variations, and offer tips to make it perfect. Let’s get started on this delicious journey!
Why I Love This Recipe
- Flavorful Depth: The roasted garlic adds a rich, sweet flavor that elevates the traditional hummus experience.
- Health Benefits: Packed with protein and fiber from chickpeas, this hummus is a nutritious snack option.
- Versatile Use: Perfect as a dip, spread, or even a salad dressing, making it a staple in any kitchen.
- Simple Preparation: With minimal ingredients and easy steps, anyone can whip up this delicious hummus in no time.
Ingredients
List of Ingredients
- 1 cup canned chickpeas (drained and rinsed)
- 1/4 cup tahini
- 3 tablespoons lemon juice
- 4-6 cloves of garlic (roasted)
- 2 tablespoons extra virgin olive oil
- 1/2 teaspoon ground cumin
- Salt to taste
- 2-4 tablespoons water (to adjust consistency)
- Fresh parsley for garnish
- Paprika for dusting
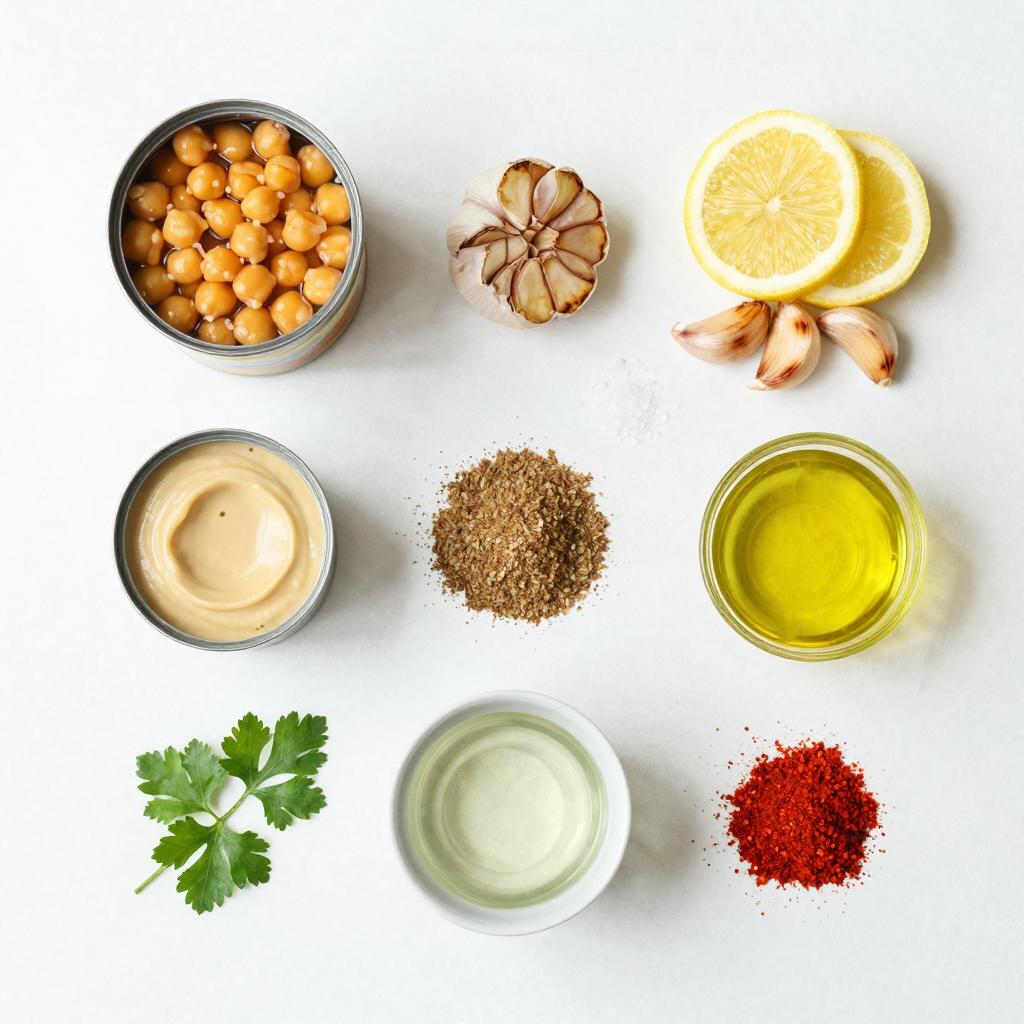
To make creamy roasted garlic hummus, you need simple ingredients. Start with one cup of canned chickpeas. They give the dip its base and creamy texture. Drain and rinse them well before using. Next, grab a quarter cup of tahini. This sesame paste adds a rich, nutty flavor. You will also need three tablespoons of fresh lemon juice. It brightens the taste and keeps the hummus fresh.
The star of this dip is the roasted garlic. Use four to six cloves. Roasting them makes them sweet and soft. You will love the flavor! Next, add two tablespoons of extra virgin olive oil. It adds smoothness and depth. A half teaspoon of ground cumin gives a hint of warmth. Don’t forget salt to taste, which enhances all the flavors.
Finally, you may need two to four tablespoons of water. This helps adjust the hummus to your desired creaminess. For a touch of color, use fresh parsley as a garnish. A sprinkle of paprika on top adds a nice finish. With these ingredients, you are ready to create a delicious dip that everyone will enjoy!

Step-by-Step Instructions
How to Roast Garlic
- Preheat the oven to 400°F (200°C).
- Wrap garlic cloves in aluminum foil.
- Roast for 30-35 minutes.
Roasting garlic makes it sweet and soft. Start by preheating your oven. While it warms, take whole garlic cloves and wrap them in aluminum foil. This helps them cook evenly. Place the wrapped garlic in the oven. After about 30 to 35 minutes, check if they are soft. Once done, let them cool before peeling.
Making the Hummus
- Combine ingredients in a food processor.
- Blend until smooth.
- Adjust consistency with water.
Now, it’s time to make the hummus! In a food processor, add the rinsed chickpeas, tahini, lemon juice, roasted garlic, olive oil, cumin, and salt. Blend all the ingredients together until they are creamy. If the hummus is too thick, add water one tablespoon at a time. Keep blending until you reach the texture you like.
Final Touches
- Taste and adjust seasoning.
- Transfer to a serving bowl.
- Add finishing garnishes.
Once blended, taste your hummus. You may want to add more salt or lemon juice for extra flavor. Next, scoop the hummus into a serving bowl. For a nice finish, drizzle some olive oil on top. Sprinkle fresh parsley and a dash of paprika for color. Your creamy roasted garlic hummus is now ready to enjoy!
Pro Tips
- Use Fresh Garlic: For a more robust flavor, consider using fresh garlic instead of roasted. You can roast them yourself for a sweeter taste.
- Adjust Consistency: If you want a creamier hummus, add a bit more tahini or olive oil to the mixture.
- Chill Before Serving: Let the hummus chill in the fridge for at least an hour before serving to enhance the flavors.
- Experiment with Flavors: Try adding spices like smoked paprika or cayenne pepper for a different flavor profile.
Tips & Tricks
Achieving the Perfect Consistency
To make your hummus smooth, add water slowly. Start with one tablespoon. Blend well, then check the texture. If it needs to be creamier, add more water. You can also try using more olive oil. This adds richness and flavor. Just be careful not to overdo it. Too much oil can make it greasy.
Flavor Enhancements
Want to boost the taste? Add extra lemon juice. This will brighten the flavor and make it fresh. You can also add spices like paprika or cayenne. A little heat can elevate the dip. Start with a pinch, then taste. Adjust to your liking. You can even mix in fresh herbs for a unique twist.
Presentation Ideas
Make your hummus look as good as it tastes. Drizzle some olive oil on top right before serving. This adds a nice shine and flavor. For a pop of color, garnish with chopped parsley and a few whole chickpeas. A sprinkle of paprika adds some flair too. Serve with warm pita or crisp veggies for a great snack.

Variations
Herb-Infused Hummus
To make herb-infused hummus, you can add fresh herbs. Basil or cilantro works well. These herbs add bright flavors and fresh aromas. Simply chop the herbs finely and mix them into the hummus. You can start with a tablespoon of each herb and adjust to your taste. This variation gives your hummus a new twist that you will love.
Roasted Vegetable Variation
If you enjoy roasted veggies, try adding them to your hummus. Roasted red peppers or beets can add sweetness and depth. To do this, blend one or two roasted red peppers or a small beet into the mixture. This adds a beautiful color and unique taste. It makes your hummus more exciting and full of flavor.
Spicy Hummus Recipe
For those who love heat, you can make a spicy hummus. Add jalapeños or chili flakes to the mix. Start with one jalapeño, chopped, and blend it in. If you prefer, sprinkle in chili flakes to reach your desired spice level. This variation packs a punch and keeps things fun. It is perfect for those who like a bit of fire in their dips.
Storage Info
Storing Leftover Hummus
Store your leftover hummus in an airtight container. This keeps it fresh and tasty. You can refrigerate it for up to one week. Just make sure to seal it tightly to avoid any odors from your fridge mixing in.
Freezing Tips
You can freeze hummus for up to three months. This is a great way to save some for later. To use, take it out and let it thaw in the fridge. After it thaws, stir it well before serving. It will be just as creamy and delicious!
Reheating Suggestions
Before serving, let your hummus come to room temperature. This helps bring out its full flavor. If you want to make it richer, add a splash of olive oil. It will enhance the taste and make it even more enjoyable!
FAQs
What is the best way to make hummus creamy?
To make hummus creamy, you need a good blender. Start by blending the chickpeas, tahini, lemon juice, roasted garlic, olive oil, and cumin together. Blend until the mixture is smooth. If it feels thick, add water. Start with one tablespoon and mix again. Keep adding water until you reach the creaminess you like. This method makes your hummus light and easy to dip into.
Can I use dried chickpeas instead of canned?
Yes, you can use dried chickpeas! First, soak them in water overnight. This softens them and makes cooking easier. The next day, drain the chickpeas and place them in a pot. Cover them with fresh water and boil for about one hour or until soft. After they are cooked, drain and rinse them. Now, you can use them just like canned chickpeas in your hummus.
Is homemade hummus healthier than store-bought?
Homemade hummus is often healthier than store-bought options. You control the ingredients, which means no extra preservatives or unhealthy fats. You can choose high-quality olive oil and fresh garlic. Plus, you can adjust flavors to fit your taste. Making hummus at home allows you to enjoy a tasty dip while knowing it is made with good ingredients.
In this post, I covered all you need to make delicious hummus. We talked about the key ingredients and how to roast garlic. I provided steps for mixing and serving. Tips on achieving the right texture and flavor were also included. You can add variations to suit your taste.
Homemade hummus is easy and allows for creativity. It’s healthy, fresh, and perfect for sharing. Enjoy exploring this dish and make it your own. You’ll love the results!

Creamy Roasted Garlic Hummus
Ingredients
1 cup canned chickpeas (drained and rinsed)
1/4 cup tahini
3 tablespoons lemon juice
4-6 cloves of garlic (roasted)
2 tablespoons extra virgin olive oil
1/2 teaspoon ground cumin
Salt to taste
2-4 tablespoons water (to adjust consistency)
Fresh parsley for garnish
Paprika for dusting
Instructions
Roast the Garlic: Preheat your oven to 400°F (200°C). Wrap the unpeeled garlic cloves in aluminum foil and roast them for 30-35 minutes until soft and caramelized. Allow to cool before handling.
Blend Ingredients: In a food processor, combine the rinsed chickpeas, tahini, lemon juice, roasted garlic, olive oil, cumin, and a pinch of salt.
Process Until Smooth: Blend the mixture until it is creamy. If it is too thick, gradually add water, one tablespoon at a time, until you reach the desired consistency.
Taste and Adjust: Taste the hummus and adjust with more salt or lemon juice if needed.
Serve: Transfer the hummus to a serving bowl. Drizzle with additional olive oil, and sprinkle parsley and paprika on top for garnish.
– Prep Time: 10 minutes | Total Time: 50 minutes | Servings: 6-8
– Presentation Tips: Serve the hummus with warm pita bread or fresh veggie sticks. For a pop of color, add a few whole chickpeas on top and an extra drizzle of olive oil before serving.

Creamy Roasted Garlic Hummus
Ingredients
- 1 cup canned chickpeas (drained and rinsed)
- 1/4 cup tahini
- 3 tablespoons lemon juice
- 4-6 cloves of garlic (roasted)
- 2 tablespoons extra virgin olive oil
- 1/2 teaspoon ground cumin
- to taste none Salt
- 2-4 tablespoons water (to adjust consistency)
- none none Fresh parsley for garnish
- none none Paprika for dusting
Instructions
- Roast the Garlic: Preheat your oven to 400°F (200°C). Wrap the unpeeled garlic cloves in aluminum foil and roast them for 30-35 minutes until soft and caramelized. Allow to cool before handling.
- Blend Ingredients: In a food processor, combine the rinsed chickpeas, tahini, lemon juice, roasted garlic, olive oil, cumin, and a pinch of salt.
- Process Until Smooth: Blend the mixture until it is creamy. If it is too thick, gradually add water, one tablespoon at a time, until you reach the desired consistency.
- Taste and Adjust: Taste the hummus and adjust with more salt or lemon juice if needed.
- Serve: Transfer the hummus to a serving bowl. Drizzle with additional olive oil, and sprinkle parsley and paprika on top for garnish.

![- 1 pound ground beef (or turkey) - 1/2 cup breadcrumbs (plain or seasoned) - 1/4 cup grated Parmesan cheese - 1/4 cup finely chopped onion - 1 egg - 2 cloves garlic, minced The main ingredients for honey garlic slow cooker meatballs are simple yet flavorful. Ground beef or turkey serves as a great base, giving the meatballs a hearty texture. I like to use breadcrumbs to hold everything together while adding a nice crunch. Adding grated Parmesan cheese gives the meatballs a savory kick. Finely chopped onion and minced garlic infuse rich flavors that blend perfectly. Finally, one egg binds all these ingredients and keeps the meatballs moist. - 1/3 cup honey - 1/4 cup soy sauce (or tamari for gluten-free) - 1 tablespoon apple cider vinegar - 1 teaspoon ground ginger - 1/4 teaspoon black pepper For the sauce, honey is the star. Its sweetness balances well with the salty soy sauce. You can use tamari if you want a gluten-free option. A splash of apple cider vinegar adds a tangy note, while ground ginger brings warmth and depth. Just a sprinkle of black pepper rounds out the flavors nicely. - Chopped green onions - Sesame seeds Garnishes can elevate your dish. Chopped green onions add a fresh crunch, while sesame seeds give a nice nutty flavor. You can add these right before serving for a beautiful finish. For the full recipe, refer to [Full Recipe]. - Combine the main ingredients in a bowl. Mix 1 pound of ground beef or turkey, 1/2 cup of breadcrumbs, 1/4 cup of grated Parmesan cheese, 1/4 cup of finely chopped onion, 1 egg, and 2 minced garlic cloves. - Form the mixture into small meatballs, about 1 inch in diameter. Set them aside on a plate. - In a separate bowl, whisk together the sauce ingredients. Mix 1/3 cup of honey, 1/4 cup of soy sauce, 1 tablespoon of apple cider vinegar, 1 teaspoon of ground ginger, and 1/4 teaspoon of black pepper. - Place the meatballs in the slow cooker. Arrange them in a single layer for even cooking. - Pour the honey garlic sauce over the meatballs. Make sure they are well coated. - Cook on low for 4-5 hours or on high for 2-3 hours. Check that the meatballs are cooked through and tender. - After cooking, gently stir the meatballs. Let them soak up the sauce for about 10 minutes before serving. - Garnish with chopped green onions and sesame seeds if you want. Enjoy these tasty bites! For the full recipe, check out the detailed instructions. To make great honey garlic meatballs, start by ensuring even cooking. This means forming your meatballs to the same size. Aim for about one inch in diameter. This way, they cook at the same rate. If you make them too big, they may not cook through. For cooking time, I recommend using low heat for about 4 to 5 hours. If you are short on time, use high heat for 2 to 3 hours. Either way, check the meatballs near the end. They should be tender and fully cooked. You can also use a meat thermometer to check for doneness. The internal temperature should reach 165°F. Honey garlic meatballs shine with simple sides. Serve them with steamed rice, noodles, or even a fresh salad. These pair well with the sweet and savory flavors of the meatballs. For presentation, arrange the meatballs on a large platter. Drizzle extra sauce over them for a glossy look. Sprinkle chopped green onions and sesame seeds on top. This adds color and a fresh crunch. When making meatballs, some issues may pop up. If your meatballs fall apart, it could be too much moisture. Ensure you use the right amount of breadcrumbs. Another common problem is dry meatballs. This can happen if you overcook them. Always check your cooking time and temperature. If they seem dry, serve them with more sauce to help. These tips can guide you through making perfect honey garlic slow cooker meatballs. For the full recipe, check back to the main section. {{image_2}} You can easily switch the meat you use. Ground turkey works well instead of beef. If you want a plant-based option, use lentils or chickpeas. Both are tasty and healthy. When it comes to breadcrumbs, you can use gluten-free options. Look for gluten-free bread or crushed rice crackers. This swap keeps the dish friendly for those with gluten issues. To boost the taste, think about adding spices. A pinch of red pepper flakes gives a nice kick. Fresh herbs like basil or cilantro can add a fresh twist. You can also adjust the sweetness. If you want it less sweet, cut back on the honey. To add saltiness, consider a splash more soy sauce. Each of these changes can make your dish unique. You don’t have to use a slow cooker for this recipe. You can bake the meatballs in the oven. Just preheat it to 400°F. Place the meatballs on a baking sheet. Bake for about 20 minutes until they are golden brown. For stovetop cooking, heat a skillet over medium heat. Brown the meatballs on all sides. Then add the sauce and simmer until cooked through. Each method brings a different texture and flavor to the dish. Remember, you can find the full recipe in the earlier section. To store leftover meatballs, place them in an airtight container. Make sure to cover them well. This keeps the meatballs fresh and tasty. You can store them in the fridge for up to 4 days. If you want to enjoy them later, freezing may be a better choice. For the best results, freeze meatballs in a single layer on a baking sheet. Once they are frozen, place them in a freezer bag. This helps prevent them from sticking together. You can freeze them for up to 3 months. When you're ready to eat, thaw the meatballs in the fridge overnight. Reheat them in the slow cooker or microwave until hot. Preparing ahead is a great way to save time. You can mix and form the meatballs a day in advance. Just store them in the fridge until you're ready to cook. Portioning is also key. Consider making small bags with the right amount for meals. This makes it easy for quick dinners during busy days. For a delightful meal, try the Full Recipe for Honey Garlic Slow Cooker Meatballs. You can tell meatballs are done by checking their internal temperature. Use a meat thermometer. The safe temperature for ground meat is 165°F (74°C). Insert the thermometer into the center of a meatball. If it reads 165°F, they are ready to eat. If not, cook them a bit longer. Yes, you can prepare honey garlic meatballs in advance. Mix the meatball ingredients and form them into balls. Place them in the fridge for up to 24 hours before cooking. You can also freeze them for later. Just thaw them in the fridge overnight before cooking. This saves time on busy days. Definitely! You can swap ground beef for turkey or a plant-based option. For gluten-free diets, use gluten-free breadcrumbs and tamari instead of soy sauce. If you prefer less sugar, reduce the amount of honey or use a sugar-free substitute. There are many options to fit your needs. Honey garlic meatballs pair well with various side dishes. Here are some great options: - Steamed rice or quinoa - Roasted vegetables - Noodles, like rice or soba - A fresh green salad - Mashed potatoes These sides complement the sweet and savory flavors of the meatballs. Enjoy mixing and matching to find your favorite combination! For the complete recipe, check the Full Recipe section. This blog post covered how to make juicy honey garlic meatballs. We explored the main ingredients, including ground beef and Parmesan cheese. Then, we discussed the sauce, which combines honey and soy sauce, and provided cooking tips. Plus, we shared variations and storage tips for leftovers. Whether you follow the recipe or make your own tweaks, you can enjoy delicious meatballs. Now, it's your turn to try this easy dish and share it with your loved ones!](https://dailydishlab.com/wp-content/uploads/2025/07/f340aba1-8a32-460a-95c5-e4b0f40aca57-768x768.webp)


