Creamy Tomato Spinach Gnocchi Tasty Dinner Delight

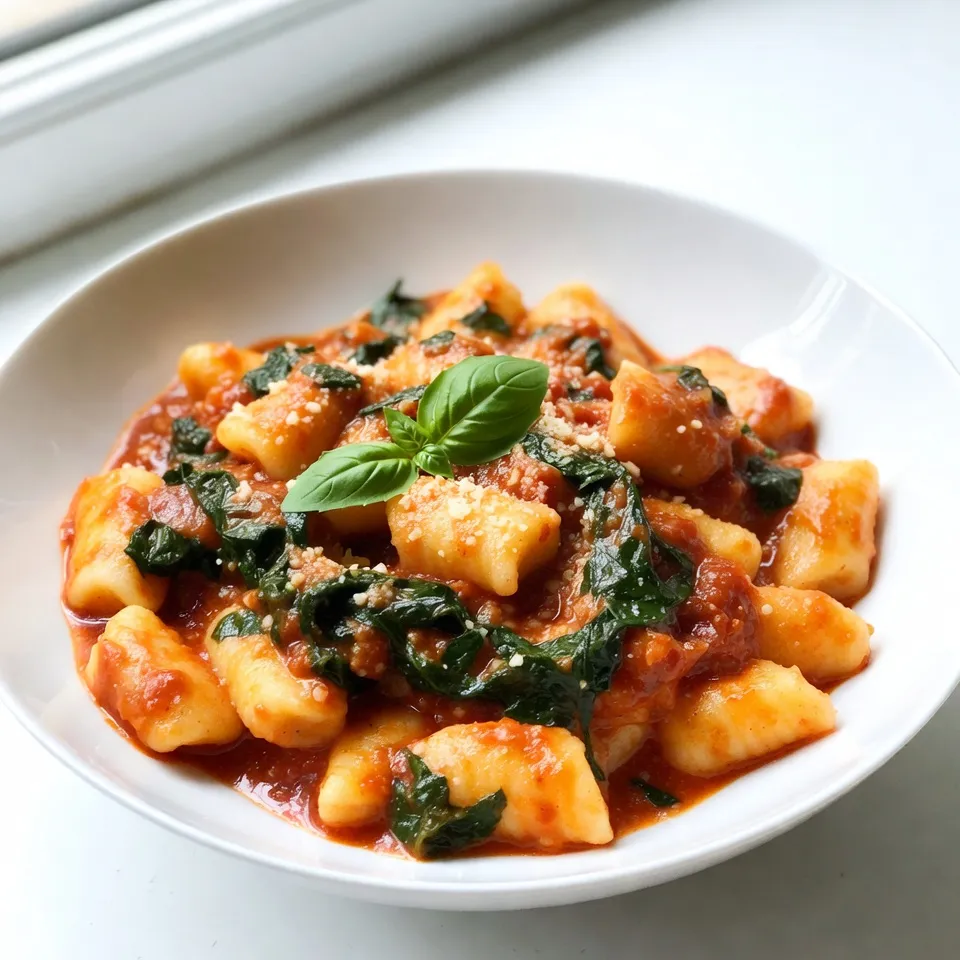
Looking for a quick, delightful dinner? My Creamy Tomato Spinach Gnocchi checks all the boxes! It blends soft potato gnocchi with a rich, creamy sauce and fresh spinach. Whether you’re feeding the family or impressing guests, this dish is both easy to make and bursting with flavor. Stick around as I walk you through the simple steps, tasty variations, and tips to elevate your meal to perfection!
Why I Love This Recipe
- Comforting and Creamy: This dish combines the richness of cream with the freshness of spinach, creating a comforting meal that’s perfect for any occasion.
- Quick and Easy: With just a few simple ingredients and a total cooking time of 25 minutes, this recipe is ideal for busy weeknights.
- Customizable: You can easily adjust the ingredients to suit your dietary preferences, whether you want to go dairy-free or add more veggies.
- Family-Friendly: Kids and adults alike will love the soft gnocchi and flavorful sauce, making it a great choice for family dinners.
Ingredients
Main Ingredients
- 1 pound potato gnocchi
- 2 tablespoons olive oil
- 3 cloves garlic, minced
- 1 can (14 ounces) crushed tomatoes
- 1 cup heavy cream (or coconut cream)
Additional Ingredients
- 3 cups fresh spinach, chopped
- 1 teaspoon dried basil
- 1 teaspoon dried oregano
- Salt and pepper to taste
- ¼ cup grated Parmesan cheese (optional)
- Fresh basil leaves for garnish
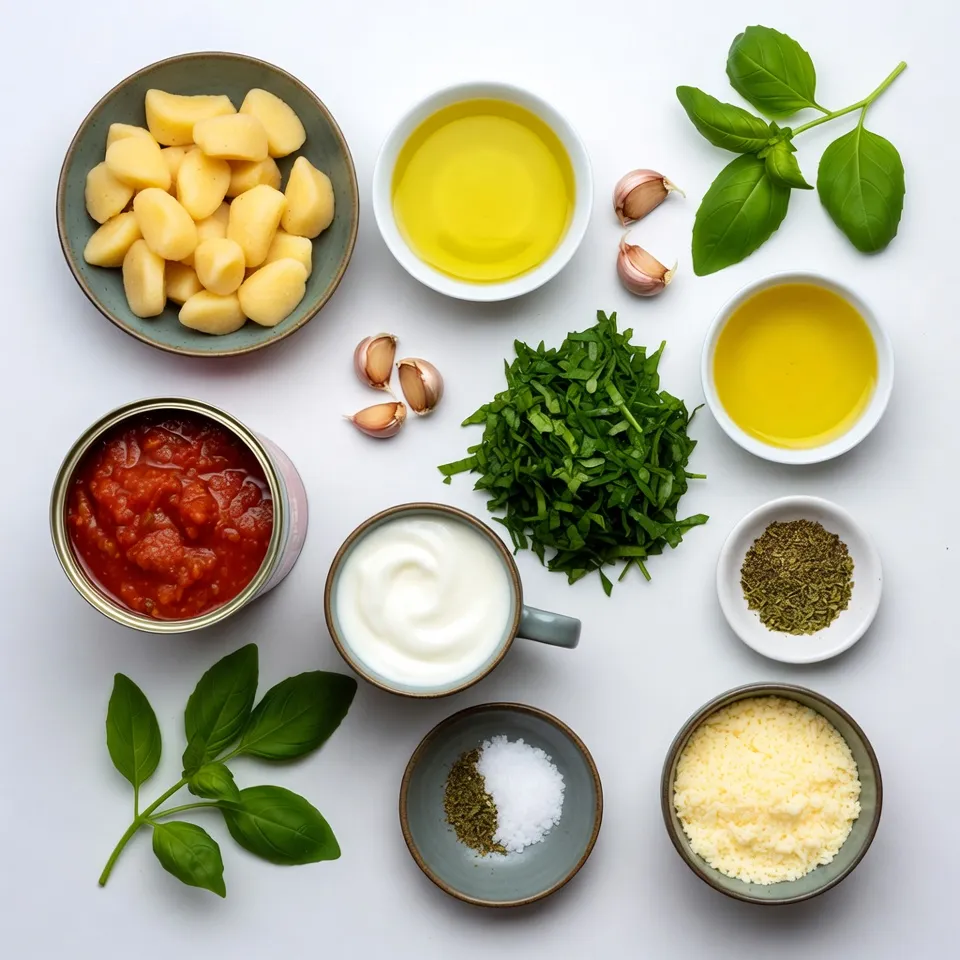
The main ingredients form the base of this creamy tomato spinach gnocchi. The potato gnocchi provides a soft and chewy texture. Olive oil adds richness and flavor, while garlic gives a nice aroma. The crushed tomatoes create a tangy sauce, and cream makes it rich and creamy.
For additional flavor, I add fresh spinach, which wilts down nicely. Dried basil and oregano bring in herb notes that enhance the dish. Salt and pepper balance the flavors, while Parmesan cheese gives an extra layer of taste.
Fresh basil leaves make a lovely garnish. They add a pop of color and a fresh taste. This mix of ingredients creates a delightful dinner that you’ll love to share.

Step-by-Step Instructions
Cooking the Gnocchi
First, bring a large pot of salted water to a boil. This is key for cooking gnocchi properly. Add 1 pound of potato gnocchi to the boiling water. Cook them until they float to the top. This usually takes about 2-3 minutes. Once they float, drain the gnocchi and set them aside.
Preparing the Sauce
Next, heat 2 tablespoons of olive oil in a large skillet over medium heat. Add 3 cloves of minced garlic and sauté them for about 1 minute. You want them fragrant but not burned. Now, pour in 1 can of crushed tomatoes. Add 1 teaspoon of dried basil and 1 teaspoon of dried oregano for flavor. Let this mixture simmer for about 5 minutes. This helps the flavors blend nicely.
Combining Ingredients
Now, reduce the heat to low. Add 1 cup of heavy cream to the sauce and stir until fully combined. This makes the sauce creamy and rich. Season it with salt and pepper to taste. Next, add 3 cups of chopped fresh spinach and stir just until it wilts, which takes about 2 minutes. Finally, gently fold in the cooked gnocchi. Make sure each piece is coated in that creamy sauce. If you like, sprinkle in ¼ cup of grated Parmesan cheese and mix until it melts. Let it sit for a minute before serving. Enjoy your creamy delight!
Tips & Tricks
Perfecting the Sauce
To make your sauce creamier, use heavy cream or coconut cream. These options add a rich texture. You can also blend the crushed tomatoes for a smoother feel. When seasoning, taste as you go. Add salt and pepper slowly. This way, you create a well-balanced flavor.
Cooking Guide
For gnocchi, boiling is best. Always cook them in salted water. This adds flavor. Watch for the gnocchi to float, which means they are ready. A common mistake is overcooking. Once they float, remove them right away.
Serving Suggestions
When serving, use shallow bowls for a beautiful look. Garnish with fresh basil leaves. A sprinkle of Parmesan cheese adds a nice touch. For sides, try garlic bread or a simple green salad. These pair well with the creamy dish.
Pro Tips
- Use Fresh Ingredients: Fresh spinach and high-quality tomatoes will significantly enhance the flavor of your dish.
- Adjust Creaminess: For a lighter version, reduce the amount of cream or use a plant-based alternative like coconut cream.
- Customize Your Herbs: Feel free to add fresh herbs like basil or parsley for an extra burst of flavor.
- Perfect Gnocchi Texture: Ensure you don’t overcook the gnocchi; they should be tender yet slightly firm to the bite for the best texture.

Variations
Dietary Substitutions
You can easily make this dish fit your diet. For a dairy-free option, swap heavy cream for coconut cream. It adds a nice, rich flavor without the dairy. If you need gluten-free gnocchi, look for brands made from rice or corn. Many grocery stores offer good choices.
Additional Ingredients
Feel free to add protein to your dish. Chicken or shrimp works well here. Just cook them in the skillet before adding garlic. They will soak up all the flavors. You can also customize with different veggies. Try bell peppers, zucchini, or mushrooms. They add color and taste.
Flavor Enhancements
To make this dish even more exciting, play with herbs and spices. Fresh basil or thyme can brighten the flavors. You might also enjoy adding red pepper flakes for a kick. For a unique twist, try using sun-dried tomatoes. They add a deep, sweet flavor that pairs well with the creamy sauce.
Storage Info
Storing Leftovers
To keep your creamy tomato spinach gnocchi fresh, place it in an airtight container. Glass or plastic containers work well. This dish lasts for about 3 to 5 days in the fridge. Make sure it cools down before storing it.
Freezing Guidance
If you want to freeze gnocchi, do it before adding cream. Freeze the cooked gnocchi on a baking sheet first. Once frozen, transfer it to a zip-top bag. It stays good for up to 3 months. To reheat, cook it directly from frozen in a skillet with a bit of oil. Add the creamy sauce and heat until warm.
Refreshing Leftover Meals
Use your leftovers in fun ways! Try adding them to a soup to make it heartier. Another idea is to make a pasta bake. Just mix the gnocchi with some cheese and breadcrumbs. Bake it until golden and bubbly for a new meal.
FAQs
How do I know when gnocchi is cooked?
You can tell gnocchi is cooked when it floats to the top of the water. This usually takes about two to four minutes. The gnocchi will be soft but still firm. If you want, taste one to see if it has the right texture.
Can I make this dish ahead of time?
Yes, you can make this dish ahead of time! Cook the gnocchi and prepare the sauce. Just keep them separate. When you are ready to eat, combine them in a skillet over low heat. This saves time on busy nights.
What can I substitute for spinach?
If you don’t have spinach, try kale or Swiss chard. Both greens work well in this recipe. You can also use arugula for a peppery flavor. Just chop them up and add them to the sauce. Cook until they wilt, just like the spinach.
This dish combines potato gnocchi with creamy tomato sauce and fresh spinach. We discussed key ingredients like garlic and herbs. You can customize it to fit your diet, adding proteins or different veggies. Proper storage keeps leftovers tasty for later meals.
Remember, cooking is fun, and this gnocchi recipe shines with simplicity. Enjoy experimenting with flavors and techniques. You now have all the tools to create a delicious meal that friends and family will love. Happy cookin

Creamy Tomato Spinach Gnocchi
Ingredients
- 1 pound potato gnocchi
- 2 tablespoons olive oil
- 3 cloves garlic, minced
- 1 can (14 ounces) crushed tomatoes
- 1 cup heavy cream (or coconut cream for a dairy-free version)
- 3 cups fresh spinach, chopped
- 1 teaspoon dried basil
- 1 teaspoon dried oregano
- to taste salt and pepper
- 0.25 cup grated Parmesan cheese (optional)
- for garnish fresh basil leaves
Instructions
- Bring a large pot of salted water to a boil. Add the potato gnocchi and cook according to package instructions until they float to the top. Drain and set aside.
- In a large skillet, heat the olive oil over medium heat. Add the minced garlic and sauté for about 1 minute, until fragrant.
- Pour in the crushed tomatoes and stir in the dried basil and oregano. Let it simmer for about 5 minutes, allowing the flavors to meld.
- Reduce the heat to low, then add the heavy cream, stirring until fully combined and creamy. Season with salt and pepper to taste.
- Add the chopped spinach to the sauce, stirring just until the spinach wilts, about 2 minutes.
- Gently fold in the cooked gnocchi, ensuring that each piece is coated in the creamy sauce.
- If desired, sprinkle in the grated Parmesan cheese and mix well until melted and combined.
- Remove from heat and let sit for a minute before serving.


![To make a tasty Easy Broccoli Cheese Casserole, you need a few simple ingredients. Each one plays a key role in creating a rich flavor and creamy texture. Here’s what you will need: - 4 cups fresh broccoli florets - 1 cup cooked quinoa - 2 cups shredded cheddar cheese - 1 cup cream of mushroom soup - 1/2 cup milk - 1/4 cup sour cream - 1 teaspoon garlic powder - 1/2 teaspoon onion powder - Salt and pepper to taste - 1/2 cup breadcrumbs - 2 tablespoons olive oil Fresh broccoli florets give this dish its bright color and crunch. I like using cooked quinoa for a boost of protein. It makes the casserole more filling. The shredded cheddar cheese melts beautifully, adding a rich, creamy layer. Cream of mushroom soup is the secret to a dreamy texture. Milk and sour cream make everything extra smooth. Don’t forget the spices! Garlic powder and onion powder add depth to the flavor. You can adjust the salt and pepper to match your taste. The breadcrumbs on top add a nice crispiness, thanks to the olive oil. For the Full Recipe, check the detailed instructions. Enjoy making this dish with your family! First, preheat your oven to 350°F (175°C). This helps the casserole cook evenly. Next, grab a 9x13 inch baking dish and lightly grease it. This prevents sticking. Now, let’s steam the broccoli florets. Place them in a steamer for about 4-5 minutes. You want them tender but not mushy. Once done, set them aside to cool. In a large mixing bowl, combine the cooked quinoa, 1 1/2 cups of shredded cheddar cheese, cream of mushroom soup, milk, sour cream, garlic powder, onion powder, salt, and pepper. Mix everything well. You want a smooth, cheesy blend. This mix is the heart of your casserole, so make sure it's well combined. Now it’s time to fold in the steamed broccoli. Gently stir it into the cheesy mixture until coated. This adds a nice green color and texture. Pour this mixture into your prepared baking dish, spreading it out evenly. For the topping, mix breadcrumbs with olive oil in a small bowl. Sprinkle this mixture over the casserole. Finally, add the remaining 1/2 cup of shredded cheddar cheese on top. Place the casserole in the preheated oven. Bake it for 25-30 minutes. You will know it’s done when the top is golden brown and the cheese is bubbly. This creates a nice crust. After baking, let it cool for a few minutes before serving. This helps the flavors settle and makes it easier to serve. Enjoy your Easy Broccoli Cheese Casserole! For the full recipe, check the earlier section. To cook broccoli for the best texture, steam it lightly. This method keeps it bright green and crisp. Steam the florets for about 4-5 minutes. They should be tender but not mushy. This step helps them hold their shape and adds a nice bite to your casserole. Choosing the right cheese is key for flavor. I recommend using sharp cheddar. It melts well and gives a rich taste. If you want a creamier texture, try adding mozzarella. Mixing different cheeses can also add depth to your dish. You can easily make ingredient substitutions. If you don’t have quinoa, use rice or even pasta. For a lighter option, swap cream of mushroom soup with plain yogurt. This change keeps the dish creamy while cutting calories. Add-ins can boost flavor and nutrition. Consider mixing in cooked chicken or turkey for protein. Diced bell peppers or carrots can add color and crunch. You can also throw in some nuts for a nice crunch. These options make it fun and unique every time you make it. For the full recipe, check out the [Full Recipe]. {{image_2}} For a lighter version of this casserole, swap out some ingredients. Use low-fat cheese to cut calories. You can also replace cream of mushroom soup with a homemade version or low-sodium broth. This gives you control over the fat and salt levels. If you want a gluten-free option, use gluten-free breadcrumbs. You can also make your own with gluten-free bread if you prefer. These small changes keep the dish tasty while making it healthier. To add more flavor, you can include other vegetables. Bell peppers, carrots, or even spinach work well. These not only boost nutrition but also add great color. Mixing in proteins like cooked chicken or turkey makes the dish heartier. It turns a side dish into a full meal. For the best flavor, try adding fresh herbs like thyme or rosemary. These herbs brighten up the taste and add a nice aroma. You can also use a mix of cheeses for a more complex flavor profile. Just remember to keep it balanced so the broccoli shines through. For the complete recipe, check out the Full Recipe section. To keep your Easy Broccoli Cheese Casserole fresh, let it cool first. Once cool, cover it tightly with plastic wrap or aluminum foil. Store it in the fridge for up to three days. Use a clean spoon when serving, so you avoid cross-contamination. This way, you can enjoy your leftovers without worry. If you want to freeze your casserole, here’s what to do. First, let it cool completely. Then, cut it into portions. Wrap each piece in plastic wrap, then place them in a freezer bag. This helps keep the flavor and texture intact. When you are ready to eat, thaw it overnight in the fridge. Reheat in the oven at 350°F (175°C) until hot. This method works well to enjoy your Easy Broccoli Cheese Casserole later. For the complete recipe, check out the Full Recipe. How can I make this broccoli cheese casserole in advance? You can prepare this casserole a day ahead. Simply follow the recipe until you layer the casserole in the dish. Cover it tightly with plastic wrap and store it in the fridge. When ready to bake, remove the wrap and add a few extra minutes to the baking time. This method saves time and lets the flavors mix well. Can I use frozen broccoli instead of fresh? Yes, frozen broccoli works well in this casserole. Just thaw and drain it before mixing. This saves prep time and still gives you that great broccoli flavor. Make sure to squeeze out extra water to avoid a soggy casserole. What is the calorie count per serving? Each serving of this broccoli cheese casserole has about 300 calories. This count can vary based on your specific ingredients. If you use low-fat cheese or a lighter soup, the calories may drop. Does this casserole freeze well? Yes, this casserole freezes nicely. After baking, let it cool completely. Then, cover it tightly with foil or plastic wrap. Store it in the freezer for up to three months. When you want to eat it, thaw it overnight in the fridge and reheat in the oven. This helps keep the flavors fresh and delicious. For the full recipe, check out the Cheesy Broccoli Bliss Casserole! This blog covered a simple and tasty broccoli cheese casserole. You learned about the key ingredients, from fresh broccoli to spices. I shared step-by-step instructions for mixing and baking. Also, you discovered tips for perfecting the dish and ways to customize it. Finally, we discussed storage methods for leftovers. I hope you feel ready to make this dish! Enjoy your cooking and create a meal that everyone will love.](https://dailydishlab.com/wp-content/uploads/2025/07/a9a80e4c-75b2-4ae9-8984-ae1ea083217d-768x768.webp)


![Let’s dive into the simple ingredients that make this dish shine. Each element plays a role in creating a tasty and healthy meal. Here’s what you need: - 4 cod fillets (about 6 oz each) - 2 tablespoons olive oil - 2 lemons (one for zest and juice, one for slices) - 3 cloves garlic, minced - 1 teaspoon dried oregano - 1 teaspoon dried thyme - 1 teaspoon paprika - Salt and pepper to taste - Fresh parsley, chopped (for garnish) Cod fillets are the star here. They have a mild taste that works well with the bright lemon and herbs. Olive oil adds richness and helps the fish stay moist. Garlic brings a punch of flavor, and the herbs add freshness. Using fresh lemons is key. You’ll use one for zest and juice, which brightens up the dish. The other lemon gets sliced and placed on top of the cod for extra flavor and a nice look. Dried oregano and thyme give depth to the dish. Paprika adds a hint of warmth. Finally, a sprinkle of salt and pepper rounds it all out. These ingredients come together to create a dish that is both light and satisfying. If you want to see how these ingredients blend, check out the Full Recipe for step-by-step instructions. 1. Preheat the oven: Start by setting your oven to 400°F (200°C). This ensures even cooking for our cod. 2. Prepare the marinade: In a small bowl, mix 2 tablespoons of olive oil, 3 minced garlic cloves, the zest of one lemon, and the juice from that same lemon. Add 1 teaspoon each of dried oregano, thyme, and paprika. Finally, season with salt and pepper to taste. Stir it well. 3. Coat the cod fillets: Place your 4 cod fillets in a baking dish. Pour the lemon herb marinade over each fillet. Make sure they are all well coated in that tasty mix. 1. Arrange lemon slices: Take the other lemon and slice it. Place the lemon slices on top of each cod fillet. This adds a fresh, zesty kick while baking. 2. Baking time and temperatures: Slide the baking dish into your preheated oven. Bake for 15-20 minutes. The cod is ready when it turns opaque and flakes easily with a fork. 1. Rest and garnish before serving: Once the cod is done, take it out and let it rest for a couple of minutes. This helps the juices settle. Before serving, sprinkle freshly chopped parsley on top. It adds color and a fresh taste. Feel free to check the [Full Recipe] for more details! Choosing the best cod is key to a tasty dish. Look for cod fillets that are firm and moist. They should have a clean, ocean-like smell. Freshness matters. If you can, buy wild-caught cod for the best flavor. Fresh herbs and citrus add bright notes. Use fresh parsley, thyme, and oregano when possible. They bring out the lemon's zest. Always choose lemons that feel heavy for their size. Juicy lemons will boost your dish. To ensure moist fillets, don’t overcook the cod. Bake just until it is opaque and flakes easily. Set a timer for 15 minutes, then check. If it needs more time, add a few minutes. Adjusting seasoning levels is easy. Taste the marinade before adding it to the cod. If it feels bland, add a pinch more salt or pepper. You can always adjust to match your palate. Pair this dish with sides that complement its light flavors. Roasted vegetables work nicely. Try asparagus or green beans for a fresh touch. A light sauce can elevate the meal. Consider a yogurt dill sauce for creaminess. It adds a nice contrast to the cod. For a bit of crunch, add a side salad. For the full recipe, see the details above. {{image_2}} You can try other white fish instead of cod. Fish like tilapia or haddock work well. They will soak up the lemon and herb flavors nicely. If you want a richer taste, you can substitute cod with salmon. Salmon has more fat, so it stays moist when cooked. The lemon still brightens the dish, making it fresh and tasty. Adding spices can take your baked lemon herb cod to the next level. You might want to try adding cumin or dill to the mix. These spices pair well with lemon, enhancing the dish's flavor. If you love heat, consider making a spicy version. Add chili flakes or fresh jalapeños to the marinade. This twist creates a fun kick that many will enjoy. While baking is easy, you can also grill or pan-sear your cod. Grilling adds a smoky flavor that many people love. Just be sure to keep an eye on it so it doesn't dry out. Air-frying is another great option. It cooks the fish quickly and gives it a nice crust. Each method offers a unique taste and texture, so feel free to experiment. To store leftover cod, let it cool first. Place the cod in an airtight container. Cover it tightly to keep it fresh. You can store it in the fridge for up to three days. Make sure to check for any off smells or changes in texture before eating. If you want to keep cod longer, freezing is a great option. Wrap the cod tightly in plastic wrap or foil. You can also use a freezer-safe bag. This helps prevent freezer burn. Cod can last up to three months in the freezer. When you are ready to use it, remember to thaw it slowly. Place it in the fridge overnight for the best results. To reheat your baked cod, use the oven or a skillet. If you use the oven, preheat it to 350°F (175°C). Place the cod on a baking sheet for about 10 minutes. This keeps it moist and tasty. If you choose a skillet, heat it over medium heat. Add a splash of olive oil and gently warm the cod for about 5 minutes. Avoid high heat to keep the texture nice. Enjoy your flavorful meal again! What can I substitute for cod in this recipe? You can use halibut, haddock, or tilapia as substitutes for cod. Each fish has a mild flavor and similar texture. This ensures your dish remains light and flaky. How do I know when cod is fully cooked? Cod is fully cooked when it turns opaque and flakes easily with a fork. This usually takes 15 to 20 minutes at 400°F. A food thermometer can help; the internal temperature should reach 145°F. Can I prepare the marinade in advance? Yes, you can prepare the marinade a day ahead. Store it in the fridge until you are ready to use it. This allows the flavors to blend nicely. Caloric values per serving Each serving of Baked Lemon Herb Cod contains about 250 calories. This is a healthy option for a balanced meal. Key vitamins and minerals in the dish This dish is rich in protein, vitamin C, and omega-3 fatty acids. Cod provides important nutrients for heart health and overall well-being. Making it gluten-free This recipe is naturally gluten-free. Use gluten-free seasoning blends if you want to add extra flavors without worry. Adjusting for low-sodium diets For a low-sodium version, skip the added salt. Use fresh herbs and lemon juice for flavor without extra salt. This keeps your meal healthy and tasty. This article covered how to make delicious baked cod. You learned about the right ingredients, like fresh cod and herbs. I shared step-by-step instructions for preparing, baking, and serving. We also explored tips for ingredient selection and cooking methods. Remember, cooking should be fun and simple. Experiment with flavors and cooking styles. Whether you stick to cod or try other fish, enjoy the process. Keep these tips in mind for tasty meals every time. Happy cooking!](https://dailydishlab.com/wp-content/uploads/2025/07/2716cd61-27b0-42e4-83ae-f5907d1cee06-768x768.webp)

