Crispy Baked Chicken Tenders Easy and Crunchy Recipe

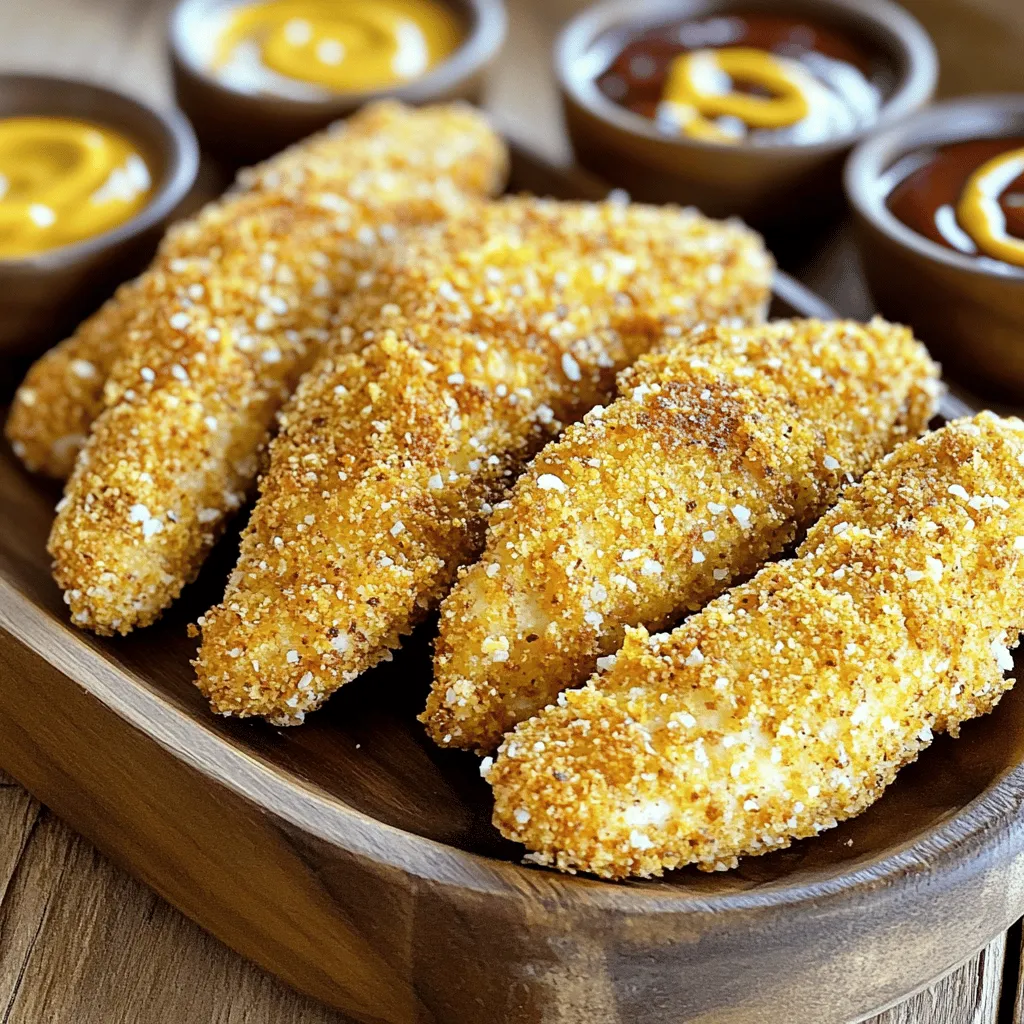
Looking for a delicious way to satisfy your chicken cravings? Try my crispy baked chicken tenders! This easy and crunchy recipe will give you the perfect blend of flavor and texture. With simple ingredients and step-by-step instructions, you’ll have a meal that’s fun to make and eat. Let’s dive into this delectable dish that everyone in your family will love!
Why I Love This Recipe
- Simple Preparation: This recipe is easy to follow and requires minimal effort, making it perfect for busy weeknights.
- Crispy Texture: The combination of panko breadcrumbs and Parmesan cheese ensures a deliciously crispy coating that kids and adults love.
- Customizable Spice: You can easily adjust the spice level by adding or omitting the cayenne pepper, catering to different taste preferences.
- Perfect for Dipping: These tenders pair wonderfully with a variety of dipping sauces, making them a great option for parties or family meals.
Ingredients
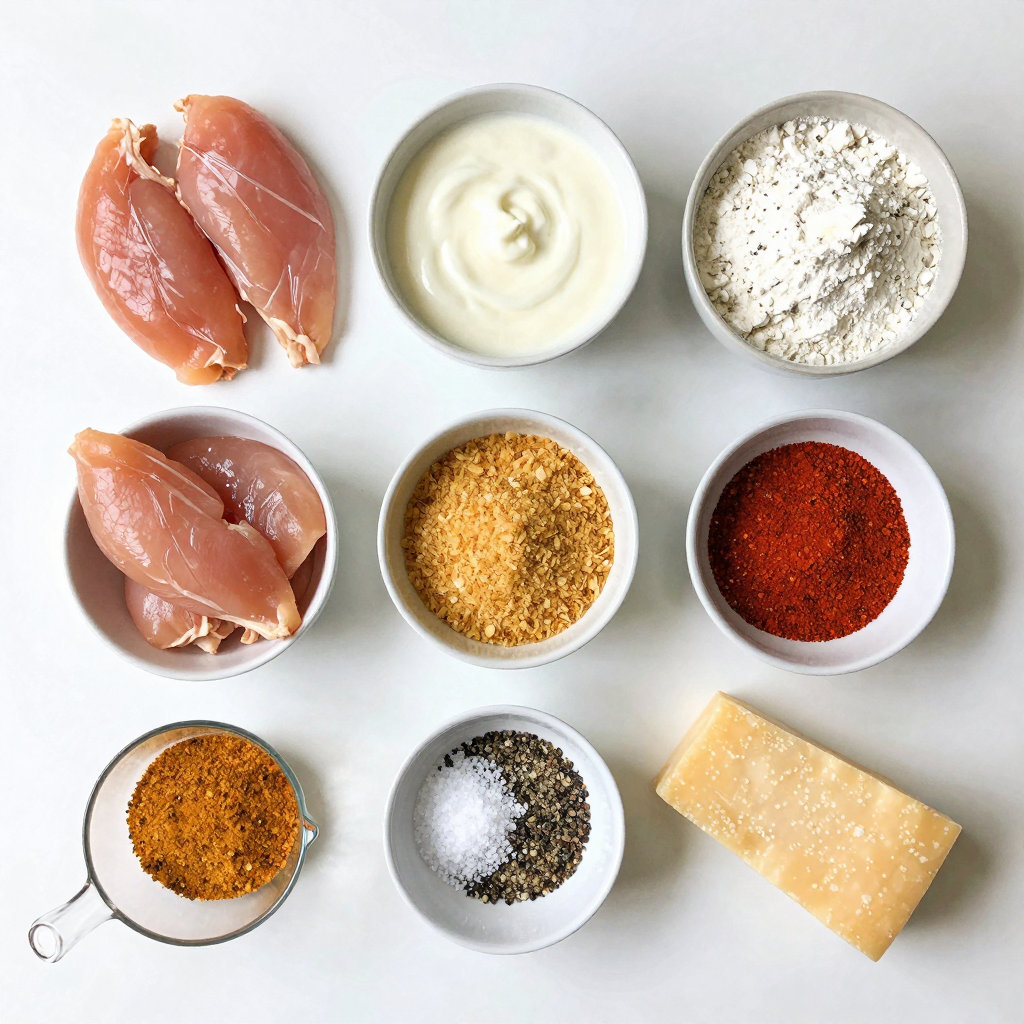
To create the best crispy baked chicken tenders, gather these simple ingredients:
- 1 pound chicken breast tenders
- 1 cup buttermilk (or plain yogurt)
- 1 cup all-purpose flour
- 1 cup panko breadcrumbs
- 1 teaspoon garlic powder
- 1 teaspoon onion powder
- 1 teaspoon smoked paprika
- 1 teaspoon salt
- 1/2 teaspoon black pepper
- 1/2 teaspoon cayenne pepper (optional, for spice)
- 1/4 cup grated Parmesan cheese
- Cooking spray
These ingredients work together to deliver great flavor and texture. The buttermilk tenderizes the chicken, while the spices add depth. The panko breadcrumbs make the tenders extra crunchy. Using these exact ingredients will help you achieve the perfect crispiness. Enjoy the process as you prepare these delicious chicken tenders!

Step-by-Step Instructions
Marinate the Chicken
- In a large bowl, mix buttermilk, salt, pepper, and cayenne pepper.
- Add the chicken tenders, making sure they’re fully submerged.
- Cover and let marinate for at least 1 hour, or overnight for the best flavor.
Marinating keeps the chicken tender and juicy. The buttermilk helps to break down proteins, making the meat softer. This step is vital for great taste and texture.
Prepare Your Breading Station
- Preheat your oven to 425°F (220°C).
- Line a baking sheet with parchment paper and spray it lightly with cooking spray.
- Set up three shallow bowls: one with flour, one with a mix of garlic powder, onion powder, smoked paprika, and salt, and the last with panko breadcrumbs and grated Parmesan cheese.
A well-organized station makes breading easy. Each bowl has a purpose, ensuring a perfect coating every time.
Bread the Chicken
- Take each chicken tender from the marinade, letting excess drip off.
- Dredge it in flour, shaking off the extra.
- Dip the tender in the seasoning mix, coating it evenly.
- Finally, press it into the panko mixture for a thick, crispy layer.
This three-step breading process gives each tender a crunchy texture. The panko breadcrumbs provide that extra crispiness that everyone loves.
Bake the Chicken
- Place the breaded tenders on the prepared baking sheet.
- Lightly spray the tops with cooking spray to help them crisp.
- Bake for about 18-20 minutes, until the chicken is cooked and the coating is golden brown.
The cooking spray is key for achieving that perfect crunch. Keep an eye on them as they bake. You want a beautiful, golden color!
Pro Tips
- Marinate for Maximum Flavor: Letting the chicken tenders soak in buttermilk overnight enhances their tenderness and infuses them with flavor.
- Use Panko for Extra Crispiness: Panko breadcrumbs create a lighter, crunchier coating compared to regular breadcrumbs, resulting in a crispier texture.
- Don’t Skip the Cooking Spray: A light spray of cooking oil on the breaded chicken before baking helps achieve that golden, crispy finish.
- Experiment with Seasonings: Feel free to customize the spice mix by adding your favorite herbs or spices to the flour or panko for a unique flavor.
Tips & Tricks
Achieving Extra Crispiness
Using panko breadcrumbs is key. They add a light and airy crunch. Regular breadcrumbs can’t match that texture. For even coating, make sure to shake off excess flour. This helps the egg wash stick better. Use baking spray on the chicken before it goes in the oven. This step adds extra crunch while it bakes.
Recommended Marinating Time
Marinating chicken in buttermilk makes it juicy and flavorful. I suggest marinating for at least one hour. For the best taste and texture, let it sit overnight. The longer marination allows the flavors to sink in fully.
Perfect Serving Suggestions
These chicken tenders pair well with many dipping sauces. Honey mustard, barbecue sauce, and ranch dressing are great options. For sides, consider crispy fries or a fresh salad. These add color and balance to your meal.

Variations
Flavor Variations
You can change the taste by adding different seasonings or herbs. Try Italian herbs like oregano or basil for a fresh twist. If you like heat, add more cayenne or a splash of hot sauce to the marinade. These changes can make your chicken tenders exciting and full of flavor.
Alternative Coatings
For a new texture, use crushed cornflakes or crackers instead of panko. This gives the chicken tenders a unique crunch. If you need a gluten-free option, almond flour works well. It adds a nutty taste and keeps the tenders crispy.
Cooking Method Variations
If you have an air fryer, use it for a faster option. Cook at 400°F for about 10-12 minutes. Flip the tenders halfway for even crispiness. You can also grill the chicken tenders for a smoky flavor. Grill them over medium heat for about 6-8 minutes on each side. Both methods give you tasty, crispy chicken tenders.
Storage Info
Storing Leftovers
To keep your crispy baked chicken tenders fresh, follow these steps:
- Allow the chicken tenders to cool to room temperature.
- Place leftovers in an airtight container.
- Store in the refrigerator for up to 3 days.
Using glass containers works well, as they seal tightly and help avoid moisture loss.
Reheating Tips
When it’s time to enjoy leftovers, reheating is key:
- Preheat your oven to 375°F (190°C).
- Place the chicken tenders on a baking sheet.
- Heat for about 10-12 minutes.
This method helps keep the crust crunchy. Avoid the microwave, as it can make the tenders soggy.
Freezing Instructions
You can freeze both uncooked and cooked chicken tenders:
- For uncooked tenders, place them in a single layer on a baking sheet.
- Once frozen, transfer to a freezer-safe bag.
- For cooked tenders, cool completely before placing in a freezer bag.
- When ready, thaw uncooked tenders in the fridge overnight.
- Cook them straight from frozen, adding a few extra minutes to the bake time.
For cooked ones, thaw in the fridge, then reheat as mentioned above.
FAQs
How long should I marinate chicken tenders?
You should marinate chicken tenders for at least 1 hour. This time allows the meat to soak up the flavors. For best taste and texture, marinate overnight. The longer marination makes the chicken tender and juicy.
Can I use chicken breasts instead of tenders?
Yes, you can use chicken breasts. Cut them into strips about the same size as tenders. This way, they will cook evenly. Just remember to adjust the cooking time if your strips are thicker.
What is the best way to ensure crispy baked chicken?
To ensure crispy baked chicken, use panko breadcrumbs. They create a lighter, crunchier coating than regular breadcrumbs. Also, lightly spray the chicken with cooking spray before baking. This helps achieve that golden crust.
Can I make these chicken tenders ahead of time?
Yes, you can prepare the chicken tenders ahead of time. Bread them and store them in the fridge for up to 24 hours. This helps the flavors meld together. Just bake them when you are ready to eat.
What dipping sauces pair well with crispy chicken tenders?
Crispy chicken tenders go well with many dipping sauces. Honey mustard, barbecue sauce, and ranch dressing are favorites. You can also try spicy mayo or a tangy garlic aioli for a twist.
In this post, we covered the ingredients and steps for making juicy baked chicken tenders. You learned about the marinade, the perfect breading process, and how to achieve extra crispiness. Remember, marinating adds flavor and moisture. You can explore variations for an exciting twist. Store leftovers properly to enjoy later, and don’t forget those tasty dipping sauces! With these tips in hand, you can create a simple and delicious meal any day. Enjoy your cooking adventure!

Crispy Baked Chicken Tenders
Ingredients
1 pound chicken breast tenders
1 cup buttermilk (or plain yogurt)
1 cup all-purpose flour
1 cup panko breadcrumbs
1 teaspoon garlic powder
1 teaspoon onion powder
1 teaspoon smoked paprika
1 teaspoon salt
1/2 teaspoon black pepper
1/2 teaspoon cayenne pepper (optional, for spice)
1/4 cup grated Parmesan cheese
Cooking spray
Instructions
Marinate the Chicken: In a large bowl, combine the buttermilk, salt, pepper, and cayenne pepper (if using). Add the chicken tenders, ensuring they are fully submerged. Cover and let marinate in the refrigerator for at least 1 hour or up to overnight for best results.
Prepare Your Breading Station: Preheat your oven to 425°F (220°C). Line a baking sheet with parchment paper and spray it lightly with cooking spray. Set up three shallow bowls: one with flour, the second with a mixture of garlic powder, onion powder, smoked paprika, and salt, and the third with the panko breadcrumbs mixed with grated Parmesan cheese.
Bread the Chicken: Remove each chicken tender from the marinade, allowing any excess to drip off. Dredge each tender first in the flour, shaking off the excess. Next, dip it into the seasoning mix, coating it evenly, and finally, press it into the panko mixture to ensure a thick, crispy coating.
Bake the Chicken: Place the breaded chicken tenders on the prepared baking sheet. Lightly spray the tops with cooking spray to help them crisp up while baking. Bake in the preheated oven for about 18-20 minutes, or until the chicken is cooked through and the coating is golden brown and crispy.
Serve and Enjoy: Once cooked, remove from the oven and let cool for a minute. Serve these crispy baked chicken tenders with your favorite dipping sauces, such as honey mustard, barbecue sauce, or ranch dressing.
Prep Time: 10 minutes | Total Time: 30-40 minutes | Servings: 4 (approx. 12-16 tenders)

Crispy Baked Chicken Tenders
Ingredients
- 1 pound chicken breast tenders
- 1 cup buttermilk (or plain yogurt)
- 1 cup all-purpose flour
- 1 cup panko breadcrumbs
- 1 teaspoon garlic powder
- 1 teaspoon onion powder
- 1 teaspoon smoked paprika
- 1 teaspoon salt
- 0.5 teaspoon black pepper
- 0.5 teaspoon cayenne pepper (optional, for spice)
- 0.25 cup grated Parmesan cheese
- 1 spray cooking spray
Instructions
- In a large bowl, combine the buttermilk, salt, pepper, and cayenne pepper (if using). Add the chicken tenders, ensuring they are fully submerged. Cover and let marinate in the refrigerator for at least 1 hour or up to overnight for best results.
- Preheat your oven to 425°F (220°C). Line a baking sheet with parchment paper and spray it lightly with cooking spray. Set up three shallow bowls: one with flour, the second with a mixture of garlic powder, onion powder, smoked paprika, and salt, and the third with the panko breadcrumbs mixed with grated Parmesan cheese.
- Remove each chicken tender from the marinade, allowing any excess to drip off. Dredge each tender first in the flour, shaking off the excess. Next, dip it into the seasoning mix, coating it evenly, and finally, press it into the panko mixture to ensure a thick, crispy coating.
- Place the breaded chicken tenders on the prepared baking sheet. Lightly spray the tops with cooking spray to help them crisp up while baking. Bake in the preheated oven for about 18-20 minutes, or until the chicken is cooked through and the coating is golden brown and crispy.
- Once cooked, remove from the oven and let cool for a minute. Serve these crispy baked chicken tenders with your favorite dipping sauces, such as honey mustard, barbecue sauce, or ranch dressing.

![Here’s what you need for a tasty Baked Potato Chicken Broccoli Casserole: - 4 medium-sized potatoes, peeled and diced - 2 cups cooked chicken, shredded - 2 cups fresh broccoli florets - 1 cup shredded cheddar cheese - 1 cup sour cream - 1/2 cup milk - Spices: garlic powder, onion powder, salt, and pepper - Topping: 1/2 cup breadcrumbs and 1/4 cup grated Parmesan cheese - 2 tablespoons olive oil Each ingredient plays a role in the final dish. The potatoes provide a hearty base. Chicken adds protein and flavor. Fresh broccoli brings in a nice crunch and color. The cheddar cheese gives it that creamy, cheesy goodness. Sour cream and milk keep it moist. Don’t forget the spices; they boost the taste. Lastly, the breadcrumbs and Parmesan create a crunchy topping that everyone loves. You can find the full recipe for this delicious casserole in the [Full Recipe] section. Enjoy cooking! 1. Preheat the oven to 375°F (190°C). This ensures even cooking. 2. Boil the diced potatoes in salted water until they are fork-tender. This takes about 10-15 minutes. Drain the potatoes and let them cool slightly. 3. In a large bowl, mix the shredded chicken, boiled potatoes, fresh broccoli, shredded cheddar cheese, sour cream, milk, garlic powder, onion powder, and a pinch of salt and pepper. Stir until all ingredients are well combined. 1. Drizzle olive oil over the mixture and stir again to mix it well. 2. Transfer the mixture to a greased 9x13 inch casserole dish. Spread it out evenly for even baking. 3. In a small bowl, combine breadcrumbs and grated Parmesan cheese. Sprinkle this mixture evenly on top of the casserole. 1. Bake the casserole in the preheated oven for 25-30 minutes, or until the top is golden brown and bubbly. 2. Once baked, remove it from the oven and let it cool for about 5 minutes. This helps the casserole set before serving. For the full recipe, check out the details above. Enjoy your delicious meal! - Use rotisserie chicken for convenience. - Adjust liquid ingredients based on desired creaminess. Using rotisserie chicken saves time and adds great flavor. It’s tender and juicy, making your casserole richer. If you want a creamy texture, add more sour cream or milk. If you prefer a thicker mix, use less liquid. This way, you can customize to your taste. - Overcooking the potatoes. - Not seasoning adequately. Be careful not to overcook the potatoes. They should be fork-tender but not mushy. If they cook too long, your casserole will turn out soggy. Also, don’t skimp on seasoning. Salt and pepper are key to bringing out all the flavors in the dish. - Garnish with parsley. - Pair with a crisp side salad for balance. Garnish your casserole with fresh parsley for color and taste. This small touch makes it look fancy! Pairing it with a crisp side salad adds freshness. The salad balances the creamy casserole and makes the meal complete. For the full recipe, check the main sections above! {{image_4}} You can change the recipe to fit your taste. For a twist, substitute broccoli with fresh spinach or tender asparagus. Both options add a nice touch and keep the dish colorful. You can also use different cheese varieties. Try mozzarella for a mild flavor or pepper jack for a spicy kick. Each cheese brings its own charm to the casserole. If you want a lighter version, replace sour cream with Greek yogurt. It adds creaminess while cutting calories. You can also switch out regular potatoes for sweet potatoes. Sweet potatoes bring a hint of sweetness and more nutrients. Both swaps keep the dish tasty and satisfying. To give your casserole a fun twist, think about adding spices. A sprinkle of cumin and chili powder can create a Tex-Mex vibe. For an Italian touch, mix in dried oregano and basil. These spices can turn a simple casserole into something special and unique. Remember, small changes can lead to big flavors! You can keep your baked potato chicken broccoli casserole in the fridge. Store it in an airtight container. It will stay fresh for 3-4 days. Before you put it in the fridge, let it cool down. This helps keep the texture nice. For longer storage, you can freeze your casserole. I recommend freezing it in individual portions. This makes it easy to reheat later. Use freezer-safe containers or bags to avoid freezer burn. Label each bag or container with the date to track freshness. When it's time to enjoy your leftovers, reheating is key. For the best texture, reheat in the oven. Preheat the oven to 350°F (175°C) and heat for about 20 minutes. The oven will keep the top crunchy. Microwaving is quick, but it might change the texture. If you use the microwave, heat in short intervals and stir between to warm evenly. For the full recipe, you can refer to the Baked Potato Chicken Broccoli Casserole section above. Yes, prepare the casserole and refrigerate it before baking. This saves time on busy days. You can make it in the morning and bake it later. Just be sure to cover it tightly. A crisp side salad or steamed vegetables complement it well. The freshness of a salad balances the creamy casserole. Try adding some cherry tomatoes or cucumbers for crunch. Look for a golden brown top and bubbling edges. It should smell amazing, too! If you see this, it is ready to eat. A meat thermometer can help, aiming for 165°F in the center ensures safety. It can be made gluten-free by using gluten-free breadcrumbs. Many brands offer great options. This way, everyone can enjoy the dish without worry. Plus, it can still be delicious and crunchy! This baked potato chicken broccoli casserole combines simple ingredients for a wholesome meal. We covered the easy steps to prepare, assemble, and bake your dish perfectly. Remember to adjust for creaminess and avoid overcooking the potatoes. Try variations to suit your taste and enjoy leftovers with proper storage. This dish is not just tasty; it’s customizable and convenient. Have fun creating your delicious version!](https://dailydishlab.com/wp-content/uploads/2025/06/48777e9c-67aa-4801-bf00-58215c9964ff-768x768.webp)


