
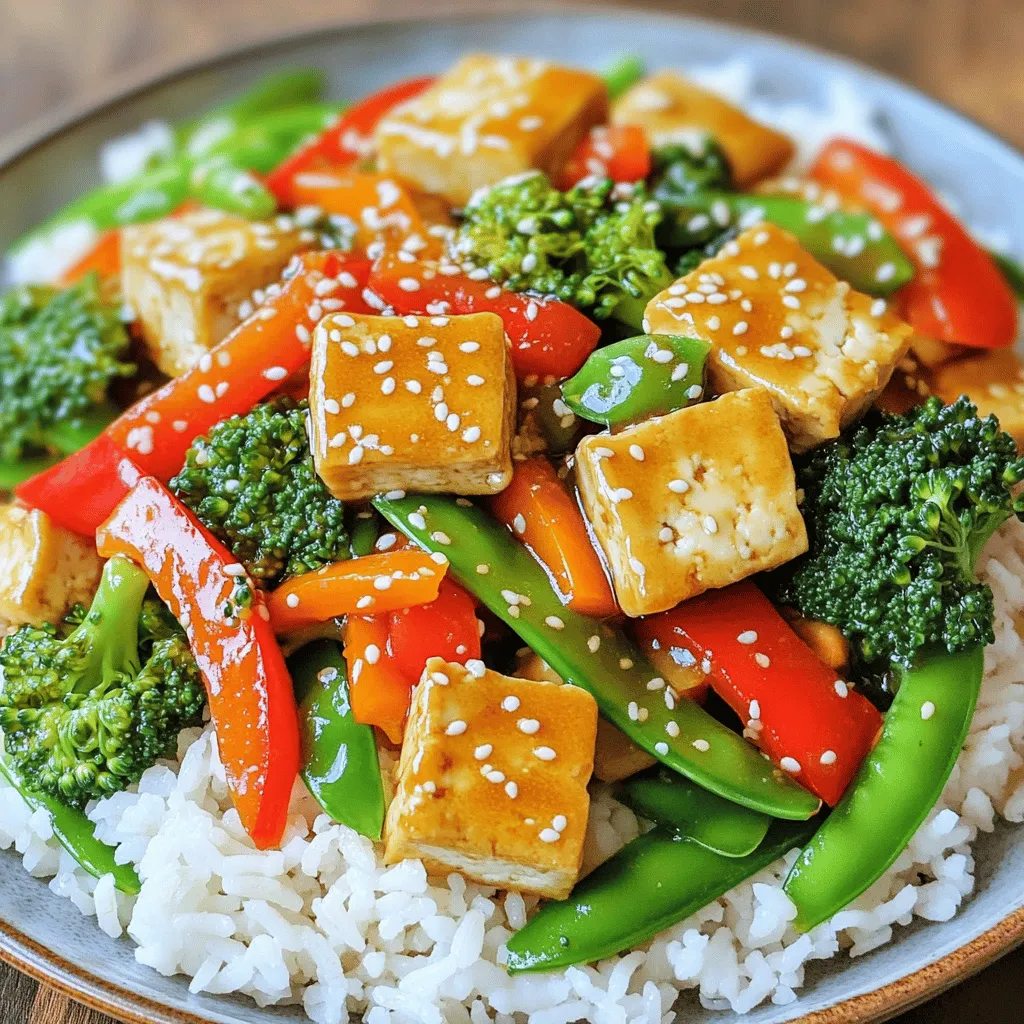
Looking for a quick and tasty meal? This Crispy Tofu Stir Fry is your answer! With just a few simple steps, you can whip up a delightful dish that is full of flavor and crunch. I’ll guide you through the process, from prepping the tofu to stir-frying vibrant veggies. Get ready to impress your taste buds with this easy, healthy recipe that fits perfectly into your busy lifestyle!
Why I Love This Recipe
- Flavorful Harmony: This stir fry combines crispy tofu with vibrant vegetables, creating a delicious balance of textures and flavors.
- Quick and Easy: With a total cooking time of just 45 minutes, this recipe is perfect for busy weeknights.
- Customizable Ingredients: Feel free to swap in your favorite veggies or adjust the sauce to suit your taste preferences.
- Healthy and Satisfying: This dish is packed with nutrients from the vegetables and plant-based protein from the tofu, making it a wholesome meal.
Ingredients
Main Ingredients
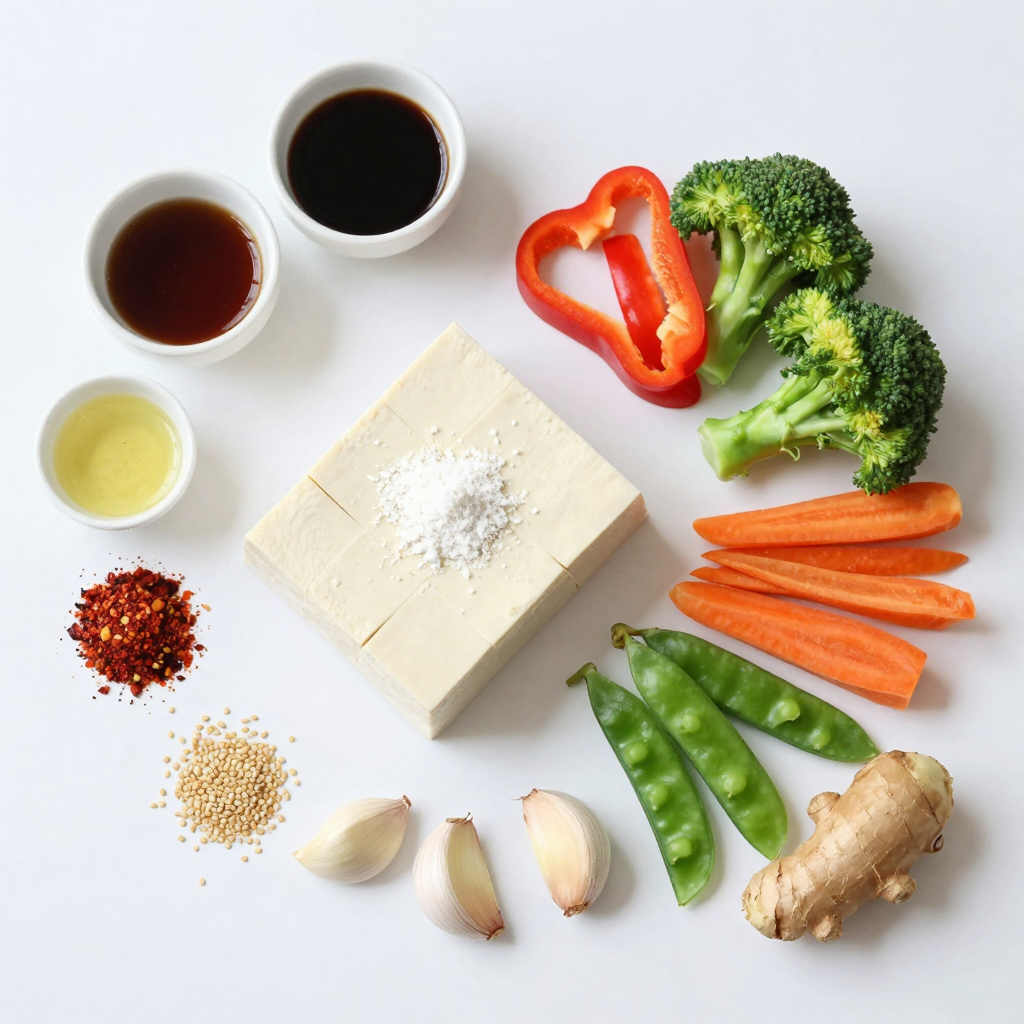
– 1 block firm tofu
– 2 tablespoons cornstarch
– 3 tablespoons vegetable oil
– 1 red bell pepper
– 1 cup broccoli florets
– 1 carrot
– 1 cup snap peas
– 2 garlic cloves
– 1 inch ginger
– 3 tablespoons soy sauce
– 1 tablespoon sesame oil
– 1 tablespoon rice vinegar
Optional Ingredients
– 1 teaspoon chili flakes
– Sesame seeds for garnish
Tools and Equipment Needed
– Non-stick skillet
– Tofu press
– Measuring spoons
When I make crispy tofu stir fry, I love using firm tofu. It holds its shape well and gives a great texture. You should press the tofu for at least 30 minutes. This step removes the water. Less water means a crispier bite. Then, cut it into cubes.
Next, fresh vegetables bring color and crunch. I often use red bell pepper, broccoli, carrot, and snap peas. These add flavor and nutrition. Feel free to mix and match with your favorites.
For the sauce, I use soy sauce, sesame oil, and rice vinegar. These ingredients give a lovely umami taste. If you want some heat, add chili flakes. They boost the flavor and provide a nice kick.
Lastly, you’ll need a non-stick skillet. This tool helps cook the tofu evenly and prevents sticking. A tofu press and measuring spoons will also make your cooking easier.Enjoy your cooking adventure!
Step-by-Step Instructions
Preparing the Tofu
To start, you need to press the tofu. Place it on a plate, cover it with another plate, and add a weight on top. Let it sit for at least 30 minutes. This step removes extra moisture. Once pressed, cut the tofu into small cubes, about one inch each.
Next, coat the tofu with cornstarch. Place the cubed tofu in a bowl and sprinkle the cornstarch over it. Toss gently until each piece is well covered. This helps create a crispy crust when you fry the tofu.
Cooking the Crispy Tofu
Now, it’s time to cook the tofu. Heat 2 tablespoons of vegetable oil in a non-stick skillet over medium-high heat. When the oil is hot, carefully add the tofu cubes in a single layer. Fry them for 5 to 7 minutes. Turn the pieces occasionally so they brown evenly. You want them golden brown and crispy on all sides. Once done, remove the tofu from the skillet and set it aside.
Stir-Frying the Vegetables
In the same skillet, add 1 tablespoon of oil. Then, add the minced garlic and grated ginger. Sauté them for about 30 seconds. This will make your kitchen smell amazing.
Next, add the sliced red bell pepper, broccoli florets, julienned carrot, and snap peas to the skillet. Stir-fry these veggies for 5 to 6 minutes. You want them tender but still crisp.
Combining Ingredients
Lower the heat and add the crispy tofu back into the skillet. Pour in the soy sauce, sesame oil, rice vinegar, and chili flakes if you like a little spice. Gently toss everything together. Make sure the tofu and vegetables are well coated in the sauce. Cook for an additional 2 to 3 minutes to let the flavors mix.
This dish looks great on a plate. Serve it hot over a bed of steamed jasmine rice or quinoa. Don’t forget to sprinkle sesame seeds on top for a nice finish.
Pro Tips
- Press Tofu Properly: Make sure to press the tofu for a full 30 minutes to achieve the best texture. This removes excess moisture, allowing for a crispier finish.
- Coat Tofu Evenly: When tossing the cubed tofu with cornstarch, ensure each piece is thoroughly coated. This step is crucial for achieving that perfect crunch.
- Use High Heat: Stir-frying requires high heat to quickly cook the vegetables while retaining their crispness. Don’t overcrowd the pan, or the temperature will drop.
- Flavor Boosting: For an extra depth of flavor, consider adding a splash of lime juice or a sprinkle of fresh herbs just before serving.
Tips & Tricks
Achieving Perfectly Crispy Tofu
To make crispy tofu, you must press it first. Pressing removes extra water. Wet tofu will not crisp up well. Use a tofu press or wrap the tofu in a towel. Place a heavy object on top for 30 minutes.
Next, coat the pressed tofu with cornstarch. This coating creates a crunchy outer layer. Toss the cubes gently in cornstarch. Make sure each piece is fully covered. This small step makes a big difference in texture.
Cooking Techniques
Heat is crucial for crispy tofu. Use medium-high heat when frying. Too low heat will make the tofu soggy. Make sure your oil is hot before adding tofu.
When stir-frying, keep the food moving. This helps everything cook evenly. Use a non-stick skillet for best results. Avoid overcrowding the pan; it can lower the heat. Fry in batches if needed.
Enhancing Flavor
To boost flavor, consider adding garlic and ginger. These give a warm, aromatic touch. You can also mix in other seasonings. Try adding a splash of lime juice or fresh herbs.
For sauces, balance is key. Soy sauce pairs well with sesame oil. Rice vinegar adds brightness. Adjust these to taste. If you like heat, add chili flakes. This will kick up the flavor.Enjoy your crispy tofu stir fry!
Variations
Protein Alternatives
You can switch the tofu for tempeh. Tempeh is made from fermented soybeans. It has a nutty flavor and is great for adding protein. To use tempeh, cut it into cubes like tofu. Cook it the same way for a nice crispy texture.
Another option is to add chicken or shrimp. Both add a different taste and texture. For chicken, cut it into small pieces. Cook it in the skillet until it is fully done before adding vegetables. For shrimp, add them after the garlic and ginger. They cook quickly, so make sure they turn pink.
Vegetable Substitutions
You can use any fresh vegetables you have. Seasonal options are best since they taste great. In spring, try asparagus or snap peas. In the fall, use squash or bell peppers.
Using frozen vegetables is a good choice too. They are quick and easy. Just add them straight to the skillet and cook until heated through. This saves time and reduces food waste.
Different Sauces
You can explore many sauce options. A homemade sauce can add unique flavors. Mix soy sauce with honey or maple syrup for sweetness. You can also add garlic or citrus for a fresh taste.
If you like heat, create a spicy version. Add chili paste or sriracha to your sauce mix. Adjust the amount to your heat preference. This can make your stir fry exciting and packed with flavor.
Storage Info
Leftovers
To keep your crispy tofu stir fry fresh, store leftovers in an airtight container. This will prevent the tofu from getting soggy. In the fridge, it lasts about 3 to 4 days. The longer it sits, the softer it gets, so try to enjoy it soon!
Reheating Tips
When you’re ready to eat your leftovers, reheat them in a skillet. Heat it over medium heat and add a splash of oil. This helps keep the tofu crispy. Stir gently to avoid breaking the tofu. Heat for about 5 to 7 minutes or until warm.
Freezing Options
If you want to save some stir fry for later, you can freeze it. First, let it cool completely. Then, portion it into freezer-safe bags or containers. It can last up to 3 months in the freezer.
To thaw, place it in the fridge overnight. When you’re ready to eat, reheat it in a skillet, just like before. This way, you keep the flavors and textures close to the original dish. Enjoy your tasty meal anytime!
FAQs
What is the best type of tofu to use for stir fry?
The best tofu for stir fry is firm tofu. Firm tofu holds its shape well during cooking. Soft or silken tofu can break apart, which is not ideal for this dish. You can also use extra-firm tofu if you prefer a denser texture. Both types work well, but I find firm tofu is easiest to handle.
Can I make this recipe vegan?
Yes, this recipe is vegan! All the ingredients are plant-based. The tofu, vegetables, and sauces contain no animal products. Just make sure your soy sauce is vegan. Most brands are, but it’s good to check the label.
How can I make my tofu extra crispy?
To make your tofu extra crispy, press it well! Remove as much water as possible. Coat the tofu cubes in cornstarch before frying. This gives it a nice crunch. Fry it in hot oil, and avoid overcrowding the pan. This helps the tofu crisp up nicely.
What to serve with crispy tofu stir fry?
Crispy tofu stir fry is great with steamed rice or quinoa. You can also serve it with noodles. Add a side of fresh salad for crunch. If you like heat, serve with chili sauce. This meal is both tasty and filling!
This blog post shared the best way to make a crispy tofu stir fry. We covered key ingredients like firm tofu, fresh veggies, and tasty sauces. I explained how to prepare the tofu, achieve that perfect crunch, and stir-fry vegetables for great flavor. You can mix it up with protein alternatives or different sauces. Remember to store leftovers properly and use my reheating tips. By following these steps, you can enjoy a quick, healthy meal. Now, get cooking and enjoy your delicious stir fry!


