Curry Coconut Chickpea Soup Flavorful and Easy Recipe

Are you ready to spice up your meal routine? This Curry Coconut Chickpea Soup is not only flavorful but also super easy to make. With creamy coconut milk, hearty chickpeas, and fresh vegetables, it’s the perfect dish for any day of the week. Dive in to discover how simple it is to create a warm, satisfying soup that your family will love. Let’s get cooking!
Why I Love This Recipe
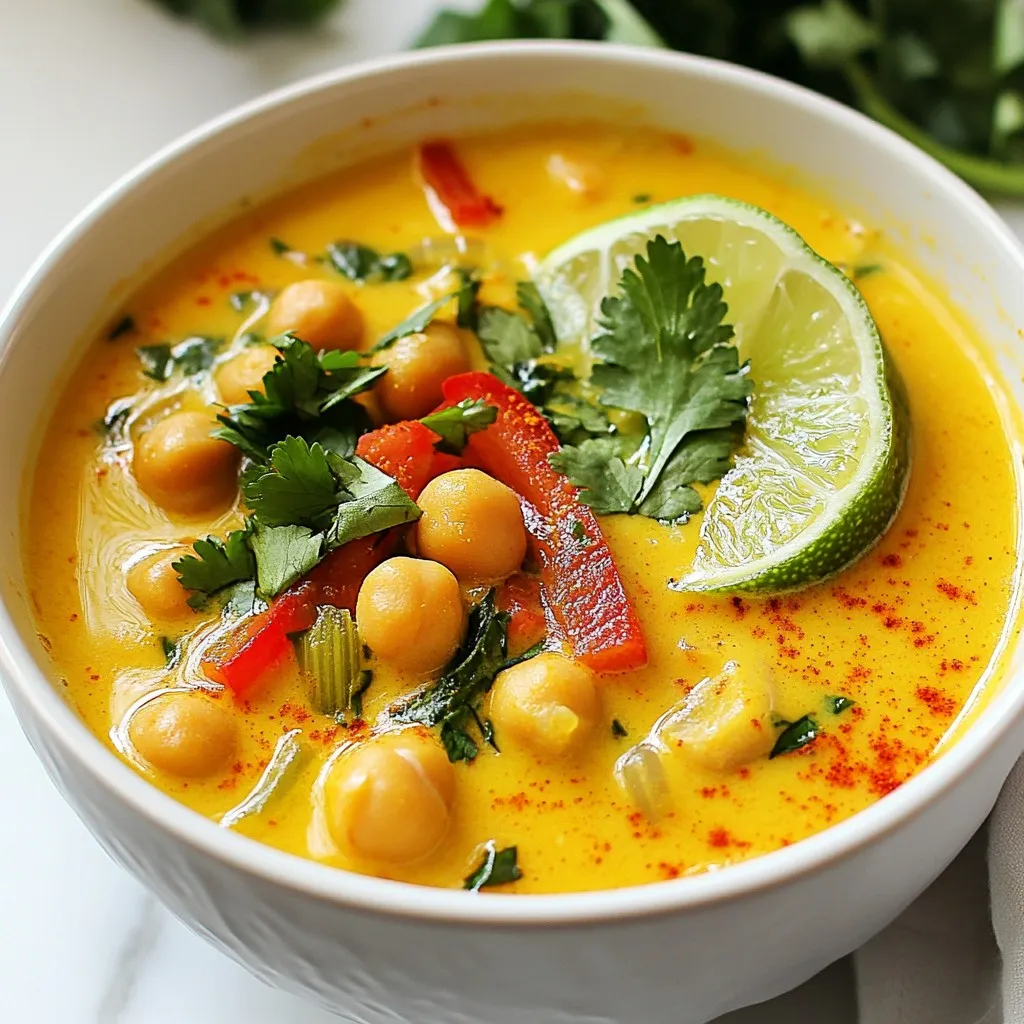
- Comforting and Flavorful: This soup combines the warmth of spices with the creaminess of coconut milk, creating a comforting dish perfect for any time of year.
- Nutritious Ingredients: Packed with chickpeas, kale, and a variety of spices, this recipe is not only delicious but also nourishing for your body.
- Quick and Easy: With a prep time of just 10 minutes and a total cook time of 30 minutes, this recipe is perfect for a busy weeknight dinner.
- Customizable: You can easily adjust the vegetables and spices according to your taste, making this soup versatile and adaptable to what you have on hand.
Ingredients
Main Ingredients
- 1 can (15 oz) chickpeas, rinsed and drained
- 1 can (13.5 oz) coconut milk
- 1 cup vegetable broth
- 1 medium onion, diced
- 3 cloves garlic, minced
- 1 inch fresh ginger, grated
- 1 red bell pepper, diced
- 1 cup kale or spinach, chopped
I love using chickpeas for this soup. They add protein and texture. Coconut milk brings a creamy richness that balances the spices. Vegetable broth adds depth to the soup’s flavor. Diced onion, minced garlic, and fresh ginger create a strong base that enhances the dish. The red bell pepper adds sweetness and color. Lastly, kale or spinach gives a healthy green boost.
Spices and Seasoning
- 1 tablespoon curry powder
- 1 teaspoon turmeric powder
- 1 teaspoon cumin powder
- Salt and pepper to taste
- Juice of 1 lime
Spices make this soup pop! Curry powder gives it warmth and a bit of heat. Turmeric adds a lovely golden color and health benefits. Cumin adds an earthy note that rounds out the flavors. Season with salt and pepper to bring everything together. A squeeze of lime juice at the end brightens the dish and adds freshness.
Garnishes
- Fresh cilantro, for garnish
- Optional toppings
I love to add fresh cilantro on top. It adds a burst of flavor and a nice pop of color. You can also try toppings like avocado or a dollop of yogurt for extra creaminess. Feel free to make it your own!

Step-by-Step Instructions
Preparation
- Gather and measure all your ingredients first.
- In a large pot, heat 2 tablespoons of olive oil over medium heat.
- Add the diced onion and sauté for about 5 minutes until it turns soft and clear.
Cooking Process
- Next, stir in 3 minced garlic cloves and 1 inch of grated ginger. Cook them for 1-2 minutes.
- Add 1 tablespoon of curry powder, 1 teaspoon of turmeric, and 1 teaspoon of cumin. Stir for 1 minute to release their great smells.
- Toss in 1 diced red bell pepper. Cook for 3-4 minutes until it starts to soften.
- Pour in 1 can of coconut milk and 1 cup of vegetable broth. Stir everything together well.
- Add 1 can of rinsed chickpeas. Bring the mix to a gentle simmer. Cook for 10-15 minutes to blend the flavors.
- Right before you serve, stir in 1 cup of chopped kale or spinach. Cook for another 2-3 minutes until it wilts. Season with salt, pepper, and the juice of 1 lime.
Serving Instructions
- Remove the pot from the heat. Ladle the soup into bowls.
- Garnish each bowl with fresh cilantro for a pop of flavor and color.
Tips & Tricks
Enhancing Flavor
To make your curry coconut chickpea soup even tastier, add extra spices. Try a pinch of cayenne for heat or a bit of coriander for depth. You can also use fresh herbs like basil or mint for a bright flavor.
When sautéing, use medium heat. This helps the onions cook evenly and not burn. Sauté until they are soft and translucent. This step builds a great base for your soup.
Cooking Techniques
Use a heavy pot, like a Dutch oven. It holds heat well and helps the soup cook evenly. Keep the heat at medium to low while simmering. This ensures the soup doesn’t boil too quickly, which can change the texture.
To get the perfect consistency, stir the soup as it cooks. If it feels too thick, add more vegetable broth. If it’s too thin, let it simmer longer to reduce.
Common Mistakes to Avoid
One mistake is overcooking the greens. Adding kale or spinach too early can make them mushy. Stir them in just before serving. This keeps them bright and fresh.
Another mistake is not letting the flavors meld. After you add all your ingredients, let the soup simmer. This step allows all the flavors to come together and enhance each other.
Pro Tips
- Enhance Flavor: For an extra kick, add a pinch of red pepper flakes or a dash of hot sauce while cooking the spices.
- Veggie Variations: Feel free to substitute or add other vegetables like carrots, sweet potatoes, or zucchini for more texture and nutrients.
- Storage Tips: This soup stores well in the fridge for up to 3 days. Reheat gently on the stove, adding a splash of broth if needed.
- Garnishing Ideas: Besides cilantro, try adding a dollop of yogurt or a sprinkle of toasted coconut for added creaminess and crunch.

Variations
Ingredient Substitutions
You can mix it up with different legumes. Black beans or lentils work great. They add their own unique flavors. You can also swap vegetables. Try zucchini, carrots, or sweet potatoes for a new twist.
For a non-dairy option, use almond milk or oat milk. They still bring creaminess to the soup. Look for unsweetened versions to keep the taste right.
Spice Adjustments
Want more heat? Add crushed red pepper or jalapeño. Start with a small amount and taste as you go. If you prefer milder flavors, use less curry powder.
You can also play with curry blends. Try Thai curry paste for a different vibe. Each blend gives the soup a unique taste.
Dietary Preferences
This soup is vegan and gluten-free, making it a great choice for many diets. For a low-carb version, skip the chickpeas and add more veggies. Cauliflower or bell peppers can help keep it filling.
If you want more protein, add cooked chicken or tofu. This way, you can enjoy a hearty meal that fits your needs.
Storage Info
Refrigeration
To chill your soup correctly, let it cool for a bit at room temperature. Then, pour it into an airtight container. This keeps the soup fresh and tasty. In the fridge, your Curry Coconut Chickpea Soup stays good for about 4-5 days. Just make sure to check for any signs of spoilage before you enjoy it again.
Freezing Instructions
Freezing the soup is easy. First, let it cool completely. Then, put it in a freezer-safe container or bag. Remove as much air as you can, sealing it tightly. This way, the soup won’t get freezer burn. You can freeze it for up to 3 months. To thaw, place it in the fridge overnight. For a quick option, you can defrost it in the microwave.
Reheating Methods
You can reheat your soup on the stovetop or in the microwave. For the stovetop, pour the soup into a pot. Heat it on medium, stirring often until hot. If using the microwave, place the soup in a safe bowl. Heat it in short bursts, stirring in between. This keeps the flavors and texture just right. Always taste and adjust seasoning after reheating. Enjoy your warm, delicious soup!
FAQs
How can I make this soup spicier?
To add spice, you can try several ways. First, add red pepper flakes. Start with a pinch and adjust to taste. You can also use fresh chili peppers. Slice them up and add them during cooking. Another option is to use spicy curry powder. This will boost heat without changing the flavor too much. Just remember, a little goes a long way. Taste as you go to avoid overpowering the soup.
Can I use dried chickpeas instead of canned?
Yes, you can use dried chickpeas! However, you need to plan ahead. Soak the chickpeas overnight in water. This helps them cook faster. After soaking, boil them for about an hour until tender. You will need about 1 cup of dried chickpeas. This will give you the same amount as one can. Adjust your cooking time, as the soup will take longer to make. Add them at the same step as canned ones.
What can I serve with Curry Coconut Chickpea Soup?
This soup pairs well with many sides. Serve it with warm naan bread for a fun dip. You can also add a simple salad for crunch. A side of rice is great if you want something filling. For a fresh touch, serve it with lime wedges. This adds brightness to your meal. Feel free to mix and match these options to find your favorite combination!
This blog post covered how to make a tasty Curry Coconut Chickpea Soup. We talked about key ingredients, like chickpeas and coconut milk, and how to cook them step-by-step. I shared helpful tips to enhance flavor and avoid common mistakes. You can also customize the soup with variations and learn how to store it properly.
Cooking should be fun and flexible. You can create a dish that fits your taste and needs. Enjoy your cooking, and get ready to savor each bow

Curry Coconut Chickpea Soup
Ingredients
- 1 can chickpeas, rinsed and drained (15 oz)
- 1 can coconut milk (13.5 oz)
- 1 cup vegetable broth
- 1 medium onion, diced
- 3 cloves garlic, minced
- 1 inch fresh ginger, grated
- 1 tablespoon curry powder
- 1 teaspoon turmeric powder
- 1 teaspoon cumin powder
- 1 red bell pepper, diced
- 1 cup kale or spinach, chopped
- 2 tablespoons olive oil
- to taste salt and pepper
- for garnish fresh cilantro
- 1 lime, juiced
Instructions
- In a large pot, heat the olive oil over medium heat. Add the diced onion and sauté for about 5 minutes until it becomes translucent.
- Stir in the minced garlic and grated ginger, cooking for an additional 1-2 minutes until fragrant.
- Add the curry powder, turmeric, and cumin to the pot. Stir well to coat the onion, cooking the spices for about 1 minute to release their flavors.
- Toss in the diced red bell pepper and continue to cook for 3-4 minutes until slightly softened.
- Pour in the coconut milk and vegetable broth, stirring to combine all the ingredients.
- Add the rinsed chickpeas and bring the mixture to a gentle simmer. Cook for about 10-15 minutes, allowing the flavors to meld.
- Just before serving, stir in the chopped kale or spinach and cook for another 2-3 minutes until wilted. Season with salt, pepper, and lime juice to taste.
- Remove from heat and ladle the soup into bowls.
- Garnish each bowl with fresh cilantro for added flavor and presentation.


![To make this vibrant Black Bean Quinoa Salad, gather the following ingredients: - 1 cup quinoa, rinsed - 2 cups vegetable broth or water - 1 can (15 oz) black beans, drained and rinsed - 1 red bell pepper, diced - 1 cup corn (fresh or frozen) - 1 small red onion, finely chopped - 1 avocado, diced - 1/4 cup fresh cilantro, chopped - Juice of 2 limes - 3 tablespoons olive oil - 1 teaspoon cumin - Salt and black pepper to taste - 1/2 teaspoon cayenne pepper (optional for heat) These ingredients blend together to create a dish full of flavor and nutrients. If you need to change some ingredients, here are some easy swaps: - Quinoa: Use brown rice or bulgur for a different grain. - Black Beans: Chickpeas or kidney beans work well too. - Red Bell Pepper: Try yellow or green peppers for variety. - Corn: You can use peas if corn isn’t available. - Avocado: Substitute with diced mango for a sweet twist. - Lime Juice: Lemon juice is a great alternative. These substitutions keep the salad tasty while fitting your needs. This salad is not only delicious but also healthy. Here’s a rough breakdown per serving: - Calories: Approximately 250 - Protein: 8 grams - Carbohydrates: 40 grams - Dietary Fiber: 10 grams - Fat: 8 grams Black beans and quinoa provide protein and fiber. This dish is great for a light meal or side. Enjoy your fresh and flavorful delight! You can find the Full Recipe for detailed steps. First, rinse 1 cup of quinoa under cold water. This helps remove any bitter taste. Next, combine the quinoa with 2 cups of vegetable broth or water in a medium pot. Bring this mixture to a boil over medium-high heat. Once it boils, lower the heat, cover, and let it simmer for about 15 minutes. After 15 minutes, the quinoa should be fluffy and all the liquid gone. Use a fork to fluff it up and set it aside to cool. In a large mixing bowl, add the following ingredients: - 1 can (15 oz) black beans, drained and rinsed - 1 red bell pepper, diced - 1 cup corn (fresh or frozen) - 1 small red onion, finely chopped - 1 avocado, diced - 1/4 cup fresh cilantro, chopped Stir these ingredients together gently. This mix adds color and flavor to your salad. In a separate small bowl, whisk together: - Juice of 2 limes - 3 tablespoons olive oil - 1 teaspoon cumin - Salt and black pepper to taste - 1/2 teaspoon cayenne pepper (optional for heat) Make sure to mix it well until it is smooth. This dressing adds zest to the salad. Once the quinoa has cooled, add it to the bowl with the bean and vegetable mix. Next, drizzle the dressing over everything. Gently toss until all the ingredients are well combined. Taste the salad and adjust the seasoning. If you want more flavor, add more salt, pepper, or lime juice. Let the salad sit for at least 15 minutes. This resting time helps the flavors blend. You can find the full recipe in the previous section. Enjoy your fresh and flavorful Black Bean Quinoa Salad! To cook quinoa just right, rinse it first. Rinsing removes bitter saponins. Use two cups of liquid for every cup of quinoa. Bring the liquid to a boil, then lower the heat. Cover and simmer for about fifteen minutes. When done, let it cool before mixing it into your salad. Fluff it with a fork to keep it light and airy. To boost flavor, use vegetable broth instead of water. It adds a rich taste. You can also add spices like cumin or cayenne for a kick. Fresh herbs like cilantro brighten the dish. If you want crunch, try adding chopped nuts or seeds. For sweetness, diced mango or pineapple works well. These additions make your salad unique and tasty. Serve the salad cold or at room temperature. It looks great in a clear bowl to show off the colors. You can add extra avocado slices on top for a nice finish. Drizzling extra lime juice just before serving enhances the flavor. Pair the salad with grilled chicken or fish for a full meal. For a light lunch, enjoy it on its own. Check out the full recipe to explore more serving ideas! {{image_2}} You can easily make this salad vegan. All the ingredients are already plant-based. Just make sure your vegetable broth is vegan. You can also add more veggies like zucchini or carrots for extra flavor and nutrients. This salad is naturally gluten-free. Quinoa is a great grain choice. If you want to enhance the texture, add chopped nuts like almonds or walnuts. Just check that your canned black beans don’t contain any gluten. You can change the veggies based on the season. In summer, add fresh tomatoes or cucumbers. In fall, try roasted sweet potatoes or butternut squash. This flexibility keeps the salad fresh and exciting. Use the Full Recipe to get started on these tasty variations! To store leftover Black Bean Quinoa Salad, place it in an airtight container. This keeps the salad fresh and prevents it from drying out. Make sure to cover it well. Store it in the fridge for up to three days. To keep the ingredients fresh, store them separately if possible. For example, keep the avocado out until you serve the salad. This prevents browning and keeps your salad looking vibrant. Always rinse and dry beans before storing to avoid excess moisture. You can freeze the quinoa salad, but it's best to freeze just the quinoa and beans. Mix them together before freezing. When you're ready to eat, thaw them in the fridge overnight. After thawing, add fresh veggies and dressing for the best taste. To make your salad more filling, add more protein. You can mix in grilled chicken or shrimp. Tofu or tempeh also works well for a plant-based option. Adding nuts or seeds boosts protein and healthy fats too. Try topping it with some feta cheese for extra flavor. Yes, you can prepare this salad ahead of time. Make it up to a day in advance. Just store it in the fridge. The flavors will blend well overnight. Keep the avocado separate until you serve it. This way, it stays fresh and green. This salad pairs well with many dishes. Serve it with grilled fish or chicken for a complete meal. It also complements tacos or burritos nicely. For a lighter option, enjoy it with a vegetable soup. The salad adds a nice crunch and flavor contrast. Yes, this salad can get better with time. As it sits, the flavors mingle and deepen. The quinoa absorbs the dressing, making each bite tasty. Just remember to stir well before serving. This helps to bring everything back together. For the full recipe, check this out: [Full Recipe]. This blog post guides you through making a tasty black bean quinoa salad. You learned about the key ingredients and some useful substitutions. I shared step-by-step instructions for preparation, mixing, and combining the salad. You also found tips for cooking quinoa perfectly and ideas for serving. I covered variations to fit different diets and storage information to keep the salad fresh. In closing, enjoy experimenting with this salad. It's healthy, easy, and fits many tastes.](https://dailydishlab.com/wp-content/uploads/2025/06/f78c832a-491a-41c3-97fa-5e18f3b5684e-768x768.webp)


![To make Chicken Alfredo Lasagna, you need simple and tasty ingredients. Here’s what you will need: - 8 lasagna noodles - 2 cups cooked chicken, shredded - 2 cups ricotta cheese - 2 cups mozzarella cheese, shredded - 1 cup grated Parmesan cheese - 3 cups Alfredo sauce (store-bought or homemade) - 1 teaspoon garlic powder - 1 teaspoon Italian seasoning - Salt and pepper to taste These ingredients work together to create a creamy and comforting dish. The lasagna noodles give it structure, while the chicken adds protein. Ricotta and mozzarella create a rich, cheesy base. Alfredo sauce makes it all creamy and delicious. You can add a few garnishes to make your Chicken Alfredo Lasagna even better. Here are some ideas: - Fresh parsley, chopped - Extra Parmesan cheese, grated - A sprinkle of red pepper flakes for spice These garnishes not only look nice but also enhance the flavor. A touch of parsley adds color, while red pepper flakes give a little kick. Knowing the nutritional facts helps you enjoy your meal fully. For each serving of Chicken Alfredo Lasagna, you get: - Calories: 450 - Protein: 30g - Fat: 25g - Carbohydrates: 35g - Fiber: 2g - Sugar: 3g This dish is filling and satisfying. It provides a good amount of protein and energy to keep you going. Just remember that it’s rich, so enjoy it in moderation. For the full recipe, check out the section above. To make Chicken Alfredo Lasagna, start by gathering all your ingredients. This includes lasagna noodles, cooked chicken, ricotta cheese, mozzarella cheese, Parmesan cheese, and Alfredo sauce. It helps to have everything ready before you start cooking. Preheating the oven to 375°F (190°C) is essential to ensure even baking. For the lasagna noodles, boil a large pot of salted water. Add the noodles and cook them until they are al dente, about 8 to 10 minutes. After cooking, drain the noodles and rinse them under cold water. This stops the cooking process and helps them stay firm. Set the noodles aside on a clean towel or plate. Now, let’s start layering! First, spread a thin layer of Alfredo sauce on the bottom of a 9x13-inch baking dish. Place four lasagna noodles on top of the sauce. Next, add half of the chicken mixture, which includes shredded chicken and ricotta cheese. Then, sprinkle one cup of mozzarella cheese over the chicken. Pour another cup of Alfredo sauce on top. Repeat this layering: add another set of four noodles, the remaining chicken mixture, one more cup of mozzarella cheese, and another cup of Alfredo sauce. Finish with a final layer of noodles. Pour the remaining Alfredo sauce over this top layer, then sprinkle grated Parmesan cheese and any leftover mozzarella cheese. Now cover the dish with aluminum foil and bake it in the preheated oven for about 25 minutes. After 25 minutes, remove the foil and bake for another 15 to 20 minutes. The cheese should be bubbly and golden when done. Let the lasagna rest for about 10 minutes before slicing. Garnish with fresh parsley for a lovely touch. Enjoy your creamy Chicken Alfredo Lasagna! For a complete guide, refer to the Full Recipe. To get great texture in your lasagna, cook the noodles just right. Aim for al dente, which means they should still have a slight bite. This will help keep your lasagna from becoming mushy. Don't forget to rinse the noodles in cold water after boiling. This step stops the cooking and prevents them from sticking together. Making homemade Alfredo sauce is simple and rewarding. You will need butter, heavy cream, and Parmesan cheese. Start by melting butter in a pan. Add heavy cream and let it simmer. Stir in grated Parmesan until smooth. Season with garlic powder and salt. This sauce will make your lasagna extra creamy and delicious. When serving Chicken Alfredo Lasagna, a fresh salad pairs nicely. A side of garlic bread is also a great choice. For drinks, consider a light white wine or sparkling water with lemon. This adds a refreshing touch to your meal. You can find the full recipe for Chicken Alfredo Lasagna above to guide you. {{image_2}} You can easily make a vegetarian version. Just swap the chicken for mushrooms or spinach. Use a blend of ricotta and cottage cheese for texture. This change keeps the dish creamy and rich without meat. Gluten-free lasagna noodles work great in this dish. Look for brands made from rice or corn. They cook similarly to regular noodles. Just follow the package instructions closely. This way, everyone can enjoy your Chicken Alfredo Lasagna. Feel free to add veggies for extra flavor and nutrients. Zucchini, bell peppers, or broccoli are great choices. Just sauté them lightly before adding to the layers. This adds color and a healthy twist to your lasagna. To store leftover Chicken Alfredo Lasagna, let it cool first. Then, place it in an airtight container. You can keep it in the fridge for up to three days. Make sure to cover the dish tightly to prevent it from drying out. If you want to freeze your lasagna, wrap it well in plastic wrap and then in foil. You can freeze it for up to three months. It’s best to freeze it before baking. When you're ready to eat it, thaw it in the fridge overnight. To reheat your lasagna, preheat your oven to 350°F (175°C). Place the lasagna in an oven-safe dish. Cover it with foil to keep it moist. Heat for about 25-30 minutes or until it’s hot all the way through. If you want a bubbly top, uncover it for the last 5-10 minutes. Enjoy your creamy Chicken Alfredo Lasagna! For the complete recipe, check out [Full Recipe]. Yes, you can use no-boil lasagna noodles. They save time and effort. Just layer them as you would regular noodles. They will cook in the oven with the sauce. This method keeps your lasagna moist and creamy. Chicken Alfredo Lasagna lasts about 3 to 5 days in the fridge. Make sure to store it in an airtight container. This keeps it fresh and tasty. Just reheat individual portions in the microwave or oven. Enjoy it warm, and it tastes almost as good as fresh! If you need substitutions, here are some easy swaps: - Use cottage cheese instead of ricotta. - Swap mozzarella for provolone for a bolder flavor. - Try a white sauce if you don’t have Alfredo. - You can replace chicken with cooked spinach for a veggie version. These changes still give you a great taste and texture in your lasagna. Check out the Full Recipe for more ideas! This blog post covered how to make Chicken Alfredo Lasagna, from ingredients to storage tips. I shared step-by-step instructions, helpful tricks, and tasty variations. With this guide, you can enjoy a rich, creamy dish that fits your needs, whether you're vegetarian or gluten-free. Remember to store any leftovers properly and try my tips for reheating. Get ready to savor this easy-to-make favorite!](https://dailydishlab.com/wp-content/uploads/2025/06/d9fb5a23-c67e-4c93-be8f-149e76ff08bb-768x768.webp)
