
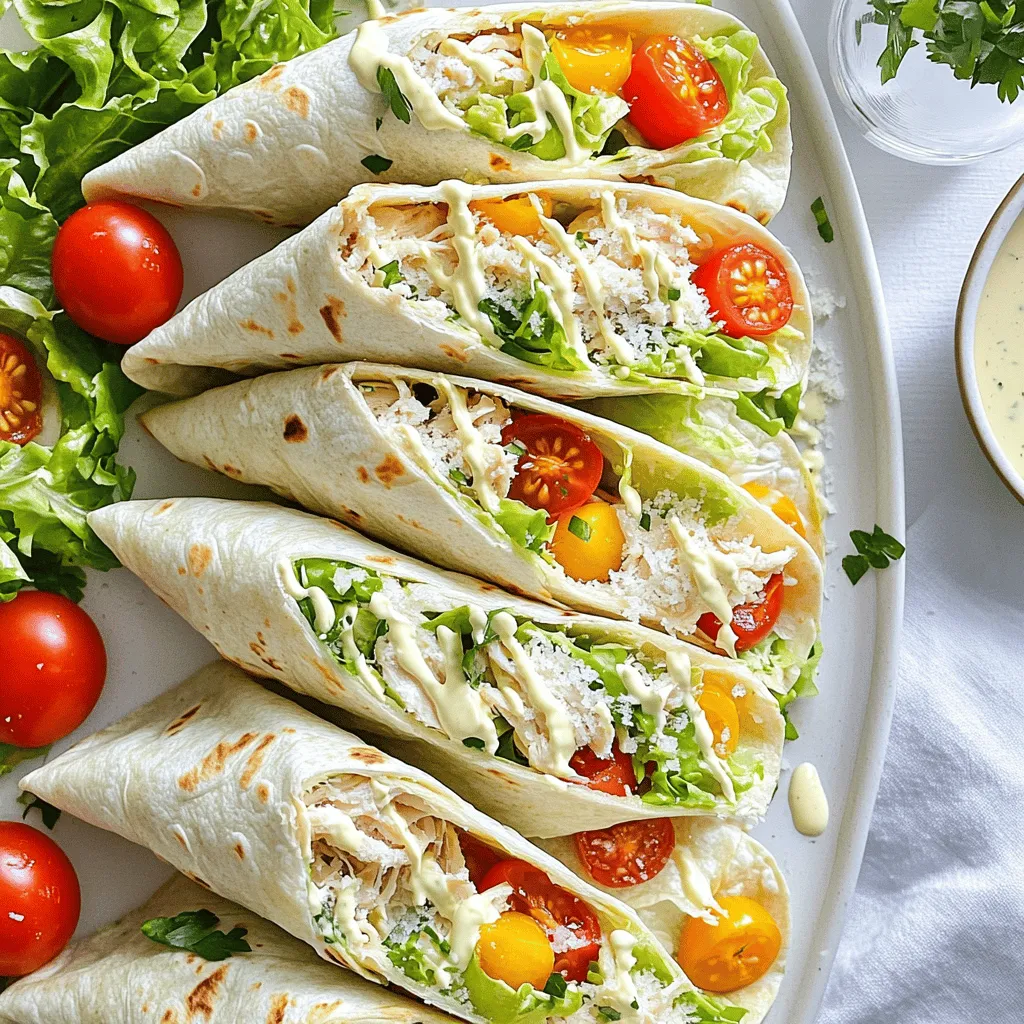
Craving a quick and tasty meal? Look no further than Easy Chicken Caesar Wraps! With simple ingredients and steps, you can enjoy a satisfying dish in no time. I’ll share how to customize your wraps and avoid common mistakes. Whether you need a nutritious lunch or dinner on the go, this recipe has you covered. Let’s dive in to make wraps that everyone will love!
Why I Love This Recipe
- Quick and Easy: This recipe takes just 15 minutes to prepare, making it perfect for busy weeknights or a quick lunch.
- Fresh Ingredients: Packed with fresh romaine lettuce and juicy cherry tomatoes, these wraps are a great way to enjoy healthy flavors.
- Customizable: You can easily customize these wraps with your favorite veggies or add-ins, such as avocado or grilled bell peppers.
- Portable and Fun: The wraps are easy to eat on the go, making them a fun option for picnics, road trips, or school lunches.
Ingredients
List of Required Ingredients
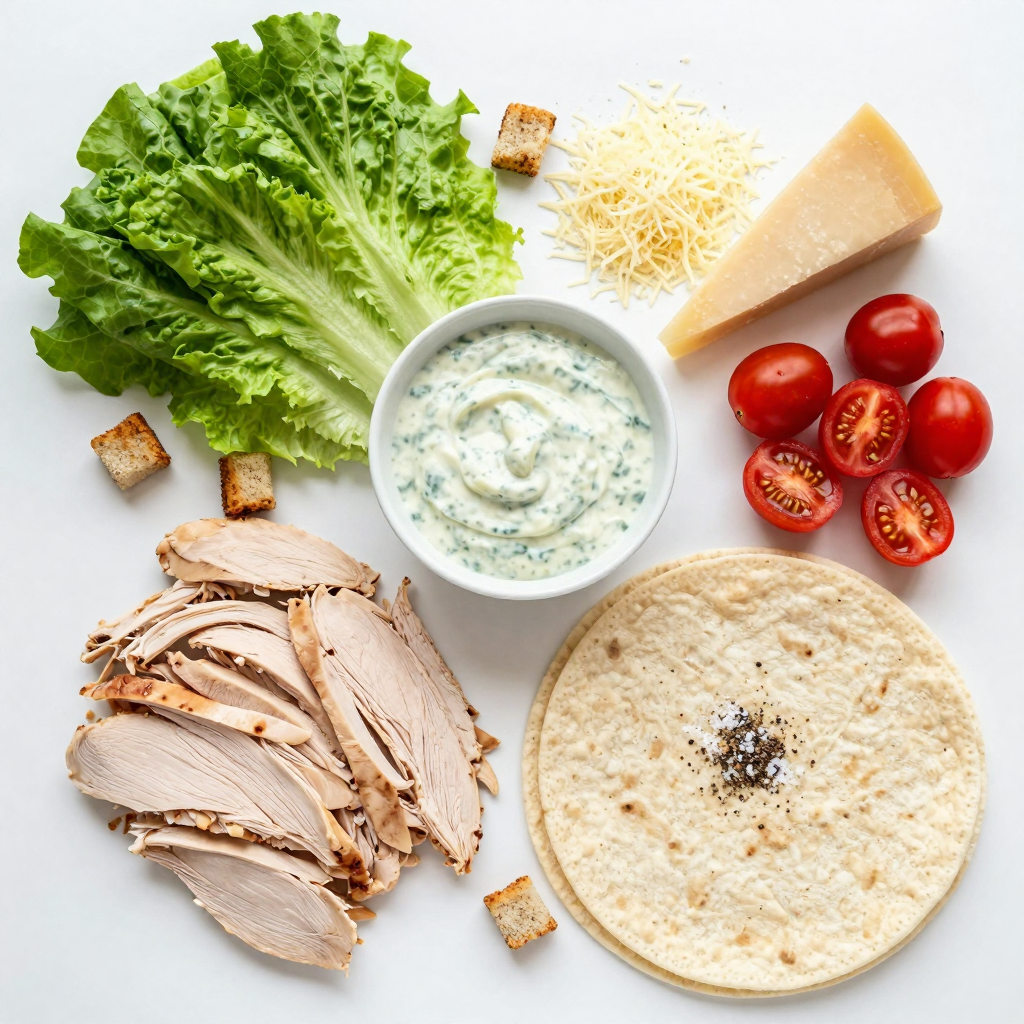
To make Easy Chicken Caesar Wraps, gather these simple ingredients:
– 2 cups cooked chicken, shredded or diced
– 1 cup romaine lettuce, chopped
– ½ cup Caesar dressing
– ½ cup grated Parmesan cheese
– 1 cup cherry tomatoes, halved
– 4 large whole wheat tortillas
– Salt and pepper to taste
Optional Ingredients for Customization
You can add your own twist to the wraps with these options:
– Croutons for crunch
– Avocado slices for creaminess
– Sliced cucumbers for freshness
– Grated carrots for color and flavor
Nutritional Information
These wraps are not just tasty; they are also nutritious. Here’s a quick look at the key nutritional facts per serving:
– Calories: 350
– Protein: 30g
– Carbohydrates: 35g
– Fat: 15g
– Fiber: 5g
This makes the Easy Chicken Caesar Wraps a balanced meal for lunch or dinner.
Step-by-Step Instructions
Preparation Process
First, gather your ingredients. You need cooked chicken, romaine lettuce, Caesar dressing, Parmesan cheese, cherry tomatoes, and tortillas. In a large bowl, mix the cooked chicken, chopped romaine, halved cherry tomatoes, and grated Parmesan. This mix brings the fresh flavors together. Drizzle the Caesar dressing over the mixture. Add salt and pepper to taste. Then, gently toss everything to coat well. This step is key for a tasty wrap.
Assembling the Wrap
Now it’s time to build your wrap. Lay a tortilla flat on a clean surface. Spoon the chicken Caesar mixture onto the center. Make sure to leave space at the edges. If you want extra crunch, sprinkle a few croutons on top. This adds a nice texture. Next, fold the sides of the tortilla inward. Then, roll it tightly from the bottom up. This keeps all the yummy filling inside. Repeat this with the remaining tortillas and filling. Finally, slice each wrap in half diagonally. This makes them easy to eat.
Tips for a Perfectly Wrapped Caesar Wrap
To make the best wraps, use fresh ingredients. Fresh lettuce and ripe tomatoes boost flavor. Make sure not to overfill the wraps. Too much filling can make them messy. When rolling, start tight but not so tight that the wrap tears. If you find it hard to roll, warm the tortillas slightly. This makes them more flexible. Serve the wraps on a platter with extra dressing for dipping. A sprinkle of Parmesan on top adds a nice touch.
Pro Tips
- Use Fresh Ingredients: Always opt for fresh romaine lettuce and ripe cherry tomatoes to enhance the flavor and texture of your wraps.
- Customize Your Wrap: Feel free to add other ingredients such as sliced cucumbers, bell peppers, or avocado for extra nutrition and taste.
- Perfect Tortilla Technique: Warm the tortillas slightly before wrapping to make them more pliable and easier to roll without tearing.
- Storage Tips: If making ahead, store the filling and tortillas separately to keep the wraps fresh and prevent sogginess.
Tips & Tricks
Suggestions for Serving
Serve your Easy Chicken Caesar Wraps with a side of crunchy veggie sticks. Carrot and cucumber sticks add freshness. You can also pair these wraps with a light soup for a warm touch. Consider a tomato basil soup or a creamy potato soup. For a fun twist, cut the wraps into pinwheels. This makes them great for parties or lunches.
Enhancements to Boost Flavor
To take your wraps up a notch, try adding more toppings. You can include sliced avocado for creaminess. Some diced red onion adds a nice bite. A sprinkle of fresh herbs, like parsley or basil, brightens the dish. If you love a bit of heat, add some sliced jalapeños. A squeeze of lemon juice gives a fresh pop too. You can also mix in some chopped olives for a briny flavor.
Common Mistakes to Avoid
Don’t skip the salt and pepper. They bring out the flavors in your wraps. Make sure your chicken is not too dry. Overcooked chicken can ruin the texture. When tossing the salad, do it gently. You want to keep the ingredients intact. If you over-mix, the wraps become mushy. Lastly, avoid overfilling your tortillas. Too much filling makes wrapping difficult and messy. Keep the filling within the edges for a clean wrap.
Variations
Vegetarian Options
You can easily change this recipe to make it vegetarian. Instead of chicken, use grilled veggies like bell peppers, zucchini, and mushrooms. You can also add chickpeas or black beans for protein. They give a great texture and flavor. Toss in your favorite veggies like cucumbers or carrots for extra crunch. This way, you can enjoy a tasty wrap that fits your diet.
Different Dressing Choices
While Caesar dressing is classic, you can try other dressings for a twist. Ranch dressing adds a creamy taste that works well with chicken. For a zesty kick, use a chipotle or avocado dressing. If you prefer a lighter option, a simple vinaigrette with lemon juice and olive oil is refreshing. Feel free to mix and match to find your favorite flavor.
Wrap Alternatives (Gluten-free, Low-carb)
If you want gluten-free wraps, look for corn or rice tortillas. They are just as tasty and hold the filling well. For a low-carb option, use lettuce leaves instead of tortillas. This makes a fresh and crunchy wrap. You can also try almond flour tortillas, which are low in carbs and high in fiber. These options keep your meal light while still being delicious.
Storage Info
Best Practices for Storing Leftovers
To keep your Easy Chicken Caesar Wraps fresh, store them in the fridge. Place them in an airtight container. This helps to keep them from drying out. Enjoy the wraps within 2-3 days for the best taste and texture. If you have extra dressing, store it separately. This way, the wraps stay crisp and tasty.
How to Reheat the Wraps
Reheating is simple. First, unwrap the tortilla. Place it on a microwave-safe plate. Heat it for 30 seconds to 1 minute. Check that it’s warm all the way through. If you prefer a crispy wrap, use a skillet. Heat it on medium for about 2-3 minutes on each side. This gives a nice crunch.
Freezing Instructions
You can freeze these wraps for later use. First, wrap each one tightly in plastic wrap. Then, place them in a freezer bag. Make sure to squeeze out as much air as possible. They can last up to 2 months in the freezer. When you’re ready to eat, thaw them in the fridge overnight before reheating.
FAQs
Can I make Easy Chicken Caesar Wraps ahead of time?
Yes, you can prepare these wraps in advance. Just make the filling and store it in the fridge. Keep the tortillas separate until you are ready to eat. This way, the wraps stay fresh and do not get soggy. I recommend eating them within 24 hours for the best taste.
What can I substitute for chicken in this recipe?
If you want a different protein, try grilled shrimp or diced turkey. For a vegetarian option, use chickpeas or grilled veggies. These swaps still give you great flavor and texture. You can even use tofu for a plant-based choice.
How can I make the wraps healthier?
To make the wraps healthier, you can use low-fat Caesar dressing. Opt for whole-grain tortillas instead of regular ones. Add more veggies like spinach or bell peppers for extra nutrients. You can also skip the cheese or use a smaller amount. This way, you keep the taste while lightening the meal.
This blog post covered everything you need to make tasty Easy Chicken Caesar Wraps. We explored the key ingredients and offered ways to personalize your wrap. You learned step-by-step instructions for preparation and assembly, plus tips for a perfect wrap. We also shared ideas for serving and flavor boosts. You discovered variations for different diets and storage tips to keep your leftovers fresh.
In summary, cooking wraps can be simple and fun. Experiment with flavors to make them your own. Enjoy your delicious wraps!


