Funfetti Cake Batter Dip Delightful and Easy Treat

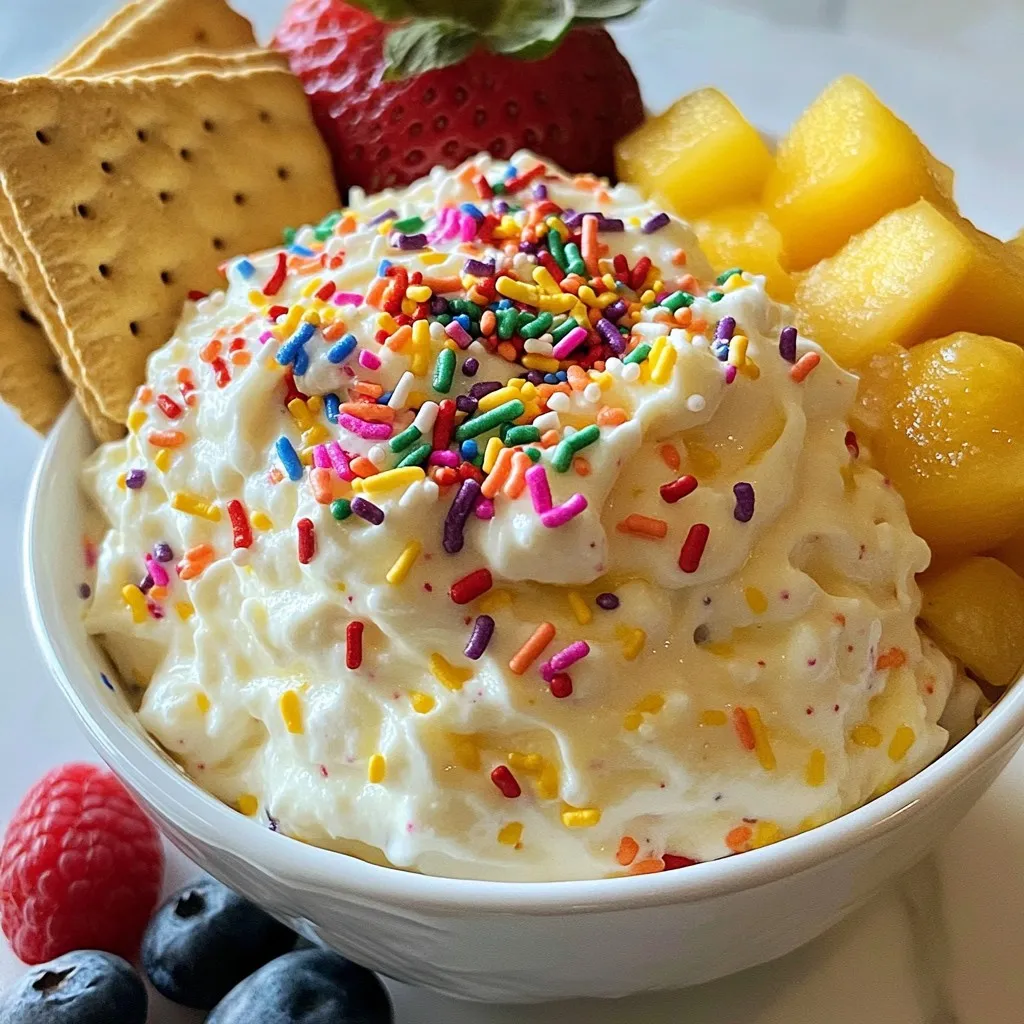
Looking for a fun and easy treat that will wow your friends? You’ll love this Funfetti Cake Batter Dip! This delightful dip mixes sweetness and fun into one tasty bowl. Perfect for parties, it’s creamy, colorful, and oh-so-simple to make. In this post, I’ll guide you through the ingredients, steps, and tips to create a dip that everyone will rave about. Let’s dive into this sweet adventure together!
Why I Love This Recipe
- Easy to Make: This dip comes together in just 10 minutes, making it perfect for last-minute gatherings or parties.
- Fun and Festive: The colorful sprinkles add a cheerful touch that brightens up any occasion, making it a hit with both kids and adults.
- Versatile Dipping Options: You can serve this dip with graham crackers, fresh fruits, or even pretzel sticks, allowing for a variety of tasty combinations.
- Decadently Delicious: With the rich flavors of cream cheese and butter combined with cake mix, this dip is a sweet treat that satisfies your dessert cravings.
Ingredients
List of Ingredients
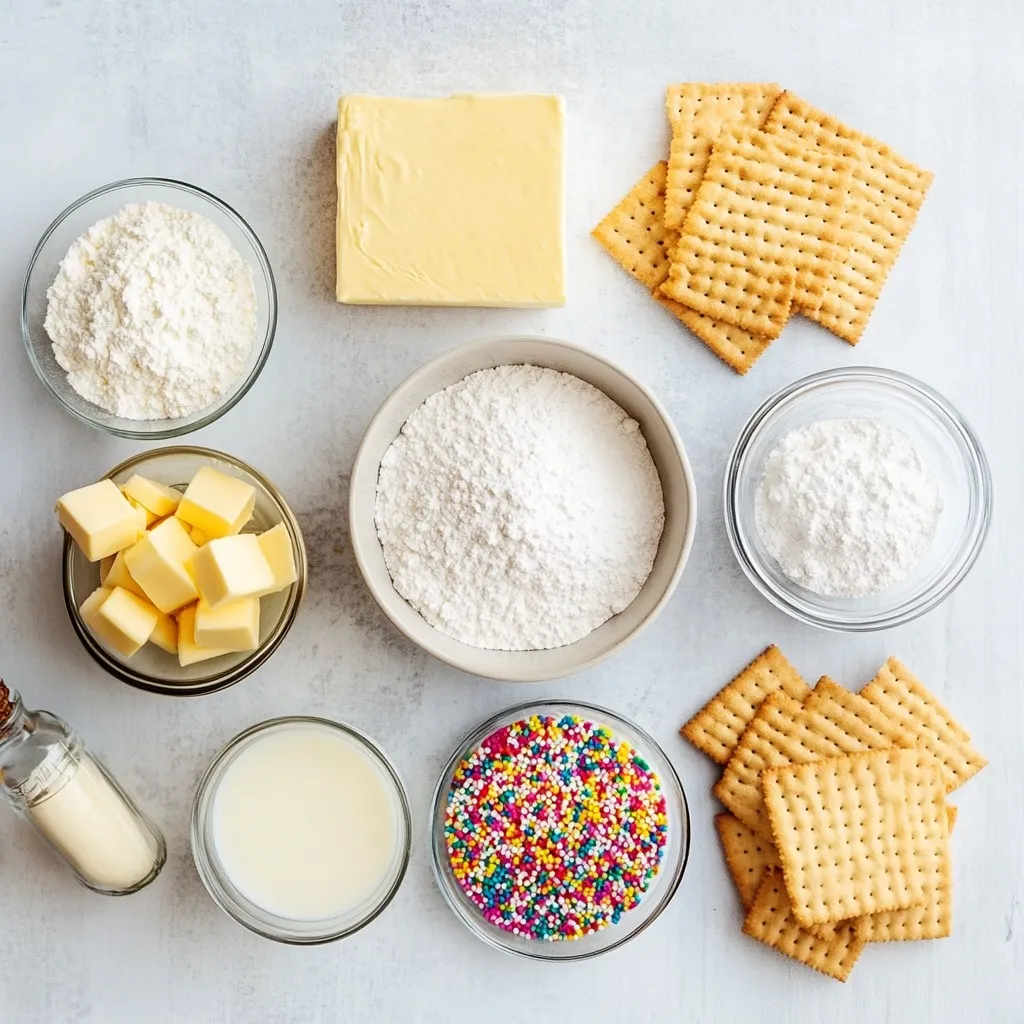
To make Funfetti Cake Batter Dip, gather these ingredients:
- 1 cup vanilla cake mix
- 1/2 cup cream cheese, softened
- 1/4 cup butter, softened
- 1/2 cup powdered sugar
- 1/4 cup milk
- 1 teaspoon vanilla extract
- 1/2 cup colorful sprinkles
- Graham crackers or fruit for dipping
Optional Dipping Options
You can try many fun options for dipping! Here are some ideas:
- Sliced strawberries
- Apple slices
- Pretzel sticks
- Mini cookies
- Marshmallows
These choices add more flavor and fun to your dip.
Notes on Ingredient Quality
Using high-quality ingredients makes a big difference. Choose fresh cream cheese and real butter for the best taste. Look for good vanilla extract, too. When picking cake mix, select a brand you enjoy. Quality sprinkles can add a nice pop of color to your dish. Always check expiration dates on your ingredients for the best results.

Step-by-Step Instructions
Preparation Overview
Making Funfetti cake batter dip is a breeze! First, gather all your ingredients. You will need cream cheese, butter, cake mix, powdered sugar, milk, vanilla extract, and sprinkles. This will make a tasty treat for any party or snack time.
Mixing Tips for a Smooth Texture
Start by mixing the softened cream cheese and butter in a medium bowl. Use an electric mixer to beat them until they are smooth. This helps the dip stay creamy. Next, slowly add the cake mix. Use low speed here to avoid a flour cloud. After that, pour in the milk and vanilla extract. Mix until it looks fluffy. Finally, add the powdered sugar and mix until everything is well combined. Your dip should be very smooth at this point.
Final Touches Before Serving
Gently fold in the colorful sprinkles. Save a few for the top! This gives the dip a fun look. Then, transfer the dip to a nice serving bowl. Sprinkle the reserved sprinkles on top for a pop of color. You can serve it chilled or at room temperature. Pair it with graham crackers or fresh fruit for dipping. Enjoy your delightful treat!
Tips & Tricks
How to Achieve the Best Flavor
To get the best flavor in your Funfetti Cake Batter Dip, always use fresh ingredients. Make sure your cream cheese and butter are soft. This helps them mix well. Use real vanilla extract for a richer taste. I like to add a bit more milk for a creamier dip. Mixing in a little extra sprinkle can also boost flavor and fun!
Storage Tips for Leftovers
If you have leftover dip, store it in an airtight container. Keep it in the fridge, where it will stay fresh for up to three days. If you plan to eat it later, let it sit at room temperature for about 30 minutes. This helps bring back its creamy texture. You can also give it a quick stir before serving!
Common Mistakes to Avoid
One common mistake is overmixing the dip. This can make it too runny. Always mix on low speed when adding cake mix. Another mistake is not measuring your ingredients. Accurate measurements help keep the flavor just right. Lastly, don’t skip the sprinkles! They add color and fun, making your dip extra special.
Pro Tips
- Use Room Temperature Ingredients: Ensure that your cream cheese and butter are at room temperature for easier mixing and a smoother dip.
- Customize Your Sprinkles: Feel free to use themed sprinkles for different occasions, such as holiday colors or birthday themes.
- Chill Before Serving: For the best flavor and texture, let the dip chill in the refrigerator for at least 30 minutes before serving.
- Experiment with Dip Options: In addition to graham crackers, try serving the dip with pretzels, cookies, or fresh fruits like strawberries and bananas.

Variations
Different Flavor Combinations
You can change up the funfetti cake batter dip easily. Try adding chocolate cake mix for a rich twist. You can also mix in peanut butter for a nutty flavor. Another fun idea is to use lemon cake mix for a zesty option. Each flavor adds a new layer of fun to your dip!
Healthier Alternative Ingredients
Want a healthier dip? Swap out cream cheese for Greek yogurt. This will give you a creamy texture with less fat. Use whole wheat cake mix instead of regular cake mix for more fiber. You can also use coconut milk for a dairy-free option. These swaps keep the dip tasty while making it a bit healthier.
Serving Suggestions for Different Occasions
You can serve this dip at many events. For birthday parties, use colorful sprinkles for a festive touch. If it’s a picnic, add fresh fruit for dipping. For game day, serve with pretzel sticks for a salty crunch. This dip fits any occasion and makes everyone smile!
Storage Info
Best Practices for Short-Term Storage
To keep your Funfetti cake batter dip fresh, place it in an airtight container. Make sure to seal it tightly. This will help keep the dip creamy and tasty. Store it in the fridge if you plan to eat it within a few days. Always use a clean spoon when serving to avoid contamination.
Freezing Options and Tips
You can freeze this dip, but it may change in texture. If you want to freeze it, scoop it into a freezer-safe container. Leave some space at the top for expansion. When ready to eat, thaw it in the fridge overnight. Stir it well before serving to restore its creamy goodness.
How Long Does It Last in the Fridge?
In the fridge, your Funfetti cake batter dip lasts about 5 days. After that, it may start to lose flavor and texture. Always check for any off smells or changes in color before enjoying it again. If you see any signs, it’s best to toss it. Enjoy your sweet treat while it’s fresh!
FAQs
Can I make this dip ahead of time?
Yes, you can make this dip ahead of time. Just prepare it and store it in the fridge. It stays fresh for up to three days. This makes it great for parties or snacks. Just remember to cover it well to keep it tasty.
What can I use instead of cream cheese?
If you want a different option, use Greek yogurt or mascarpone. Both give a nice creamy texture. Greek yogurt adds a tangy taste, while mascarpone is rich and smooth. These swaps still keep the dip delicious.
How do I make it gluten-free?
To make this dip gluten-free, choose a gluten-free cake mix. Many brands offer great options. Also, use gluten-free graham crackers or fruit for dipping. This way, everyone can enjoy the fun!
This blog post covers all you need to create a tasty dip. We talked about key ingredients, mixing tips, and storing leftovers. I shared ways to boost flavor and fix common mistakes. You can also explore fun variations for any occasion. Finally, I answered your common questions to make the process easier. Enjoy your dip-making journey, and remember, quality ingredients lead to the best tast

Funfetti Cake Batter Dip
Ingredients
- 1 cup vanilla cake mix
- 0.5 cup cream cheese, softened
- 0.25 cup butter, softened
- 0.5 cup powdered sugar
- 0.25 cup milk
- 1 teaspoon vanilla extract
- 0.5 cup colorful sprinkles
- to taste Graham crackers or fruit for dipping
Instructions
- In a medium mixing bowl, combine the softened cream cheese and butter. Beat them together using an electric mixer until smooth and creamy.
- Gradually add in the vanilla cake mix, mixing on low speed to avoid any flour dust clouds.
- Pour in the milk and vanilla extract. Continue to mix until combined and fluffy.
- Gradually add the powdered sugar and mix until fully incorporated and the dip becomes smooth.
- Gently fold in the colorful sprinkles, reserving a few for garnish.
- Transfer the dip to a serving bowl and sprinkle the reserved sprinkles on top for a festive touch.
- Serve chilled or at room temperature with graham crackers, sliced fruits, or pretzel sticks for dipping.


![- 1 cup rolled oats - 1/2 cup almond butter (or any nut butter of choice) - 1/4 cup honey or maple syrup These key ingredients form the base of your energy bites. Rolled oats provide fiber and texture. Almond butter gives healthy fats and protein. Honey or maple syrup adds natural sweetness. - 1/4 cup mini chocolate chips - 1/4 cup ground flaxseed - 1/4 cup shredded coconut (unsweetened) Mini chocolate chips add a delightful burst of flavor. Ground flaxseed boosts nutrition with omega-3s. Shredded coconut gives a chewy texture and tropical taste. - 1 tsp vanilla extract - 1/2 tsp cinnamon - A pinch of salt Vanilla extract enhances the overall flavor. Cinnamon adds warmth and depth. A pinch of salt balances the sweetness and brings all the flavors together. For the complete guide on making these bites, check out the [Full Recipe]. To start, gather your ingredients. For the dry mix, you need rolled oats, ground flaxseed, shredded coconut, and cinnamon. In a medium bowl, combine these dry ingredients. Mix them well so they blend nicely. Next, let's make the wet mix. In a separate bowl, add almond butter, honey (or maple syrup), vanilla extract, and a pinch of salt. Stir until it becomes smooth and creamy. This step is key for a good flavor. Now, pour the wet mix into the dry mix. Stir until you combine everything. You want all the dry ingredients to be coated with the wet mix. Finally, gently fold in mini chocolate chips. This adds a sweet delight to every bite. Now it’s time to shape your energy bites. Take about one tablespoon of the mixture. Roll it between your hands to form a ball. Make sure they are about the same size for even bites. Repeat this process until you use all the mixture. Place each ball on a parchment-lined baking sheet. This helps them not stick and makes clean-up easy. Keep them spaced out a bit to avoid sticking together. After shaping, place the baking sheet in the fridge. Let the energy bites chill for at least 30 minutes. This helps them firm up and hold their shape. Once chilled, store the bites in an airtight container. Keep them in the fridge for up to one week. Enjoy these tasty snacks whenever you need a quick energy boost, and don’t forget to check out the Full Recipe for more details! To boost the flavor of your energy bites, add spices like nutmeg or ginger. They give a warm kick. You can also try different extracts, like almond or coconut, for a unique taste. If you like it sweeter, adjust the honey or maple syrup. Just add a little at a time to find your perfect sweetness. For a better texture, focus on the consistency of your mixture. If it's too dry, add a touch more nut butter or honey. For crunchier bites, mix in chopped nuts or seeds. If you prefer them chewier, reduce the baking time slightly. This makes them softer and more enjoyable. Use a medium bowl for mixing your ingredients. A spatula works well for combining everything. To store your energy bites, an airtight container is best. It keeps them fresh longer. You can also use parchment paper to prevent sticking when chilling them in the fridge. For the full recipe, check out the [Full Recipe]. {{image_2}} You can easily make these energy bites fit your diet. For gluten-free options, use certified gluten-free oats. This way, you avoid any gluten while still enjoying a tasty snack. If you want vegan alternatives, swap honey for maple syrup. Both options keep the bites sweet and delicious. You can add fun flavors to your energy bites. Try mixing in dried fruits like raisins or cranberries. These add chewiness and natural sweetness. Nuts such as almonds or walnuts also work well. They add crunch and healthy fats. You can also experiment with different types of chocolate. Use dark, milk, or even white chocolate chips. Each type brings its own unique taste. Get creative with nut butters! While almond butter is great, you can try peanut butter or cashew butter. Each brings a different flavor and texture. You can also incorporate protein powder for a boost. This makes the bites even more filling and nutritious. Adjust the wet ingredients slightly if you add protein powder to keep the right texture. Feel free to explore these variations. They can help you make the perfect chocolate chip energy bites just for you. Check out the Full Recipe for the basic mix, then let your imagination lead the way! To keep your chocolate chip energy bites fresh, store them in an airtight container. Glass or plastic containers work well. Place them in the fridge to maintain their texture and taste. They can last up to one week when stored properly. You can freeze energy bites for longer storage. To freeze, place them in a single layer on a baking sheet. Once frozen, transfer them to a freezer-safe bag. This method prevents them from sticking together. When you want to eat them, take out a few bites and let them thaw in the fridge. This process takes about an hour. In the fridge, these bites last about one week. After that, they may lose flavor and texture. Watch for signs of spoilage, like an off smell or changes in color. If you see or smell anything unusual, it's best to toss them. Enjoy your homemade snacks while they’re fresh! Chocolate chip energy bites can last up to one week in the fridge. Store them in an airtight container for the best freshness. If you freeze them, they can last for about three months. Just thaw them in the fridge when you're ready to enjoy. Yes, you can easily substitute ingredients in this recipe. If you don't like almond butter, feel free to use peanut butter or sunflower seed butter. You can swap honey for maple syrup if you prefer a vegan option. The mini chocolate chips can also be replaced with dried fruits or nuts. Absolutely! These energy bites are a great snack for kids. They are tasty, healthy, and easy to make. You can even involve your kids in the preparation. They will love rolling the bites into balls. Just ensure there are no allergies to the ingredients used. Yes, making these energy bites in advance is a smart idea. You can prepare a batch at the start of the week. This way, you have quick snacks ready for busy days. Just store them in the fridge or freeze some for later use. Chocolate chip energy bites offer many nutritional benefits. They contain rolled oats, which provide fiber for digestion. Almond butter adds healthy fats and protein. Flaxseed is rich in omega-3 fatty acids, promoting heart health. Plus, the little bit of chocolate makes them a treat! These chocolate chip energy bites are simple to make and full of good stuff. You can enjoy them as snacks or quick breakfast bites. Let’s dive into what makes these little treats so special. - Rolled oats: They give a hearty base and provide fiber. - Almond butter (or nut butter alternatives): This adds creaminess and healthy fats. - Honey or maple syrup: Sweeteners that bring flavor and stickiness. - Mini chocolate chips: They add sweetness and a fun texture. - Ground flaxseed: This boosts nutrition and adds omega-3s. - Unsweetened shredded coconut: It gives a nice chewiness. - Vanilla extract: This enhances the flavor and warms the bites. - Cinnamon: It adds spice and depth. - Salt: Just a pinch balances all the flavors. In this recipe, we blend all these ingredients to create something delicious. You can find the [Full Recipe] at the start of this article. It only takes about 10 minutes to mix, and then just chill for 30 minutes. You’ll have about 12 bites ready to enjoy! Feel free to switch it up with your favorite nut butter or add different mix-ins. The options are endless! These chocolate chip energy bites are simple to make and full of flavor. We covered key ingredients like oats and nut butter. I shared tips on making them crunchier or chewier, and variations for different diets. Remember to store them in an airtight container for the best taste. You can enjoy these bites anytime you need a quick snack. Making them yourself lets you control the ingredients and flavors. Healthy snacks can be easy and delicious, so try these energy bites today!](https://dailydishlab.com/wp-content/uploads/2025/07/ee6487bc-f560-4f96-a21c-d76d52703957-768x768.webp)