Garlic Butter Shrimp Scampi Fresh and Flavorful Dish

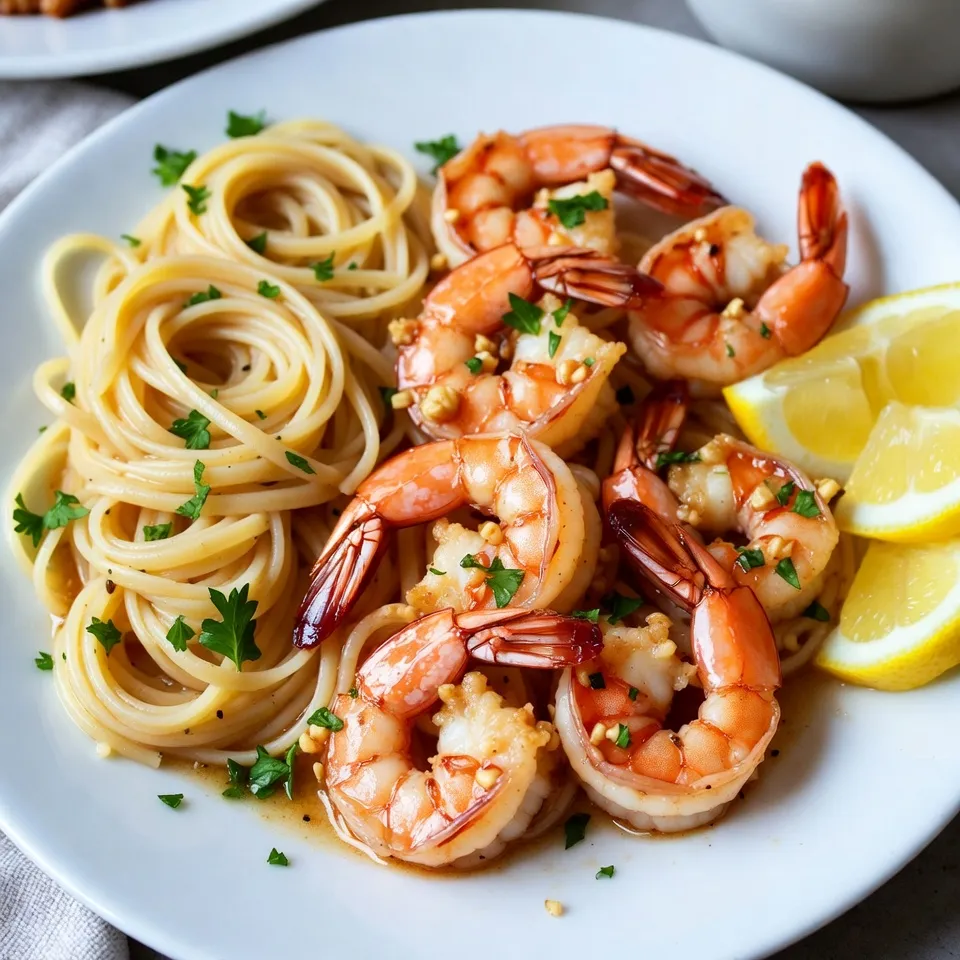
Garlic Butter Shrimp Scampi is a dish full of flavor and joy. If you love quick meals, this recipe is for you! It combines fresh shrimp, zesty lemon, and savory garlic in under 30 minutes. You will impress your friends and family without spending hours in the kitchen. Ready to learn how to make this tasty dish? Let’s dive into the ingredients and get cooking!
Why I Love This Recipe
- Quick and Easy: This recipe comes together in just 20 minutes, making it perfect for busy weeknights or last-minute dinner parties.
- Flavorful Twist: The addition of lemon zest and juice brightens up the classic garlic butter sauce, adding a refreshing zing to each bite.
- Customizable Heat: With adjustable red pepper flakes, you can easily control the spice level to suit your taste preferences.
- Impressive Presentation: This dish not only tastes amazing but also looks stunning on the plate, perfect for impressing your guests.
Ingredients
List of Ingredients
- 1 pound large shrimp, peeled and deveined
- 8 oz linguine or spaghetti
- 4 tablespoons unsalted butter
- 4 cloves garlic, minced
- 1 teaspoon red pepper flakes (adjust to taste)
- Zest and juice of 1 lemon
- 1/4 cup chicken or vegetable broth
- 1/4 cup freshly chopped parsley
- Salt and pepper to taste
- Lemon wedges for serving
When making garlic butter shrimp scampi, fresh ingredients make a big difference. The shrimp should be large and fresh for the best taste. I always prefer linguine for this dish, but spaghetti works too.
The unsalted butter adds richness. Using fresh garlic gives a strong flavor. Red pepper flakes add just the right kick, but you can adjust them to suit your taste.
The lemon zest and juice brighten the dish. Broth adds depth to the sauce and keeps it moist. Fresh parsley adds color and freshness. Salt and pepper are key for seasoning.
Optional Ingredients for Customization
- Different types of pasta
You can switch up the pasta type. Try penne or fettuccine for a new twist. Each pasta shape holds the sauce differently, giving you a unique texture.
Recommended Tools
- Large pot
- Skillet
You need a big pot for boiling the pasta. A skillet is a must for cooking the shrimp and making the sauce. Having the right tools makes cooking easier and more fun!

Step-by-Step Instructions
Cooking the Pasta
To cook linguine or spaghetti, start by boiling a large pot of salted water. The salt adds flavor to the pasta. Once the water is boiling, add the pasta. Cook it according to the package instructions until it is al dente. This usually takes 8 to 10 minutes. When the pasta is done, save 1/2 cup of the pasta water. Drain the pasta and set it aside.
Preparing the Shrimp
In a large skillet, melt 4 tablespoons of unsalted butter over medium heat. Once the butter melts, add 4 cloves of minced garlic and 1 teaspoon of red pepper flakes. Sauté this mix for about 30 seconds. You want to cook it until the garlic smells great, but don’t let it burn.
Creating the Sauce
Next, increase the heat to medium-high and add 1 pound of peeled and deveined shrimp to the skillet. Season the shrimp with salt and pepper. Cook the shrimp for 2 to 3 minutes on each side. They should turn pink and opaque when ready. After that, pour in 1/4 cup of chicken or vegetable broth, the zest, and juice of 1 lemon. Let this cook for 2 to 3 minutes to mix the flavors. If the sauce feels too thick, add some of the reserved pasta water.
Finishing Touch
Now, add the cooked pasta to the skillet with the shrimp. Toss everything together so the pasta gets coated well in the garlic butter sauce. Stir in 1/4 cup of freshly chopped parsley for a burst of color and flavor. Serve your delicious garlic butter shrimp scampi with lemon wedges on the side. Enjoy!
Tips & Tricks
Perfecting the Shrimp
To cook shrimp just right, start with fresh or thawed shrimp. Look for shrimp that are pink and firm. Cook them in a hot skillet with butter. This helps to seal in their flavor. You should cook the shrimp for 2-3 minutes on each side. They are done when they turn pink and opaque. Don’t overcook, or they will become tough.
Adjusting the Flavor
You can make this dish your own by changing the spice levels. If you like heat, add more red pepper flakes. Start with a small amount and taste as you go. Zesting the lemon adds a bright flavor. The zest gives that extra punch without making the dish sour. You can also squeeze in more lemon juice for added zest. This will brighten the dish even more.
Achieving the Right Sauce Consistency
The sauce should be rich but not too thick. If it seems too thick, add some of the reserved pasta water. This water has starch, which helps to create a silky sauce. Stir it in slowly until you reach your desired thickness. This step is key to making the dish creamy and smooth. It also helps to coat the pasta evenly for the best flavor.
Pro Tips
- Use Fresh Shrimp: For the best flavor and texture, opt for fresh shrimp over frozen. If using frozen, ensure they are fully thawed before cooking.
- Don’t Overcook the Shrimp: Shrimp cook quickly; be careful not to overcook them as they can become rubbery. They should be pink and opaque when done.
- Customize the Heat: Adjust the amount of red pepper flakes to your heat preference. You can also add fresh chili slices for an extra kick!
- Garnish with Lemon: A squeeze of fresh lemon juice right before serving brightens the dish and enhances the flavors. Don’t skip the lemon wedges!

Variations
Additions for Extra Flavor
You can change this dish by adding fresh veggies. Spinach brings a nice green color and rich taste. You can also toss in halved cherry tomatoes. They add sweetness and a pop of color. Simply sauté these with the garlic before adding shrimp. This makes your scampi more colorful and healthy.
Sauce Alternatives
You can switch up the sauce too. Try using white wine instead of broth. It adds a nice depth and a touch of acidity. If you prefer cream, that works well too. Cream gives the sauce a rich, smooth texture. Both options enhance the dish’s flavor in different ways.
Dietary Modifications
If you need gluten-free options, you have choices. Look for gluten-free pasta made from rice or corn. These alternatives cook well and hold the sauce nicely. You can enjoy all the flavors without worrying about gluten. This makes the dish accessible for everyone.
Storage Info
Storing Leftovers
To keep your garlic butter shrimp scampi fresh, store it in the fridge. Use an airtight container to avoid any smell from other foods. It stays good for about 2 to 3 days. Make sure to let it cool to room temperature before sealing. This helps keep the shrimp safe and tasty.
Reheating Tips
When you reheat leftovers, do it slowly. Use a skillet on low heat. Add a splash of broth or water to keep it moist. Stir often to heat evenly. You can also use a microwave, but cover it loosely to prevent drying out. Heat in short bursts, stirring in between. This way, the flavor stays strong.
Freezing Instructions
Yes, you can freeze garlic butter shrimp scampi, but it’s best to freeze only the shrimp and sauce. Cooked pasta does not freeze well. Store the shrimp and sauce in a freezer-safe container. It can last up to 2 months. Thaw in the fridge overnight before reheating. This helps keep the taste and texture just right.
FAQs
What is Garlic Butter Shrimp Scampi?
Garlic butter shrimp scampi is a quick and tasty dish. It features shrimp cooked in garlic and butter. This dish often uses pasta. The flavors blend well and create a rich, savory sauce. It comes from Italian cooking but has become popular worldwide. The bright lemon adds freshness, making it a favorite for many.
Can I use frozen shrimp for this recipe?
Yes, frozen shrimp work well for this recipe. Make sure to thaw them first. You can do this by placing them in cold water for about 15 minutes. After thawing, drain and pat them dry. This step helps the shrimp cook evenly. If you use frozen shrimp, adjust the cooking time slightly. Cook them just until pink and opaque.
How can I make Garlic Butter Shrimp Scampi spicier?
To add heat, increase the red pepper flakes. You can also use fresh chopped chili peppers. Another option is to drizzle some hot sauce on top before serving. Just be careful not to overpower the dish. Balance is key to enhance the garlic and lemon flavors. Always taste as you go to find your perfect spice level.
This blog post shared a simple recipe for Garlic Butter Shrimp Scampi. You learned about key ingredients, step-by-step cooking, and helpful tips for perfecting the dish. Don’t forget to try different pasta or add vegetables for flavor. Storing leftovers properly keeps your meal fresh. Remember, you can adjust spice levels to meet your taste. Experimenting makes cooking fun! Enjoy making this dish and savoring it with family or friends. Good cooking brings joy, and with this recipe, you can create something specia

Garlic Butter Shrimp Scampi with a Zesty Twist
Ingredients
- 1 pound large shrimp, peeled and deveined
- 8 oz linguine or spaghetti
- 4 tablespoons unsalted butter
- 4 cloves garlic, minced
- 1 teaspoon red pepper flakes
- 1 lemon zest and juice
- 1 4 cup chicken or vegetable broth
- 1 4 cup freshly chopped parsley
- to taste salt and pepper
- for serving lemon wedges
Instructions
- In a large pot of salted boiling water, cook the linguine or spaghetti according to package instructions until al dente. Reserve 1/2 cup of pasta water, then drain and set aside.
- In a large skillet, melt the butter over medium heat. Add the minced garlic and red pepper flakes, sautéing for about 30 seconds until fragrant.
- Increase the heat to medium-high and add the shrimp to the skillet. Season with salt and pepper, then cook for 2-3 minutes on each side until the shrimp are pink and opaque.
- Pour in the chicken or vegetable broth, lemon zest, and lemon juice. Let the mixture simmer for 2-3 minutes, allowing the flavors to meld. If the sauce is too thick, you can add a bit of the reserved pasta water to reach your desired consistency.
- Add the cooked pasta directly into the skillet with the shrimp, tossing everything together until the pasta is well coated with the garlic butter sauce. Stir in the chopped parsley.
- Plate the scampi and garnish with additional parsley and lemon wedges. Enjoy your delicious garlic butter shrimp scampi!


![- 1 lb ground beef or turkey - 1 small onion, diced - 2 cloves garlic, minced - 1 packet taco seasoning - 1 cup diced tomatoes (canned or fresh) The base of our Loaded Cheesy Taco Skillet starts with ground beef or turkey. You can choose either, but I prefer ground turkey for a lighter meal. Next, we add a small diced onion and two cloves of minced garlic. These add flavor and aroma to the dish. Taco seasoning gives a rich taste. Don't forget the diced tomatoes! They add moisture and freshness. - 1 cup black beans, drained and rinsed - 1 cup corn (canned or frozen) - 1 cup bell peppers, diced (mix of colors for vibrancy) - 1 ½ cups shredded cheddar cheese - 1 cup sour cream - 2 green onions, sliced (for garnish) - Fresh cilantro, chopped (for garnish) Now, let’s add some color and nutrition! Black beans and corn bring a nice texture. Bell peppers add crunch and sweetness. I love to use a mix of colors for a pop! We need a cheesy topping, so grab some shredded cheddar cheese. It melts beautifully. For serving, sour cream cools the dish, while green onions and fresh cilantro make it look pretty and bright. - Best types of tortilla chips - Ideal accompaniments or side dishes When serving, use sturdy tortilla chips. They hold up well for scooping. Pair this skillet meal with a fresh side salad or some guacamole for extra flavor. You can also add some salsa for a zesty kick. Enjoy this dish with family and friends, and don’t forget to share the Full Recipe! Start with a large skillet over medium heat. Add 1 pound of ground beef or turkey. Cook it until it turns brown, which takes about 5 to 7 minutes. Make sure to break it apart with a spatula as it cooks. This helps it cook evenly. Once the meat is browned, add 1 small diced onion and 2 minced garlic cloves. Sauté these for 3 to 4 minutes. You want the onion to become soft and translucent. This step adds a nice flavor base to your dish. Next, stir in a packet of taco seasoning. Mix in 1 cup of diced tomatoes, 1 cup of black beans (drained and rinsed), 1 cup of corn (canned or frozen), and 1 cup of diced bell peppers. Mix everything well, so the flavors blend. Allow this mixture to simmer for about 5 to 8 minutes. Simmering helps all the flavors meld together, making your dish even tastier. Now, preheat your oven to 350°F (175°C). After simmering, take the skillet off the heat. Sprinkle 1 ½ cups of shredded cheddar cheese evenly over the top. Place the skillet in the oven for about 10 minutes. You want the cheese to melt and become bubbly. Once it's done, let it cool slightly. Then, add dollops of 1 cup of sour cream on top. Finish with sliced green onions and chopped fresh cilantro. Serve with tortilla chips on the side for scooping. For the full recipe, click [Full Recipe]. To keep your meat juicy, don't cook it too long. Ground beef or turkey cooks fast. Stir it often to break it apart. This helps it cook evenly. Use taco seasoning to boost flavor. I love adding extra spices like cumin and paprika. These spices add depth and warmth. A pinch of chili powder can add a nice kick too. Layering is key for a great look. Start with the meat on the bottom. Then, add beans and corn evenly. Top it off with the cheese. When melted, it looks lovely! Colorful garnishes make a big impact. Use bright green cilantro and green onions. A dollop of white sour cream adds contrast. These colors catch the eye and make the dish pop. Tortilla chips are perfect for scooping. Choose sturdy chips to hold the weight. You can also serve some chips on the side for dipping. Portion sizes matter. Aim for ½ to ¾ cup per person. This way, everyone gets enough without waste. Adjust based on your family’s appetite! For the full recipe, check out the Loaded Cheesy Taco Skillet. {{image_2}} You can easily change the protein in this dish. Ground chicken or turkey work well. If you want a meat-free meal, try using black beans or pinto beans. Both options add great texture and flavor. You can also add extra veggies like zucchini or spinach. These swaps keep the meal fresh while still being hearty. For those who like it spicy, add sliced jalapeños or a splash of hot sauce. These ingredients give a nice kick. If you have kids or prefer milder flavors, skip the heat. Instead, you can use sweet bell peppers or a bit of mild salsa. This makes the dish family-friendly while still being tasty. Think about adding spices from other cuisines. You can mix in taco seasoning with chili powder or cumin for a deeper flavor. Want to try something different? Incorporate Italian herbs like oregano and basil. These spices create a fusion twist that surprises the taste buds. You can make it your own by mixing flavors from around the world. Explore the [Full Recipe] for more ideas and details! To store leftovers, let the Loaded Cheesy Taco Skillet cool first. Then, place it in an airtight container. This keeps it fresh for later meals. When reheating, use a microwave or stovetop. Heat it gently to avoid drying it out. You can freeze this dish for future meals. Let it cool completely, then transfer it to a freezer-safe container. Be sure to label it with the date. It will keep well for about three months. For best flavor, eat it within this time frame. In the fridge, your Loaded Cheesy Taco Skillet lasts about three to four days. Look for signs of spoilage, like a sour smell, mold, or change in color. If you see any of these signs, it’s best to toss it out. Enjoy your meal safely! You can serve many tasty sides with this dish. Here are some ideas: - Mexican rice: Fluffy and flavorful, it pairs well with the skillet. - Refried beans: Creamy and rich, they add a nice touch. - Guacamole: Fresh and creamy, it adds a cool contrast. - Simple salad: A mix of greens, tomatoes, and a light dressing works great. - Cornbread: Sweet and soft, it complements the savory flavors. Yes, you can prep Loaded Cheesy Taco Skillet in advance. Here’s how: - Cook the meat: Prepare the ground beef or turkey and let it cool. - Chop veggies: Dice onions, garlic, and peppers ahead of time. - Mix it up: Combine all the ingredients until you’re ready to bake. - Store in the fridge: Keep it in an airtight dish for up to two days. - Bake when ready: Just add cheese and bake before serving. Absolutely! You can make it vegetarian-friendly by swapping a few ingredients: - Use beans: Replace meat with black beans or pinto beans for protein. - Add more veggies: Try zucchini, mushrooms, or spinach for extra flavor. - Use a meat substitute: Choose plant-based ground meat for a similar texture. - Top with cheese: Use your favorite cheese or a plant-based option for a creamy layer. The Loaded Cheesy Taco Skillet is a fun and tasty dish. We explored key ingredients like ground beef, cheese, and fresh veggies, combining them for rich flavor. You can tweak this dish with different proteins and spice levels. Don’t forget tips on storage and serving suggestions for the best experience. Enjoy making this dish at home, impressing friends and family alike. With a few simple steps, you create a crowd-pleaser that’s easy and rewarding. Happy cooking!](https://dailydishlab.com/wp-content/uploads/2025/07/b0f98873-f356-44f9-8ffc-552e70b38ff9-768x768.webp)


![To make the savory Southwest quinoa salad, gather these fresh and vibrant ingredients. Each one plays a crucial role in flavor and texture. - Quinoa and Broth - 1 cup quinoa, rinsed - 2 cups vegetable broth or water - Vegetables and Beans - 1 cup black beans, rinsed and drained - 1 cup corn (fresh or frozen) - 1 red bell pepper, diced - 1 small red onion, finely chopped - 1 avocado, diced - 1/4 cup fresh cilantro, chopped - Dressing Elements - 1 lime, juiced - 3 tablespoons olive oil - 1 teaspoon cumin - 1/2 teaspoon smoked paprika - Salt and pepper to taste These ingredients come together to create a colorful and nutritious salad. The quinoa offers protein and fiber, while the beans and vegetables add crunch and flavor. Using vegetable broth instead of water enhances the taste of the quinoa. The lime juice and spices in the dressing provide a zesty kick. For the full recipe, check out the [Full Recipe]. Preparing the Cooking Liquid Start by rinsing 1 cup of quinoa under cold water. This step removes the bitter coating called saponin. Next, combine the rinsed quinoa with 2 cups of vegetable broth or water in a medium saucepan. This liquid adds flavor and helps the quinoa cook well. Simmering the Quinoa Bring the mixture to a boil over high heat. Once it boils, reduce the heat to low. Cover the saucepan and let it simmer for about 15 minutes. You will know it is ready when the quinoa is fluffy and the liquid is absorbed. Cooling the Quinoa After cooking, remove the saucepan from heat. Let the quinoa cool for a few minutes. This cooling step is important before combining it with the other salad ingredients. Combining the Vegetables and Beans In a large mixing bowl, add 1 cup of black beans (rinsed and drained), 1 cup of corn (fresh or frozen), 1 diced red bell pepper, 1 finely chopped small red onion, and 1 diced avocado. Stir these ingredients together well. Fluffing the Quinoa Once the quinoa has cooled, fluff it with a fork. This makes it light and airy. Add the fluffed quinoa to the large bowl with the vegetables and beans. Adding the Dressing In a small bowl, whisk together the juice of 1 lime, 3 tablespoons of olive oil, 1 teaspoon of cumin, and 1/2 teaspoon of smoked paprika. Season with salt and pepper to taste. Pour this dressing over the quinoa and vegetable mixture. Toss everything together gently until it is well combined. Incorporating Cilantro Chop 1/4 cup of fresh cilantro and stir it into the salad. This herb adds freshness and bright flavor. Adjusting Seasoning Taste the salad and adjust the seasoning if needed. You can add more salt, pepper, or lime juice to suit your taste. Presentation Tips Serve the salad chilled or at room temperature. You can present it in a large bowl with lime wedges on the side. For an appealing look, garnish with extra cilantro leaves and a sprinkle of smoked paprika on top. For the full recipe, check out the details above. Enjoy your delicious Southwest Quinoa Salad! Rinsing Techniques Rinsing quinoa is key. It removes the bitter coating called saponin. Use a fine mesh strainer to rinse the quinoa under cold water. Swirl it around for about 30 seconds. This step makes a big difference in taste. Cooking Time Suggestions Cook quinoa carefully. Bring your broth or water to a boil first. Then, reduce the heat and cover it. Let it simmer for about 15 minutes. Once the liquid is absorbed, fluff it with a fork. This gives you light and fluffy grains. Additional Seasoning Options You can boost flavor easily. Try adding garlic powder or chili powder for a kick. Fresh herbs like dill or parsley can also enhance taste. Adjust the salt and pepper as needed. Recommended Serving Suggestions Serve the salad cold or at room temperature. I love adding lime wedges for a fresh burst. You can also top it with extra cilantro or avocado slices. This makes your dish look even better and taste divine. For the full recipe, check out the details above. {{image_2}} You can boost your salad with extra proteins. Tofu, chickpeas, or tempeh work great. These options add texture and flavor. You can also use nuts like almonds or walnuts. They bring a nice crunch and healthy fats. Feel free to swap in other veggies to fit your taste. Zucchini, cherry tomatoes, or spinach can add freshness. You can even try roasted sweet potatoes for a sweet twist. Mixing colors makes the salad pop and look inviting. To turn up the heat, add diced jalapeños or a splash of hot sauce. This spicy kick adds depth and excitement. You can also use chili powder or cayenne pepper in the dressing for a fiery flavor. For a Mediterranean twist, replace the cilantro with fresh parsley. You can add feta cheese for creaminess. Toss in olives or artichoke hearts for extra flavor. This variation gives a fresh taste that brightens the classic recipe. Try these variations to keep your Southwest quinoa salad exciting. Discover new flavors while enjoying a healthy meal! For more ideas, check out the Full Recipe. Refrigeration Tips After making your Southwest Quinoa Salad, let it cool if it’s warm. Place it in an airtight container. It lasts in the fridge for up to five days. To keep it fresh, avoid adding avocado until you serve it. This prevents browning. Freezing Instructions You can freeze the salad, but some ingredients may change. For best results, freeze the quinoa and beans separately. Use a freezer-safe container and label it with the date. It can last for about three months in the freezer. Thaw overnight in the fridge before using. Best Methods for Reheating When reheating, avoid the microwave if possible. Instead, warm it on the stove over low heat. Add a splash of water or broth to keep it moist. Stir gently until heated through. If using the microwave, heat in short bursts, stirring in between. Recipe Reuses This salad is versatile. You can add it to wraps or tacos for a meal. Mix it into soups or grain bowls for extra nutrition. It also makes a great topping for baked potatoes or a side dish for grilled meats. Quinoa is a small, round seed that cooks like a grain. It comes in many colors, like white, red, and black. Quinoa is a complete protein. This means it has all nine essential amino acids. Each cup of cooked quinoa has about 8 grams of protein. It is also high in fiber, iron, and magnesium. These nutrients help with digestion and energy levels. Using quinoa in salads adds a nice texture. It makes the salad filling and nutritious. Plus, quinoa absorbs flavors well, making it perfect for dressings and spices. Yes, you can make this salad ahead of time! It stores well in the fridge for up to 3 days. When preparing for meal prep, cool the salad first. Place it in an airtight container. This keeps it fresh and safe to eat. If you want to add avocado, do this right before serving. This keeps it from browning and losing flavor. This salad pairs nicely with many dishes. You can enjoy it with grilled chicken or shrimp. It also goes well with tacos or burritos. Complementary flavors include lime, cilantro, and spicy peppers. These flavors enhance the taste of the salad. For a balanced meal, serve it with a light soup or a fresh fruit salad. For the full recipe, check out the Southwest Quinoa Salad section above. This blog post shares how to make a tasty Southwest Quinoa Salad. We covered the main ingredients, like quinoa, veggies, and dressing. I guided you through cooking, mixing, and perfecting the salad. Tips for flavor and texture help you create the best dish. With options for variations and storage advice, you can enjoy this salad anytime. Remember, meal prep helps save time. Try this recipe to delight your taste buds and impress your friends!](https://dailydishlab.com/wp-content/uploads/2025/07/3ab8b3fd-78de-4e54-929d-2e7840f55583-768x768.webp)