Garlic Butter Shrimp Skewers Tasty Grilled Delight

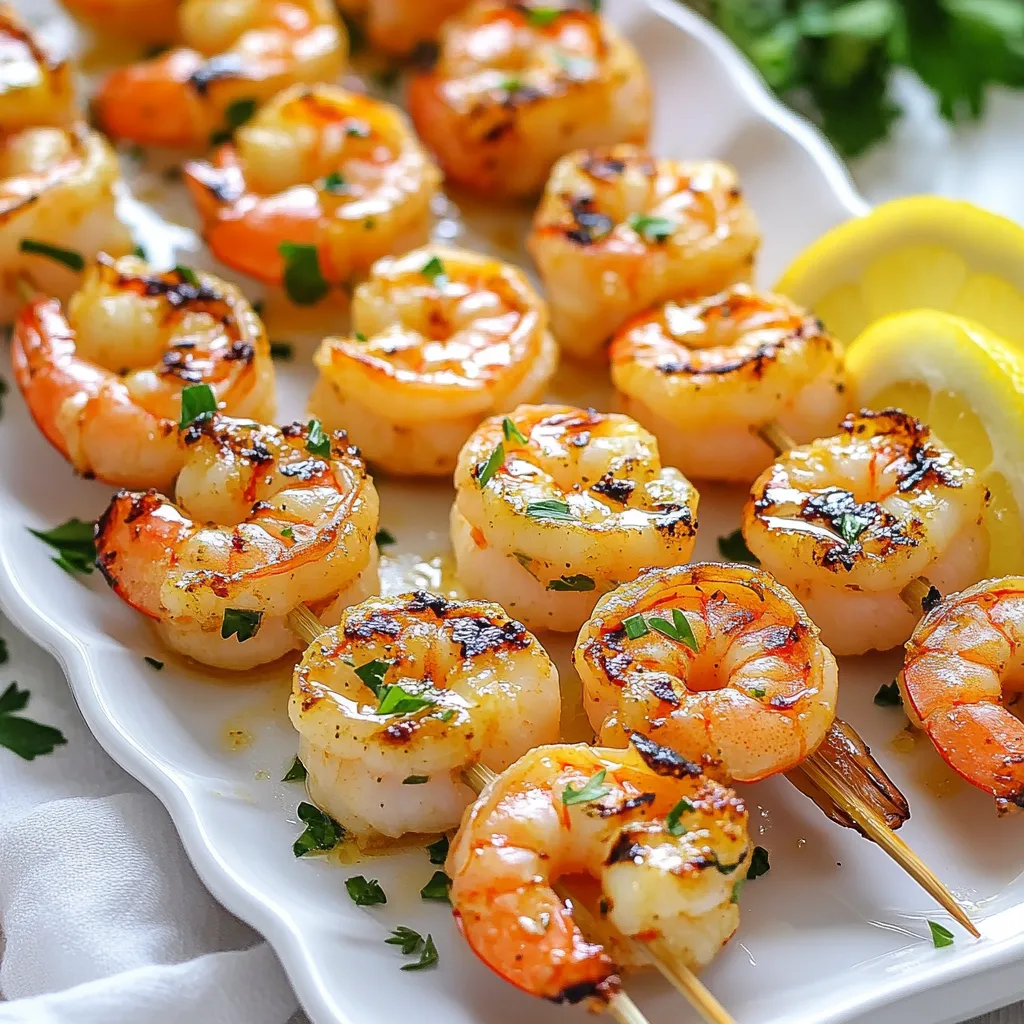
Get ready to fire up your grill for a tasty treat! Garlic Butter Shrimp Skewers are simple to make and bursting with flavor. You’ll love how easy it is to mix garlic, butter, and spices with fresh shrimp. This dish is perfect for any meal or a summer get-together. Follow my step-by-step guide to bring this delicious delight to your table. Let’s dive into the ingredients and get cooking!
Why I Love This Recipe
- Quick and Easy: This recipe comes together in just 30 minutes, making it perfect for a weeknight dinner or a last-minute gathering.
- Flavor-Packed: The combination of garlic, butter, and lemon juice creates a mouthwatering marinade that enhances the natural sweetness of the shrimp.
- Grill-Friendly: These skewers are ideal for grilling, allowing for smoky flavors and a delightful char that adds to the dish’s appeal.
- Customizable: You can easily adapt this recipe by adding your favorite vegetables or spices to the skewers for an even more personalized dish.
Ingredients
Main Ingredients
- 1 lb large shrimp, peeled and deveined
- 4 cloves garlic, minced
- 1/2 cup unsalted butter, melted
- 2 tablespoons fresh parsley, chopped
- 1 tablespoon lemon juice
- 1 teaspoon paprika
- Salt and pepper to taste
- Skewers (soaked in water if using wooden ones)
Optional Ingredients
- Additional spices (e.g., cayenne for heat)
- Fresh herbs for garnish
- Vegetables for skewering (e.g., bell peppers, zucchini)
The main ingredients make this dish shine. You need large shrimp, peeled and deveined, for the best flavor. Garlic adds depth, while melted butter creates a rich base. Fresh parsley brings a bright touch. Lemon juice adds zing, and paprika gives color and warmth. Don’t forget salt and pepper for seasoning! If you use wooden skewers, soak them in water. This prevents burning during grilling.
Optional ingredients can enhance your skewers. If you like heat, add cayenne pepper. You can also use fresh herbs like cilantro or basil for garnish. Grilled vegetables like bell peppers or zucchini make perfect partners for the shrimp. Feel free to get creative!

Step-by-Step Instructions
Preparation Steps
1. Create the garlic butter marinade
In a mixing bowl, combine the melted butter, minced garlic, chopped parsley, lemon juice, paprika, salt, and pepper. Stir well until mixed. This marinade gives the shrimp a big flavor boost.
2. Marinate the shrimp for flavor enhancement
Add the shrimp to the bowl and toss them until they are fully coated. Let them sit for 15-20 minutes. This step allows the shrimp to soak up all the tasty flavors from the marinade.
Cooking Steps
1. Preheat the grill or grill pan
Set your grill or grill pan to medium-high heat. A hot grill ensures that the shrimp cook quickly and evenly.
2. Thread shrimp onto skewers
Take the marinated shrimp and thread them onto skewers. Aim for about 4-5 shrimp per skewer. Leave a little space between each shrimp to help them cook well.
3. Grill the shrimp to perfection
Place the skewers on the grill. Cook for about 2-3 minutes on each side. The shrimp should turn pink and opaque. Be careful not to overcook them, as they can become tough. Once done, drizzle any leftover garlic butter from the bowl over the skewers for extra flavor.
Tips & Tricks
Marinating Tips
The best time to marinate shrimp is 15-20 minutes. This gives the shrimp time to soak up the flavors. If you marinate too long, the shrimp can turn mushy. Choose large shrimp for this recipe. They hold up well on the grill and taste great. Look for shrimp that are firm and smell fresh. Peel and devein them for a clean taste.
Grilling Tips
To prevent shrimp from overcooking, watch the clock. Grill them for just 2-3 minutes on each side. They turn pink and opaque when done. Remove them from heat right away. For even cooking, leave space between shrimp on the skewers. This way, the heat circulates and cooks them well. Soak wooden skewers in water before grilling. This keeps them from burning.
Pro Tips
- Buy Fresh Shrimp: Always choose fresh shrimp for the best flavor. Look for shrimp that are firm, translucent, and have a mild sea scent.
- Don’t Overcook: Shrimp cook very quickly; remove them from the grill as soon as they turn pink and opaque to avoid a rubbery texture.
- Use Soaked Skewers: If using wooden skewers, soak them in water for at least 30 minutes before grilling to prevent them from burning.
- Add Zest: For an extra layer of flavor, consider adding a teaspoon of lemon zest to the marinade along with the lemon juice.

Variations
Flavor Variations
You can change the flavor of your garlic butter shrimp skewers in fun ways. For a kick, try spicy garlic butter shrimp. Just add a pinch of cayenne pepper to your marinade. This little spice will give your dish a nice heat. You can adjust the heat level based on your taste.
Another great option is citrus-infused garlic butter. Add some fresh orange or lime juice to the marinade. The citrus will brighten the flavors. It pairs well with the shrimp and garlic. You can also add some zest from the fruit for extra flavor. Both variations keep the dish fresh and exciting.
Serving Suggestions
To make your meal even better, pair the skewers with grilled vegetables. Bell peppers, zucchini, and cherry tomatoes are great choices. Grill them alongside your shrimp for a colorful plate. The smoky flavor of the veggies mixes well with the shrimp.
You might also want to serve your skewers with a light salad. A fresh green salad with lemon vinaigrette works well. It adds a crisp contrast to the rich garlic butter. Rice or quinoa can also be great side dishes. Both options soak up the flavors and make your meal more filling. Enjoy your tasty shrimp skewers in any of these ways!
Storage Info
Refrigeration Tips
To store leftover shrimp skewers, let them cool down first. Place the skewers in an airtight container. You can keep them in the fridge for up to two days. If you want to keep the shrimp moist, drizzle a little olive oil over them before sealing. This helps prevent drying out.
Freezing Instructions
For freezing cooked shrimp skewers, remove the shrimp from the skewers. Lay them flat in a single layer on a baking sheet. Freeze until solid, then transfer them to a freezer bag. This keeps them from sticking together. They can last up to three months in the freezer. When ready to eat, thaw them in the fridge overnight before reheating.
FAQs
Can I use frozen shrimp for this recipe?
Yes, you can use frozen shrimp. Just thaw them before cooking. Place the shrimp in a bowl of cold water for about 15-20 minutes. Once they are thawed, peel and devein them if needed. This way, you can still enjoy the garlic butter flavor!
How do I know when the shrimp are fully cooked?
You know shrimp are cooked when they turn pink and opaque. They should also curl slightly into a C shape. If they remain gray or translucent, they need more time. Avoid overcooking, as they can become tough and chewy.
Are garlic butter shrimp skewers suitable for meal prep?
Yes, these skewers are great for meal prep. You can make them ahead and store them in the fridge. Just reheat them in the microwave or on a skillet when ready to eat. They stay tasty and flavorful!
What can I substitute for butter in this recipe?
If you want a butter substitute, try using olive oil or coconut oil. Both options give a rich flavor and keep the shrimp moist. You can also use vegan butter for a dairy-free option.
This blog post shared how to make tasty garlic butter shrimp skewers. We covered the main ingredients, preparation and cooking steps, and tips to enhance your dish. Remember, marinate your shrimp for great flavor. Use fresh herbs or spices to mix things up. Now you can grill shrimp like a pro. Enjoy your meal with friends or famil

Garlic Butter Shrimp Skewers
Ingredients
- 1 lb large shrimp, peeled and deveined
- 4 cloves garlic, minced
- 0.5 cup unsalted butter, melted
- 2 tablespoons fresh parsley, chopped
- 1 tablespoon lemon juice
- 1 teaspoon paprika
- to taste salt and pepper
- skewers (soaked in water if using wooden ones)
Instructions
- In a mixing bowl, combine the melted butter, minced garlic, chopped parsley, lemon juice, paprika, salt, and pepper. Stir well to create the garlic butter marinade.
- Add the shrimp to the bowl and toss until they are thoroughly coated with the marinade. Allow the shrimp to marinate for 15-20 minutes for maximum flavor.
- Preheat your grill or grill pan over medium-high heat.
- Thread the marinated shrimp onto the skewers, approximately 4-5 shrimp per skewer, making sure to leave a little space between each shrimp for even cooking.
- Place the skewers on the grill and cook for about 2-3 minutes per side, or until the shrimp are pink and opaque, being careful not to overcook them.
- Once cooked, remove from the grill and drizzle any remaining garlic butter from the bowl over the skewers for extra flavor.


![To make a spicy mango cucumber salad, gather these fresh ingredients: - 1 ripe mango, peeled and diced - 1 large cucumber, diced - 1 red bell pepper, diced - 1 small red onion, finely chopped - 1 to 2 red chilies, deseeded and finely chopped - 2 tablespoons lime juice - 1 tablespoon olive oil - Fresh cilantro leaves, chopped - Salt and pepper to taste These ingredients bring together sweet, spicy, and crunchy textures. The ripe mango adds sweetness, while the cucumber provides a refreshing crunch. The red bell pepper and onion contribute flavor and color, making the dish vibrant. If you want to change things up, consider these options: - Substitute mango with pineapple or peach for a twist. - Use zucchini or yellow squash instead of cucumber for variety. - Swap red bell pepper with green or yellow for a different taste. - Add herbs like mint or basil for extra flavor. These substitutions can keep your salad exciting and fresh. This salad is not only tasty but also healthy. Each serving has: - Approximately 120 calories - 3g of protein - 5g of fat - 18g of carbohydrates - 3g of fiber This salad is a great choice for a light lunch or a side dish. The mix of fruits and veggies gives you vitamins and minerals too. Enjoy the burst of flavors while keeping your meal nutritious! Step 1: Chopping Vegetables Start by peeling and dicing one ripe mango. Make sure you get nice, small pieces. Next, grab a large cucumber and dice it into similar-sized chunks. Then, take a red bell pepper, remove the seeds, and chop it up. Finally, finely chop one small red onion. The colors will really pop! Step 2: Making the Dressing In a small bowl, mix together one to two finely chopped red chilies, two tablespoons of lime juice, and one tablespoon of olive oil. Stir this well. This dressing adds the spicy kick and tangy flavor. Step 3: Combining Ingredients In a large mixing bowl, combine all your chopped vegetables. Pour the dressing over them and toss gently. Be careful not to bruise the ingredients. You want everything to stay fresh and crisp. How to toss ingredients without bruising To toss without bruising, use a gentle motion. Lift the ingredients from the bottom and turn them over. You want to coat everything without mashing it. Importance of letting flavors meld Let the salad sit for about 10 minutes before serving. This time helps the flavors blend nicely. You’ll be amazed at how much better it tastes! Garnishing with cilantro Right before serving, chop some fresh cilantro leaves and sprinkle them on top. This adds a burst of freshness and color. Presentation tips for serving Serve the salad in a chilled bowl for a nice touch. You can add extra slices of mango or cucumber on top for a pretty finish. A sprinkle of sesame seeds also gives a nice crunch. For the full recipe, check the detailed instructions above. Choosing ripe mangoes is key. Look for mangoes that feel soft but not mushy. The skin should have a nice color, usually a mix of green and yellow. A ripe mango will smell sweet at the stem end. For cucumbers, pick firm ones. They should be dark green and free of spots. Choose red bell peppers that are shiny and smooth. Fresh peppers add a crisp bite to the salad. You can add sweetness by mixing in a bit of honey or agave syrup. This pairs well with the spicy chilies. If you want more heat, add extra red chilies. For a fun twist, try adding sliced jalapeños. Pair this salad with grilled chicken or fish for a complete meal. It also works well as a side with tacos or burritos. To make this salad gluten-free, skip any sauces that contain gluten. This recipe is already vegan, but you can add chickpeas for extra protein. If you want to make it low-carb, use zucchini noodles instead of cucumbers. This keeps the crunch while cutting down on carbs. Check the [Full Recipe] for more ideas on how to customize your salad. {{image_2}} You can make this salad even better by adding more fruits. Pineapple brings a sweet and tangy flavor. Papaya adds a soft texture and a hint of sweetness. You can also mix in avocados for creaminess. They make the salad rich and filling. Each fruit adds its own twist. Consider adding nuts or seeds for crunch. Toasted cashews or sunflower seeds work great. They add a nice texture and flavor boost. You can also try different dressings. A honey-lime dressing gives a sweet touch. A spicy vinaigrette can add more heat. Change the dressing to match your taste. You can switch up the recipe based on the season. In summer, keep it light and fresh. Add juicy tomatoes or fresh herbs for a bright taste. In fall or winter, try roasted butternut squash or apples. These ingredients bring warmth and comfort. Adjust the salad to fit what is in season for the best flavors. If you're looking for the full recipe, check out the [Full Recipe] for all the details! To store leftover salad, place it in an airtight container. This keeps moisture in and air out. Make sure to seal it tightly. You can add a paper towel in the container to absorb excess moisture. This helps keep the ingredients crisp. To keep ingredients fresh, store any unused mango or cucumber separately. These can spoil quickly when mixed with dressing. If you plan to use them later, store them in the fridge. The salad lasts about three days in the fridge. After that, it may lose its taste and crunch. Always check for signs before eating. If the mango or cucumber looks soggy or has dark spots, it’s best to toss it. You should also look for any off smells. If it smells sour or unusual, do not eat it. Fresh ingredients are key to enjoying this dish. You can incorporate leftover salad into other meals. For example, add it to tacos or wrap it in a tortilla. It can also be a great topping on grilled chicken or fish. Transforming it into a salsa is another fun idea. Just chop the salad more finely and serve it with chips. You can also mix it into a grain bowl for extra flavor and crunch. These ideas keep meals exciting and reduce food waste. You can swap out mango for other fruits or vegetables. - Fruit alternatives: Pineapple and peach work well. They add sweetness and a juicy texture. - Vegetable options: Try using diced bell peppers or zucchini for a crunch without the fruit flavor. Yes, this salad can be spicy, depending on the chilies you use. - Adjusting heat levels: Use one chili for a mild taste or two for more heat. You can also remove the seeds for less spice. - Tips for non-spicy versions: Skip the chilies and add a touch of honey. It keeps the sweetness without the heat. The salad stays fresh for a short time. - Storage duration: It lasts up to 2 days in the fridge. After that, it can become soggy. - Best time to consume: Enjoy it within the first day for the best taste and crunch. Yes, you can prep it ahead of time. - Recommended time frames: Make it up to 4 hours before serving. This way, flavors blend well. - Storage tips prior to serving: Keep the dressing separate until just before you serve. This keeps the salad crisp. For the Full Recipe, please check the main article. This blog post guided you through making a spicy mango cucumber salad. I covered the essential ingredients and tips for choosing the best ones. You learned how to prepare and mix the salad while adjusting flavors to fit your taste. I also shared storage info and ways to use leftovers effectively. Enjoy experimenting with variations and substitutions to make this salad yours. With fresh ingredients and simple steps, your dish will shine. Happy cooking!](https://dailydishlab.com/wp-content/uploads/2025/06/903f86d3-1577-467f-b884-054eeff054cc-768x768.webp)